Table of Contents
Advertisement
Quick Links
®
Installation, Operation and Maintenance Manual
Installation, Operation and Maintenance Manual
Please read and save these instructions for future reference. Read carefully before attempting to assemble, install,
Please read and save these instructions for future reference. Read carefully before attempting to assemble, install,
operate or maintain the product described. Protect yourself and others by observing all safety information. Failure
operate or maintain the product described. Protect yourself and others by observing all safety information. Failure
to comply with these instructions will result in voiding of the product warranty and may result in personal injury
to comply with instructions could result in personal injury and/or property damage!
and/or property damage.
Arrangement 10
General Safety Information
Only qualified personnel should install this fan.
Personnel should have a clear understanding of these
instructions and should be aware of general safety
precautions. Improper installation can result in electric
shock, possible injury due to coming in contact with
moving parts, as well as other potential hazards. Other
considerations may be required if seismic activity
is present. If more information is needed, contact a
licensed professional engineer before moving forward.
1. Follow all local electrical and safety codes, as well as
the National Electrical Code (NEC) and the National
Fire Protection Agency (NFPA), where applicable.
Follow the Canadian Electric Code (CEC) in Canada.
2. The rotation of the wheel is critical. It must be free
to rotate without striking or rubbing any stationary
objects.
3. Motor must be securely and adequately grounded.
4. Do not spin fan wheel faster than max cataloged fan
RPM. Adjustments to fan speed significantly effects
motor load. If the fan RPM is changed, the motor
current should be checked to make sure it is not
exceeding the motor nameplate amps.
5. Do not allow the power cable to kink or come in
contact with oil, grease, hot surfaces or chemicals.
Replace cord immediately if damaged.
6. Verify that the power source is compatible with the
equipment.
7. Never open access doors to a duct while the fan is
running.
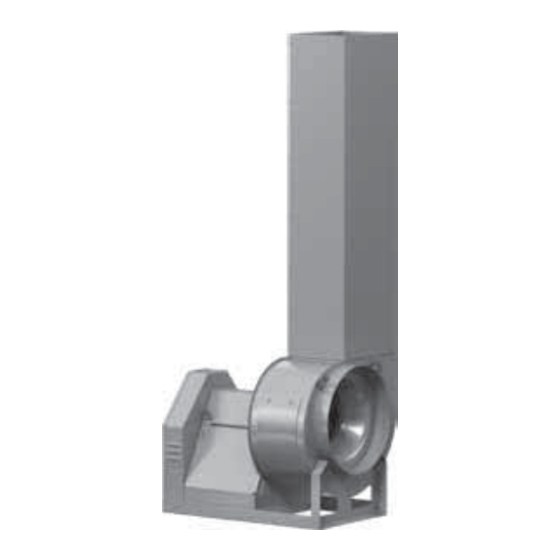
®
FJC-300
Belt Drive
FJI-BD
Belt Drive
Arrangement 10
Always disconnect, lock and tag power source before
installing or servicing. Failure to disconnect power
source can result in fire, shock or serious injury.
When servicing the fan, motor may be hot enough
to cause pain or injury. Allow motor to cool before
servicing.
Precaution should be taken in explosive atmospheres.
Pour écarter les risques d'incendie, de choc électrique
ou de blessure grave, veiller à toujours débrancher,
verrouiller et étiqueter la source de courant avant
l'installation ou l'entretien.
Lors de toute intervention sur la soufflante, le moteur
peut être suffisamment chaud pour provoquer une
douleur voire une blessure. Laisser le moteur refroidir
avant toute maintenance.
Faire preuve de précaution dans les atmosphères
explosives.
Document 481501
Model FJC-300
®
FumeJet
Fume Exhaust Fans
FJI-DD
Direct Drive
Arrangement 4
DANGER
CAUTION
CAUTION
DANGER
ATTENTION
ATTENTION
FumeJet™ Fume Exhaust Fans
Model FJI
1
Advertisement
Table of Contents

Related Manuals for Greenheck FumeJet FJC-300


Summary of Contents for Greenheck FumeJet FJC-300
-
Page 1: General Safety Information
Document 481501 Model FJC-300 Model FJI ® ® FumeJet Fume Exhaust Fans Installation, Operation and Maintenance Manual Installation, Operation and Maintenance Manual Please read and save these instructions for future reference. Read carefully before attempting to assemble, install, Please read and save these instructions for future reference. Read carefully before attempting to assemble, install, operate or maintain the product described. -
Page 2: Receiving / Unpacking / Handling / Storage
Receiving INDOOR - The ideal environment for the storage of fans and accessories is indoors, above grade, in a low Upon receiving the product, check to ensure all items humidity atmosphere which is sealed to prevent the entry are accounted for by referencing the delivery receipt or of blowing dust, rain or snow. -
Page 3: Table Of Contents
® with Tectyl 506 (Ashland Inc.) or the equivalent. For Table of Contents hard to reach internal surfaces or for occasional use, General Safety Information ..... . 1 ®... -
Page 4: General Information
General Information To ensure a successful installation, the instructions in Guards – Motor Cover, Weatherhood this manual should be read and adhered to. Failure to Do not operate fans without proper protective devices in comply with proper installation procedures may void the place. -
Page 5: Installation Considerations
Installation Considerations Installations with inlet configurations that deviate from this manual may result in reduced fan performance. Restricted or unstable flow at the fan inlet can cause pre-rotation of incoming air or uneven loading of the fan wheel yielding large system losses and increased sound levels. Free discharge or turbulent flow in the discharge ductwork will also result in system effect losses. -
Page 6: Fans - Rigging And Lifting
Fans – Rigging and Lifting IMPORTANT Fans should never be lifted by the stack, shaft, motor, motor cover, weatherhood or accessories. Fans are to be rigged and moved by the lifting brackets provided or by the skid when a forklift is used before mounting stack to the fan. -
Page 7: Installation
IMPORTANT Steel Greenheck Roof Curb GPFHL When installing a fan, ensure the proper protective devices are used to protect personnel from moving Continuous weld or stitch weld. Minimum 6 inch (152.4 mm) stitch weld by parts and other hazards. -
Page 8: Duct Support
Duct Support - Adjustable spacer bar is used for Curb Mounted Fans - Mount roof curb to roof deck in the installation of the duct drop. Duct support will be accordance with local codes. Place the fan body onto supplied with roof curb from fan manufacturer or by the secured roof curb. -
Page 9: System Assembly
System Assembly Equipment Supports Model GESS equipment supports are designed for use NOTE on flat roof decks, to be mounted directly to the roof When installing stack and fan body, be certain to rig deck structure, then roofed and flashed for weather each section separately using the lifting lugs provided. -
Page 10: Fan Drainage Piping And Trap Details (By Others)
Fan Drainage Piping and Trap Detail V-Belt Drives (by others) V-Belt Drive Installation 1. Remove the protective coating from the end of the NOTE fan shaft using mineral spirits or another similar On the model FJI, the plug needs to be removed from solvent. -
Page 11: Radial Gap, Overlap And Wheel Alignment
Radial Gap, Overlap and Wheel Alignment Wheels must rotate freely and not rub on the inlet cone. Radial Gap and Overlap Dimensions Model FJC and FJI wheels overlap the inlet cone. Refer Overlap Overlap to the table for the proper dimension. Tolerance FJC-300 inches (mm) -
Page 12: Field Coating Touch-Up Procedure For Scratched Areas
Field Coating Touch-Up Procedure Electrical Connections for Scratched Areas Before electrical connections are made, the supply voltage, phase and ampere capacity must be checked Standard coating and color is RAL 7023 Concrete Grey. for compatibility with the fan motor. In addition, the The procedure outlines the correct method for repairing supply wiring must be properly fused and conform to minor scratches in the coating. -
Page 13: Unit Start-Up
Unit Start-Up Additional Steps for Initial Start-Up WARNING 1. Check for proper wheel rotation by momentarily Disconnect and secure to the OFF position all energizing the fan. Access to view the wheel can be electrical power to the fan prior to inspection or gained through the blower housing access panel. -
Page 14: Routine Maintenance And Operation
Routine Maintenance and Operation Belt Drive Maintenance WARNING V-belt drives must be checked on a regular basis Before taking any corrective action, make certain unit for wear, tension, alignment and dirt accumulation. is not capable of operation during repairs. Premature or frequent belt failures can be caused by AVERTISSEMENT improper belt tension (either too loose or too tight) or misaligned sheaves. -
Page 15: Bearing Lubrication Schedule
Bearing Lubrication Schedule Field Adjustable Nozzle Shaft bearings are the most critical moving part of a When ordered with an adjustable nozzle, the FumeJet fan. Therefore, special attention should be given to will arrive at the job site with the nozzle preset at the keeping the bearings clean and well lubricated. -
Page 16: Bearing Replacement
Bearing Replacement For Arrangement 10 Only Bearing Installation The intent of this procedure is to allow a field service 1. Before installing, read bearing manufacturers’ technician to replace bearings with the fan remaining procedures. Before putting the new bearings on in place in its intended application. -
Page 17: Parts List
Parts List Each fan bears a manufacturer’s nameplate with model number and serial number embossed. This information will assist the local representative and the factory in providing service and replacement parts. Before taking any corrective action, make certain unit is not capable of operation during repairs. CAUTION CAUTION A fan manufactured with an explosion resistant motor... - Page 18 FJI-15 Direct Drive Shown with optional curb cap inlet box and inlet flanges. Stack Disconnect Switch Motor Cover Scroll Housing Wheel Inlet Cone Inlet Flange Inlet Companion Flange Inlet Box Motor Access Door Motor Plate Integrated Mounting Rails Curb Cap Isolation Damper Roof Curb ®...
-
Page 19: Troubleshooting
Troubleshooting WARNING AVERTISSEMENT Before taking any corrective action, make certain unit Avant d’entreprendre toute action corrective, s’assurer is not capable of operation during repairs. que l’appareil ne pourra pas fonctionner durant les réparations. Problem Cause Corrective Action Adjust wheel and/or inlet cone. Wheel Rubbing Inlet Tighten wheel hub or bearing collars on shaft. -
Page 20: Maintenance Log
As a result of our commitment to continuous improvement, Greenheck reserves the right to change specifications without notice. Product warranties can be found online at Greenheck.com, either on the specific product page or in the literature section of the website at Greenheck.com/Resources/Library/Literature.