Table of Contents
Advertisement
Available languages
Available languages
Quick Links
Advertisement
Chapters
Table of Contents

Related Manuals for TEFAL GV9567


Summary of Contents for TEFAL GV9567
- Page 1 Pro Express Ultimate - GV9581...
- Page 3 DEUTSCH ...................... p.4 TÜRK ......................p.34 ENGLISH ......................p.62 HOW TO CONTACT YOUR LOCAL TEFAL TEAM? ......p.90...
-
Page 4: Table Of Contents
Inhaltsverzeichnis 1. SICHERHEITSHINWEISE ................5 2. BENUTZUNG IHRES GERÄTES ............. 12 2.1 Erste Schritte ..................12 2.2 Füllen des Wasserbehälters ............15 2.3 Transport ..................17 2.4 Einstellungen ................... 18 2.5 Vertikales Dampfbügeln .............. 21 2.6 Automatische Abschaltung ............22 3. WARTUNG UND LAGERUNG .............. 23 3.1 Entleeren des Kalk-Kollektors ............ -
Page 5: Sicherheitshinweise
SICHERHEITSHINWEISE Wichtige Empfehlungen • Bitte lesen Sie die Gebrauchsanweisung vor der ersten Verwendung aufmerksam. Das Gerät ist nur für den Hausgebrauch in Innenräumen bestimmt. Eine Verwendung, die nicht der Gebrauchsanweisung entspricht, befreit die Marke von jeglicher Haftung und die Garantie entfällt. •... - Page 6 werden oder zuvor hinsichtlich der Nutzung des Geräts eingewiesen wurden. • Kinder müssen überwacht werden, um sicherzustellen, dass sie nicht mit dem Gerät spielen. • Dieses Gerät kann von Kinder ab 8 Jahren und Personen, denen es an Erfahrung und Kenntnissen mangelt oder deren physische, sensorielle oder mentale Fähigkeiten verringert sind, verwendet werden, wenn sie bezüglich der sicheren Verwendung des Geräts unterrichtet und betreut...
- Page 7 • Vorsicht! Wenn der Verschluss des Boilers abgefallen oder beschädigt ist, lassen Sie von einer zugelassenen Kundendienststelle einen neuen anbringen bzw. ihn austauschen. • Füllen Sie den Wassertank keinesfalls direkt am Wasserhahn auf. • Der Verschluss darf während der Nutzung nicht geöffnet werden.
- Page 8 • Betreiben Sie Ihre Dampfstation stets: – an einer Elektroinstallation mit einer Spannung zwischen 220 und 240 V. – an einer geerdeten Steckdose. Anschlussfehler können zu nicht behebbaren Schäden führen und lassen die Garantie erlöschen. Überprüfen Sie, wenn Sie ein Verlängerungskabel verwenden, ob es sich wirklich um eine bipolare 16A-Dose mit Erdung handelt.
- Page 9 demineralisiertem Wasser. In bestimmten Küstengebieten kann das Wasser einen hohen Salzgehalt aufweisen. In diesem Fall verwenden Sie ausschließlich demineralisiertes Wasser. • Wasserenthärter: Es gibt verschiedene Arten von Wasserenthärtern. In den meisten Fällen ist das mithilfe dieser Geräte aufbereitete Wasser für die Verwendung im Generator geeignet.
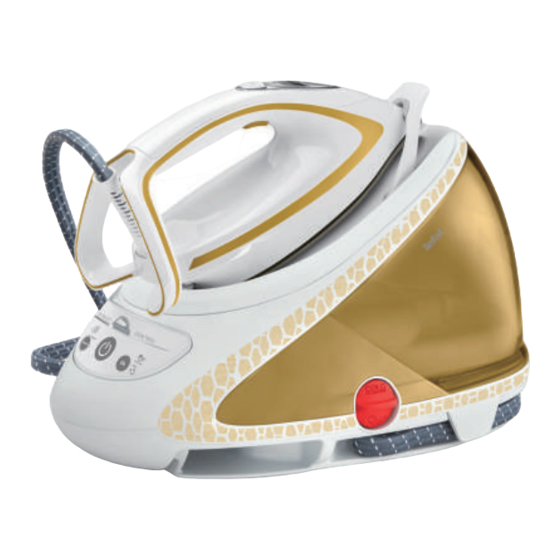
- Page 10 1 Dampftaste 2 Verriegelungssystem 3 Wasserbehälter 4 Dampfkabelaufbewahrung 5 Kalk-Kollektor 6 Netzkabelaufbewahrung 7 Bedienfeld...
- Page 11 CLICK www.tefal.com...
-
Page 12: Benutzung Ihres Gerätes
BENUTZUNG IHRES GERÄTES • Prinzip des Bügelns: Schalten Sie Ihr Gerät ein und legen Sie die Kleidungsstücke, die Sie bügeln CLICK möchten, auf das Bügelbrett. Wenn das Gerät einsatzbereit ist, setzen Sie das Bügeleisen auf das Kleidungsstück und bewegen Sie es von einer Seite zur anderen. - Page 13 BENUTZUNG IHRES GERÄTES • Drücken Sie die Taste „ON-OFF“ Bedienfeld. • Drücken Sie die Taste „ON-OFF“ an der Basis. Die Tastenbeleuchtung „Normal“ am Griff blinkt weiter, während das Gerät sich aufheizt. • Die Dampfbügelstation ist nun einsatzbereit. Sie können den Modus immer noch wechseln, selbst wenn das Licht blinkt.
- Page 14 BENUTZUNG IHRES GERÄTES • Um eine größere Dampfmenge zu erzeugen, drücken Sie die Dampftaste an der Unterseite des ×3 Griffs dreimal kurz, automatisch nacheinander automatische Dampfstöße auszulösen. NEIN Stellen Sie während des Bügelns das Bügeleisen nicht direkt auf die Bügelsohle. Stellen Sie es auf seinen Standfuß...
-
Page 15: Füllen Des Wasserbehälters
BENUTZUNG IHRES GERÄTES 2.2 Füllen des Wasserbehälters • Füllen Sie vor jedem Gebrauch, oder wenn Anzeigeleuchte „ W a s s e r b e h ä l t e r leer“ blinkt, Wasserbehälter. • Schalten Sie das Gerät aus und ziehen Sie den Stecker aus der Steckdose. - Page 16 BENUTZUNG IHRES GERÄTES • Stecken Netzstecker des Gerätes in eine Steckdose. • Drücken Sie die Taste „ON- OFF“, um das Gerät wieder einzuschalten. • Die rote Anzeigeleuchte „ W a s s e r b e h ä l t e r leer“...
-
Page 17: Transport
BENUTZUNG IHRES GERÄTES 2.3 Transport Ihre Dampfbügelstation CLICK einem Ve r r i e g e l u n g s s y s t e m ausgestattet, welches das Bügeleisen auf der Basis fixiert, um den Transport und die Lagerung zu erleichtern. -
Page 18: Einstellungen
BENUTZUNG IHRES GERÄTES Einstellungen • Mithilfe des Bedienfeldes um die Taste „MODE“ herum können alle Einstellungen des Bügeleisens direkt vorgenommen werden. • Anhand des Bedienfeldes kann der gewünschte Modus (ECO/DELICATE/NORMAL/ MAX) mit einer Berührung ausgewählt werden. • Sie können durch Drücken der Taste „MODE“... - Page 19 BENUTZUNG IHRES GERÄTES Auswahl des geeigne- ten Modus DELICATE • Prüfen Pflegeetikett. Wählen Sie je nach Art der NORMAL Bügelwäsche die richtige Einstellung am Gerät. BOOST • Je nach ausgewähltem Modus wird Delicate Normal Produkt automatisch Temperatur Bügelsohle sowie die Dampfleistung anpassen.
- Page 20 BENUTZUNG IHRES GERÄTES Boost-Modus • Wenn Sie die Taste BOOST drücken, schaltet das Bügeleisen automatisch in den Modus MAX. Die Anzeige blinkt und leuchtet dann stetig, sobald das Produkt heiß ist. bis zu bis zu 15 min • Nach Minuten Betrieb blinkt die Taste „Boost“...
-
Page 21: Vertikales Dampfbügeln
BENUTZUNG IHRES GERÄTES 2.5 Vertikales Dampfbügeln NEIN Da der Dampf sehr heiß ist: Versuchen Sie niemals, Falten aus einem Kleidungsstück zu entfernen, während dieses getragen wird. Hängen K l e i d u n g s s t ü c k e immer einem Kleiderbügel auf. -
Page 22: Automatische Abschaltung
BENUTZUNG IHRES GERÄTES 2.6 Automatische Abschaltung bis zu 8 min • Die Dampfbügelstation ist mit einem „AUTO- OFF“ Kontrollsystem ausgestattet, das nach 8 Minuten ohne Gebrauch automatisch aktiviert wird. Die Taste „ON-OFF“ blinkt, um anzuzeigen, dass das Gerät sich Stand-by-Modus befindet. -
Page 23: Wartung Und Lagerung
WARTUNG UND LAGERUNG 3.1 Entleeren des Kalk-Kollektors • Eine orangefarbene „Anti-Kalk“ Leuchte blinkt auf dem Bedienfeld, um zu signalisieren, dass der Kalk-Kollektor ausgespült werden muss. • Schalten Sie das Gerät aus und ziehen Sie den Stecker aus der Steckdose. Gerät muss mindestens 2 Stunden von der Stromquelle... - Page 24 WARTUNG UND LAGERUNG • Spülen Sie den Kollektor unter laufendem Wasser aus, um ihn zu reinigen und alle Kalkpartikel, die sich im Inneren abgelagert haben, zu entfernen. • Setzen Sie den Kollektor in sein Gehäuse, indem vollständig einschrauben, bis er wasserdicht an seinem Platz sitzt.
-
Page 25: Ausspülen Des Boilers
WARTUNG UND LAGERUNG 3.2 Ausspülen des Boilers • Ergänzend dieser regelmäßigen Wartung ratsam, 2 PRO JAHR ** Boilerbehälter alle Monate oder nach ungefähr 25 Benutzungen, je nachdem, welcher Fall früher eintritt, vollständig auszuspülen. • Schalten Sie das Gerät aus und ziehen Sie den Stecker aus der Steckdose. - Page 26 WARTUNG UND LAGERUNG Während dieses Vorgangs kann Wasser Entkalkungsöffnung tropfen. • Stellen D a m p f b ü g e l s t a t i o n auf den Rand Ihres Spülbeckens halten Sie das Gerät schräg. Füllen Sie den Boilerbehälter mithilfe einer Kanne mit 1/4 Liter...
- Page 27 WARTUNG UND LAGERUNG • Schütteln Basiseinheit vorsichtig für einige Sekunden und entleeren Sie sie dann vollständig in das Spülbecken. • Setzen Sie den Kollektor in sein Gehäuse, indem Sie in vollständig einschrauben, bis er wasserdicht an seinem Platz sitzt. • Stecken Netzstecker des Gerätes in eine Steckdose.
-
Page 28: Reinigung
WARTUNG UND LAGERUNG 3.3 Reinigung Gerät muss 2 Std. mindestens 2 Stunden von der Stromquelle getrennt vollständig abgekühlt sein, bevor Kollektor ausgespült werden kann. NEIN • Wischen Bügelsohle mit einem weichen, angefeuchteten Tuch sauber. Verwenden Sie keine Reinigungs- Entkalkungsprodukte Reinigung NEIN Bügelsohle. -
Page 29: Lagerung
WARTUNG UND LAGERUNG 3.4 Lagerung • Schalten Sie das Gerät aus und ziehen Sie den Stecker aus der Steckdose. • Verstauen Netzkabel seiner Aufbewahrung. • Verstauen Dampfkabel in seiner Aufbewahrung, sodass nicht straff aufgewickelt ist und gedehnt wird. • Setzen Sie das Bügeleisen auf die Abstellfläche der 1 Std. - Page 30 WARTUNG UND LAGERUNG Wenn Ihre Dampfbügelstation an einem relativ kühlen Ort (ungefähr <10 °C) aufbewahren, stellen Sie das Gerät an einen warmen Ort, bevor Sie mit dem Bügeln beginnen.
-
Page 31: Probleme Mit Ihrem Bügeleisen
PROBLEME MIT IHREM BÜGELEISEN? Problem Mögliche ursachen Lösungen Das Wasser Das Wasser Drücken Sie den sickert durch kondensiert in den Dampfknopf, während die Öffnungen Leitungskanälen, Sie das Bügeleisen vom in der da Sie die Bügelbrett entfernt halten, Bügeleisensohle Dampffunktion zum bis aus dem Bügeleisen hindurch. - Page 32 Problem Mögliche ursachen Lösungen An den Sie verwenden Verwenden Sie im Erhitzer Öffnungen der chemische niemals zusätzliche Bügeleisensohle Entkalkungsmittel Mittel (siehe Kapitel sind braune oder Zusatzstoffe „Welches Wasser sollten Verfärbungen im Bügelwasser. Sie verwenden?“). Bitte zu beobachten, Zu häufige drücken Sie die Extra- die zur Verwendung Dampstoßtaste nicht...
- Page 33 Problem Mögliche ursachen Lösungen Die rote Sie haben die Drücken Sie auf der Anzeige „OK“-Taste für den Bedientafel die „OK“- Taste „WATER“ blinkt. Neustart nicht für den Neustart, bis die gedrückt. Anzeige erlischt. Die Anzeige Sie haben die Drücken Sie auf der „anti-calc“...
- Page 34 Özet 1. GÜVENLIK TALIMATLARI ..............35 2. CİHAZINIZI KULLANMA ................ 42 2.1 Başlarken ................... 42 2.2 Su haznesini doldurma .............. 45 2.3 Taşıma ....................47 2.4 Ayarlar ....................48 2.5 Dikey buhar verme ................ 51 2.6 Otomatik kapanma ............... 52 3.
-
Page 35: Güvenlik Talimatlari
GÜVENLIK TALIMATLARI Önemli tavsiyeler • Cihazınızı ilk defa kullanmadan önce, kullanım kitapçığını dikkatli bir şekilde okuyun. Bu ürün sadece evsel amaçlarla kapalı alanlarda kullanılmak üzere tasarlanmıştır. Kullanım kitapçığına uygun olmayan kullanımdan doğacak sorunlardan marka hiçbir şekilde sorumlu tutulamaz. • Cihazın fişini asla elektrik kablosundan çekerek çıkarmayın. - Page 36 • Cihazla oynamadıklarından emin olmak için çocukların gözetim altında tutulmaları gerekir. • Bu cihaz fiziksel, duyusal veya zihinsel engeli olan kimseler veya sekiz yaş üzeri çocuklar tarafından, güvenliklerinden sorumlu bir kişinin gözetimi altında olmaları veya bu kişi tarafından cihazın kullanımı konusunda eğitilmeleri halinde kullanılabilir.
- Page 37 görmüş olabileceğinden Yetkili bir Servis Merkezi tarafından değiştirilmelidir. • Su haznesini asla doğrudan musluktan doldurmayın. • Doldurma,kireçsizlendirme, durulama ve denetim kapakları basınç altındadır, kullanım sırasında kesinlikle açılmamalıdır. • Cihaz düşmüş ise, görünür hasarlar içeriyor ise veya işleyiş bozukluğu arz ediyor ise, kullanılmamalıdır. Cihazınızı...
- Page 38 – Aşırı ısınmaya engel olan termik sigorta. • Buhar jeneratörünüzün fişini prize takarken şunlara dikkat edin: – 220 ve 240 V arasında gerilime sahip, elektrik şebekesine takın – «Toprak» tipi bir elektrik prizine takın. Hatalı bağlantı gerçekleştirilmesi garantinin geçersiz kalmasına neden olacak ve geri dönüşü olmayan hasara neden olur.
- Page 39 piyasada satılan minerali giderilmiş suyu yarı yarıya karıştırın. Bazı kıyı bölgelerinde, sudaki tuz miktarı yüksek olabilir. Bu durumda, yalnızca mineralden arındırılmış su kullanın. • Yumuşatıcı: Birçok türde yumuşatıcı bulunmaktadır ve su yumuşatıcılarının çoğu jeneratörlerde kullanılabilir. Bununla birlikte, bazı yumuşatıcılar, özellikle tuz gibi kimyasal maddeler içerenler, beyaz veya kahverengi lekelere neden olabilir, bu durum özellikle su filtreleme sürahileri için geçerlidir.
- Page 40 1 Buhar tetiği 2 Kilit sistemi 3 Su haznesi 4 Buhar kablosu saklama yeri 5 Kireç toplayıcı 6 Güç kablosu saklama yeri 7 Kontrol paneli...
- Page 41 CLICK www.tefal.com...
-
Page 42: Ci̇hazinizi Kullanma
CİHAZINIZI KULLANMA • Ütüleme talimatı cihazınızı çalıştırın ve ütülemek istediğiniz giysiyi CLICK ütü masasına koyun. Cihaz kullanıma hazır olduğunda ütüyü giysinin üzerine koyun ve bir yandan öbür yana doğru hareket ettirmeye başlayın. Buhar vermek için tetiği çekin. 2.1 Başlarken Pro Express Ultimate, ütüyü... - Page 43 CİHAZINIZI KULLANMA • Kontrol panelindeki « A Ç M A - K A P A T M A » düğmesine basın. • Cihaz ısınırken tabandaki « A Ç M A - K A P A T M A » düğmesi saptaki «Normal»...
- Page 44 CİHAZINIZI KULLANMA • Daha fazla buhar elde etmek için, otomatik sıralı buhar için arka arkaya üç ×3 kez sapın altındaki buhar tetiğine basın. Ütü yaparken, ütüyü HAYIR doğrudan taban plakasına koymayın. Topuk veya tabanı kullanın.
-
Page 45: Su Haznesini Doldurma
CİHAZINIZI KULLANMA 2.2 Su haznesini doldurma • Her kullanımdan önce veya «su deposu boş» ışığı yanıp söndüğünde su deposunu doldurun. KAPALI • Cihazınızı kapatın ve fişini çekin. • Buhar jeneratörü önündeki sapı kullanarak çıkarılabilir su haznesini çıkarın. • MAX seviyesini aşmadan musluk suyu ile doldurun. - Page 46 CİHAZINIZI KULLANMA • Cihazı takın. • Cihazı yeniden çalıştırmak için «AÇMA-KAPATMA» düğmesine basın. • Kontrol panelinde kırmızı «su deposu boş» ışığı yanıp söner. • Kırmızı ışığı kapatmak için «OK» düğmesini birkaç saniye basılı tutun.
-
Page 47: Taşıma
CİHAZINIZI KULLANMA 2.3 Taşıma CLICK Buhar jeneratörünüz ütüyü kolay taşımak depolamak için taban üzerinde tutmak için bir kilit sistemi ile donatılmıştır. Buhar jeneratörünüzü ütünün sapını kullanarak taşımak için: • Ütüyü buhar jeneratörü ütü desteğinin üzerine koyun ve kilit sistemini yerine oturuncaya kadar ütünün üzerinden geçirin (tık sesi). -
Page 48: Ayarlar
CİHAZINIZI KULLANMA 2.4 Ayarlar • «MODE» (Mod) düğmesinin etrafında yer alan control paneli doğrudan ütünün tüm ayarlarını ayarlar. • İstenen modu (ECO (Eco) / DELICATE (Hassas) / NORMAL / MAX (Maks) tek dokunuşla seçmek için kullanılır. • MODE (Mod) düğmesine basarak modlar sıra ile etkinleştirebilirsiniz. - Page 49 CİHAZINIZI KULLANMA Uyarlanmış modu seçme DELICATE • Giysi etiketini kontrol edin. Ütülenecek kumaş NORMAL tipine göre, cihazdaki doğru ayarı seçin. BOOST • Seçtiğiniz moda bağlı olarak, ürün taban Delicate Normal plakasının sıcaklığını ve ayrıca buhar çıkışını otomatik olarak ayarlayacaktır.
- Page 50 CİHAZINIZI KULLANMA Boost modu • BOOST (Güçlendirme) düğmesine bastığınız zaman ütü otomatik olarak (Maks) moduna geçer. Işık yanıp söner ve sonra ürün ısındığında sabitlenir. maks maks 15 dak • 15 dakika kullanımdan sonra, «Boost» düğmesi 10 saniye boyunca yanıp söner. «Boost»...
-
Page 51: Dikey Buhar Verme
CİHAZINIZI KULLANMA 2.5 Dikey buhar HAYIR verme Buhar çok sıcak olduğundan: asla giyilen giysilerdeki kırışıklıkları açmaya çalışmayın, giysileri her zaman elbise askısına asın. • Dikey buhar kullanmak için cihazı "Normal" moduna alın. • Giysiyi bir elbise askısına asın ve kumaşı tek elle hafifçe tutun. -
Page 52: Otomatik Kapanma
CİHAZINIZI KULLANMA 2.6 Otomatik maks 8 dak kapanma • Buhar jeneratörünüz, 8 dakika kullanılmaması halinde otomatik olarak etkinleşen bir «OTOMATİK KAPANMA» izleme AÇIK sistemi bulunur. Cihazın bekleme modunda olduğunu göstermek için sadece «AÇMA- KAPATMA» düğmesi yanıp söner. • Buhar jeneratörünü maks KAPALI tekrar... -
Page 53: Bakim Ve Saklama
BAKIM VE SAKLAMA 3.1 Kireç toplayıcıyı boşaltma • Kontrol panelinde bulunan turuncu «anti- calc» (kireç giderme) KAPALI ışığı, kireç toplayıcının durulanması gerektiğini bildirmek için yanıp sönmeye başlar. • Cihazınızı kapatın ve fişini çekin. Cihazın en az 2 saat boyunca fişi çekilmeli ve yapmadan önce tamamen soğutulmalıdır. - Page 54 BAKIM VE SAKLAMA • Toplayıcıyı temizlemek için, içerdiği herhangi bir kireci çıkarmak için akan suyun altında durulayın. • Su geçirmez olduğundan emin olmak için toplayıcıyı yuvasına yerleştirin. • Cihazı takın. • Cihazı yeniden çalıştırmak AÇIK için «AÇMA-KAPATMA» düğmesine basın. • Turuncu «Anti-Calc»...
-
Page 55: Kazanın Durulanması
BAKIM VE SAKLAMA 3.2 Kazanın durulanması • Bu düzenli bakımın yanı sıra, kazan deposunu 2 X YIL ** 6 ayda bir veya yaklaşık 25 kullanımdan sonra (hangisi daha erken KAPALI olursa olsun) tamamen yıkamanız tavsiye edilir. • Cihazınızı kapatın ve fişini çekin. - Page 56 BAKIM VE SAKLAMA • Buhar jeneratörünü lavabonuzun kenarına yerleştirin buhar jeneratörünüzü eğimli konumda tutun. Kazan deposunu 1/4 litre arıtılmamış musluk suyu ile doldurmak için bir sürahi kullanın. • Taban ünitesini birkaç saniye hafifçe çalkalayın ve ardından tamamen lavaboya boşaltın. • Su geçirmez olduğundan emin olmak için...
-
Page 57: Temizlik
BAKIM VE SAKLAMA 3.3 Temizlik Cihazın en az 2 saat boyunca fişi çekilmeli yapmadan önce tamamen soğutulmalıdır. HAYIR • Taban plakasını yumuşak nemli bir bezle temizleyin. Tabanı temizlemek için deterjan veya kireç çözücü ürünler HAYIR kullanmayın. • Cihazın plastik parçalarını ara sıra yumuşak bir bezle temizleyin. -
Page 58: Depolama
BAKIM VE SAKLAMA 3.4 Depolama KAPALI • Cihazınızı kapatın ve fişini çekin. • Güç kablosunu saklama yerinde saklayın. • Buhar kablosunu çok fazla gerdirmeden saklama yerinde saklayın. • Ütüyü buhar jeneratörü ütü desteğinin üzerine koyun ve tespit halkasını yerine oturuncaya kadar ütünün üzerinden geçirin (tık sesi). -
Page 59: Ütünüzde Sorun Mu Var
ÜTÜNÜZDE SORUN MU VAR? MUHTEMEL SORUN ÇÖZÜMLER SEBEPLER Borularda su birikiyor Ütü buhar çünkü buhar verene kadar ütü Ütü tabanındaki özelliğini ilk defa masanızın dışındaki kullanıyorsunuz deliklerden su akıyor. buhar komutuna veya bir süredir basın. kullanmıyorsunuz. Ütü masanızın elektriğe bağlı Ütü... - Page 60 MUHTEMEL SORUN ÇÖZÜMLER SEBEPLER Kazana asla bu maddeleri Ütüleme suyunda eklemeyin (bkz. "Ne kireç çözücü kimyasal Ütü tabanının tür su kullanmak maddeler veya deliklerinden gerekir? "). katkı maddeleri kahverengi bir sıvı Buhar düğmesine kullanıyorsunuz. akıyor ve çamaşırları uzun süre basılı lekeliyor.
- Page 61 MUHTEMEL SORUN ÇÖZÜMLER SEBEPLER Yeniden başlatmak için uyarı ışığı Yeniden başlatmak "Anti-calc" uyarı ışığı sönene kadar için "OK" düğmesine yanıp söner. kontrol panelindeki basmadınız. "OK" düğmesine basın. "Auto-off" Yeniden başlatmak Buharlı ütü yanmıyor sistemi, 38 dakika için kontrol veya ütü uyarı ışığı ve kullanılmamasının panelindeki "ON- "ONOFF"...
- Page 62 Summary 1. SAFETY INSTRUCTIONS................ 63 2. USING YOUR APPLIANCE ..............70 2.1 Getting started................70 2.2 Filling the water tank ..............73 2.3 Transportation ................75 2.4 Settings ....................76 2.5 Vertical steaming ................79 2.6 Auto-off ..................... 80 3. MAINTENANCE AND STORAGE ............81 3.1 Emptying the calc collector ............
-
Page 63: Safety Instructions
SAFETY INSTRUCTIONS Important recommendations • Please read these instructions carefully before first use. This product has been designed for domestic and indoor use only. Any commercial use, inappropriate use or failure to comply with the instructions, the manufacturer accepts no responsibility and the guarantee will not apply. •... - Page 64 or persons with reduced or impaired physical, sensory or mental capabilities provided that they have been thoroughly instructed regarding use of the appliance, are supervised, and understand the risks involved. Children shall not play with the appliance. Cleaning and user maintenance shall not be made by children without supervision.
- Page 65 apertures that are under pressure, must not be opened during use. • The appliance must not be used if it has been dropped, if it has any visible damage, if it leaks, or if it functions abnormally in any way. Do not attempt to dismantle your appliance: have it examined at an Approved Service Centre to avoid any danger.
- Page 66 Connecting to the wrong voltage may cause irreparable damage to the appliance and will invalidate your guarantee. • Do not use an extension lead. If you accept liability for doing so, only use an extension lead which is in good condition, has a plug with an earth connection and is suited to the power rating of the appliance.
- Page 67 • Water softener: There are several types of water softeners available and most of them can be used in the generator. • However, some softeners (especially those that use chemicals such as salt) may cause white or brown streaks. This is often the case when using water from filtering jugs.
- Page 68 1 Steam trigger 2 Lock system 3 Water tank 4 Steam cord storage 5 Scale collector 6 Electrical cord storage 7 Control panel...
- Page 69 CLICK www.tefal.com...
-
Page 70: Using Your Appliance
USING YOUR APPLIANCE • Principle of ironing : start your appliance and put the fabric you want to CLICK iron on the ironing board. When the appliance is ready to use, put the iron on the fabric and start moving it fom one side to the other. - Page 71 USING YOUR APPLIANCE • Press «ON-OFF» button on control panel. • The "ON-OFF" button of the base and the "Normal" button light of the handle remain flashing while appliance is warming up. • The steam generator is ready for use. The mode can still be switched even when the light flashes.
- Page 72 USING YOUR APPLIANCE • To obtain even more steam, press the steam trigger under the handle ×3 three times in quick succession for automatic sequential steam. During ironing, do not place directly the iron on the soleplate. Use the heel or the base.
-
Page 73: Filling The Water Tank
USING YOUR APPLIANCE 2.2 Filling the water tank • Fill in the water tank before every use or when the « water tank empty » light flashes. • Switch off and unplug the appliance. • Remove the removable water tank using the handle located at the front of the steam generator... - Page 74 USING YOUR APPLIANCE • Plug the appliance. • Press «ON-OFF» button to restart the appliance. • Red «water tank empty» light flashes on control panel. • Hold down the «OK» button for a few seconds to turn off the red light.
-
Page 75: Transportation
USING YOUR APPLIANCE 2.3 Transportation CLICK Your steam generator is equiped with a lock system to hold the iron onto the base for easy transport and storage To transport your steam generator using handle of the iron: • Put the iron on the steam generator iron rest and raise the lock system over the iron until it locks... -
Page 76: Settings
USING YOUR APPLIANCE 2.4 Settings • The control panel placed around “MODE” button is used to directly adjust all the iron’s settings. • It is used to select the desired mode (ECO / DELICATE / NORMAL / MAX) with a single touch. •... - Page 77 USING YOUR APPLIANCE Choosing the adapted mode DELICATE • Check garment label. According to the type NORMAL of fabric ironed, select the right setting on the appliance. BOOST • Depending on which mode select, Delicate Normal product will automatically adjust the temperature of the soleplate as well as the steam output.
- Page 78 USING YOUR APPLIANCE Boost mode • When you press the BOOST button, the iron will automatically go into MAX mode. The light will flash and then stay fix once the product is hot. up to up to • After 15 minutes of use, 15 min «Boost»...
-
Page 79: Vertical Steaming
USING YOUR APPLIANCE 2.5 Vertical steaming As steam is very hot: never attempt remove creases from a garment while it is being worn, always hang garments on a coat hanger. • To use the vertical steam, put the appliance on "Normal"... -
Page 80: Auto-Off
USING YOUR APPLIANCE 2.6 Auto-off up to 8 min • The steam generator is fitted with an «AUTO- OFF» monitoring system, which activated automatically after approximately 8 minutes without use. The «ON-OFF» button flashes to indicate that the appliance is on standby. •... -
Page 81: Maintenance And Storage
MAINTENANCE AND STORAGE 3.1 Emptying the calc collector • An orange «anti-calc» light located on the control panel starts flashing to inform that the calc collector needs rinsing. • Switch off and unplug the appliance. Appliance has to be unplugged for at least 2 hours and has cooled down completely... - Page 82 MAINTENANCE AND STORAGE • To clean the collector, rinse it under running water to remove any scale it contains . • Place the collector in its housing by screwing it in completely to ensure it is watertight. • Plug the appliance. •...
-
Page 83: Rinsing The Boiler
MAINTENANCE AND STORAGE 3.2 Rinsing the boiler • In addition this regular maintenance, 2 X YEAR ** it is advisable to rinse the boiler tank out completely every months after approximately 25 uses, whichever is the sooner. • Switch off and unplug the appliance. - Page 84 MAINTENANCE AND STORAGE • Place steam generator on the edge of your sink and hold your steam generator in an inclined position. Use a jug to fill the boiler tank with 1/4 litre of untreated tap water. • Shake the base unit gently for a few seconds then empty...
-
Page 85: Cleaning
MAINTENANCE AND STORAGE 3.3 Cleaning Appliance has to be unplugged for at least 2 hours and has cooled down completely before being carried out. • Clean soleplate with a soft damp cloth. Do not use detergent or descaling products for cleaning the soleplate. -
Page 86: Storage
MAINTENANCE AND STORAGE 3.4 Storage • Switch off and unplug the appliance. • Store the power cord in its slide storage place. • Store the steam cord in its slide storage place without strechting it too much. • Put the iron on the steam generator iron rest and raise the retaining hoop over the iron until it locks... -
Page 87: Troubleshooting
TROUBLESHOOTING Problem Possible Causes Solutions Water runs out The water has Press the steam control of the holes in condensed in the button holding the iron the soleplate. pipes because you away from your ironing are using steam for board until the iron the first time or you produces steam. - Page 88 Problem Possible Causes Solutions Brown streaks You are using Never add any products come out of chemical descaling to the water tank (see the holes in products or additives section on "What water the soleplate in the ironing water. to use?" ). and stain the Over use of the laundry.
- Page 89 Problem Possible Causes Solutions The steam The "AUTO-OFF" Press the "ON-OFF" generator does system was activated restart button located not switch on after 38 minutes of on the control panel. or the iron non-use and has indicator light switched off your and the "ON- steam generator.
- Page 90 HOW TO CONTACT YOUR LOCAL TEFAL TEAM? In case of any trouble, please contact our local TEFAL team. TEFAL/T-FAL INTERNATIONAL GUARANTEE: COUNTRY LIST SMALL HOUSEHOLD APPLIANCES www.tefal.com GROUPE SEB ISTANBUL AS 2 YIL TÜRKIYE Dereboyu Cd. Bilim Sk. 444 40 50...
- Page 92 1820002737...