Table of Contents
Advertisement
Quick Links
DIGITAL
VOICE RECORDER
DS - 2600
INSTRUCTIONS
EN
Thank you for purchasing an Olympus digital voice recorder.
Please read these instructions for information about using the product correctly and safely.
Keep the instructions handy for future reference.
To ensure successful recording, we recommend that you test the record function and volume before use.
Advertisement
Table of Contents

Related Manuals for Olympus DS-2600


Summary of Contents for Olympus DS-2600
- Page 1 VOICE RECORDER DS - 2600 INSTRUCTIONS Thank you for purchasing an Olympus digital voice recorder. Please read these instructions for information about using the product correctly and safely. Keep the instructions handy for future reference. To ensure successful recording, we recommend that you test the record function and volume before use.
-
Page 2: Table Of Contents
Table of contents 1 Getting started 2 Basic operations Main features ........4 Recording ........16 Names of parts ........5 New recording ..........17 Overwrite recording ........18 Recorder ............. 5 Insert recording..........19 Display ..............6 Recording monitor......20 Inserting the battery ......7 Playback ..........21 Charge the battery ......8 Erasing ..........23 Charging directly via USB cable .... - Page 3 Table of contents 4 Managing files on your PC Indications used in this manual DSS Player Software .......34 NOTE Operating environment ......35 Using online help ..........35 Describes precautions and operations that should be absolutely avoided in using the voice recorder. Connecting to your PC ....36 Connecting to your PC using the USB cable ............36...
-
Page 4: Getting Started
Getting started Main features s Slide switch operation for ease of use s This recorder is compatible with USB and fast response. 2.0, enabling fast data transfer to a computer. s Three recording modes are available for selection: DSS, PCM, and MP3 s Five folders and up to 200 files per (☞... -
Page 5: Names Of Parts
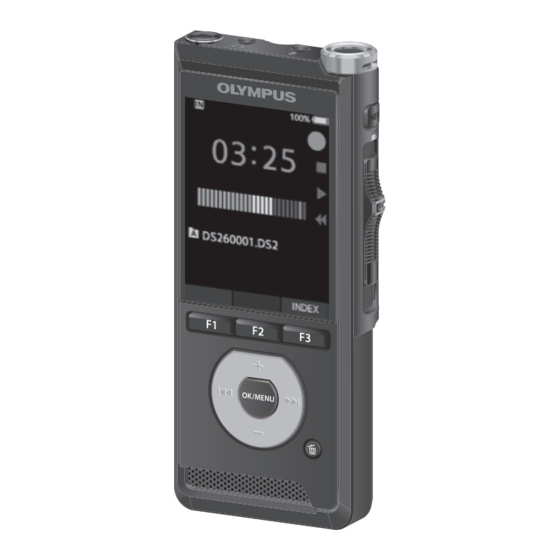
Names of parts Recorder & @ NEW button 1 q (earphone) jack 2 Built-in 2 microphone (L) # LED indicator light 3 Display $ Slide (sREC/ 4STOP/ `PLAY/ 7REV) switch 4 Programmable smart (F1,F2,F3) % OK/MENU button buttons 5 + (volume) button ^ 9 (fast forward) button 6 0 (rewind) button &... -
Page 6: Display
Names of parts Display Display in the recording Display in the playback Display in the device mode mode information Meanings of indicators 1 Recording media indicator ]: Internal memory 2 Battery status indicator ]: SD card 3 Slide switch guide ]: SD card lock status ]: Recording indicator ]: Battery... -
Page 7: Inserting The Battery
Inserting the battery This recorder uses a lithium ion battery specified Battery indicator by Olympus (Li-92B). Do not use any other type of battery. The battery indicator on the display will decrease as the battery loses power. Lightly press down on the battery cover release button, then open the battery cover, as shown in the illustration below. -
Page 8: Charge The Battery
Charge the battery After loading the battery into the recorder, you can charge it by connecting the USB cable to the recorder. Charging directly via USB cable After loading the battery into the recorder, you can charge it by connecting the USB cable to the recorder. -
Page 9: Using The Lithium Ion Battery
For customers in Germany: This recorder uses a lithium ion battery specified Olympus has a contract with the GRS (Joint Battery by Olympus (Li-92B). Do not use any other type of Disposal Association) in Germany to ensure battery. environmentally friendly disposal. -
Page 10: Power Supply From Usb Cable Or Ac Adapter
Power supply from USB cable or AC adapter Use the AC adapter or USB cable when recording for Use the AC adapter extended period of time. The docking station and AC adapter are sold Plug the AC adapter into a household power outlet separately. -
Page 11: Turn The Power On
Memory cards compatibility POWER For a list of memory card compatible with the recorder, please visit the product homepage at the Olympus website applicable to your region or contact your Olympus reseller where you purchased the product. NOTE • When initializing (formatting) a memory card, confirm that no necessary data is stored on the memory card beforehand. -
Page 12: Inserting And Ejecting A Memory Card
Memory card Inserting and ejecting a memory card NOTE • Inserting the memory card the wrong way or at an angle could damage the contact area or Inserting a memory card cause the memory card to jam. • If the memory card is not inserted all the Insert the memory card fully into the card way into the slot, data may not be written properly. -
Page 13: Setting Time And Date [Time & Date]
Setting time and date [Time & date] Press the 9 or 0 button to select If you set the time and date beforehand, the information when the file is recorded is the item to set. automatically stored for each file. Setting the time and date beforehand enables easier file Select the item from the management. -
Page 14: Changing The Time And Date
Setting time and date [Time & date] Changing the time and date If the current time and date is not correct, set it using the procedure below. Press the OK/MENU or 9 button. When the file display screen appears, press the OK/MENU button while the voice recorder is in stop mode. -
Page 15: Operate The Slide Switch
Operate the slide switch Slide the slide switch on the side of the recorder up or down to perform the recording, stop, playback, and fast-rewind operations. You can determine the current position at a glance even from the front because the slide switch works in conjunction with the slide switch guide on the screen. -
Page 16: Basic Operations
Basic operations Recording By default, the recorder has five folders, [A], [B], Recording related settings [C], [D], [E]. These five folders can be selectively used to distinguish the kind of recording. Up to 200 Recording related settings can be configured messages can be recorded per folder. -
Page 17: New Recording
Recording New recording Create a new file to record in. Press the NEW button to create a new file. • [New file] appears in the display. a New file name Move the slide switch to the REC (s) position to start recording. •... -
Page 18: Overwrite Recording
Recording Overwrite recording You can overwrite a previously recorded file starting from any point within the file. When using overwriting, the overwritten part will be erased. Select and play the file you want to overwrite. • Stop the playback at the point you want to start overwriting. -
Page 19: Insert Recording
Recording Insert recording Additional recording can be inserted into previously recorded file. Select and play the file you want to insert an additional recording into. While playing the file, press the F1 (INSERT) button to insert an additional recording. • [Insert Rec?] will appear on the display. Move the slide switch to the REC (s) position to start inserting the additional recording. -
Page 20: Recording Monitor
Recording monitor It is possible to monitor your recording by listening to it even while the recording is in progress. In order to do so, insert the earphone plug into the q (earphone) jack and use the + or – buttons to control the volume level. -
Page 21: Playback
Playback You can playback a file starting from any point. Select the file, then move the slide switch to the PLAY (`) position to start playback. • The LED indicator lights in green. a Elapsed playback time Press the + or – button to adjust the volume. - Page 22 Playback Playback functions Operation How to cancel Fast Forward Press the 9 button once while in stop mode. Move the slide switch to a position other (FF) than the STOP (4) position. • The recorder starts the operation of Rewind Press the 0 button once while in stop mode.
-
Page 23: Erasing
Erasing Erasing files Partially erasing a file A selected file can be erased from a folder. Also, all Any unnecessary part of a file can be erased. files in a folder can be erased simultaneously. Playback the file you would like to Select the file you want to erase. - Page 24 Erasing NOTE • If the k (erase) button is not pressed within 8 seconds after the [Start point] and [End point] are alternately displayed, the recorder will revert to play back status. • MP3 files cannot be partially erased. • An erased file cannot be restored. •...
-
Page 25: Advanced Operations
Advanced operations Selecting folders and files Displaying file information The recorder can display a variety of information Changing folders related to the current file. Select the file containing the When the file display screen appears, information to display. press the F1 (FOLDER) button while the voice recorder is in stop mode. -
Page 26: Index Marks
Index marks Index marks can be placed into a file during Clearing an index mark recording or playback. Index marks are used to provide a quick and easy way to identify important Select a file in which index marks you or significant parts within the file. -
Page 27: How To Use The Menu
How to use the menu Press the + or − button to select the tab Items in menus are categorized by tabs, so select a tab first and move to a desired item to quickly set it. containing the item you want to set. You can set each menu item as follows. - Page 28 How to use the menu Press the OK/MENU or 9 button. Menu list • Move to the setting of the selected item. File menu [File information] [File lock] Recording menu [Mic mode] [Mic sense] [Rec mode] [VCVA] Press the + or – button to change the setting.
-
Page 29: Menu Items
Menu items [Low]: File menu The lowest recording sensitivity. Suited to recording close-talk. File information Rec mode The recorder can display a variety of information Three recording formats are available for selection: related to the current file. DS2, WAV, and MP3. File lock Select [DSS], [PCM] or [MP3]. -
Page 30: Lcd/ Sound Menu
Menu items LCD/ Sound menu Backlight By default, the display will remain lit for about Level meter (varies 10 seconds when a button on the recorder is according to the sound pressed. volume being recorded) Select [Lighting time], [Dim light time] or [Brightness]. -
Page 31: Device Menu
When there is a SD card (sold separately) in the voice Format recorder, you can select whether to record on the internal memory or on the SD card. Memory cards that have been used in non-Olympus • The recording media ([ ] or [ ]) will appear devices, or memory cards that are not recognized by on the display. -
Page 32: Formatting The Memory Card [Format]
Formatting the memory card [Format] Press the OK/MENU or 9 button. Memory cards that have been used in non-Olympus devices, or memory cards that are not recognized by the recorder, must be formatted before they can be used with the recorder. - Page 33 Formatting the memory card [Format] Press the + button again to select NOTE [Start] option. • The time required to format a memory card varies according to the capacity of the memory card to be formatted. Do not interrupt the formatting process with the following actions.
-
Page 34: Managing Files On Your Pc
• Voice recorder’s menu setting. • Direct recording and editing of existing Dictation through Voice recorder’s button. In order to download the software, please access the website in your respective region. (Europe, Middle east and Africa) http://www.olympus.eu/sds-downloads/ (The Americas) https://www.olympusamericaprodictation.com/odms-r7 (Oceania) https://www.olympus.com.au/support/... -
Page 35: Operating Environment
PCs and other compatible machines will not be covered under the operational warranty. • Macintosh version does not support voice recognition software. • For information on the latest OS upgrades compatibility, visit the Olympus Web page at http://www.olympus-global.com... -
Page 36: Connecting To Your Pc
Connecting to your PC Connecting to your PC using the USB • Some PC’s may not supply sufficient power and the recorder fails to connect. Refer to your PC cable user’s manual regarding the USB port on your PC. • Do not connect the recorder to a PC by using a Boot the PC. -
Page 37: Disconnecting From Your Pc
Connecting to your PC Disconnecting from your PC NOTE • NEVER remove the memory card or disconnect the USB cable while the record indicator light is Windows flashing. If you do, the data will be destroyed. • Never touch the contact points at the bottom of the docking station, as this may cause a bad Click [ ] on the task bar located at the... -
Page 38: Other Information
The memory card was not recognized correctly. (☞ P.12). [Format error] A formatting problem occurred. Format again (☞ P.32). Contact the Olympus Customer Support Center [Memory error] An internal memory error occurred. (☞ back cover). [Insert SD card] The recorder cannot find the memory card. -
Page 39: Troubleshooting
Troubleshooting Symptom Probable cause Action The remaining battery power is low. Charge the battery (☞ P.8). Nothing appears on The recorder is turned off. Turn the power on (☞ P.11). the display. The recorder is currently in Power Save mode. Press any button. - Page 40 Troubleshooting Symptom Probable cause Action The maximum number of index marks has been Erase unnecessary index marks (☞ P.26). reached. Unable to set index The file is locked. Unlock the file from the file menu (☞ P.29). marks. The memory card is locked. Unlock the memory card.
-
Page 41: Device Care
Lithium ion battery: LI-92B This lithium ion rechargeable battery is manufactured by Olympus. It is best paired with the UC90 battery charger. s AC adapter (5V): A517 & F-5AC In order to charge the battery, the docking station (CR21) will be necessary (optional). -
Page 42: Copyright And Trademark Information
• Any liability for passive damages or damage of any kind occurred due to data loss incurred by a defect of the product, repair performed by the third party other than Olympus or an Olympus authorized service station, or any other reason is excluded. -
Page 43: Safety Precautions
“memory card”. manual in an easily accessible location for future reference. • The word “ODMS” is used to refer to the Olympus Dictation Management System in The warning symbols indicate important safety Windows environment. related information. To protect yourself and others from personal injury or damage to property, it is •... - Page 44 Doing so may cause parts repair performed by the third party other to deteriorate and, in some circumstances, than Olympus, an Olympus authorized cause the recorder to catch fire. Do not use service station or any other reason is the charger or AC adapter if it is covered.
- Page 45 1. Remove the battery immediately while to flame, heated, short-circuited or being careful not to burn yourself, and; disassembled. 2. Call your dealer or local Olympus • Never heat or incinerate battery. representative for service. • Take precautions when carrying or storing •...
- Page 46 Safety precautions LCD monitor • The LCD used for the monitor is made with high-precision technology. However, black spots or bright spots of light may appear on the LCD monitor. Due to its characteristics or the angle at which you are viewing the monitor, the spot may not be uniform in color and brightness.
-
Page 47: Specifications
Specifications 4 MIC jack General points ø 3.5 mm impedance 8 Ω or more 4 Recording format 4 Power source DS2 (Digital Speech Standard Pro) Standard voltage: 3.6 V Linear PCM (Pulse Code Modulation) Battery: Lithium-ion battery (LI-92B) MP3 (MPEG-1 Audio Layer3) External power supply: USB connection, 4 Storage AC adapter (A517, F-5AC) (DC5V) - Page 48 2 GB Specifications and design are subject to change 32 GB 2350 h 4810 h without notice. Battery life is measured by Olympus. It varies SD card 16 GB 1170 h 2410 h greatly according to the conditions of use.
- Page 49 CAN ICES-3 (B)/NMB-3 (B) the receiver is connected. ➤ Consult the dealer or an experienced radio/TV technician for help. ➤ Use only Olympus’ supplied cable or AC adapter when you connect the applicable equipment to an external device or a power outlet.
- Page 50 Republic, Hungary, Poland, Iceland, Bulgaria, Israel, Latvia, Lithuania, Estonia, Russia, South Africa. Some phone service providers do not permit Professional dictation devices from Olympus access to 00800 numbers or require an additional are distributed via specially trained and prefix. Charges may apply here. Please contact educated partners.
- Page 51 3500 Corporate Parkway, P.O. Box 610, Center Valley, PA 18034-0610, U.S.A. E-mail: Audio@olympus.com http://www.olympusamerica.com OLYMPUS EUROPA SE & CO. KG (Premises) Wendenstrasse 14 – 18, 20097 Hamburg, Germany Tel. +49 40 - 23 77 3-0 (Goods delivery) Modul H, Willi-Bleicher Str. 36, 52353 Düren, Germany (Letters) Postfach 10 49 08, 20034 Hamburg, Germany http://www.olympus-europa.com...