Table of Contents
Advertisement
Quick Links
DIGITAL KEYBOARD
Owner's Manual
Thank you for purchasing this Yamaha Digital Keyboard!
The instrument is a portable keyboard with featuring a wide variety of sounds and functions.
We recommend that you read this manual carefully so that you can fully take advantage of the advanced and
convenient functions of the instrument. We also recommend that you keep this manual in a safe and handy place
for future reference.
Before using the instrument, be sure to read "PRECAUTIONS" on pages 5–7.
EN
Advertisement
Table of Contents

Related Manuals for Yamaha PSR-I500


Summary of Contents for Yamaha PSR-I500
- Page 1 DIGITAL KEYBOARD Owner’s Manual Thank you for purchasing this Yamaha Digital Keyboard! The instrument is a portable keyboard with featuring a wide variety of sounds and functions. We recommend that you read this manual carefully so that you can fully take advantage of the advanced and convenient functions of the instrument.
- Page 2 This product should be used only with the components supplied and never mix different types of batteries. Batteries MUST be or; a cart, rack, or stand that is recommended by Yamaha. If a installed correctly. Mismatches or incorrect installation may cart, etc., is used, please observe all safety markings and...
- Page 3 Yamaha Corporation of America or its subsidiaries. devices. Compliance with FCC regulations does not guarantee * This applies only to products distributed by YAMAHA CORPORATION OF AMERICA. (class B) The model number, serial number, power requirements, etc., may be found on or near the name plate, which is at the bottom of the unit.
- Page 4 WARNING TO REDUCE THE RISK OF FIRE OR ELECTRIC SHOCK, DO NOT EXPOSE THIS APPARATUS TO RAIN OR MOISTURE. (UL60065_03) PSR-I500 Owner’s Manual...
- Page 5 For AC adaptor WARNING CAUTION • This AC adaptor is designed for use with only Yamaha electronic • When setting up, make sure that the AC outlet is easily instruments. Do not use for any other purpose. accessible. If some trouble or malfunction occurs, immediately turn off the power switch of the instrument and disconnect the AC •...
- Page 6 (If you are using batteries, remove all batteries from the - Use new batteries, all of which are the same type, same model, instrument.) Then have the device inspected by Yamaha service and made by the same manufacturer. personnel.
- Page 7 Yamaha cannot be held responsible for damage caused by improper use or modifications to the instrument, or data that is lost or destroyed. Always turn the power off when the instrument is not in use.
-
Page 8: Table Of Contents
RAGA SCALE Songs. You can the tools to completely transform the sound. expand the expressive range by using various functions, Page 24) including Live Controls and Portamento, a continuous pitch change that is essential to Indian music. PSR-I500 Owner’s Manual... - Page 9 USB flash drive. Since the recorded data the keyboard—as rhythm loops, melodies or sound is saved as an audio file, you can easily play it back effects—giving you even greater creative expressive on a computer or portable audio player. tools for your performance. PSR-I500 Owner’s Manual...
-
Page 10: Compatible Format And Functions
GM System Level. XGlite As its name implies, “XGlite” is a simplified version of Yamaha’s high-quality XG tone gen- eration format. Naturally, you can play back any XG song data using an XGlite tone gener- ator. However, keep in mind that some songs may play back differently compared to the original data, due to the reduced set of control parameters and effects. -
Page 11: About The Manuals
Connection Manual Explains how to connect the instrument to smart devices, such iPhone, iPad, etc. To see the above materials, access the Yamaha website. Open the following website, enter the model name and search them. Yamaha Downloads https://download.yamaha.com/... -
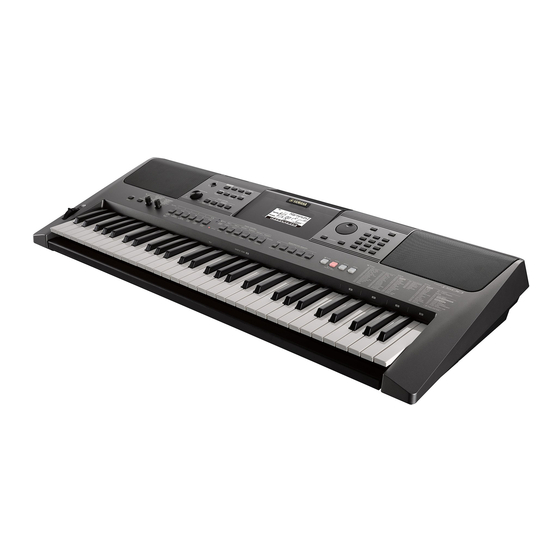
Page 12: Panel Controls And Terminals
• Song List (Data List) As illustrated, each note of the key- board has a specific note number and name (e.g., 036/C1), which is used in making various settings, (C1) (C2) (C3) (C4) (C5) (C6) such as Split Point (page 62). PSR-I500 Owner’s Manual... - Page 13 • When the [RIYAZ] lamp is on: ..........page 31 • When the [SONG/AUDIO] lamp is on: ........pages 28, 37 • When the [STYLE] lamp is on: ..........page 60 @5 [PITCH BEND] wheel ......page 50 PSR-I500 Owner’s Manual...
-
Page 14: Setting Up
Setting Up Power Requirements Although the instrument will run either from an AC Plug adaptor or batteries, Yamaha recommends use of an AC adaptor whenever possible. An AC adaptor is Slide the plug as indicated. more environmentally friendly than batteries and does not deplete resources. - Page 15 For details, refer to page 69, Function 072. NOTICE • Failure to set the battery type may shorten the amount of the battery life. Make sure to set the battery type correctly. PSR-I500 Owner’s Manual...
-
Page 16: Turning The Power On/Off
This could cause physical on the keyboard. This starts the instrument with the injury to you or others, as well as damage to the instru- ment or other property. Auto Power Off function disabled. The lowest key PSR-I500 Owner’s Manual... -
Page 17: Quick Guide
Style functions are printed below. The “Press & Hold” Symbol Buttons having this indication can be used to call up an alternate function when the relevant button is pressed and held. Hold down this button until the function calls up. PSR-I500 Owner’s Manual... -
Page 18: Display Items
Indicates the chord which is being played in the Auto page 46 Accompaniment range (page 25) or specified via Song playback. page 25 Track status page 60 Indicates the on/off status of the current Song, Style or Riyaz (pages 28, 37, 60). PSR-I500 Owner’s Manual... -
Page 19: Try Playing A Variety Of Instrument Voices
Layering a Dual Voice Style, Song or Riyaz. This function is called OTS (page 51). In addition to the Main Voice, you can layer a sec- ond, different Voice over the entire keyboard as a “Dual Voice.” NEXT PAGE PSR-I500 Owner’s Manual... -
Page 20: Playing A Split Voice In The Left Hand Area
TimeSigN The Split Voice (page 55) and the Split Point can be changed as desired (page 62). Hold for longer Press the [SPLIT] button again to exit Number of beats than a second. per measure. from Split. PSR-I500 Owner’s Manual... -
Page 21: Adding Harmony/Triggering Arpeggios
Split Voice and is triggered only by playing a key to the left of the Split Point. Rotate the dial to set the volume. • By assigning the Arpeggio Hold function to the foot- switch, the Arpeggio will continue to play after the note is released (page 56). PSR-I500 Owner’s Manual... -
Page 22: Changing The Harmony And Arpeggio Types
You can adjust the Arpeggio velocity in the Function Both in Riyaz and auto accompaniment modes Setting (page 68, Function 046). Keep holding down the keys. Harmony types 20 to 26 (Echo) Both in Riyaz and auto accompaniment modes Play the keys. PSR-I500 Owner’s Manual... -
Page 23: Adding Dsp Effects
• The DSP effects may not be applied as expected RotarySp when a User Song is being played back. This is because the DSP effects are affected by the data recorded to the User Song. Current DSP type PSR-I500 Owner’s Manual... -
Page 24: Creating Original Sounds Via The Knobs
• Rotating a knob to the right while the volume is set to a After a few seconds, the current target (KEY- high level may result in distortion. If this occurs, reduce BOARD or BACKING) appears. the volume level. PSR-I500 Owner’s Manual... -
Page 25: Playing Styles
59. you play chords. Split Point ... default value: 054 (F#2) (C3) (C4) (C5) (C6) (C1) (C2) Auto Accompa- niment area The Split Point can be changed as desired (page 62). PSR-I500 Owner’s Manual... -
Page 26: Playing Songs
• USB: Songs in the USB flash drive (page 71). NOTE • In addition to the 60 preset Songs in this instrument, you can enjoy extra Songs downloadable from the Yamaha website. For details, refer to page 11. • For instructions on transferring Songs from a computer to this instrument, refer to the online PDF manual (page 11) “Computer-related Operations. -
Page 27: Listening To A Demo Song
Song playback started by using the [DEMO] button. Song number Press the [ ] (Start/Stop) button to start playback. To stop playback, press the [ ] (Start/Stop) button again. Jeanie Current measure Each arrow mark flashes in time with the beat. PSR-I500 Owner’s Manual... -
Page 28: Playing A Specified Section Of A Song Repeatedly (A-B Repeat)
[ ] (A-B REPEAT) button before starting playback. • If you want to set end point “B” to the end of the Song, specify only the A point and play back the Song to the end. PSR-I500 Owner’s Manual... -
Page 29: Using The Song Lesson Feature
1: LISTEN 2: TIMING 3: WAITING off 1…. Press this button until the desired num- ber is shown on the display. Sample Zone B: C5–D5 Sample Zone C: D#5–F#5 Sample Zone D: G5–A5 NEXT PAGE Sample Zone E: A#5–C6 PSR-I500 Owner’s Manual... -
Page 30: Making Practice Perfect-Repeat & Learn
When the lesson song has played all the way through your performance will be evaluated in 4 levels: OK, Good, Very Good, or Excellent. “Excellent” is the high- est evaluation. After the evaluation display is shown, the les- son will start again from the beginning. PSR-I500 Owner’s Manual... -
Page 31: Playing The Riyaz
4] buttons to add a Tanpura phrase. Next, press • You can record your performance and save it as an audio file to the USB flash drive. (page 41) another Tanpura button to change the phrase. You PSR-I500 Owner’s Manual... -
Page 32: Playing With Quick Sampling
• To avoid damage to the devices, first turn on the power to the external device, and then to the instrument. When turning off the power, first turn off the power to the instrument, and then to the external device. PSR-I500 Owner’s Manual... -
Page 33: Sampling External Audio Sound
• If you want to use the metronome or Melody Suppressor Pause playback on the external device at when sampling, set these functions beforehand. The Metro- nome click is not sampled. the beginning of the sound or phrase you want to sample. NEXT PAGE PSR-I500 Owner’s Manual... - Page 34 If you are not satisfied with the sample, return to step 2 and try sampling again. To sample and assign to another Sample Zone, go on to step 2 again. Press the [QUICK SAMPLING] button to exit from the Quick Sampling mode. PSR-I500 Owner’s Manual...
-
Page 35: Restoring The Default Samples
• If the instrument is in the Quick Sampling mode, press the [QUICK SAMPLING] button to exit from the mode, and then follow the steps below. Confirm the Sample Zone containing the sample you intend to save. 1-1 Press the [VOICE] button. PSR-I500 Owner’s Manual... -
Page 36: Loading A Sample From A Usb Flash Drive
USB flash drive. If the instrument is in the File Control display, no sound comes out even if you press the keyboard. Press the [FUNCTION] button to exit from the File Control display. PSR-I500 Owner’s Manual... -
Page 37: Recording Your Performance
• If you want to record the performance using a Style, press the [STYLE] button. NEXT PAGE Press the [REC] button to enter the Record Ready mode. This operation selects the lowest-numbered unrecorded User Song from 061–070 (User 1– 10) as the recording target. PSR-I500 Owner’s Manual... -
Page 38: Recording To A Specified Track
Style, then simultaneously hold down the cannot be recorded. [REC] button and press the [A] button. ACMP is • Performances using Sample Voices can be recorded on track 1 only. automatically turned on. Press and hold PSR-I500 Owner’s Manual... -
Page 39: Clearing A User Song
A confirmation message will appear on the dis- An in-progress message will appear briefly on the play. To cancel this operation, press the [-] button. display. Press the [+/YES] button to clear the Song. An in-progress message will appear briefly on the display. PSR-I500 Owner’s Manual... -
Page 40: Audio Playback And Recording
The USB flash drive may have a problem. Audio file name • Refer to “Compatible USB Device List for USB Err PSR-I500” on the Yamaha website. AUDIO001 • Format the USB Flash Drive. For example, the file named “AUDIO001.wav” in the USB flash drive is shown like this. -
Page 41: Recording/Saving Audio Files To A Usb Flash Drive
The USB flash drive may have a problem. PressREC • Refer to “Compatible USB Device List for USB Err PSR-I500” on the Yamaha website. • Format the USB Flash Drive. NOTE • To exit from the Audio mode, press the [AUDIO] button again. -
Page 42: Deleting Audio Files From The Usb Flash Drive
After a while, a message indicating completion of the operation appears. NOTICE • The Delete operation cannot be cancelled during exe- cution. Never turn off the power or disconnect the USB flash drive during the operation. Doing so may result in data loss. PSR-I500 Owner’s Manual... -
Page 43: Memorizing Your Favorite Settings (Registration Memory)
Press and hold REGIST 1 Registration Memory number A “Mem OK” message appears indicating that the panel settings will be stored temporarily. The data is actually written to the memory when the power is turned off. NEXT PAGE PSR-I500 Owner’s Manual... -
Page 44: Freezing The Style Settings Even If A Different Registration Number Is Selected
REGIST MEMORY number button. Press and hold If you want to freeze the Style settings or Riyaz set- tings permanently, set the Freeze mode parameter to ON from Function display 069 (page 69). StyleFrz PSR-I500 Owner’s Manual... -
Page 45: Connecting To Other Devices
• To avoid possible damage to the external device, first turn on the power to the instrument, then to the external device. When turning off the power, do so in reverse order: first turn off the power to the external device, then to the instrument. PSR-I500 Owner’s Manual... -
Page 46: Playing An External Audio Device With The Built-In Speakers
Press the [MELODY SUPPRESSOR] but- Adjust the volume balance between the ton again to turn it off. audio device and this instrument. Adjust the audio playback volume on the audio device, then adjust the entire volume by rotating PSR-I500 Owner’s Manual... -
Page 47: Using With Computer Or Smart Device
[MASTER VOLUME] con- NOTE trol. • When using the Windows computer, install the Yamaha Stein- • The audio data from computer or smart device cannot be berg USB Driver on the computer. For details, refer to the played on the instrument in Quick Sampling mode or Audio mode. -
Page 48: Backup And Initialization
• Keep in mind that this operation also deletes any data you have purchased and loaded. Be sure to save important data to a computer. For details, refer to the online PDF manual (page 11) “Computer-related Operations. ” PSR-I500 Owner’s Manual... -
Page 49: Reference
Main, Dual, and Split Voices individually via the same operations above. Regarding the item in step same operations above. Regarding the item in step 2, refer to the Function List on page 67. 2, refer to the Function List on page 67. PSR-I500 Owner’s Manual... -
Page 50: Pitch Controls-Transpose
• When using Quick Sampling (page 32) or with a specific effect sound (Instrument number 802 [Smpl Vce]), Porta- mento will not be applied to the sample sounds assigned to Sample Zones B to E of the keyboard. PSR-I500 Owner’s Manual... -
Page 51: Setting The Portamento Time
Riyaz. Produces a fairly “standard” keyboard Medium response. Requires strong playing to produce Hard high volume. All notes are produced at the same Fixed volume no matter how hard the key- board is played. PSR-I500 Owner’s Manual... -
Page 52: Selecting An Eq Setting For The Best Sound
Results in more powerful sound. Depending on the selected Voice and Boost Style, etc., the sound may be more subject to distortion than other EQ types. Piano Optimum for piano solo performance. Lowers the mid range for a brighter Bright sound. PSR-I500 Owner’s Manual... -
Page 53: Scale Tuning
Preset Scale types Rotate the dial to select a base note from Equal C, C#, D, Eb, E, F, F#, G, Ab, A, Bb and B. Pure Major The default setting is “C.” Pure Minor Bayat (Arabic) Rast (Arabic) PSR-I500 Owner’s Manual... -
Page 54: Tuning Each Note To Create An Original Scale
C, C#, D, Eb, E, F, F#, G, Ab, A, Bb, B. Press the CATEGORY [>>] button to call up “Tune” (Function 051). After a few seconds, the tuning value of the note selected in step 3 appears. Tune Tune C Tuning value PSR-I500 Owner’s Manual... -
Page 55: Voice Settings
The Voice-related settings are reset when a dif- ferent Voice is selected. If you want to store the Current Split Voice created sound for future recall, memorize the set- tings to a Registration Memory. Rotate the dial to select the desired Split Voice. PSR-I500 Owner’s Manual... -
Page 56: Arpeggio Settings
Rotate the dial to select a value from notes, Arpeggio playback will continue. To stop “OFF,” “1/8” and “1/16.” Arpeggio playback, release the footswitch. • OFF No synchronization • 1/8 Synchronizing to quarter notes • 1/16 Synchronizing to 8th notes PSR-I500 Owner’s Manual... -
Page 57: Parameters Assigned To The Knobs
Adjusts the amount of Resonance applied at the ATTACK DECAY RELEASE Time cutoff frequency. Turning the knob to the right increases the Resonance to emphasize the fre- quencies at the cutoff frequency, resulting in an Key Played Key Released exaggerated peak. PSR-I500 Owner’s Manual... - Page 58 These knobs let you finely adjust the Voice to create the appropriate sound for the particular song you’re playing. PSR-I500 Owner’s Manual...
-
Page 59: Styles And Riyaz Patterns
Auto Accompaniment area of the keyboard. Press the [MAIN/AUTO FILL] button to select Main A or Main B. MAIN A Current Section (Main A or B) PSR-I500 Owner’s Manual... -
Page 60: Style Synchro Stop
• Style numbers 258, 270–282 have no rhythm parts, so no rhythm will play. When one of these Styles is selected, turn ACMP on, then specify the chord in the Auto Accompaniment area to play Style parts other than the Rhythm part. PSR-I500 Owner’s Manual... -
Page 61: Riyaz Variations
You can start play back of the Style, Riyaz or Song by simply tapping the [TEMPO/TAP] button at the required tempo—four times for time signatures in 4 (4/4, etc.), and three times for time signatures in 3 (3/ 4, etc.). NOTE • Tap tempo setting range: 32–280 PSR-I500 Owner’s Manual... -
Page 62: Adjusting The Volume Of The Style Or Riyaz
Use the CATEGORY [<<] and [>>] but- tons to call up “SplitPnt” (Function 009). You can call up this display also by pressing the [STYLE] then holding the [ACMP] button for lon- ger than a second. SplitPnt Split Point PSR-I500 Owner’s Manual... -
Page 63: Chord Types For Style Playback
Press the root note together with the the chord. with the nearest black key to with the nearest white key to nearest white and black keys to the the left of it. the left of it. left of it (three keys altogether). PSR-I500 Owner’s Manual... -
Page 64: Song Settings
• When there are no existing User Songs, Download Songs or USB Songs in the data, the Demo Songs are played back. Press the [DEMO] button to start play- back. To stop playback, press the [DEMO] button again. PSR-I500 Owner’s Manual... -
Page 65: Tempo Setting Of The Song
• You cannot change the Melody Voice of a User Song. • Other Voice will be changed depending on Song. • Song volume can be adjusted while in the Song mode. • You cannot change the Voice of an audio data. PSR-I500 Owner’s Manual... -
Page 66: The Functions
Refer to page 62. 1 (Soft), 2 (Medium), TouchRes Touch Response 2 (Medium) Refer to page 51. 3 (Hard), 4 (Fixed) Port. Portamento ON/OFF Switches Portamento on or off. PortTime Portamento Time 000–127 Sets the Portamento Time. PSR-I500 Owner’s Manual... - Page 67 Determines how much of the Split Voice’s signal is sent to the S.Reverb Reverb Depth 000–127 Reverb effect. Determines how much of the Split Voice’s signal is sent to the S.Chorus Chorus Depth 000–127 Chorus effect. PSR-I500 Owner’s Manual...
- Page 68 TO HOST] terminal. When selecting Sampling Voice, it is not generated regardless of setting. Determines whether MIDI messages generated via Style play- StyleOut Style Out ON/OFF back are transmitted (ON) or not (OFF) from the [USB TO HOST] terminal. PSR-I500 Owner’s Manual...
- Page 69 Specifies the time that will elapse before the instrument’s AutoOff 30 minutes Time 120 (min.) power is automatically turned off. Battery (page 14) 1 (Alkaline) / Selects the type of batteries you have installed to this instru- Battery Battery Type 1 (Alkaline) 2 (Ni-MH) ment. PSR-I500 Owner’s Manual...
- Page 70 ** The appropriate value is automatically set for each Style, Song and Riyaz. NOTE • The MIDI and Audio settings are designed specifically for convenient use for when an external device such as a computer is connected to the [USB TO HOST] terminal (page 47). PSR-I500 Owner’s Manual...
-
Page 71: Usb Flash Drive Operations
The instrument does not necessarily support all com- can save data you’ve created to the connected device, mercially available USB devices. Yamaha cannot guar- as well as read data from the connected device. antee operation of USB devices that you purchase. -
Page 72: Connecting A Usb Flash Drive
File Control operations will be active. played. Use the CATEGORY [<<] and [>>] but- tons to call up the desired File Control function, then execute it. For details, refer to the table on the right. PSR-I500 Owner’s Manual... -
Page 73: Formatting A Usb Flash Drive
A confirmation message will appear. To cancel from the File Control display. the operation, press the [-/NO] button. Overwriting existing files If a file that already contains data is selected as the target user file, “OverWr?” will appear on the display. PSR-I500 Owner’s Manual... -
Page 74: Saving A User Song As Smf To A Usb Flash Drive
CUTE] button. User 1 Press the [0/EXECUTE] button again. Target file names on the USB flash drive appear on the display as “USER***” (***: number 1–100). If desired, rotate the dial to select the different file. SONG001 PSR-I500 Owner’s Manual... -
Page 75: Loading User Data From A Usb Flash Drive
After a while, a message indicating completion of the operation appears. NOTICE • The Load operation cannot be cancelled during execu- tion. Never turn off the power or disconnect the USB flash drive during the operation. Doing so may result in data loss. PSR-I500 Owner’s Manual... -
Page 76: Loading A Style File
Use the CATEGORY [<<] and [>>] but- tons to call up the “Load STY” message. Load STY Press the [0/EXECUTE] button. The name of a Style file in the USB flash drive or internal memory of this instrument will appear on PSR-I500 Owner’s Manual... -
Page 77: Deleting A User File In The Usb Flash Drive
Never turn off the power or disconnect the USB flash drive during the operation. Doing so may result in data loss. Press the [FUNCTION] button to exit from the File Control display. Press the [FUNCTION] button to exit from the File Control display. PSR-I500 Owner’s Manual... -
Page 78: Exiting From A File Control Display
Set protect to off and try again. Displayed when connecting an unformat- UnFormat ted USB flash drive. USB flash drive save, delete, and format operations cannot be performed when the UseAdpt instrument is being powered from battery. Use an AC adaptor. PSR-I500 Owner’s Manual... -
Page 79: Appendix
Check the on/off status of the [STYLE] lamp. When using a Style, when the [ACMP ON/OFF] button is pressed. press the [STYLE] button to turn on the [STYLE] lamp. Refer to the “Message List” on pages 41, 78 as required. PSR-I500 Owner’s Manual... -
Page 80: Specifications
External Drives USB flash drive Storage and USB TO HOST, USB TO DEVICE, Connectivity Connectivity DC IN 12V, Headphones/Output, Sustain Pedal, AUX IN (Stereo-mini) Amplifiers 6 W + 6 W Sound System Speakers 12 cm x 2 PSR-I500 Owner’s Manual... - Page 81 • Wireless MIDI adaptor: UD-BT01 * The contents of this manual apply to the latest specifications as of the publishing date. To obtain the latest manual, access the Yamaha website then download the manual file. Since specifications, equipment or separately sold accessories may not be the same in every locale, please check with your Yamaha dealer.
-
Page 82: Index
Music Rest ......10 Sustain........45 ENDING ........59 Synchro Stop ......60 EQ (Equalizer) ......52 External Clock ......68 Normal ........32 Tabla ......31, 57, 61 Tanpura......31, 57, 61 Fast Forward......27 Octave ........67 Tap Start ......61, 65 PSR-I500 Owner’s Manual... - Page 83 USB TO DEVICE.....71 USB TO HOST ......47 Voice........19, 55 Volume........16 Volume (AUX IN) .....66 Volume (Harmany)....22 Volume (Metronome) ....21 Volume (Song)......65 Volume (Style) ......62 Volume (USB TO DEVICE)..66 Volume (USB TO HOST) ..66 Volume (Voice) ......67 Waiting........29 PSR-I500 Owner’s Manual...
- Page 84 Note for the battery symbol (bottom two symbol examples): This symbol might be used in combination with a chemical symbol. In this case it complies with the requirement set by the EU Battery Directive for the chemical involved. (weee_battery_eu_en_02) PSR-I500 Owner’s Manual...
- Page 85 Owner’s Manual for this product; any shipment of the product (claims must be presented to the carrier); repair or attempted repair by anyone other than Yamaha or an authorized Yamaha Service Center; (b) any unit which has been altered or on which the serial number has been defaced, modified or removed;...
- Page 87 For details of products, please contact your nearest Yamaha representative or the authorized distributor listed below.
- Page 88 Yamaha Global Site https://www.yamaha.com/ Yamaha Downloads https://download.yamaha.com/ Manual Development Group © 2019 Yamaha Corporation Published 4/2019 POIN*.*-**A1 VAW4430...