Table of Contents
Advertisement
Quick Links
Advertisement
Table of Contents

Related Manuals for Kurzweil KP70 HARMONY


Summary of Contents for Kurzweil KP70 HARMONY
- Page 1 Electronic Keyboard Owner’s Manual A.B.C. DUAL TOUCH LOWER SUSTAIN...
- Page 2 INFORMATION FOR YOUR SAFETY The normal function of the product may by Strong Electro Magnetic Interference. If so, simply reset the product to resume normal Caution! operation by following the instruction manual. In case the function could not resume, please use the product in other location.
-
Page 3: Table Of Contents
Contents Panel & Display Description Play Back the Recording..........Front Panel..............Song Rear Panel..............Lesson Mode.............. LCD Display..............Lesson 1..............Lesson 2..............Preparation Lesson 3..............Power Supply............... Grade Function............Setting the Music Stand..........Demo Connections Enter Demo..............20 Headphones Jack............Exit Demo..............20 Sustain Jack.............. -
Page 4: Panel & Display Description
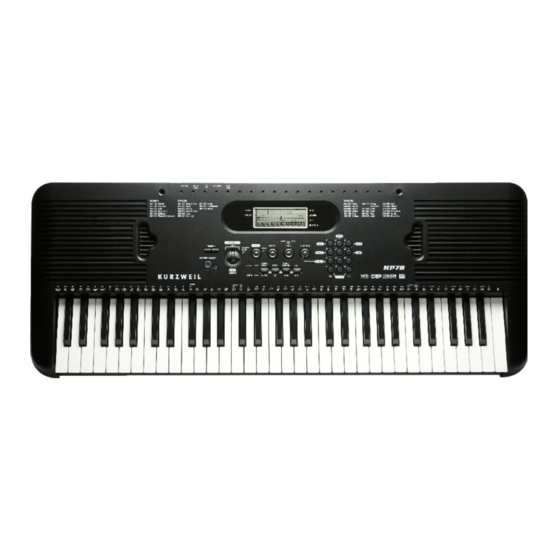
Panel & Display Description Front Panel OFF-ON SUSTAIN 100 SONGS 100 STYLES 300 VOICES 0 1-0 14 Classic 0 1-0 15 Beat & Pop 071-080 Latin 0 1-0 Piano 148-170 String 246-258 Pad 015-040 Favorite 016-028 Rock 081-090 Tradi tional 040-062 Mallet Ensemble 259-266 Effects... -
Page 5: Preparation
Preparation Power Supply This electronic keyboard can be powered by the current of a standard household wall outlet (using the specified SUSTAIN OFF-ON AC adaptor) or by batteries. Using the AC Adaptor Make sure that only the AC adaptor specified for this electronic keyboard is used. -
Page 6: Connections
Connections Headphones Jack If you prefer to play with headphones for high quality personal monitoring, plug a set of stereo headphones into the rear panel PHONES jack. OFF-ON SUSTAIN Plug a set of headphones into the PHONES jack and the speakers will be disabled automatically. NOTE: Never use headphones in high volume, as it may hurt your ears. -
Page 7: Basic Operation
Basic Operation Power Switch POWER First, please ensure the correct connection has been OFF - ON made based on the previous instruction. Turn the [POWER] switch on. The LCD display lights up. NOTE: If the LCD display does not light up after you turned power on the keyboard, please check the supply. -
Page 8: Voices And Effects
Voices and Effects There are 300 voices in total (See appendix). Select a Voice VOICE STYLE The default VOICE is “NO.01 Acoustic Grand piano”. SONG LCD displays “VOICE 1” and the voice number. The [+/YES] and [-/NO] buttons: Press [+/YES] or [-/NO] button to select the voice you want. The selected voice number will be shown on the display. -
Page 9: Lower Voice/Split Point
Lower Voice / Split Point You can play two sounds on different parts of the keyboard. It is called “Split Mode”. T h e l o w e r v o i c e f u n c t i o n i s s e t t o O F F w h e n k e y b o a r d p o w e r o n . -
Page 10: Style Control
Style Control The keyboard has a total of 100 styles, from 01 to 100, including 10 piano styles. Select a Style VOICE STYLE A.B.C. DUAL Press the [STYLE/SONG/VOICE] button to set the SONG TOUCH LOWER keyboard to the “Style Mode”. The default STYLE 1 is NO:01;... -
Page 11: Start A Style
Style Control Start a Style START / INTRO / STYLE STOP SYNC ENDING FILL 1. Start immediately: SONG Press [START/STOP] button to start the style, the drum A.B.C. DUAL beats of the style will be played at once. The beats will TOUCH LOWER be shown on the LCD alternately. -
Page 12: Stop A Style
Style Control Stop a Style START / INTRO / Stop immediately STYLE STOP SYNC ENDING FILL The accompaniment can be stopped at any time by SONG pressing [START/STOP] button. Ending stop START / INTRO / STYLE STOP SYNC ENDING FILL Press [INTRO/ENDING] button to complete style with an ending section. -
Page 13: Chord Recongnize
Style Control Chord Recognize L & R CHORD DICT. “A.B.C.” is disabled during the default setting. Press [A.B.C.] button to turn on this “auto bass chord” function; the A.B.C. flag on the LCD is lightened. The LESSON left section of the keyboard is known as the “chord area”, A.B.C. - Page 14 Style Control Single Finger Single finger type not only can detect single finger but also Major Triad can detect multi finger. And the single finger makes it easily Only press the root note on the to play chords through only one, two or three keys. Including keyboard.
-
Page 15: Metronome
One Touch Setting When One Touch Setting is switched on, you can instantly recall all auto accompaniment related settings including voices selection and digital effects simply with a single touch of a button. FUNCTION In this function, 1 types of parameters will be loaded for operating the current style. -
Page 16: Record
Record Start Recording PLAY Press the [RECORD] button, the four-beat indicator Flash simultaneously the LCD will flash simultaneity, indicating the “record waiting status”. A.B.C. DUAL A voice and style can be selected in this status. The ACCOMP track and MELODY track can be recorded TOUCH LOWER together. -
Page 17: Song
Song T h e r e a r e t o t a l 1 0 0 s o n g s i n t h i s k e y b o a r d (see Appendix). Each song can be practised in the MELODY OFF mode. -
Page 18: Lesson 1
Song Lesson 1 L & R CHORD DICT. Press [A.B.C./LESSON] button to enter LESSON 1, the lesson 1 flag will be lightened on the LCD. Evaluation is based on the accuracy of the time value, and the accuracy of note playing will not be graded. LESSON A.B.C. -
Page 19: Lesson 3
Song Lesson 3 L & R CHORD Press [LESSON] button in LESSON 2 to enter DICT. LESSON 3 . In this mode, you can hear what you play whether the notes are right or wrong, evaluation is based on the LESSON correctiveness of both the time value and notes. -
Page 20: Demo
Demo Demo Enter Demo Mode: Press and hold down [FUNCTION] button at first, FUNCTION then press [2] button to enter the “Demo Mode” , LCD will display "DEMO" flag and its number. The keyboard will be playing songs 082, 001, 063, 073, 012, 046, 004, 031, 025, 060 in a loop. -
Page 21: Function Menu
Function Menu Press [FUNCTION] key to enter the menu of function. Option Display Range Default The default option of function menu is “TRANSPOSE”. TRANSPOSE xPS 00 -12 ~ 0 ~ 12 Everytime you enter the menu, it will return to the option OCTAVE OCt 00 -1 ~ 0 ~ 1... -
Page 22: Midi In
Function Menu MIDI IN RECEIVE can be used to set the channel of MIDI IN. A.B.C. DUAL Channel 1-16 can be selected by pressing [+/YES] / TOUCH LOWER FUNCTION [-/NO] button. The default setting is ALL. SUSTAIN MIDI OUT A.B.C. DUAL TRANSMIT can be used to set the channel of MIDI OUT. -
Page 23: Chorus Level
Function Menu Chorus Level A.B.C. DUAL Press [FUNCTION] button to enter the CHORUS LEVEL TOUCH LOWER FUNCTION sub-menu.The LCD displays the current chorus level. Use [+/YES] / [-/NO] button to adjust the chorus level SUSTAIN from 0 to 127. The default level is 000. Pedal Assign Press [FUNCTION] button to enter the PEDAL A.B.C. -
Page 24: Chord Dictionary
Chord Dictionary If you know the name of a chord but don't know how to play it, you can use the Chord Dictionary function. L & R CHORD DICT. In song mode (when song is not playing),Press and hold [CHORD DICT./R] button 2 seconds to enter the DICT mode. -
Page 25: Midi Function
MIDI Function What is MIDI MIDI stands for Musical Instrument Digital Interface " ", that is the standard interface between a PC and other electronic instrument(s). USB connection can be used for midi data transference with a computer or other USB host devices that support USB audio devices. -
Page 26: Specifications
Specifications LCD display Multi-functional LCD Keys 61 keys with Touch Response Polyphony 32-note polyphony(max) Voice 300 Voices Style 100 Styles Demo Song 100 Songs; 10 Demos Master Volume, Tempo +/-, R / Accomp+/Chord Dict., A.B.C/Lesson, Rec/Play, Metro, Voice, Style, Song, Fuction, Start/Stop, Sync, Control button Intro/Ending, Fill, Dual, Touch, Sustain, Dsp, Demo, O.T.S., +/YES, -/NO Start/Stop, Sync, Intro/Ending, Fill... -
Page 27: Appendix 1- Voice List
Appendix 1- Voice List NAME NAME NAME NAME Tango Accordion Slap Bass 2 PIANO Dark Celesta Dark Tango Accordion Slap Bass 3 Acoustic Grand Piano Celesta & Sine Slap Bass 4 Piano Dark Reecho Bell GUITAR Nylon Guitar Synth Bass 1 Octave Piano 1 Celesta &... - Page 28 Appendix 1- Voice List NAME NAME NAME NAME Aahs & SynStr English Horn 2 Voice Lead 2 Tinkle Bell Big Aahs Agogo Bassoon 1 Fifths Lead Voice Ooh Bassoon 2 Bass & Lead 1 Steel Drums Synth Voice 1 Clarinet 1 Bass &...
-
Page 29: Appendix 2- Style List
Appendix 2- Style List NAME NAME NAME NAME Swing Fox BEAT & POP Rock Shuffle Jazz Samba Big Band Reggae 8 Beat 1 Charlston Big Band Meduim Pop Reggae DANCE 8 Beat 2 8 Beat 3 Disco 1 Jazz Waltz TRADITIONAL Ragtime 8 Beat 4... -
Page 30: Appendix 4- Song List
Appendix 4- Song List NAME NAME NAME NAME CLASSIC When The Saints Go Marching In Deck The Halls La Cucaracha Canno Grandfather’s Clock Twinkle Twinkle Little Star Home Sweet Home Happy Birthday To You Up On The House Top Thais Meditation America The Beautiful The Sideway BALLROOM... -
Page 31: Appendix 6- Midi List
Appendix 6- MIDI List Transmitted Recognized Function Remarks Basic Default Channel Changed 1-16ch 1-16ch Default Mode Messages Altered *********** 0-127 0...127 Note *********** 0...127 Number True voice Velocity : Note on O 9nH,V=1-127 O 9nH,V=1-127 Note off (9nH,V=0) X (9nH,V=0; 8nH,V=0-127 After Keys Touch... - Page 32 M5_G07...