
Related Manuals for Icom F2000D 01


Summary of Contents for Icom F2000D 01
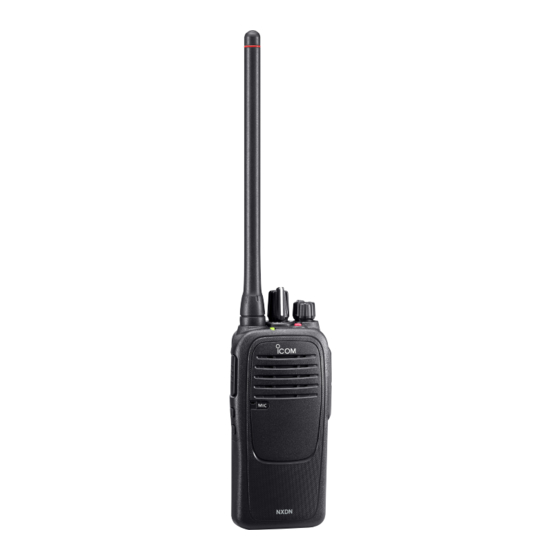
- Page 1 OPERATING GUIDE VHF DIGITAL TRANSCEIVERS iF1000D series UHF DIGITAL TRANSCEIVERS iF2000D series The photo shows the VHF transceiver.
-
Page 2: Table Of Contents
Setting the Ringer level ………………………… 5-4 Setting the microphone gain …………………… 5-5 Setting the squelch level ……………………… 5-6 Icom, Icom Inc. and the Icom logo are registered trademarks Setting the VOX function ……………………… 5-7 of Icom Incorporated (Japan) in Japan, the United States, Setting the VOX gain ……………………………... -
Page 3: Panel Description
Section PANEL DESCRIPTION Front, top and side panels ............1-2 LED indicator ................1-3 Programmable function keys ..........1-4... -
Page 4: Front, Top And Side Panels
PANEL DESCRIPTION Front, top and side panels ROTARY SELECTOR ROTARY ANTENNA Rotate to select the preset memory channels. CONNECTOR SELECTOR VOLUME VOLUME CONTROL [VOL] CONTROL [VOL] INDICATOR Rotate to turn the power ON or OFF and to adjust the [Emer] audio level. -
Page 5: Led Indicator
PANEL DESCRIPTION LED indicator The LED indicator indicates the status of various parameters of the transceiver as follows: (Reference: R=Red, G=Green, O=Orange) • Transmitting • Receiving The following LED indicator patterns are repetitive. The following LED indicator patterns light only once. One cycle is approximately two seconds. -
Page 6: Programmable Function Keys
PANEL DESCRIPTION Programmable function keys The following functions can be assigned to [Emer], [Upper], and [Lower]. Consult your Icom dealer or system operator for details concerning your transceiver’s presetting. SCAN START/STOP LONE WORKER Push to start and cancel scanning operation. - Page 7 PANEL DESCRIPTION DTMF AUTODIAL ENCRYPTION Push to transmit the preset DTMF code. (only for the digital mode operation) Hold down for 1 second to turn ON the Encryption  function. CALL Push to turn OFF the Encryption function.  Push to transmit a 2-Tone or 5-Tone in the operating channel.
-
Page 8: Basic Operation
Section BASIC OPERATION Selecting a channel ..............2-2 Receiving and transmitting ............2-3 Transmitting notes ..............2-3 ‹ Receiving a Stun, Kill, and Revive call .......2-3 ‹ Emergency call ................2-4 About other Emergency calls ..........2-5 Lone Worker Emergency call ..........2-5 ‹ Man Down Emergency call ..........2-5 ‹... -
Page 9: Selecting A Channel
BASIC OPERATION Selecting a channel There are several types of channel selections. Methods may differ, depending on the presetting. Ask your dealer for details. NON-ZONE TYPE: To select the desired operating channel: Rotate [ROTARY SELECTOR]. Â Push one of [MR-CH 1] to [MR-CH 4]. Â... -
Page 10: Receiving And Transmitting
BASIC OPERATION Receiving and transmitting NOTE: These functions and operations may or may not be available or different, depending on the presetting. Ask your dealer for preset information. Transmitting notes ‹ CAUTION: • Transmit inhibit function Attach an antenna before transmitting. The transceiver has several inhibit functions which Transmitting without an antenna may damage the restrict transmission under the following conditions: transceiver. -
Page 11: Emergency Call
BASIC OPERATION Emergency call NOTE: This function and operations may or may not be available or different, depending on the presetting. Ask your dealer for preset information. When holding down [Emergency] for the set time NOTE: period, the transceiver enters the Emergency mode Depending on the presetting, the following then the countdown starts. -
Page 12: About Other Emergency Calls
BASIC OPERATION About other Emergency calls NOTE: These functions and operations may or may not be available or different, depending on the presetting. Ask your dealer for preset information. Lone Worker Emergency call Motion Detection Emergency call ‹ ‹ When the Lone Worker function is ON, the transceiver When the acceleration sensor keeps detecting a enters the Emergency mode then the countdown for higher acceleration than the preset value for the set... -
Page 13: Nxdn™ Operation
Section NXDN™ OPERATION NXDN™ operation ..............3-2 Conventional mode ...............3-2 ‹ Trunking mode ..............3-2 ‹ Receiving a call ...............3-3 Receiving a Call Alert ............3-3 ‹ Receiving a Stun, Kill, and Revive call .......3-3 ‹ Receiving a Remote Monitor or Radio Check call .....3-3 ‹... -
Page 14: X8B; Conventional Mode
NXDN™ OPERATION NXDN™ operation The transceiver provides Icom Digital Advanced System (IDAS™) that meets the 6.25 kHz emission mask requirements for narrow banding, and increases efficiency of channel allocation and use of spectrum using the NXDN™ common air interface. NOTE: During the NXDN™... -
Page 15: Receiving A Call
NXDN™ OPERATION Receiving a call NOTE: These functions and operations may or may not be available or different, depending on the presetting. Ask your dealer for preset information. Receiving a Call Alert Receiving a Remote Monitor or Radio ‹ ‹ When a Call Alert is received: Check call Â... -
Page 16: Transmitting A Call
NXDN™ OPERATION Transmitting a call NOTE: These functions and operations may or may not be available or different, depending on the presetting. Ask your dealer for preset information. Transmitting a Call Alert Transmitting a Status call ‹ ‹ Hold down [Call Alert]. A Status call can be transmitted by pushing [Status]. -
Page 17: About Other Emergency Calls
NXDN™ OPERATION About other Emergency calls NOTE: These functions and operations may or may not be available or different, depending on the presetting. Ask your dealer for preset information. Lone Worker Emergency call Motion Detection Emergency call ‹ ‹ When the Lone Worker function is ON, the transceiver When the acceleration sensor keeps detecting a enters the Emergency mode then the countdown for higher acceleration than the preset value for the set... -
Page 18: Encryption Function
NXDN™ OPERATION Encryption function NOTE: This function and operations may or may not be available or different, depending on the presetting. Ask your dealer for preset information. The Encryption function enables voice scrambling, which provides a private digital communication between stations. Hold down [Encryption] for 1 second to turn ON the Encryption function. -
Page 19: Mdc 1200 System Operation
Section MDC 1200 SYSTEM OPERATION MDC 1200 system operation ..........4-2 Receiving a call ...............4-3 Receiving a PTT ID ...............4-3 ‹ Receiving an Emergency call ..........4-3 ‹ Receiving a Stun or Revive call ...........4-3 ‹ Transmitting a call ..............4-4 Transmitting a PTT ID ............4-4 ‹... -
Page 20: Mdc 1200 System Operation
Radio Check, Stun, and Revive calls. An additional feature of the MDC 1200 system included in Icom transceivers is called aliasing. Each transceiver on the system has a unique ID number. Aliasing is a substitute for this ID number and you can set a ringer for each station ID. -
Page 21: Receiving A Call
MDC 1200 SYSTEM OPERATION Receiving a call NOTE: These functions and operations may or may not be available or different, depending on the presetting. Ask your dealer for preset information. Receiving a PTT ID ‹ When a PTT ID is received: • Beeps sound. -
Page 22: Transmitting A Call
MDC 1200 SYSTEM OPERATION Transmitting a call NOTE: These functions and operations may or may not be available or different, depending on the presetting. Ask your dealer for preset information. Transmitting a PTT ID ‹ Push [PTT] to make a call. Beeps sound, depending on the presetting. -
Page 23: User Settings
Section USER SETTINGS Setting the Beep function ............5-2 Setting the Beep level .............5-3 Setting the Ringer level ............5-4 Setting the microphone gain ..........5-5 Setting the squelch level ............5-6 Setting the VOX function ............5-7 Setting the VOX gain ...............5-8... -
Page 24: Setting The Beep Function
USER SETTINGS Setting the Beep function The Beep function can be turned ON or OFF. NOTE: You should turn ON the Beep function when you set the Beep level, the Ringer level, the microphone gain, the VOX function, the VOX gain and the squelch level. -
Page 25: Setting The Beep Level
USER SETTINGS Setting the Beep level The Beep level is adjustable between 1 and 5, or 1 (linked) and 5 (linked). When a Linked option is selected, the beep audio level is adjustable by rotating [VOL]. NOTE: You should turn ON the Beep function (p. 5-2) [ROTARY SELECTOR] [VOL] before you start setting the Beep level. -
Page 26: Setting The Ringer Level
USER SETTINGS Setting the Ringer level The Ringer level can be adjusted between 1 and 5, or 1 (Linked) and 5 (Linked). When a Linked option is selected, the ringer audio level is adjustable by rotating [VOL]. NOTE: You should turn ON the Beep function (p. 5-2) [ROTARY SELECTOR] [VOL] before you start setting the Ringer level. -
Page 27: Setting The Microphone Gain
USER SETTINGS Setting the microphone gain Adjust the microphone gain. Higher values make the microphone more sensitive to the user voice. NOTE: You should turn ON the Beep function (p. 5-2) [ROTARY SELECTOR] [VOL] before you start setting the microphone gain. Rotate [VOL] to turn OFF the transceiver power. -
Page 28: Setting The Squelch Level
USER SETTINGS Setting the squelch level The squelch circuit mutes the received audio signal, depending on the signal strength. NOTE: You should turn ON the Beep function (p. 5-2) [ROTARY SELECTOR] [VOL] before you start setting the squelch level. Rotate [VOL] to turn OFF the transceiver power. Set [ROTARY SELECTOR] to any channel other than Channel 16. -
Page 29: Setting The Vox Function
USER SETTINGS Setting the VOX function The VOX function can be turned ON or OFF. The VOX function automatically switches between receive and transmit during voice operation. NOTE: You should turn ON the Beep function (p. 5-2) [ROTARY SELECTOR] [VOL] before you start setting the VOX function. -
Page 30: Setting The Vox Gain
USER SETTINGS Setting the VOX gain Adjust the VOX gain. Higher values make the VOX function more sensitive to the user voice. NOTE: You should turn ON the Beep function (p. 5-2) [ROTARY SELECTOR] [VOL] before you start setting the VOX gain. Rotate [VOL] to turn OFF the transceiver power. - Page 31 A-7206-5EX 1-1-32 Kamiminami, Hirano-ku, Osaka 547-0003, Japan © 2015 Icom Inc.
-
Page 32: Icom, Icom Inc. And The Icom Logo Are Registered Trademarks
DO NOT push [PTT] when you do not actually intend to Icom, Icom Inc. and the Icom logo are registered trademarks of Icom Incorporated (Japan) in Japan, the United States, the United transmit. - Page 33 • ALWAYS keep the antenna at least 2.5 cm (1 inch) away Your Icom radio generates RF oven, high-pressure container, or in an induction heating from the body when transmitting and only use the Icom electromagnetic energy during transmit Misuse of Li-ion batteries may result in the following cooker.