Table of Contents
Advertisement
Quick Links
PD-103/ PD-103T
PD-103B/ PD-103BT
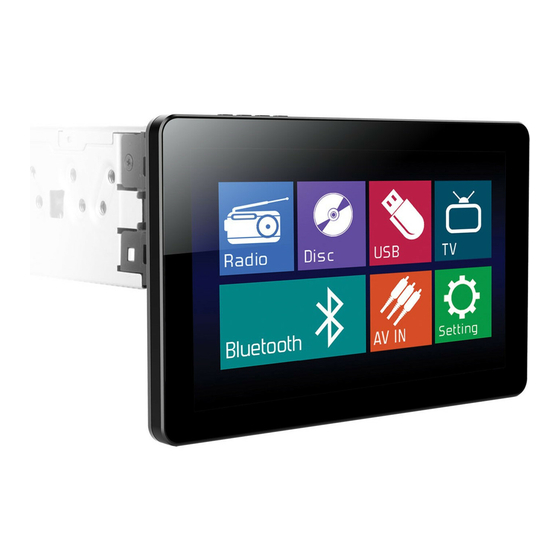
Detachable 9" Monitor
Touch Screen
DVD/CD/MP3/MP4
AM/FM Radio
With Bluetooth (only for PD-103B/PD-103BT)
External TV box (only for PD-103T/PD-103BT)
Owner's Manual
Take the time to read through this owner's manual.
Familiarity with installation and operation procedures will help you obtain the best
Performance from your new DVD-receiver.
Advertisement
Table of Contents
Troubleshooting

Related Manuals for Power Acoustik PD-103


Summary of Contents for Power Acoustik PD-103
- Page 1 PD-103/ PD-103T PD-103B/ PD-103BT Detachable 9” Monitor Touch Screen DVD/CD/MP3/MP4 AM/FM Radio With Bluetooth (only for PD-103B/PD-103BT) External TV box (only for PD-103T/PD-103BT) Owner’s Manual Take the time to read through this owner’s manual. Familiarity with installation and operation procedures will help you obtain the best...
-
Page 2: Warning
WARNING! To promote safety, certain functions are disabled unless the parking brake is on. The Unit is designed to detect parked status and must be connected to the power supply side of the parking brake switch. Improper connection or use of his connection may violate applicable law and may result in serious injury or damage. -
Page 3: Table Of Contents
CALIBRATION ......................20 TV SECTION(ONLY FOR PD-103T/PD-103BT) ............20 BLUETOOTH SECTION (ONLY FOR PD-103B/PD-103BT) ........22 SMART CONTROL(ONLY FOR PD-103/PD-103T) ..........24 OTHER FUNCTIONS ....................25 NOTES ON DISC ..................... 26 TROUBLESHOOTING ....................27 ... -
Page 4: Accessories
(2) Mounting Strap (3) Bolt (4) Screw (5) Mounting Collar (6) Release Key (7) Screw (8) Rubber Cushion Smart control cable (only for PD-103/PD-103T) Remote Control Warranty card Power Cable Trim ring User Manual TV box TV box (only for... -
Page 5: Unit Installation And Removal
UNIT INSTALLATION AND REMOVAL Installation: 1) Install the mounting sleeve into the 2) Bend the tabs into place to secure the dashboard. sleeve. 3) Slide the unit into the mounting sleeve. 4) Install the trim bezel onto the unit. 5) Install the panel to the unit. 6) Make sure all faceplate tabs meet properly with the mounting plate. - Page 6 Removal: 1) Press the button. 2) Safely detach the faceplate. 3) Take faceplate off of the mounting plate. 4) Take the panel out. 5) Detach the trim bezel. 6) Insert the keys into the opening between the unit and the mounting sleeve to unlock. 7) Pull the unit out of the mounting sleeve.
-
Page 7: Wiring Connections
WIRING CONNECTIONS NOTE: Never connect cable to the system while it is connected to the battery power. Whenever the unit is disconnected from the battery, the preset memory will be erased and the unit will go back to its factory defaults. When the brown cable for steering wheel control connected to the steering wheel, we can use the steering wheel to control some unit Note: To watch video the parking wire should be connected to break signal. - Page 8 After connecting, when you start up the reverse gear, the unit will receive the picture from car rear view camera. Note: Only use groundless loudspeakers. Use only loudspeakers of minimal 40Watt, using fewer watts may result in damaging your loudspeakers at higher volumes. Use 4~8 Ω...
-
Page 9: Panel
PANEL 1. MIC 2. POWER/ MUTE button Press it to turn on the unit. When the unit is on, short press it mute the volume output, long press it to turn the unit off. 3. MENU button Press it to turn to the main menu quickly. 4. -
Page 10: Remote Control
6. Release button Press to detach and release the front panel. When the unit was released, it will switch off automatically after a few second. Detach/Attach the Panel: Press REL button and pull out the panel towards yourself to release the panel. To attach it, press the control panel into the main unit until the “click”... - Page 11 2. POWER button Power on or off 3. BAND/ RDM/CLEAR button In Radio mode, press it to change radio band in sequence of FM1 → FM2 → FM3 → AM1 → AM2. In DVD mode, press to play randomly .In Bluetooth mode, press briefly it to clear single wrong number.
- Page 12 18. SETUP button In DVD mode press it to enter the setup menu. 19. ANGLE /ACCEPT button In DVD mode, press it repeatedly to change the viewing angle (Available only with a recorded DVD file or DVD disc that has this function). In BLUETOOTH mode, press to make a call after inputted a phone number or accept an incoming call.
-
Page 13: Remove Battery
REMOVE BATTERY Note: The distance may vary according to the brightness of ambient light. If the remote is not used for an extended period of time, remove the battery to prevent possible damage from battery leakage and corrosion. Do not place any objects between the remote control unit and the sensor on the unit. Do not drop the remote control onto the floor;... -
Page 14: Radio Player
◆ RADIO PLAYER To start Radio, tap RADIO button on main menu screen. Mute the sound.. Increase the volume. Decrease the volume. Touch this button can choose FM1, FM2, FM3, AM1, AM2. Touch this button can scan the stations from 1-6, long touch it to save the stations with good reception automatically and scan each station for about 5 seconds. -
Page 15: Dvd Player
◆ DVD PLAYER To start DVD Player, tap on DVD button from main menu screen. TOUCH SCREEN MENU You will not see any buttons while DVD is played. Buttons will appear when you tap on TFT screen. Tap the screen again to hide the buttons. Insert DVD disc Insert VCD disc NOTE... -
Page 16: Disc/Usb/Sd/Mmc Interface Operation
◆DISC/USB/SD/MMC INTERFACE OPERATION When a file disc, USB or a memory card is played, the screen will show following interface: Mute the sound. Stop button. Press it to stop playback from the current track, press it again to final stop to the very beginning Play/pause button. -
Page 17: Sound Control
SOUND CONTROL Tap SOUND button to show SOUND 1 menu. Select EQ mode BAS LEVEL Bass up/down TRE LEVEL Treble up/down BALANCE Left/Right Balance Control FADER Front/Back Fader Control button to show SOUND 2 menu. BEEP Set keypad sound on /off LOUDNESS Set loud on /off LOUD LEVEL... -
Page 18: Display Control
DISPLAY CONTROL Tap DISPLAY button to show DISPLAY menu. SCREEN Screen setting 16:9, 4:3,FULL BACKLIGHT Backlight setting LOW, MID, HIGH GENERAL CONTROL Tap GENERAL button to show GENERAL menu. TILT Adjust monitor tilt angle ANGLE CLOCK Set clock display time on or off. CLOCK Set 24hour format or 12hour HOUR... -
Page 19: Dvd Set Up Menu
DVD SET UP MENU Tap the DVD button in main menu to enter the DVD player. Press the SETUP button to enter into the system settings main menu; press the up or down arrow buttons to move to the highlighted menu item and select one of the Setup Pages: [1]. -
Page 20: System Information
[7] TV SHAPE: Set TFT screen mode to the correct ratio: Three screen ratio modes are available, Normal/PS (4:3 Pan Scan), Normal/LB (4:3 Letter Box) and Wide (16:9). Different disc formats will display different images depending this setting and the screen size used. [8] NTSC/ PAL: Select this menu item to set up your preferred video output format. - Page 21 adjust the setting. Tap BACK button to return to the setup page. 3. Press the icon to be back to main menu. 4. Press the button to switch channel. Note: This function is available when TV tuner is connected. TV MENU Auto program (Auto seek mode) System Select the menu item is to set TV system: NTSC=>PAL=>SECAM, press ENTER button on...
-
Page 22: Bluetooth Section (Only For Pd-103B/Pd-103Bt)
BLUETOOTH SECTION (ONLY FOR PD-103B/PD-103BT) Warning: Driving and having a Telephone conversation at the same time is dangerous, please park your car before having a telephone conversation. The supplier waves any and all liability when this warning is not followed. To enter Bluetooth mode, you can tap Bluetooth icon on Main menu or long press the mute/Bluetooth button on the Remote Control or press mode button on remote or on front panel. - Page 23 During a call, you can change a call from Bluetooth mode to phone by tapping Transfer button. To have a call in Bluetooth mode again, tap Transfer button. NOTE: the phonebook only supports Western Characters. Any difference in character will be shown such as “+, * or # ”.
-
Page 24: Smart Control(Only For Pd-103/Pd-103T)
Smart Control(Only for PD-103/PD-103T) Smart Control technology communicates hands-free calling and MP3 playback commands by the headphone connections of select Apple and Android devices. Incoming call answering, MP3 track advancement, and even voice command activation are easily enabled from the head unit touch-screen. -
Page 25: Other Functions
General Operation Phone Calls When receiving a phone call, press the play/pause icon ( ) to answer the call. Press to reject or end the phone call. MP3 Playback Press and hold icon to activate MP3 playback mode, the most recently played song will begin. -
Page 26: Notes On Disc
NOTES ON DISC Only use groundless loudspeakers. Use only loudspeakers of minimal 40Watt, using fewer watts may result in damaging your loud speakers at higher volumes. Use 4~8 Ω (Ohm impedance) loudspeakers only; using higher or lesser impedance may damage the unit. Do not use 3-cable loudspeakers and do not connect the loudspeakers minus to the car body. -
Page 27: Troubleshooting
TROUBLESHOOTING Symptom Cause Remedy Power does not turn Replace with fuse of the same amperage. Fuse is blown If the fuse blows again, consult your store (No sound is of purchase produced.) In correct wiring Consult your local retailer. 1. Turn off the unit. 2. -
Page 28: Troubleshooting
TROUBLESHOOTING SYMPTOM CAUSE SOLUTION IF THE POWER SUPPLY IS PROPERLY THE CAR IGNITION IS CONNECTED TO THE CAR NOT ON. ACCESSORY SWITCH THE IGNITION KEY NO POWER TO “ACC”. THE FUSE IS BLOWN. REPLACE THE FUSE. PRESENCE OF DISC REMOVE THE DISC IN THE PLAYER DISC CANNOT BE INSIDE THE PLAYER THEN PUT A NEW UPWARD. -
Page 29: Technical Specifications
TECHNICAL SPECIFICATIONS General Power supply: 11~16V DC Current consumption: max. 10 A Maximum power output: 52W x 4 channels (max) DVD/SVCD/VCD/HDCD/MP3/MP4/VIDEO/CDDA/Picture Compatible formats: CDCD-R/-RW/DVD±R/±RW playback Dimensions (W x D x H) / 255*160*50 mm/2.5 kg weight: Working temperature -10℃ - +60℃ range: ESP function: 10 sec.