Table of Contents
Advertisement
Quick Links
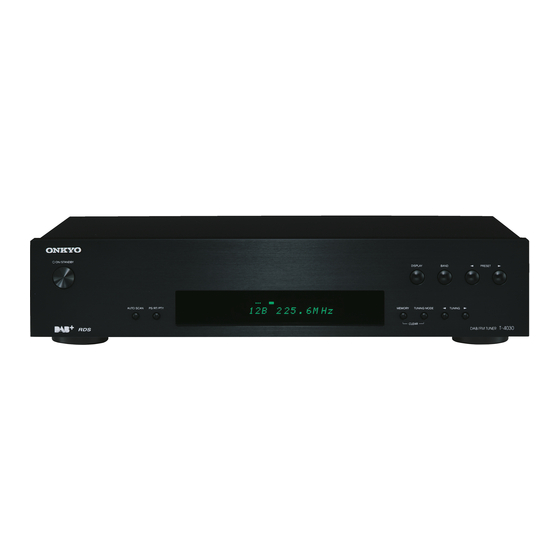
DAB/FM Tuner
T-4030
Instruction Manual
Thank you for purchasing an Onkyo Tuner. Please read
this manual thoroughly before making connections and
plugging in the unit.
Following the instructions in this manual will enable
you to obtain optimum performance and listening
enjoyment from your new Tuner.
Please retain this manual for future reference.
Contents
Introduction
..................................En-
Connections
.............................. En-
Enjoying Audio Sources
Appendix
Troubleshooting
..................... En-
Specifications
......................... En-
2
10
14
...... En-
22
23
E
n
Advertisement
Table of Contents

Related Manuals for Onkyo T-4030-S


Summary of Contents for Onkyo T-4030-S
- Page 1 T-4030 Instruction Manual Connections ......En- Enjoying Audio Sources ..En- Thank you for purchasing an Onkyo Tuner. Please read this manual thoroughly before making connections and Appendix plugging in the unit. Troubleshooting ..... En- Following the instructions in this manual will enable...
-
Page 2: Important Safety Instructions
WARNING: AVIS WARNING RISK OF ELECTRIC SHOCK RISQUE DE CHOC ELECTRIQUE TO REDUCE THE RISK OF FIRE OR ELECTRIC DO NOT OPEN NE PAS OUVRIR SHOCK, DO NOT EXPOSE THIS APPARATUS The lightning flash with arrowhead symbol, within an TO RAIN OR MOISTURE. equilateral triangle, is intended to alert the user to the presence of uninsulated “dangerous voltage”... -
Page 3: Precautions
Limits for harmonic current emissions • If you need to transport this unit, use the original – Limitation of voltage changes, voltage packaging to pack it how it was when you fluctuations and flicker originally bought it. – RoHS Directive, 2011/65/EU WEEE http://www.onkyo.com/manual/weee/weee.pdf... -
Page 4: Features
Features DAB+/DAB Capability Digital Outputs (Optical/Coaxial) 40 FM and 40 DAB+/DAB Preset FM Digital Output Capability Preset Station Naming (Up to 8 Characters) Automatic/Manual Tuning FM Mono Mode for Weak Signals Hi-Rigidity, Anti-Resonant Full Flat Chassis to Prevent Vibrations Aluminum Front Panel Audiophile Grade Capacitor Remote Interactive ( ) System Compatible... -
Page 5: Table Of Contents
Connecting Your Components......11 Before Making Any Connections......11 Cable and Jacks ............11 Connecting to an Amplifier........12 Connecting Onkyo Components ...... 13 Connecting the Power Cord ........13 Turning On and Standby ......... 13 Listening to the Radio........14 Listening to FM Stations......... -
Page 6: Supplied Accessories
Supplied Accessories Make sure you have the following accessories: Installing the Batteries Remote controller (RC-852T) and two batteries (AAA/R03) Notes: • If the remote controller doesn’t work reliably, try replacing the batteries. • Don’t mix new and old batteries or different types of Audio cable batteries. -
Page 7: Getting To Know The Tuner
Getting to Know the Tuner Front Panel For detailed information, see the pages in parentheses. Í ON/STANDBY button (13, 22) PS/RT/PTY button (17, 20) DISPLAY button (18) MEMORY button (15, 16) BAND button (14, 18) TUNING MODE button (14, 16, 19, 22) PRESET 2 button (15, 20) -
Page 8: Rear Panel
Getting to Know the Tuner —Continued Rear Panel For detailed information, see the pages in parentheses. See "Connecting Antennas", "Connecting Your AUDIO OUTPUT jacks (11, 12) Components" for connection ( pages 10 to 13). REMOTE CONTROL jack (11, 12, 13) DIGITAL OUT COAXIAL and OPTICAL jacks (11, 12) DAB/FM ANTENNA jack (10) -
Page 9: Remote Controller
Getting to Know the Tuner —Continued Remote Controller For detailed information, see the pages in parentheses. Í button (13) DIMMER button (21) DISPLAY button (18) BAND button (14, 18) Arrow [ ]/[ ]/[ ] and ENTER buttons (14, 16, 18, 21) ... -
Page 10: Connecting Antennas
Connecting Antennas This section explains how to connect the supplied Connecting the DAB/FM Antenna DAB/FM antenna. The tuner won’t pick up any radio signals if no antenna Screw the supplied DAB/FM antenna’s plug is connected, so you must connect the antenna to use the onto the DAB/FM ANTENNA jack. -
Page 11: Connecting Your Components
PCM. The maximum sampling rate for PCM output is 48kHz/16bit, 2ch. Orange Analog audio (RCA) Analog audio connections (RCA) carry analog audio. White To use (Remote Interactive), you need to connect your Onkyo AV components with an cable. -
Page 12: Connecting To An Amplifier
(see the next column). AUDIO OUTPUT L/R jacks to the LINE IN jacks on Note: your amplifier, as shown. • If the T-4030 is used with another Onkyo component, refer to its instruction manual as well. Digital (Optical or Coaxial) Connection T-4030 Connect either of them. -
Page 13: Connecting Onkyo Components
Onkyo products. Auto Power On Turning On and Standby When you turn on the T-4030, your Onkyo amplifier will turn on automatically. (The amplifier’s POWER switch Í ON/STANDBY must be set to ON for this to work.) -
Page 14: Listening To The Radio
Listening to the Radio Manual Tuning Listening to FM Stations To activate this mode, press the [TUNING MODE] button to turn off the “AUTO” indicator. In this With the built-in tuner, you can enjoy FM radio mode, you will receive the broadcast in monaural stations. - Page 15 Listening to the Radio —Continued ∫ Tuning into Stations by Frequency Presetting FM Stations You can tune to FM stations directly by entering the PRESET appropriate frequency. TUNING AUTO MEMORY TUNING SCAN MODE Number buttons D.TUN ENTER Press the remote controller’s [D.TUN] button. SETUP Number buttons...
- Page 16 Listening to the Radio —Continued When you’ve finished editing the name and ∫ Selecting Presets want to store it, be sure to use the arrow ]/[ ]/[ ] button to select “OK” and To select a preset, use the number buttons on then press [ENTER].
-
Page 17: Using Rds
Listening to the Radio —Continued RDS Program Types (PTY) Using RDS RDS only works in areas where RDS broadcasts are Type Display available. When tuned into an RDS station, the RDS None None indicator appears. News reports News Current affairs Affairs RDS indicator Information... -
Page 18: Listening To Dab Digital Radio
Listening to the Radio —Continued Using the Scan Function Manually Listening to DAB Digital Radio AUTO SCAN With the built-in tuner, you can enjoy DAB digital radio. BAND ENTER TUNING Press the tuner’s [BAND] button, or the remote controller’s [BAND] button to select “DAB”. - Page 19 Listening to the Radio —Continued ∫ DRC Setting 2. Program Type With the DRC (Dynamic Range Control) setting, you Displays the type of program. can reduce the dynamic range of DAB digital radio so that you can still hear quiet parts even when listening at low volume levels—ideal for listening to the radio late at night when you don’t want to disturb anyone.
- Page 20 Listening to the Radio —Continued Displaying Radio Text (RT) PS/RT/PTY When tuned to an RDS station that’s broadcasting text information, the text can be displayed. Press the [PS/RT/PTY] button once. The RT information scrolls across the display. Notes: • The message “Waiting” may appear while the tuner waits for the RT information.
-
Page 21: Advanced Setup
Advanced Setup Setting the Display Brightness Press the [ENTER] button on the remote controller to complete the setting. You can adjust the brightness of the display. Note: • Press [RETURN] to return to the previous menu. Advanced Setup Menu DIMMER Auto Standby When “ASb”... -
Page 22: Troubleshooting
• Unplug the power cord from the electric outlet, wait 5 Onkyo is not responsible for damages (such as CD seconds or more, then plug it in again. rental fees) due to unsuccessful recordings caused by the unit’s malfunction. -
Page 23: Specifications
Specifications Tuner Section ∫ FM Tuning Frequency Range 87.5 MHz– 108.0 MHz RDS Preset Channel Signal-to-noise ratio Stereo: 60 dB (IHF-A) Mono: 74 dB (IHF-A) THD (total harmonic distortion) Stereo: 1.0 % (1 kHz) Mono: 0.2 % (1 kHz) Frequency response 20 Hz–15 kHz / +1.5 dB, -4.0 dB Stereo Separation 40 dB (1 kHz) - Page 24 The above-mentioned information is subject to change without prior notice. Visit the Onkyo web site for the latest update. (C) Copyright 2016 Onkyo & Pioneer Corporation Japan. All rights reserved. F1610-1 Printed in Malaysia / Imprimé en Malaisie / Напечатано в Малайзии...