
Related Manuals for Soleus Air PSC-12HP-201


Summary of Contents for Soleus Air PSC-12HP-201
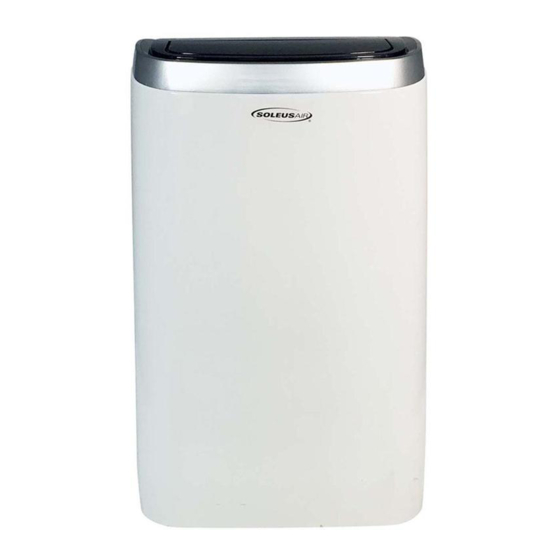
- Page 1 Portable Air Conditioner with Heat Pump 12,000 BTU 14,000 BTU • OPERATING INSTRUCTIONS PSC-12HP-201 PSC-14HP-01 3058080 V170217...
-
Page 2: Purchase Information
PURCHASE INFORMATION Thank you for choosing a Soleus Air Portable Air Conditioner. This Owner’s Manual will provide you with valuable information necessary for the proper care and maintenance of your new product. Please take a few moments to thoroughly read the instructions and familiarize yourself with all the operational aspects of your new Soleus Air Portable Air Conditioner. -
Page 3: Package Contents
Window Kit Panel (3) Remote Control (1) Window Kit Adapter (1) AAA Battery (2) Window Kit Adapter Grille (1) Owner’s Manual (1) Optional Window Security Pack (1) SPECIFICATIONS Model Number PSC-12HP-201 PSC-14HP-01 Capacity 12,000/10,000 14,000/11,000 Cool/Heat Dehumidification 131 pts/Day 120 pts/Day... -
Page 4: Power Cord And Plug
POWER CORD AND PLUG This air conditioner is equipped with an LCDI (Leakage Current Detection and Interruption) power cord and plug as required by US National Electric Code 440.65. This cord consists of a length of shielded flexi- ble cord with no termination on the load side and a LCDI attachment plug on the line side. The LCDI power cord and plug will remove the supply source via electrical disconnect (circuit trip) if the nominal current leakage between the cord shield and either load conductor exceeds a predetermined value. -
Page 5: Product Diagram
PRODUCT DIAGRAM MODEL# PSC-12HP-201/PSC-14HP-01 1. Control Panel 2. Manual Control Louver & Air Outlet 3. Carry Handle 4. Caster 5. Air Filter 6. Continuous Drain Port 7. Hot Air Discharge Opening 8. Air Intake Grille 9. Condensation Drain Hole 10. Exhaust Hose 11. -
Page 6: Parts & Assembly
PARTS & ASSEMBLY WINDOW VENTING KIT OPTIONAL WINDOW SECURITY BRACKET ASSEMBLY & INSTALLATION When the unit is operating in air conditioning mode, the unit draws in indoor air and exhausts hot air out of the room to complete the air exchange. The Window Kit must be installed when operating the unit in air conditioning, dehu- midification and heating modes. -
Page 7: Window Kit Assembly
WINDOW KIT ASSEMBLY... -
Page 8: Window Kit Installation
WINDOW KIT INSTALLATION PORTABLE AIR CONDITIONER The window venting kit must be installed in order for the unit to work correctly. The window venting kit has been de- signed to fit into most vertical and horizontal window openings and sliding glass doors up to 7 feet.. 1. -
Page 9: Security Bracket
SECURITY BRACKET Optional Security Bracket Installation Your Window Kit also includes an optional security bracket that can be installed to prevent the window from being opened from the outside while a Window Kit is installed. Single and Double Hung Windows Sliding Windows... -
Page 10: Control Panel
CONTROL PANEL Fan Speed Bucket Full Heat Mode Turbo Cool Sleep Mode Air Conditioner Indicators Indicator Fan Mode Indicator Indicator Indicator Mode Indicator Indicator Timer Indicator Power Indicator Dehumidifier Mode Auto Mode Indicator Indicator OPERATING INSTRUCTIONS FOR CONTROL PANEL BUTTONS 1) Power On and Off - Press the POWER button once to manually turn the unit on. -
Page 11: Remote Control
REMOTE CONTROL LCD DISPLAY POWER BUTTON TIMER/TEMP INCREASE SLEEP BUTTON MODE BUTTON TIMER/TEMP DECREASE TURBO COOL BUTTON FAN SPEED TIMER BUTTON °C/°F SWITCH BUTTON REMOTE LOCK BUTTON MY TEMP BUTTON... - Page 12 REMOTE CONTROL 1) Power On and Off - When the unit is plugged in, press the POWER button to turn on the unit. Press the POWER button once more to turn the unit off. When in Air Conditioner mode, Heat mode, Auto mode, and Sleep mode, the selected temperature will appear on the remote control LCD display.
-
Page 13: Unit Operation
UNIT OPERATION Air Conditioner Mode 1) Install the exhaust hose and window kit properly (see pages 7&8). 2) Plug the Power Cord into an electrical outlet. 3) Turn on the unit by pressing the POWER button. 4) Press the Mode button until the air conditioner mode indicator lights up on the control panel display. 5) Press the + or - until the desired room temperature appears on the control panel display. -
Page 14: Auto Mode
UNIT OPERATION Auto Mode 1) Install the exhaust hose and window kit properly (see pages 7&8). 2) Plug the Power Cord into an electrical outlet. 3) Turn on the unit by pressing the POWER button. 4) Press the MODE button until the Auto mode indicator lights up on the control panel display. Auto Mode will operate the unit in air conditioning mode when the temperature is above 72 degrees, Fan mode when the temperature is below 72 degrees, and heating mode when the temperature is below 68 de- grees. -
Page 15: Maintenance
MAINTENANCE BUCKET FULL INDICATOR When the Internal Water Tank is full, the Bucket Full light will illuminate and the unit will automatically shut down. The air conditioner will resume normal operation once Internal Water Tank is emptied. INTERNAL WATER TANK When the room temperature is low and the indoor humidity is high, the air conditioner may not be able to evaporate some of the moisture fast enough. - Page 16 MAINTENANCE HOW TO DRAIN THE INTERNAL WATER TANK *You will need a small pan, approximately 1” high to catch the water coming out of the water tank. Once the water tank is empty, the unit will resume operation within a few minutes. 1.
- Page 17 MAINTENANCE NOTE: Make sure power is off and the power cord is not plugged into an electrical outlet prior to perform- ing any maintenance on the unit Clean or replace filter - If the air filter is blocked with a dust, the airflow volume may reduce. It is recommended to clean the filter once every two weeks or as needed.
-
Page 18: Troubleshooting
TROUBLESHOOTING CAUSE SOLUTION PROBLEM • Plug unit in. • Unit is not plugged in • Check electric breaker box for a Air conditioner does not • No electric current to outlet trip power on • Internal safety device has tripped •... -
Page 19: Self-Diagnosis
SELF-DIAGNOSIS CODES SELF-DIAGNOSIS The unit has a self diagnosis system to identify a number of malfunctions. Error codes are displayed on the appliance display. -
Page 20: Limited Warranty
Five Year Compressor Limited Warranty Soleus N.A. warrants the accompanying Soleus Air Portable Air Conditioner to be free of defects in material and workmanship for the applications specified in its operation instruction for a period of ONE (1) year for components and FIVE (5) years for the compressor from the date of original retail purchase in the United States.