Table of Contents
Advertisement
Quick Links
1. INSTRUCTIONS FOR USE ................................................................................................... 32
2. SAFETY PRECAUTIONS ...................................................................................................... 34
3. ENVIRONMENTAL CARE ..................................................................................................... 36
3.1 Our environmental care ................................................................................................................................ 36
3.2 Your environmental care ............................................................................................................................... 36
4. GET TO KNOW YOUR APPLIANCE ..................................................................................... 37
4.1 Description of the controls on the front panel ............................................................................................... 38
5. AVAILABLE ACCESSORIES ................................................................................................. 39
5.1 Using the rack or tray .................................................................................................................................... 40
5.2 Using the support rack .................................................................................................................................. 40
6. USING THE COOKING HOB ................................................................................................. 41
6.1 General warnings and advice ....................................................................................................................... 41
7. USING THE OVEN ................................................................................................................ 42
7.1 Before using the appliance ........................................................................................................................... 42
7.2 General Description ...................................................................................................................................... 42
7.3 Storage compartment (on some models only) .............................................................................................. 42
7.4 Cooling system ............................................................................................................................................. 42
7.5 Internal light .................................................................................................................................................. 42
7.6 General warnings and advice for use ........................................................................................................... 43
7.7 Tangential cooling system ............................................................................................................................ 43
7.8 Using the electric grill .................................................................................................................................... 44
8. ELECTRONIC PROGRAMMER ............................................................................................ 45
8.1 Setting the time ............................................................................................................................................. 45
8.2 Manual cooking ............................................................................................................................................. 45
8.3 Timed cooking ............................................................................................................................................... 45
8.4 End of cooking .............................................................................................................................................. 45
8.5 Stopping the buzzer ...................................................................................................................................... 45
9. COOKING WITH THE OVEN ................................................................................................ 46
9.1 Cooking advice and instructions ................................................................................................................... 47
9.2 Cooking tables .............................................................................................................................................. 48
10. CLEANING AND MAINTENANCE ....................................................................................... 49
10.1 Cleaning stainless steel .............................................................................................................................. 49
10.2 Ordinary daily cleaning ............................................................................................................................... 49
10.3 Food stains or residues ............................................................................................................................... 49
10.4 Cleaning the glass ceramic hob .................................................................................................................. 49
10.5 Cleaning the oven ....................................................................................................................................... 50
10.6 VAPOR CLEAN: assisted oven cleaning .................................................................................................... 51
11. EXTRAORDINARY MAINTENANCE .................................................................................. 53
11.1 Replacing the light bulb ............................................................................................................................... 53
11.2 Removing the door ...................................................................................................................................... 54
11.3 Removing the door seal .............................................................................................................................. 54
11.4 Removing the internal glass panels ............................................................................................................ 55
12. INSTALLATION .................................................................................................................. 56
12.1 Installing in kitchen units ............................................................................................................................. 56
12.2 Electrical connection ................................................................................................................................... 57
12.3 Positioning the skirt (on some models only) ................................................................................................ 58
12.4 Positioning and levelling the appliance ....................................................................................................... 58
INSTRUCTIONS FOR THE USER: these contain user advice, the description of the controls and
the correct procedures for cleaning and maintenance of the appliance.
INSTRUCTIONS FOR THE INSTALLER: these are intended for the qualified technician who must
install the appliance, set it functioning and carry out an inspection test.
@
Further information about the products can be found at www.smeg.com
Contents
31
Advertisement
Table of Contents

Related Manuals for Smeg CO68CMP


Summary of Contents for Smeg CO68CMP
-
Page 1: Table Of Contents
INSTRUCTIONS FOR THE INSTALLER: these are intended for the qualified technician who must install the appliance, set it functioning and carry out an inspection test. Further information about the products can be found at www.smeg.com... -
Page 2: Instructions For Use
General instructions 1. INSTRUCTIONS FOR USE This manual is an integral part of the appliance. It must be kept in its entirety and in an accessible place for the whole working life of the appliance. We recommend reading this manual and all information it contains carefully before using the appliance. - Page 3 General instructions The appliance becomes very hot during use. Suitable heat-proof gloves should be worn for all operations. Do not use the hob if pyrolysis (where present) is taking place inside the oven. Take care that no objects are stuck in the door of the oven. Do not open the storage compartment (where present) when the oven is on and still hot.
-
Page 4: Safety Precautions
General instructions 2. SAFETY PRECAUTIONS Consult the installation instructions for safety standards on electrical or gas appliances and for ventilation functions. In your interests and for your safety the law requires that the installation and servicing of all electrical and gas appliances be carried out by qualified personnel in accordance with the standards in force. - Page 5 General instructions This appliance must not be controlled using an external timer or remote control system. Be aware of how rapidly the cooking zones heat up. Do not place empty saucepans on the heat. Danger of overheating. Fats and oils can catch fire if they overheat. You are therefore recommended not to leave the appliance unattended while preparing foods containing oils or fats.
-
Page 6: Environmental Care
Instructions for disposal 3. ENVIRONMENTAL CARE 3.1 Our environmental care Pursuant to Directives 2002/95/EC, 2002/96/EC and 2003/108/EC relating to the reduction of the use of hazardous substances in electrical and electronic appliances, as well as to the disposal of refuse, the crossed out bin symbol on the appliance indicates that at the end of the useful life of the product, it must be collected separately from other refuse. -
Page 7: Get To Know Your Appliance
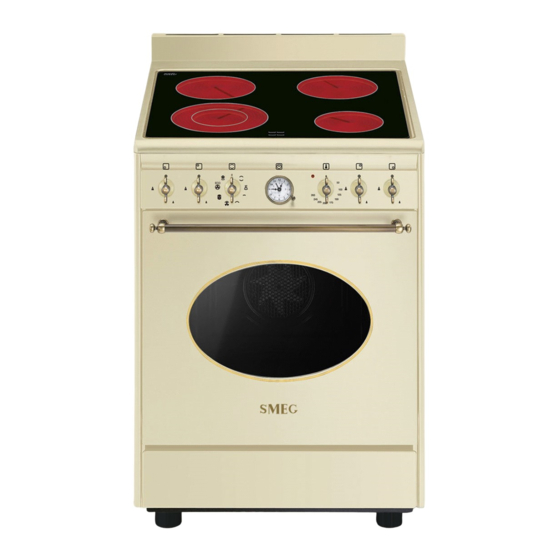
Instructions for the user 4. GET TO KNOW YOUR APPLIANCE Glass ceramic hob Hob and oven control panel Fixed roof liner Oven light Ventilation Oven seal Storage compartment Adjustable feet Rack and tray runners... -
Page 8: Description Of The Controls On The Front Panel
Instructions for the user 4.1 Description of the controls on the front panel 4.1.1 Hob control knob Standard heating The circle next to each knob indicates the cooking zone it controls. To switch a zone on, press the knob and turn it to the required position. Adjustment is continuous, so the appliance functions when set to the intermediate values as well. -
Page 9: Available Accessories
Instructions for the user 5. AVAILABLE ACCESSORIES NOTE: Some models are not provided with all accessories. Tray rack: to be placed Rack: useful for holding over the top of the oven cooking containers. tray; for cooking foods which may drip. Oven tray: useful for Deep oven tray: useful collecting fat from foods... -
Page 10: Using The Rack Or Tray
Instructions for the user 5.1 Using the rack or tray The racks or trays are equipped with a mechanical safety lock which prevents them from being taken out accidentally. To insert the rack or tray correctly, check that the lock is facing downwards (as shown in the figure at the side). -
Page 11: Using The Cooking Hob
Instructions for the user 6. USING THE COOKING HOB 6.1 General warnings and advice The appliance has 4 cooking zones of various diameters and power levels. Their position is clearly indicated with circles and heat is released within the diameters traced on the glass ceramic surface. The 4 cooking zones are HIGH-LIGHT zones and come on a few seconds after activation. -
Page 12: Using The Oven
Instructions for the user 7. USING THE OVEN 7.1 Before using the appliance Remove any labels (apart from the technical data plate) from trays, dripping pans and the cooking compartment. Remove any protective film from the outside or inside of the appliance, including from accessories such as trays, dripping pans, the pizza plate or the base cover. -
Page 13: General Warnings And Advice For Use
Instructions for the user 7.6 General warnings and advice for use All cooking operations must be carried out with the door closed. During cooking, do not cover the bottom of the oven with aluminium or tin foil and do not place pans or oven trays on it as this may damage the enamel coating. -
Page 14: Using The Electric Grill
Instructions for the user 7.8 Using the electric grill 7.8.1 Using the grill in cookers with an electric oven For short cooking processes, such as final browning of cooked meat, select the grill function turn the thermostat knob to the maximum temperature setting. The fan-assisted grill function (on some models only) allows real cooking processes to be carried out, thanks to the forced ventilation that allows the heat to penetrate inside the food. -
Page 15: Electronic Programmer
Instructions for the user 8. ELECTRONIC PROGRAMMER Allows to select manual cooking and the timer or to set the cooking time. Knob A must always be turned CLOCKWISE. Enable the required function and cooking temperature before setting the cooking time. 8.1 Setting the time To set the correct time, knob A and turn it clockwise. -
Page 16: Cooking With The Oven
Instructions for the user 9. COOKING WITH THE OVEN The ECO symbol indicates which function gives the least energy consumption. STATIC: As the heat comes from above and below at the same time, this system is particularly suitable for certain types of food. -
Page 17: Cooking Advice And Instructions
Instructions for the user 9.1 Cooking advice and instructions 9.1.1 General advice • We recommend preheating the oven before putting food in. Place the food in the oven only once the cooking light is off. • • For cooking on several levels, we recommend using a fan-assisted function to achieve uniform cooking at all heights. -
Page 18: Cooking Tables
Instructions for the user 9.2 Cooking tables Runner Temperature Time Types of food Weight Function position from °C (minutes) the bottom FIRST COURSES Lasagne 3 Kg Static 2 or 3 220 - 230 40 - 50 Oven-baked pasta Static 2 or 3 220 - 230 MEAT Roast veal... -
Page 19: Cleaning And Maintenance
Instructions for the user 10.CLEANING AND MAINTENANCE Do not use steam jets for cleaning the appliance. The steam could reach the electronics, damaging them and causing short-circuits. WARNING: For your safety, you are advised to wear protective gloves while performing any cleaning or extraordinary maintenance. -
Page 20: Cleaning The Oven
Instructions for the user 10.5 Cleaning the oven For the best oven upkeep, clean it regularly after having allowed it to cool. Take out all removable parts. • Clean the oven racks with warm water and non-abrasive detergent. Rinse and dry. •... -
Page 21: Vapor Clean: Assisted Oven Cleaning
Instructions for the user 10.6 VAPOR CLEAN: assisted oven cleaning VAPOR CLEAN is an assisted cleaning procedure which facilitates the removal of dirt. Thanks to this process, it is possible to clean the inside of the oven very easily. The dirt residues are softened by the heat and water vapour for easier removal afterwards. - Page 22 Instructions for the user 10.6.2Setting the assisted cleaning cycle Once the preparations have been made for the assisted cleaning cycle, proceed as follows: 1 Turn the function knob to the symbol and the temperature selection knob to the symbol the VAPOR CLEAN function. 2 Set a cooking time of 15 minutes using the programmer (see 8.3 Timed cooking).
-
Page 23: Extraordinary Maintenance
Instructions for the user 11. EXTRAORDINARY MAINTENANCE The oven requires periodic minor maintenance or replacement of parts subject to wear, such as gaskets, light bulbs, etc. Specific instructions for each operation of this kind are given below. Before any intervention that requires access to live parts, disconnect the appliance from the power supply. -
Page 24: Removing The Door
Instructions for the user 11.2 Removing the door Open the door completely. Insert a pin into the hole in the hinge. Repeat for both hinges. Grasp the door on both sides with both hands, lift it forming an angle of around 30° and remove it. To reassemble the door, put the hinges in the relevant slots in the oven, making sure that grooved sections C are resting completely at the base of the slots. -
Page 25: Removing The Internal Glass Panels
Instructions for the user 11.4 Removing the internal glass panels The glass in the door should always be kept thoroughly clean. To facilitate cleaning, it is possible to remove the door (see 11.2 Removing the door) and place it on a canvas, or open it and lock the hinges in order to extract the glass panels. -
Page 26: Installation
Instructions for the installer 12. INSTALLATION 12.1 Installing in kitchen units Veneers, adhesives or plastic coatings on adjacent furniture should be temperature-resistant (no less than 90°C). If they are not sufficiently temperature-resistant, they may warp over time. The appliance must be installed by a qualified technician and according to the regulations in force. Depending on the type of installation, this appliance belongs to class 2, subclass 1 (Fig. -
Page 27: Electrical Connection
Instructions for the installer 12.2 Electrical connection Make sure the voltage and the cross-section of the power supply line match the specifications indicated on the identification plate positioned on the appliance. Do not remove this plate for any reason. A copy of the plate is attached to the instructions. -
Page 28: Positioning The Skirt (On Some Models Only)
Instructions for the installer POSSIBLE CONNECTION CABLE TYPE TYPES (if not present) 4-pole 4 x 2.5 mm¬ð H05V2V2-F 3-pole 3 x 4 mm¬ð H05V2V2-F Use H05V2V2-F cables withstanding a temperature of at least 90°C. The values indicated above refer to the cross-section of the internal conductor. The tightening torque of the screws of the terminal supply wires must be 1.5 - 2 Nm.