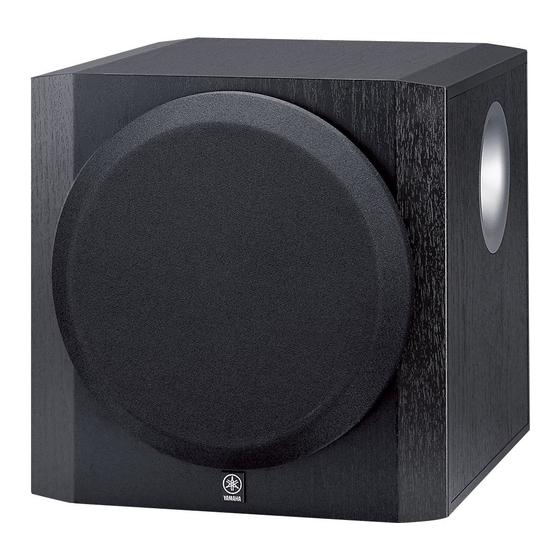
Yamaha YST-SW216 Owner's Manual
Yamaha subwoofer system owner's manual
Hide thumbs
Also See for YST-SW216:
- Owner's manual (44 pages) ,
- Service manual (16 pages) ,
- Owner's manual (100 pages)
Table of Contents
Advertisement
Advertisement
Table of Contents

Summary of Contents for Yamaha YST-SW216
- Page 1 YST-SW216 Subwoofer System OWNER’S MANUAL...
-
Page 2: Important Safety Instructions
IMPORTANT SAFETY INSTRUCTIONS IMPORTANT Please record the serial number of this system in the space below. Model: Serial No.: The serial number is located on the rear of the main unit. Retain this Owner’s Manual in a safe place for future reference. - Page 3 Yamaha Electronics Corp., U.S.A. 6660 Orangethorpe Ave, Buena Park, CA 90620. The above statements apply ONLY to those products distributed by Yamaha Corporation of America or its subsidiaries. We Want You Listening For A Lifetime YAMAHA and the Electronic Industries Association’s...
- Page 4 Thank you for selecting this YAMAHA subwoofer system. CAUTION: Read this before operating your unit Please read the following operating precautions before use. YAMAHA will not be held responsible for any damage and/or injury caused by not following the cautions below.
-
Page 5: Table Of Contents
TECHNOLOGY II ... 11 TROUBLESHOOTING ... 12 SPECIFICATIONS ... 13 FEATURES • This subwoofer system employs Advanced Yamaha Active Servo Technology II which Yamaha has developed for reproducing higher quality super-bass sound. (Refer to page 11 for details on Advanced Yamaha Active Servo Technology II.) This super-bass... -
Page 6: Placement
: subwoofer, : front speaker) PLACEMENT One subwoofer will have a good effect on your audio system, however, the use of two subwoofers is recommended to obtain more effect. If using one subwoofer, it is recommended to place it on the outside of either the right or the left front speaker. -
Page 7: Connections
Connecting to line output (pin jack) terminals of the amplifier • To connect with a YAMAHA DSP amplifier (or AV receiver), connect the SUBWOOFER (or LOW PASS etc.) terminal on the rear of the DSP amplifier (or AV receiver) to the •... -
Page 8: Using Two Subwoofers
CONNECTIONS ■ Using one subwoofer Subwoofer OUTPUT INPUT HIGH TO SPEAKERS /MONO VOLUME HIGH LOW INPUT 1 FROM AMPLIFIER POWER To AC outlet Amplifier ■ Using two subwoofers OUTPUT INPUT HIGH TO SPEAKERS /MONO VOLUME HIGH LOW POWER OUTPUT INPUT HIGH TO SPEAKERS /MONO... -
Page 9: Connecting To Speaker Output Terminals Of The Amplifier
Connecting to speaker output terminals of the amplifier Select this method if your amplifier has no line output (pin jack) terminal. If your amplifier has two sets of front speaker output terminals and both terminals can output sound signals simultaneously. •... - Page 10 CONNECTIONS If your amplifier has only one set of front speaker output terminals. Connect the speaker output terminals of the amplifier to the INPUT 1 terminals of the subwoofer, and connect the OUTPUT terminals of the subwoofer to the front speakers. ■...
-
Page 11: Connecting To The Input 1/ Output Terminals Of The Subwoofer
Connecting to the INPUT 1/OUTPUT terminals of the subwoofer For connection, keep the speaker cables as short as possible. Do not bundle or roll up the excess part of the cables. If the connections are faulty, no sound will be heard from the subwoofer or the speakers, or both of them. -
Page 12: Controls And Their Functions
CONTROLS AND THEIR FUNCTIONS Subwoofer rear panel POWER switch Press this switch to the ON position to turn on the power to the subwoofer. When the power of the subwoofer is on, the power indicator (4) on the rear panel light up in green. Press this switch again to set it to OFF position to turn off the power of the subwoofer. -
Page 13: Adjusting The Subwoofer Before Use
ADJUSTING THE SUBWOOFER BEFORE USE Before using the subwoofer, adjust the subwoofer to obtain the optimum volume and tone balance between the subwoofer and the front speakers by following the procedures described below. Subwoofer rear panel Set the VOLUME control to minimum (0). Turn on the power of all the other components. -
Page 14: Frequency Characteristics
EX.1 When combined with a 4” or 6.5” (10 cm or 16 cm) acoustic suspension, 2 way system front speakers *This diagram does not depict actual frequency response characteristics accurately. Frequency response HIGH CUT HIGH HIGH CUT 500Hz HIGH VOLUME HIGH LOW Front speaker YST-SW216 500Hz... -
Page 15: Advanced Yamaha Active Servo Technology Ii
ADVANCED YAMAHA ACTIVE SERVO TECHNOLOGY II In 1988, Yamaha brought to the marketplace speaker systems utilizing YST (Yamaha Active Servo Technology) to give powerful, high quality bass reproduction. This technique uses a direct connection between the amplifier and speaker, allowing accurate signal transmission and precise speaker control. -
Page 16: Troubleshooting
Refer to the chart below when this unit does not function properly. If the problem you are experiencing is not listed below or if the instructions given below do not help, disconnect the power cord and contact your authorized YAMAHA dealer or service center. -
Page 17: Specifications
Type ...Advanced Yamaha Active Servo Technology II Driver...25 cm (10”) cone woofer Magnetic shielding type Output Power ... 50 W (100 Hz, 5 Ω 10 %T.H.D) Dynamic Power ... 100 W, 5 Ω Input Impedance ... 12 KΩ Frequency Response ... 25 Hz - 180 Hz (–10 dB) Input Sensitivity ...50 mV (100 Hz, 50 W/5 Ω) - Page 20 YAMAHA ELECTRONICS (UK) LTD. YAMAHA HOUSE, 200 RICKMANSWORTH ROAD WATFORD, HERTS WD18 7GQ, ENGLAND YAMAHA SCANDINAVIA A.B. J A WETTERGRENS GATA 1, BOX 30053, 400 43 VÄSTRA FRÖLUNDA, SWEDEN YAMAHA MUSIC AUSTRALIA PTY, LTD. 17-33 MARKET ST., SOUTH MELBOURNE, 3205 VIC., AUSTRALIA...


