Table of Contents
Advertisement
Quick Links
Advertisement
Table of Contents

Related Manuals for Astell & Kern SR25


Summary of Contents for Astell & Kern SR25
- Page 1 SR25 INSTRUCTION BOOK User Guide...
-
Page 2: Table Of Contents
CONTENTS Getting Started Package Contents Product Overview Power Management Charging Connections Firmware Updates Using the Device Basic Operations Home Screen Notification Bar Using Open APP Service AK CONNECT Listening to Music Playlist Management USB DAC Installation How to Use USB Audio CD Ripping AK CD-Player Car Mode... -
Page 3: Package Contents
User Guide Package Contents may be changed without prior notice to improve the performance or quality of the product. Contents SR25 Protective Film microSD Card Quick Start Guide USB Type-C Cable Slot Cover & Warranty Card Protective Film: Protect the device and its screen. -
Page 4: Product Overview
User Guide Product The appearance of the product, as well as the printed and engraved information, may vary depending on the model. Overview 3.5mm Unbalanced Port USB Type-C Port Power microSD Card Slot 2.5mm Balanced Port Previous/ Rewind Volume Play/Pause Next/ Fast-Forward Touchscreen... - Page 5 User Guide Power: - Power symbol. Short press - Turns the screen on or off. Press and hold - Turns the device on or off. 2.5mm Balanced Port: - 2.5mm Balanced Port symbol. For audio output, connect earphones or headphones that utilize a 2.5mm jack.
-
Page 6: Power Management
User Guide Power Powering the Device On/Off Manage- 1. Press and hold the [Power] button to turn on the device. 2. While the device is on, press and hold the [Power] button ment to shut down the device. A confirmation message will appear. -
Page 7: Charging
User Guide Charging Charging via USB Wall Adapter 1. Commercially available 5V 2A output adapters may be used for charging. Charging time: Approx. 4.5 hours (Fully discharged, Power-off, 5V 2A adapter) Using a 9V and 12V adapter will not charge the device and may cause malfunctions. -
Page 8: Connections
User Guide Connec- 3.5mm Unbalanced Port tions 1. Connect earphones or headphones to the 3.5mm unbalanced port. 2.5mm Balanced Port 1. Connect earphones or headphones to the 2.5mm balanced port. Getting Started... - Page 9 User Guide Connecting to a Balanced Audio Device 1. Connect to an external audio device by using the 3.5mm unbalanced port and 2.5mm balanced port. Unbalanced Balanced Port (LR) Port (Ground) Getting Started...
- Page 10 User Guide Connecting to a Computer 1. Turn on the device and your computer. 2. Use the USB Type-C cable to connect the device to a computer in accordance with settings in [Menu - Settings - USB Mode]. [Default] Media Device (USB Drive): Transfer files from a computer to the device.
- Page 11 User Guide Copy Files (Folders) to the Device 1. To copy files/folders from your computer, select the desired files/folders and drag & drop them into the device folder. Ensure the USB Type-C cable is properly connected. Turning off the device, computer or disconnecting the USB Type-C cable while copying or moving files/folders may corrupt files or device memory.
- Page 12 User Guide Delete Files (or Folders) from the Device 1. Select the file/folder to delete, right-click the mouse, and then select [Delete]. 2. Select [Yes] in the [Confirm File/Folder Deletion] window to delete the selected files/folders. Disconnecting from the Computer 1.
- Page 13 User Guide Insert/Remove a microSD Card 1. Refer to the diagram and gently insert a microSD card into the microSD card slot. 2. To safely remove a microSD card, on the Home Screen, select [Safely remove SD card] from the Notification Bar or select [Unmount SD card] from [Menu - Settings - System...
-
Page 14: Firmware Updates
User Guide Notes on Using a microSD Card If the microSD card is not recognized or functions improperly, format the card, preferably in the FAT32 system. Using cards other than the recommended microSD card types may cause malfunctions. A microSD card is not included in the product package. Please purchase separately. -
Page 15: Basic Operations
User Guide Basic LCD Touchscreen Operations 1. This device features a LCD touchscreen that allows you to perform operations by touch. Use the touchscreen to access various features on the device. To prevent damage to the screen, do not use a sharp object or excessive force. - Page 16 User Guide From the Home Screen, swipe your finger to the left, right, up or down from any edge of the touchscreen to access display menus. Each side of the Home Screen will activate a different display menu. Main Menu 1.
- Page 17 User Guide Notification Bar 1. From the top edge of the touchscreen, swipe your finger down to display the Notification Bar. View Current Playlist 1. From the right edge of the touchscreen, swipe your finger left to display the Now Playing menu. Using the Device...
- Page 18 User Guide View Play History 1. From the bottom edge of the touchscreen, swipe your finger up to display the Play History menu. Moving Up/Down on a List 1. Scroll through a list by dragging your finger up or down. Using the Device...
-
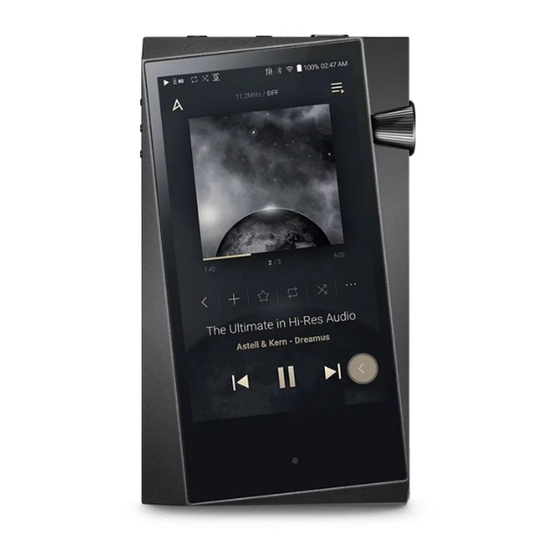
Page 19: Home Screen
User Guide Home Screen Menu Displays the Main Menu. Details Displays current song information. Song Progress Indicates song duration. Recent Menu Go to the last displayed menu list. List Add to Playlist Add the current song to a playlist. Title Song title information. - Page 20 User Guide Previous/ Short press: Play the previous Rewind song or restart the current song. Press and hold: Rewind the current song. Playlist Display current playlist. Format Displays the bit rate and sampling Information frequency data. Album Cover Displays album cover of current song. Tap image to view the song lyrics.
-
Page 21: Notification Bar
User Guide Notifi- cation Using the Device... - Page 22 User Guide Wi-Fi Press [ ] to turn Wi-Fi on/off. Bluetooth Press [ ] to turn Bluetooth on/ off. Press [ ] to turn the EQ on/ off. The most recent EQ settings are applied by default. Computer Select the mode to use when Connection connected to a computer.
- Page 23 User Guide Gapless Playback Press [ ] to turn Gapless Playback on/off. Settings Press [ ] to display the full settings menu. Brightness Use the adjustment bar to control the display brightness. Notifications Device notifications are Display displayed in this area. Clear Notifications Clear notifications.
-
Page 24: Using Open App Service
User Guide Using The Open APP Service enables the user to install specific APK music streaming apps to the device. Copy the desired Open APP APK into the Open Service folder of the product and install Service the relevant App in the [Menu-Service] of the product. The source of the app you are trying to install is unknown. -
Page 25: Ak Connect
User Guide Access and play back music files stored on a computer, NAS drive or AK Device on the same network, as well as output CONNECT sound through compatible speakers with AK Connect. AK Connect is available on your AK device and also available as an app for your smartphone or tablet via Apple’s App store or Google Play Store. - Page 26 User Guide 5. A list of libraries / speakers that are on the same network with the AK player will be displayed. 6. Select a library / speaker to connect. 7. After selecting a library / speaker, select a category from the menu to display the corresponding music list.
- Page 27 User Guide Streaming Music from Your Library 1. Select a category from the library menu to see your list of music. 2. Select a song to begin streaming. Downloading Music from Your Library 1. Select a category from the library menu to see your list of music.
- Page 28 User Guide AK Connect Usage Examples Case 1 SR25 AK T1 LIBRARY SPEAKER Case 2 AK500N SR25 AK T1 LIBRARY REMOTE SPEAKER Using the Device...
- Page 29 User Guide Case 3 SR25 AK500N REMOTE & LIBRARY SPEAKER Case 4 SR25 AK500N AK T1 LIBRARY REMOTE SPEAKER Using the Device...
- Page 30 User Guide Case 5 SR25 LIBRARY AK Connect APP REMOTE AK T1 SPEAKER AK500N LIBRARY Using the Device...
-
Page 31: Listening To Music
User Guide Listening Selecting Music to Music 1. Select a category from the Main Menu to display the corresponding music list. 2. Select a song from the list to begin playback. Select [Folder] to search music by folder. Continuous Playing Time: Approx. 15 hours (Music: FLAC,16bit, 44.1kHz, Unbalanced, Volume 80, EQ Off, LCD Off) Supported Formats: PCM [8~384kHz(8/16/24/32bit)] DSD [2.8/5.6/11.2MHz]... - Page 32 User Guide Press [ ] on top of the music list to view the options: : Select / deselect entire list : Add the selected list at the top / bottom / after the current song of Now Playing : Add selected list to a playlist : Delete selected list : Exit Turn the [Volume] wheel to adjust the volume.
- Page 33 User Guide Playlist Screen Previous Return to the previous screen. Playlist Display the current playlist. Edit mode Display the editing options for the music list. Play All Play all songs in the current list. Using the Device...
-
Page 34: Playlist Management
User Guide Playlist Creating a Playlist Manage- 1. Press [Playlists] on the menu to view the playlists. ment 2. Select [ + ] in the upper right corner of the screen. 3. Enter a name for the playlist and then press [Add] to create a new playlist. - Page 35 User Guide Removing a Song from a Playlist 1. Press [Playlists] to display the list of playlists. 2. Select the playlist to edit. 3. Press [ ] at the top, then select the song you want to delete from the playlist. 4.
- Page 36 User Guide Renaming a Playlist 1. Press [Playlists] to view the playlists, then press [ 2. Select a playlist to be renamed. 3. Press [ ] at the top of the screen to display the RENAME window. 4. Enter a name for the playlist and then press [RENAME] to confirm the change.
-
Page 37: Usb Dac Installation
Install a dedicated driver to use the AK device as a USB DAC. The driver file is located in SR25\Internal_Storage\SR25_ Contents\Driver. Before installing the driver, set device to USB DAC mode and connect to the computer. -
Page 38: How To Use Usb Audio
User Guide How to Connect the device to a portable amp or DAC using USB Audio Out. Use USB Audio How to Connect a Portable USB DAC 1. Connect the portable USB DAC to the AK device’s USB Type-C port with a dedicated cable. 2. -
Page 39: Cd Ripping
User Guide The portable USB DAC must be able to receive digital input through the micro-USB's OTG. Audio output may vary widely depending on the digital input specs of the portable USB DAC used. This is not a defect in the device output and not a reason for exchange or refund. - Page 40 User Guide CD Ripping 1. Select the ripping function in [Menu-Settings-CD Ripper- Default run-CD Ripping]. 2. Connect the AK CD-Ripper to the device and select CD Ripping if not set as the default run function. 3. Insert a CD and metadata (ID3 tags) for the inserted CD will be retrieved via Gracenote if Wi-Fi is turned on.
-
Page 41: Ak Cd-Player
User Guide AK CD- Using the AK CD-Player Function Player 1. Connect the AK CD-Ripper to the device and select CD Player if not set as the default run function. 2. Insert a CD and metadata (ID3 tags) for the inserted CD will be retrieved via Gracenote if Wi-Fi is turned on. -
Page 42: Car Mode
User Guide Car Mode Exit Exit car mode. Play/Pause Play or pause music. Playlist Display current playlist. Screen Rotation Switch the screen orientation to horizontal mode/vertical mode. Using the Device... -
Page 43: Settings
User Guide Settings The settings menu allows users to customize the device. The settings menu may vary depending on the firmware version. Setup 1. Select [Main Menu - Settings] or select [ ] from the Notification Bar menu. 2. Select the feature to view setting options. Wi-Fi Change wireless network settings and turn Wi-Fi on/off. - Page 44 If the User EQ file is modified or changed externally it will no longer be recognized. User EQ.dat will not display in the SR25, however it can be viewed when connected to the computer. Up to 20 User EQs can be displayed.
- Page 45 User Guide Line Out Set the voltage value generated when Line Out is activated. Do not use earphones with the Line Out feature enabled. Doing so may cause permanent hearing loss. LR Balance Adjust the left-right balance for earphones/headphones. Playback Settings Set how to add a song to Now Playing when a song is selected from a music list.
- Page 46 User Guide USB Audio Select the type of DSD sound being outputted through USB Audio Out to a connected portable DAC. Enable/Disable MQA decoding software. Car mode Turn the car mode on/off. Double Tap Wake function If the screen is off, tap the screen twice to turn it back on. When the device is connected to a charger, the screen will remain on.
- Page 47 User Guide Language Select the display language. Supported languages are English, Korean, Japanese, French, Russian, German, and Spanish. Input Method Back Button: the Floating Back Button will be displayed on the screen. Move the Back Button to the desired position by dragging and dropping the icon with your finger.
- Page 48 User Guide When using AK Connect to download music, if the [Default folder] is selected in Settings, downloading will automatically begin to the pre-set Downloads folder. When [Select Folder] is selected, the user is prompted to choose a download folder each time a file is downloaded. Update System Update: Update the device when a new firmware version is available.
-
Page 49: Connecting To Wi-Fi
User Guide Connecting Connecting to a Wi-Fi Network to Wi-Fi 1. Press and hold [ ] from the Notification Bar or select [Menu - Settings - Wi-Fi] to display a list of available Wi-Fi networks. 2. Select the desired AP to connect to the wireless network. -
Page 50: Using Bluetooth
User Guide Using Connect a Bluetooth device to listen to music wirelessly. Bluetooth Turning Bluetooth On/Off A Bluetooth device must be paired with the device prior to use. Refer to the Bluetooth device's instruction manual for details. 1. Select [ ] from the Notification Bar menu or select [On/Off] from [Menu - Settings - Bluetooth]. - Page 51 User Guide Removing a Bluetooth Pairing 1. Press [ ] to the right of the paired device to go to settings. 2. Select [Remove] to complete the process. Bluetooth Support Specifications Profile: A2DP, AVRCP, aptX™HD Device performance may be affected during Hi-Res playback. Do not turn off the device while connected to Bluetooth.
-
Page 52: Equalizer Setup
User Guide Equalizer Equalizer Setup Setup 1. Press and hold [ ] on the Notification Bar or turn on [Menu - Settings - Equalizer]. 2. Press [NORMAL], then select [+]. 3. Enter a name for the custom EQ settings and select [SAVE]. Using the Device... - Page 53 User Guide 4. Adjust the frequencies up and down according to the user's preferences. 5. The number values at the lower- left corner of the screen can be adjusted for fine-tuning. 6. Press the [Advanced] tab on the top to display PEQ settings screen. Adjust Freq/Gain/Q.
- Page 54 User Guide Deleting a Custom Equalizer Setting 1. Press [NORMAL] in the upper left of the equalizer. 2. Press [ ] next to the EQ name to be deleted. 3. Press [OK] to delete the selected EQ setting. Renaming a Custom Equalizer Setting 1.
-
Page 55: Safety Pre-Cautions
User Guide Safety Device Pre- When a plug is inserted into the 3.5mm unbalanced, 2.5mm balanced, or USB port, do not apply any force or impact to the plug. Cautions Do not insert any metal objects (coins, hairpins, etc.) or flammable debris into the device. -
Page 56: Using The Device
User Guide Connecting the cable to a defective or damaged USB port on a computer may damage the device. Displaying one image for an extended period may cause screen burn-in (afterimage). Using poor quality protective films or adhesive stickers on the screen may cause damage. Do not insert any foreign objects into the device ports. -
Page 57: Miscellaneous
User Guide Trouble- Solutions to Common Issues shooting 1. The device won't turn on. The battery may need to be recharged. Charge the device for at least one hour and try again. Reset the device. (See Page 5) 2. The device will not charge when connected to a computer via USB cable. -
Page 58: Copyright
User Guide 7. A file does not play or the product becomes unstable when a certain file is played. File may be damaged or corrupt if the following occurs: Playback stops or freezes. Device may act erratically or freeze. File may sound different on another device. There may be a difference in the performance of playback or other functions. -
Page 59: Certifications
User Guide Certifica- KC / FCC / CE / TELEC Class B Device (Communication equipment for residential tions use): This is a Class B Device and is registered for EMC requirements for residential use. This device can be used in residential areas and all other areas. -
Page 60: Registered Trademarks
User Guide Body-Worn Operation This device was tested for typical body-worn operations with the back of the portable music player kept 5mm from the body. To maintain compliance requirements, use only belt-clips, holsters or similar accessories that maintain a 5mm separation distance between the user’s body and the back of the portable music player, including the antenna. -
Page 61: Disclaimers
MQA audio files and streams, delivering the sound of the original master recording. The SR25 Now Playing status shows a green or blue light to indicate that the unit is decoding and playing a MQA stream or file, and denotes provenance to ensure that the sound is identical to that of the source material. -
Page 62: Specifications
User Guide Specifi- General Specifications Model SR25 cations Body Color Silver Body Material Aluminum Display 3.6inch 720x1280 touch display Supported Audio WAV, FLAC, WMA, MP3, OGG, APE, AAC, ALAC, AIFF, Formats DFF, DSF, MQA MQA playback Services (Tidal Masters), Local files, External USB, MQA-CD(ripped)