Table of Contents
Advertisement
Advertisement
Table of Contents

Related Manuals for Astell & Kern SP1000


Summary of Contents for Astell & Kern SP1000
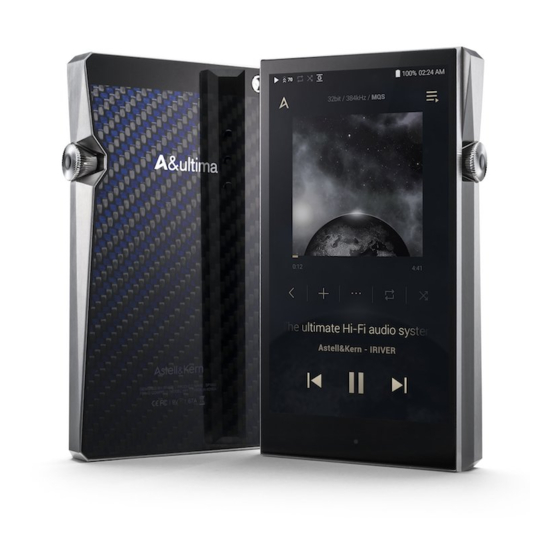
- Page 1 SP1000 INSTRUCTION BOOK User Guide...
-
Page 2: Table Of Contents
CONTENTS Getting Started Package Contents Description of Each Part Power Management Charging Connections Firmware Upgrade Using the Device Basic Operations Home Screen Notification Bar Music Store AK CONNECT Listening to Music Manage Playlist USB DAC Installation How to Use USB Audio Automatic CD Ripping Settings Connecting to Wi-Fi... -
Page 3: Getting Started
User Guide Package Contents may be changed without prior notice to improve the performance or quality of the product. Contents SP1000 Protective Film Type-C USB Cable Quick Start Guide MicroSD Pin for the tray & Warranty Card card tray Protective Film: Protects the product’s screen. -
Page 4: Description Of Each Part
User Guide Description The appearance of the product, as well as the printed and engraved information, may vary depending on the model. of Each Part 3.5mm Unbalanced Port/ OPTICAL OUT terminal Balanced Port for External Devices MicroSD Card Tray 2.5mm Balanced Port Type-C USB Port Previous/ Rewind... - Page 5 User Guide LCD Touchscreen: Display the screen, and touch it to start. Previous/Rewind: Short press - Plays the previous song or restarts the song. Press and hold - Rewind Play/Pause: Plays/pauses. Next/Fast-Forward: Short press - Plays the next music. Press and hold - Fast-forwards. Home Button: Returns to the home screen.
-
Page 6: Power Management
User Guide Power Turning on/off Power Manage- 1. Press and hold the [Power/Volume button] to turn on the device. ment 2. While the device is on, press and hold the [Power/Volume button] to shut down the device. A confirmation message will appear. -
Page 7: Charging
User Guide Charging Charging via Computer Connection 1. Connect the USB Type-C cable to a computer to charge the product. Computer may need to be turned on to start charging depending on computer specifications. When charging via computer connection, the charging time may vary depending on whether the device is turned on or off. -
Page 8: Connections
User Guide Connec- 3.5mm Unbalanced Port tions 1. Connect earphones or headphones to the 3.5mm unbalanced port. Connect to the 2.5mm Balanced Port 1. Connect earphones and headphones to the 2.5mm balanced port. Balanced Audio Device 1. Connect to an external audio device by using the 3.5mm Unbalanced Port and 2.5mm Balanced Port. - Page 9 User Guide Connecting S/PDIF OUT 1. Listen to music through an external device by connecting the S/PDIF-IN-compatible external device using the optical cable and operating the product. Turn on the output format conversion function in [Menu-Settings-S/PDIF Conversion], to convert to the format that is set when S/PDIF connection is made and output.
-
Page 10: Disconnecting From The Computer
User Guide Mac users need to download and install Android File Transfer from the Astell&Kern website. [http://www.astellnkern.com > Support > Download] For the best connection, close any unnecessary programs before connecting the device to the computer. Do not use cables other than the USB Type-C cable provided with the product. Use USB 2.0 only on Mac. - Page 11 User Guide Ensure the USB Type-C cable is properly connected. Turning off the device or disconnecting the USB Type-C cable while copying or moving files/folders may corrupt files or device memory. File transfer speeds may be affected by the computer and/or the OS environment.
- Page 12 User Guide Insert/Remove a MicroSD Card 1. Insert the pin provided with the product into the MicroSD card tray hole and open the tray by gently pulling to remove it. 2. Place the MicroSD card in the tray in the direction shown in the illustration.
-
Page 13: Firmware Upgrade
User Guide Notes on Using MicroSD Cards If the MicroSD card is not recognized or is not functioning properly, format the card, preferably as a FAT32 partition. Using cards other than the recommended MicroSD card may cause issues. A MicroSD card is not included in the product package. MicroSD cards must be purchased separately. -
Page 14: Using The Device
User Guide Basic LCD Touchscreen Operations 1. This device features an LCD touchscreen that allows you to select options by touching the screen. Use the touchscreen to access various features on the device. To prevent damage to the screen, do not use a sharp object or excessive force. -
Page 15: Notification Bar
User Guide Menus 1. Touch and hold, then drag your finger to the right or left in the home screen to display menus. The CD library menu is displayed when music files are extracted with AK CD-RIPPER and songs are stored in the Ripping folder. Notification Bar 1. - Page 16 User Guide View Current Playlist 1. Touch and hold, then drag your finger left on the home screen to display the current playlist. View playback history 1. Drag [Down / Up] direction on the Home screen to display the playback history. Using the Device...
- Page 17 User Guide Moving Up/Down on the List 1. Scroll through the list by dragging your finger up and down. Using the Device...
-
Page 18: Home Screen
User Guide Home Screen Menus Displays the menu. Details Displays current song information. Song Duration Indicates the song’s total duration. Current Album Go to the last displayed list. Add to Playlist Add the selected song to the playlist. Title Song title information. File name is displayed when ID3Tag is unavailable. - Page 19 User Guide Artist/Album Displays the artist and album info. Previous/ Short press: Plays the previous song. Rewind Press and hold: Rewinds the current song. Playlist Display current playlist. Format Displays the bit rate and sampling information frequency data. Album Cover Display album covers.
-
Page 20: Notification Bar
User Guide Notifi- cation Using the Device... - Page 21 User Guide Wi-Fi Press [ ] to turn Wi-Fi ON/ OFF. Bluetooth Press [ ] to turn Bluetooth Press [ ] to turn the EQ ON/OFF. The most recent EQ settings are applied by default. Computer Select the mode to use when Connection connected to a computer.
- Page 22 User Guide Settings Displays a list of settings. Brightness Use the adjustment bar to control the display brightness. Notifications Device notifications are Display displayed in this area. Delete Notifications Deletes notifications. Long-press an icon [ ] to navigate to the corresponding full menu settings screen.
-
Page 23: Music Store
User Guide Music Listen to streaming services or purchase music from the Store when connected to a wireless network. (Streaming Store services and ability to purchase music vary by country. Not all services are available in all countries.) Streaming or Purchasing Music 1. -
Page 24: Ak Connect
User Guide The SP1000 can access and play back music files stored on a computer on the same network, as well as output sound CONNECT through compatible speakers. MQS Streaming Server Installation 1. Visit the Astell&Kern website and download the server installer that corresponds to your operating system. - Page 25 User Guide 4. A list of libraries / speakers that are on the same network with SP1000 is displayed. 5. Select a library / speaker to connect. 6. After selecting a library / speaker, select a category from the menu to display the corresponding music list.
- Page 26 User Guide Streaming and downloading music from your library 1. Select a category from the library menu to see your list of music. 2. Select a song to begin streaming. 3. Press [ ] button at the upper- right corner of the music list. 4.
- Page 27 User Guide AK Connect Usage Examples Case 1 SP1000 AK T1 LIBRARY SPEAKER Case 2 AK500N SP1000 AK T1 LIBRARY REMOTE SPEAKER Using the Device...
- Page 28 User Guide Case 3 SP1000 AK500N REMOTE & LIBRARY SPEAKER Case 4 SP1000 AK500N AK T1 LIBRARY REMOTE SPEAKER Using the Device...
- Page 29 User Guide Case 5 SP1000 LIBRARY AK Connect APP REMOTE AK T1 SPEAKER AK500N LIBRARY Using the Device...
-
Page 30: Listening To Music
User Guide Listening Selecting Music to Music 1. Select a category from the menu to display the corresponding music list. 2. Select a song from the list to begin playback. Select [Folder] to search music by folder. Continuous Playing Time: Approximately 12 hours (Music: FLAC, 16bit, 44.1kHz, Unbalanced, Volume 75, EQ Off, LCD Off) Supported Formats: PCM [8~384kHz(8/16/24/32bit)] DSD [2.8/5.6/11.2MHz]... - Page 31 User Guide Press [ ] on top of the music list to view the options. : : Add selected list at the first / at the last / after the current song of Now Playing : Add selected list to playlist : Select / deselect entire list : Delete selected list : Exit...
- Page 32 User Guide Playlist Screen Previous Return to the previous screen. Playlist Displays the current playlist. Edit mode Display the editing options for the music list. Play All Play all songs in the current list. Using the Device...
-
Page 33: Manage Playlist
User Guide Manage Creating a Playlist Playlist 1. Press [Playlists] on the Home screen to view the playlists. 2. Select [ + ] in the upper right corner of the screen. 3. Enter a name for the playlist, and then press [Add] to create a new playlist. - Page 34 User Guide Removing a Song from a Playlist 1. Press [Playlists] to display the list of playlists. 2. Press [ ] at the top, then select the playlist you want to delete from the playlist. 3. Select the track, and press [ on top to delete the track from the playlist.
- Page 35 User Guide Renaming a Playlist 1. Press [Playlists] to view the playlists, and press [ 2. Select a playlist to be renamed. 3. Press [ ] at the top of the screen to display the name window. 4. Enter a name for the playlist, and then press [Rename] to save the playlist under a new name.
-
Page 36: Usb Dac Installation
Install a dedicated driver to use the SP1000 as a USB DAC. The driver file is located in SP1000\Internal_Storage\SP1000_ Contents\Driver. Before installing the driver, set SP1000 to USB DAC mode and connect to PC. -
Page 37: How To Use Usb Audio
User Guide How to Connect the SP1000 to a portable amp and DAC using USB Audio Out. Use USB Audio How to Connect a Portable USB DAC 1. Connect product’s USB Type C terminal and portable USB DAC with a dedicated cable. -
Page 38: Automatic Cd Ripping
RIPPER (sold separately). Ripping Turning the AK CD-RIPPER ON/OFF 1. Connect AK CD ripper to Type-C USB port of SP1000 using proper cable. Drag down notification bar and press [ to use AK CD-ripper. 2. While AK CD-RIPPER is turned on, press [ ] on the notification bar to stop. - Page 39 User Guide 2. Connect AK CD-RIPPER and insert CD, to display [CD Ripping] at the bottom of notification bar. 3. Press [CD Ripping] and select file format FLAC or WAV to rip. 4. The Gracenote database will be searched for matching CD metadata after the file format is selected.
-
Page 40: Settings
User Guide Settings The settings menu allows users to customize the device. The settings menu may vary depending on the firmware version. Setup 1. Select [Menu - Settings] or select [ ] in the notification bar on the Home screen. 2. - Page 41 User Guide Equalizer Set the equalizer according to the user's preferences. PRO EQ: Preset EQ recommended by Astell&Kern. USER EQ: Adjust the frequencies according to the user's preferences. Supported Formats for EQ: PCM [8 ~ 192kHz(8/16/24bit)] Using the equalizer may negatively affect device performance. See pages 47 - 49 for more information on using the equalizer.
- Page 42 User Guide CD Ripping Set the automatic CD ripping function, file format and ripping speed seetings. USB mode Media Device (USB Drive): When connected to a computer, device appears as a removable drive. DAC Input: Output sound from a connected computer to the device.
- Page 43 User Guide Device Name Set the name of the device. The maximum name length is 50 characters. Language Select the display language. Supported languages: English, Korean, Japanese, Chinese (Simplified/Traditional), French, Russian, German Keyboard Select the keyboard language. Supported languages: English, Korean, Japanese, Chinese (Simplified/Traditional), French, Russian, German Supported languages may vary depending on your location...
-
Page 44: System Information
User Guide The default folder is set when using AK Connect to download files. When [Select Folder] is selected, the user is prompted to choose a download folder each time a file is downloaded. Update System Update: Update the device when a new firmware version is available. -
Page 45: Connecting To Wi-Fi
User Guide Connecting Connecting to a Wi-Fi Network to Wi-Fi 1. Press and hold [ ] from the Notification Bar or select [Menu - Settings - Wi-Fi] to display a list of available Wi-Fi networks. 2. Select the desired Wi-Fi network name to connect to the wireless network. -
Page 46: Using Bluetooth
Connect a Bluetooth device to listen to music wirelessly. Bluetooth Turning Bluetooth ON/OFF A Bluetooth device must be paired with the SP1000 prior to use. Refer to the Bluetooth device's instruction manual for details. 1. Select [ ] from the home screen, or select [ON/OFF] from [Menu - Settings - Bluetooth]. - Page 47 User Guide Removing a Bluetooth Pairing 1. Press [ ] to the right of the paired device to go to settings. 2. Select [Remove] to complete the process. Bluetooth Support Specifications Profile: A2DP, aptX HD Device performance may be affected during Hi-Res playback. Do not turn off the device while connected to Bluetooth.
-
Page 48: Equalizer Setup
User Guide Equalizer Equalizer Setup Setup 1. Press and hold [ ] on the notification bar, or turn on [MENU - Settings - Equalizer]. 2. Press [Pro EQ] and select [ + ]. 3. Enter a name for the custom EQ settings and select [Save]. - Page 49 User Guide 4. Adjust the frequencies up and down according to preference. 5. The number values at the lower- left corner of the screen can be adjusted for fine-tuning. 6. Press the [Advanced] tab on the top of the screen to view the PEQ setting screen.
- Page 50 User Guide Deleting a Custom Equalizer Setting 1. Press [Pro EQ] at the upper-left corner of the screen. 2. Press [ ] next to the EQ name to delete the selected EQ setting. Renaming an Equalizer Setting 1. Press [Pro EQ] at the upper-left corner of the screen.
-
Page 51: Miscellaneous
User Guide Safety Device Pre- Do not use excessive force when inserting a plug into the earphones, balanced, or USB port. cautions Do not insert any metal objects (coins, hairpins, etc.) or flammable items into the device. Do not place heavy objects on the device. If the device gets wet (rain, water, chemicals, medicine, cosmetics, sweat, moisture, etc.), allow the device to dry thoroughly before powering on. - Page 52 User Guide Connecting to a defective or damaged USB port may damage the device. Displaying one static image for an extended period of time may cause screen burn-in. Use of poor quality protective films or adhesive stickers on the screen may cause damage to the touchscreen. Do not insert any foreign objects into the headphone port.
-
Page 53: Troubleshooting
User Guide Trouble- Solutions to common problems shooting 1. The device won't turn on. The battery may need to be recharged. Charge the device for at least one hour and try again. Reset the device. (See Page 5) 2. The device will not charge when connected to a computer via USB cable. -
Page 54: Copyright
It is the responsibility of the user to comply with applicable copyright laws. ©1999~2017 iriver Limited. All rights reserved. The SP1000 was designed and audio-tuned under the advisement of MSD. Miscellaneous... -
Page 55: Certifications
User Guide Certifica- KC / FCC / CE / TELEC Class B Device (Communication equipment for residential tions use): This is a Class B Device and is registered for EMC requirements for residential use. This device can be used in residential areas and all other areas. -
Page 56: Registered Trademarks
User Guide Body-Worn operation This device was tested for typical body-worn operations with the back of the portable music player kept 5mm. from the body. To maintain compliance requirements, use only belt-clips, holsters or similar accessories that maintain a 5mm separation distance between the user’s Body and the back of the Portable music player, including the antenna. -
Page 57: Disclaimers
User Guide Disclai- The manufacturer, importer, and distributor shall not be liable for damages including accidental and personal injury due to mers the improper use or operation of this product. The information in this user manual was written based on current product specifications. -
Page 58: Specifications
User Guide Specifi- General Specifications Product Name SP1000 cations Model PPF31 Body Color Stainless Steel Body Material Stainless Steel Display 5.0inch 720 x 1280 touch display Supported Audio WAV, FLAC, WMA, MP3, OGG, APE, AAC, ALAC, AIFF, Formats DFF, DSF...