Table of Contents
Advertisement
Advertisement
Table of Contents

Related Manuals for Yamaha MU5


Summary of Contents for Yamaha MU5
- Page 2 IMPORTANT NOTICE: DO NOT MODIFY THIS UNIT! This product, when installed as indicated in the instructions contained in this manual, meets FCC requirements. Modifications not expressly approved by Yamaha may void your authority, granted by the FCC, to use the product.
- Page 3 Questo apparecchio è conforme al D.M.13 aprile 1989 (Direttiva CEE/87/308) sulla soppressione dei radiodisturbi. Este producto está de acuerdo con los requisitos sobre interferencias de radio frequencia fijados por el Consejo Directivo 87/308/CEE. YAMAHA CORPORATION Entsorgung leerer Batterien (nur innerhalb Deutschlands) Leisten Sie einen Beitrag zum Umweltschutz.
- Page 4 Yamaha. This product should be used only with the components supplied or; a cart, rack, or stand that is recommended by Yamaha. If a cart, etc., is used, please observe all safety markings and instructions that accompany the accessory product.
-
Page 5: Welcome To The Mu5
With the built-in host computer interface and MIDI terminals, the MU5 is ideal for any computer music system — from connec- tion to a simple laptop to integration in a complete MIDI studio. It even features a two-octave keyboard (with adjustable ten- octave range), allowing you to play the internal Voices and enter notes to a connected sequencer. -
Page 6: Table Of Contents
Table of Contents Welcome to the MU5 ........1 How to Use This Manual . - Page 7 Reference ........32 Utility Mode .
-
Page 8: How To Use This Manual
However, to get the most out of your MU5, we strongly suggest that you read the following sections in the order given:... - Page 9 6) Muting and Soloing Parts; Editing Mute and Solo are useful in song playback, while editing opera- tions prepare you for digging in deeper to the advanced functions of the MU5. 7) Reference Once you’re familiar with everything above, lightly go over this comprehensive guide to all editing functions.
-
Page 10: Precautions
Your MU5 will give you years of reliable service if you follow the simple precautions below: LOCATION Keep the instrument away from locations where it is likely to be exposed to high temperatures (such as direct sunlight) or humid- ity. Also avoid locations which are subject to excessive dust accumulation or vibration which could cause mechanical damage. -
Page 11: Midi Cables
MIDI data transmission. Also, avoid using cables longer than 15 meters, since long cables can result in data errors. Yamaha is not responsible for damage caused by improper handling or operation. Precautions... -
Page 12: The Controls Of The Mu5
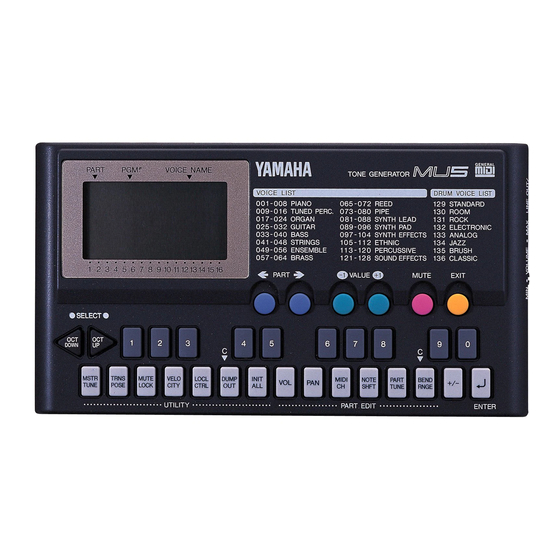
The Controls of the MU5 Front Panel PART 1 2 3 4 5 6 7 8 9 10 1112 SELECT DOWN MSTR TRNS MUTE TUNE POSE LOCK q Display In the Play mode, this shows the Part number and the currently selected program number and Voice name for the Part. - Page 13 Edit modes. u Keyboard This two-octave keyboard is used to play the Voices of the MU5. It can also be used to play notes on a connected external tone generator or enter notes to a connected sequencer or computer.
-
Page 14: Rear Panel
POWER switch For turning on the power to the unit. Side Panel q VOLUME control For adjusting the overall level of the MU5. w LINE OUT/PHONES jack For connection to an amplifier/speaker system or a set of stereo headphones. -
Page 15: The Mu5 - What It Is And What It Can Do
MU5 itself. Or you can play them from a connected MIDI keyboard. In addition, the MU5 also has a TO HOST terminal for easy interfacing with a computer, allowing you to play the Voices using your favorite music software. - Page 16 What It Can Do... Here are a few ideas on how you can use the MU5. The list below is not comprehensive, but is meant to be a general guide to the possibilities and provide a starting point or springboard for your own creative ideas and explo- rations.
-
Page 17: Play Mode
(Utility and Part Edit are the two edit-related modes of the MU5.) Play Mode This is the normal mode of the MU5, the one in which you normally play and select the internal Voices (either from the built-in keyboard or a connected MIDI device), select Parts, and use the Mute and Solo functions. -
Page 18: Setting Up Your Mu5
Setting Up Your MU5 Power Supply Your MU5 will run either from an optional AC adaptor or batteries. Follow the instructions below according to the power source you intend to use. Before making any connections, make sure that all equipment to NOTE be connected is turned off. -
Page 19: Using Batteries
Using Batteries To use the MU5 on battery power, insert six 1.5V AA size (SUM-3, R-6 or equivalent) manganese or alkaline batteries in the battery compartment. Make sure to follow the polarity indications on the bottom case (and as shown below). -
Page 20: Audio Connections
Audio Connections In order to hear your MU5, you’ll have to make certain audio connections. You can listen to the MU5 by using a set of stereo headphones or by connect- ing it to an amplifier/speaker system. Using Headphones Connect a set of stereo headphones (with a stereo miniature plug) to the LINE OUT/PHONES jack. -
Page 21: Setting Up The Mu5 In Your Music System
Setting Up the MU5 in Your Music System As you learned in the section The MU5 — What It Is and What It Can Do on page 11, the MU5 can be integrated into a variety of setups. It would be impossible to cover all connection possibilities in a short manual as this;... -
Page 22: Macintosh
Follow these instructions if you have an Apple Macintosh that is not equipped with an external MIDI interface. Connect the TO HOST terminal on the MU5 to the Modem or Printer port on the Macintosh. Operation Set the HOST SELECT switch to MAC. -
Page 23: Ibm Pc And Clones
Follow these instructions if you have an IBM PC/AT or compat- ible computer that is not equipped with an external MIDI inter- face. Connect the TO HOST terminal on the MU5 to one of the computer’s serial ports, COM 1 or COM 2. -
Page 24: Nec Pc-9800 Series
(See page 46.) Connecting to Other MIDI Devices The MU5 is equipped with MIDI IN and OUT terminals, allowing you to use it in any MIDI system. Example uses for the built-in MIDI interface include: • Connecting to a MIDI keyboard (for playing the sounds of the MU5 from that keyboard). -
Page 25: Data Flow Block Diagram
When HOST SELECT switch is set to Mac, PC-1 or PC-2: MIDI OUT MIDI IN Keyboard * When Local Control is set to Off, the keyboard of the MU5 cannot be used to play the internal AWM Voices. (See page 35.) Setting Up the MU5 in Your Music System... -
Page 26: Midi/Computer Connecting Cables
MIDI/Computer Connecting Cables Standard MIDI cable. Maximum length 15 meters. MIDI DIN 5-PIN Apple Macintosh Peripheral cable (M0197). Maximum length 2 meters. Macintosh MINI DIN 8-PIN PC-1 8-pin MINI DIN to D-SUB 25-pin cable. If your PC-1 type computer has a 9-pin serial port, use the PC-2 type cable. -
Page 27: Playing The Demo Song
Playing the Demo Song Now that you’ve set everything up properly, try playing the built-in Demo Song. This showcases the high-quality Voices and the AWM tone generation system of the MU5. Simultaneously hold down the s buttons and press Operation the E button. -
Page 28: Using The Mu5 - The Play Mode
Play mode. When you turn on the power of the MU5 or press the e button, the Play mode is automatically called up. In this mode, you can select any of the 16 Parts for playing, and select which Voice is played in each Part. -
Page 29: Changing The Octave Setting
Changing the Octave Setting Though the keyboard itself is two octaves, you can actually play the MU5 over a ten-octave range. To do this use the d (OCTAVE DOWN) and u (OCTAVE UP) buttons. Press the d button to lower the pitch by an octave, and press the u button to raise it by an octave. -
Page 30: Selecting A Part And Changing The Voice
Voice; see boxed section on the next page.) NOTE –1 VALUE +1 The MU5 has a total of 128 Voices, plus 8 different drum kits. An “OFF” setting (a value of 137, or higher) is also available for turning off the selected Part. (See page add-2 for a list of the available Voices.) - Page 31 47, simultaneously hold down the s buttons and press 4, then 7, and finally press the E button to actually enter the new value. DOWN PART Using the MU5 — The Play Mode SELECT While holding this down, press the following buttons in order: ENTER...
-
Page 32: Using The Mu5 With A Computer Or Sequencer
MU5. Using the MU5 with a MIDI Data Storage Device You can also use the MU5 with a MIDI data storage device, such as the Yamaha MDF2 MIDI Data Filer. This lets you save or back up whatever changes you’ve made in the settings of the Utility and Part Edit modes. Then, when you want to recall those settings, you can transfer the appropriate data from the storage device. -
Page 33: Muting And Soloing Parts
While a song is playing back on your computer or sequencer, you can selec- tively mute or solo any of the 16 Parts of the MU5. Mute lets you silence one Part to hear how all of the other Parts sound without it. Solo lets you isolate a single Part, to hear how that Part sounds by itself. -
Page 34: Editing
The MU5 has two edit modes: Utility and Part Edit. The Utility mode func- tions are related to the overall operation of the MU5, while the Part Edit mode provides independent controls for each Part. (See the Reference section of this manual for information about the specific editing functions.) - Page 35 This concludes our short tour of the basic setup and general operations of the MU5. Now that you’ve learned how to operate your MU5, look through the Reference section that follows for more detailed informa- tion on the Utility and Part Edit modes.
-
Page 36: Reference
Utility Mode The Utility mode lets you set functions related to the overall operation of the MU5, such as Master Tune, Transpose and Velocity settings. Included also are utility operations, such as sending bulk data to a data storage device, and initializing of the MU5 settings. -
Page 37: Transpose
MU5 as part of General MIDI song data. When Mute Lock is off, this resets the Mute status of the Parts on the MU5. If you want to keep the current Mute settings and disable this reset, set Mute Lock to On. -
Page 38: Velocity
Default This determines the note on velocity of the built-in keyboard. All notes that you play from the MU5’s keyboard will be at this fixed velocity, and sound at the same level. This velocity is also transmitted to connected devices via the MIDI or TO HOST terminals. -
Page 39: Local Control
Default This determines whether or not the internal tone generator responds to the notes you play on the MU5’s keyboard. Setting this to Off effectively disconnects the MU5 keyboard from the internal tone generator. However, notes played on the keyboard are still transmitted via the TO HOST or MIDI OUT terminals. -
Page 40: Dump Out
Settings Default This function allows you to save the current parameter settings of the MU5 to a MIDI sequencer, computer or a MIDI data recorder (such as the Yamaha MDF2 MIDI Data Filer). Saving & Restoring Data via MIDI Saving & Restoring Data via TO HOST... - Page 41 HOST SELECT switch is properly set. When using the MIDI terminals, connect the MIDI OUT of the MU5 to the MIDI IN of the data recorder. (See the Saving & Restoring Data via MIDI illustration above.) Also, set the HOST SELECT switch to MIDI.
-
Page 42: Initialize All
Simultaneously hold down the s buttons and press Operation When the operation is completed, a “Finished” message appears in the display and the MU5 returns to the normal Play mode. VOICE NAME Using Initialize All will erase whatever settings you’ve made on the MU5. If you have important settings you wish to keep, store them to a MIDI data recorder with the Dump Out function. -
Page 43: Part Edit Mode
Volume setting made here. Volume setting VOICE NAME 1 2 3 4 5 6 7 8 9 10 1112 Keep in mind that when playing the MU5’s Part Edit Mode Graphically shows Volume position for each Part. -
Page 44: Pan
Selected Part L 64 – C 00 – R 63 Range C 00 Default This determines the stereo position of a selected Part. The Pan position is graphically represented by bars in the display. A double bar (equal sign) in the middle represents the center position (C 00), while a bar at the top indicates full right (R 63) and a bar at the bottom indicates full left (L 64). -
Page 45: Note Shift
Note Shift PART Selected Part 1 2 3 4 5 6 7 8 9 10 1112 -24 – +24 semitones Range Default This determines the key transposition (Note Shift) setting for each Part. Keep in mind that the actual key transposition of the Part also depends on the global Transpose setting in the Utility menu (see page 33). -
Page 46: Pitch Bend Range
“bend” the pitch up or down as you play. Pitch Bend data can also be recorded to a sequencer along with normal note data, and then played back using the MU5. The default setting (+02) allows you to continuously change the pitch by a whole tone, up or down. -
Page 47: Appendix
Appendix Troubleshooting Even though the MU5 is exceptionally easy to use, it may occasionally not function as you expect it to. If that happens, check the possible problems and solutions below before assuming that the instrument is faulty. Problem No power. - Page 48 • Check all MIDI connections, making sure that the MIDI OUT of the external device is con- nected to the MIDI IN of the MU5, and that the MIDI IN of the external device is connected to the MIDI OUT of the MU5. (See page 20.) Or,...
-
Page 49: Error Messages
Error Messages Errors may occur from time to time, and when they do the MU5 will display a message to indicate the type of problem so that you can rectify it and return to normal operation. PART VOICE NAME PART... -
Page 50: Specifications
Mac — 31,250 bps PC-1 — 31,250 bps PC-2 — 38,400 bps Power Supply YAMAHA PA-3, PA-4 or PA-40 AC Adaptor (Never use the PA-3B.) Six “AA”size, SUM-3, R-6 or equivalent batteries Dimensions (W x D x H) 188 x 104 x 33 mm (7-3/8" x 4-1/8" x 1-1/3") Weight 340g (12 oz.) (w/o batteries) -
Page 51: Index
batteries, replacing ... . 15 batteries, using ....15 baud rate ....46 Bend Range . -
Page 52: Voice List
Voice List & MIDI Data Format... - Page 53 Voice List Instrument Name Group Piano Acoustic Grand Piano Bright Acoustic Piano Electric Grand Piano Honky-tonk Piano Electric Piano 1 Electric Piano 2 Harpsichord Clavi Chromatic Celesta Percussion Glockenspiel Music Box Vibraphone Marimba Xylophone Tubular Bells Dulcimer Organ Drawbar Organ Percussive Organ Rock Organ Church Organ...
- Page 54 Instrument Name Group Reed Soprano Sax Alto Sax Tenor Sax Baritone Sax Oboe English Horn Bassoon Clarinet Pipe Piccolo Flute Recorder Pan Flute Blown Bottle Shakuhachi Whistle Ocarina Synth Lead Lead 1 (square) Lead 2 (sawtooth) Lead 3 (calliope) Lead 4 (chiff) Lead 5 (charang) Lead 6 (voice) Lead 7 (fifths)
-
Page 55: Drum Map
Drum Map Pgm# Note# Note Key Off Alternate C# 0 D# 0 G# 0 A# 0 C# 1 D# 1 G# 1 A# 1 C# 2 D# 2 G# 2 A# 2 : Same as Standard Kit add- Standard Kit Room Kit Rock Kit Click L... - Page 56 Analog Kit Jazz Kit Brush Kit Reverse Cymbal Hi Q SD Power H Brush Slap L Bass Drum M BD Analog L BD Analog H Analog Side Stick Analog Snare L Brush Slap Analog Snare H Brush Tap Analog Tom 1 Jazz Tom 1 Brush Tom 1 Analog HH Closed 1...
- Page 57 Pgm# Note# Note Key Off Alternate C# 3 D# 3 G# 3 A# 3 C# 4 D# 4 G# 4 A# 4 C# 4 : Same as Standard Kit add- Standard Kit Room Kit Rock Kit Bongo H Bongo L Conga H Mute Conga H Open Conga L...
- Page 58 Voice List Analog Kit Jazz Kit Brush Kit Classic Kit Analog Conga H Analog Conga M Analog Conga L Scratch Push Scratch Pull add-...
-
Page 59: Midi Data Format
MIDI Data Format 1. General 1.1 Application This following MIDI information applies to the MU5. 1.2 Applicable Standards MIDI 1.0 Standard. 2. MIDI Reception / Transmission Diagrams 2.1 Transmit Condition HOST IN NOTE ON BANK SELECT MSB BANK SELECT LSB... - Page 60 2.2 Receive Condition MIDI < Rxnm > < Rxnm > $Bn, $00 $Bn, $20 $Bn, $01 $Bn, $06 $Bn, $26 $Bn, $07 $Bn, $0A $Bn, $0B $Bn, $40 $Bn, $54 $Bn, $64, $00, $65, $00, $06, $mm $Bn, $64, $01, $65, $00, $06, $mm, $26, $11 FINE TUNING $Bn, $64, $02, $65, $00, $06, $mm $Bn, $64, $7F, $65, $7F $Bn, $78, $00...
-
Page 61: Channel Messages
3. Channel Messages 3.1 Transmission 3.1.1 Note ON/OFF Note Range = E-2 – E8 Velocity = 0 – 127 3.1.2 Control change The following parameters can be transmitted. Control # 3.1.2.1 Bank Select Control # The bank select MSB switches between melody Voices and rhythm Voices. The bank select LSB is fixed at 0. - Page 62 = 1 – 127 (Note On velocity only.) When Receive Note Message is set to OFF, reception is disabled. When drum part data is received, the MU5 sometimes does not respond to Note Off messages (depending on the transmitted instrument).
- Page 63 3.2.2.1 Bank Select Control # Processing of bank select messages is paused until a program change message is received. The bank select MSB switches between a melody Voice and rhythm Voice. The bank select LSB is fixed at 0. 3.2.2.2 Modulation Control # This affects the vibrato depth.
- Page 64 Refer to the Voice List on page add-2. 3.2.4 Pitch Bend Pitch Bend resolution is 14 bit (-8192 – +8191). 3.2.5 Channel Mode Messages The MU5 receives and responds to the following channel mode messages: 2nd byte 3rd byte All sound off...
-
Page 65: Midi Implementation Chart
Omni Off is executed. (Rest is the same as in “All Notes Off” above.) 3.2.5.5 Omni On Since the MU5 has no such function, Omni On is not executed. (Rest is the same as in “All Notes Off” above.) 3.2.5.6 Mono Same as in “All Sounds Off”... -
Page 66: System Exclusive Messages
4. System Exclusive Messages 4.1 Parameter Change The MU5 receives and responds to the following parameter change messages: • Universal Real Time Message Master Volume • Universal Non Real Time Message General MIDI Mode On • Yamaha GM Exclusive Message MIDI Master Tuning •... - Page 67 00000001 01 11110111 F7 Following reception of the above parameters, all MU5 parameters will be initialized (excepting Master Tuning). However, when Mute Lock of the System parameters is set to on, Receive Note Message of the Multi Part parameters is not initialized. Since one of these messages takes about 50 msec to process, allow a sufficient amount of time before transmitting the next message.
- Page 68 0. If the received data is outside the “legal” range (i.e., higher or lower than the maximum and minimum set values at each address), the MU5 changes the value to the nearest maximum or minimum setting. 4.4.1 System Data Parameter Change Refer to charts 1-1 and 1-2 on pages add-21 and add-22.
- Page 69 PITCH BEND RANGE MOD LFO PITCH DEPTH CHANNEL AFTER TOUCH PITCH CONTROL If only Master Tune is received, the MU5 does not confirm with checksum. The MU5 does not respond to the following parameters: • System parameters EXCLUSIVE RECEIVE SWITCH...
- Page 70 The MU5 cannot send amounts of data greater than 513 bytes at a time. If a dump request exceeding 513 bytes is received, the MU5 breaks up the data into packets of 512 bytes or less and pauses for 120 msec or more before transmitting each packet.
- Page 71 The device making the dump request must include the corresponding parameter header for each data type (listed below). For example, if only one dump request header is used to request both System and Multi Part data, the MU5 will transmit only the System data.
- Page 72 EG. RELEASE RATE PITCH BEND RANGE MOD LFO PITCH DEPTH CHANNEL AFTER TOUCH PITCH CONTROL SYSTEM INFORMATION For the following parameters, which are unavailable on the MU5, the MU5 sends fixed data. • System parameters EXCLUSIVE RECEIVE SWITCH PROGRAM CHANGE RECEIVE SWITCH...
- Page 73 Chart 1-2 : MIDI Parameter Change table ( SYSTEM ) Address Size Data 00 00 00 1C – E4 MASTER TUNE 00 00 01* 00 00 02 00 – 10 00 00 03 00 – 7F 00 00 04 28 – 58 00 00 05 00 –...
- Page 74 Address Size Data Parameter 02 0n 11 31 – 4F LFO DEPTH 02 0n 12 00 – 7F LFO DELAY 02 0n 13 00 – 0F MOD LFO PITCH DEPTH 02 0n 14 28 – 58 CHANNEL AFTER TOUCH PITCH CONTROL 02 0n 15 00 –...
- Page 75 YAMAHA [ Tone Generator ] Model +----------------------------------------------------------------------+ Function ... : :-------------------+----------------+----------------+----------------: :Basic Default : 1 - 16 :Channel Changed : 1 - 16 :-------------------+----------------+----------------+----------------: Default :Mode Messages Altered : ************** : x :-------------------+----------------+----------------+----------------: :Note : 0 - 127 :Number : True voice: ************** : 0 - 127...
- Page 76 M.D.G., EMI Division © Yamaha Corporation 1994 VS67010 408PTCP25.2-01A0 Printed in Japan...