
Related Manuals for Pioneer AVIC-F160-2


Summary of Contents for Pioneer AVIC-F160-2
- Page 1 Owner’s Manual HIDE-AWAY NAVIGATION SYSTEM FOR TRUCKS/CAMPER VANS AVIC-F160-2 HIDE-AWAY NAVIGATION SYSTEM AVIC-F260-2 For details on software updates, visit www.naviextras.com. English...
- Page 2 1999/5/CE Íslenska: Português: Hér með lýsir Pioneer yfir því að [*] er í samræmi við Pioneer declara que este [*] está conforme com os grunnkröfur og aðrar kröfur, sem gerðar eru í tilskipun requisitos essenciais e outras disposições da Directiva 1999/5/EC 1999/5/CE.
-
Page 3: Table Of Contents
Monitoring the GPS reception quality 20 ! The screen examples shown in this manual are the ones for AVIC-F160-2. If you use a How to use the map different model, the screens that appear How to read the map screen 21... - Page 4 Contents – Searching for POIs using preset Modifying the route 45 – Selecting a new destination when a categories 30 Searching for POIs by categories 30 route is already set 46 – Setting a new starting position for the Searching for a POI directly from the name of the facilities 32 route 46 Searching for a nearby POI 33...
- Page 5 Contents Other operations More menu 62 Installation Important safeguards 63 Precautions before connecting the system 63 Before installing this product 64 To prevent damage 64 Precautions before installation 65 Connecting the system 66 Installing with the hook and loop fastener 67 Appendix Positioning technology 68 –...
-
Page 6: Precaution
Chapter Precaution Certain country and government laws may pro- hibit or restrict the placement and use of this system in your vehicle. Please comply with all applicable laws and regulations regarding the use, installation and operation of your naviga- tion system. If you want to dispose this product, do not mix it with general household waste. -
Page 7: Introduction
TERMS, WHICH ARE ATTACHED TO THIS The Software and related documentation are AGREEMENT (refer to page 9). IF YOU DO NOT provided to you “AS IS”. PIONEER AND ITS LI- AGREE WITH ALL OF THESE TERMS, PLEASE CENSOR(S) (for the purpose of provisions 2... - Page 8 REPRESENTATION, AND OTHER TORTS. IF change in this Agreement shall be effective PIONEER’S WARRANTY DISCLAIMER OR unless agreed to in writing by Pioneer. If any LIMITATION OF LIABILITY SET FORTH IN THIS provision of this Agreement is declared invalid AGREEMENT SHALL OR FOR ANY REASON...
-
Page 9: End User License Agreement
Chapter Introduction END USER LICENSE AGREEMENT TRANSFER OF LICENSE PLEASE READ THIS END USER LICENSE AGREEMENT CAREFUL BEFORE USING THE You may not transfer the Database to third parties, HERE DATABASE except when installed in the system for which it was created or when you do not retain any copy of the ... - Page 10 Chapter Introduction LIMITATION OF LIABILITY The price of the Database does not include any consideration for assumption of risk of consequential, indirect or unlimited direct damages which may arise in connection with your use of the Database. Accordingly, in no event shall HERE be liable for any consequential or indirect damages, including without limitation, loss of revenue, data, or use, incurred by you or any third party arising out of your use of the...
-
Page 11: About The Data For The Map Database
(ACC OFF) immediately and consult your deal- navigation system, refer to the information er or the nearest authorised Pioneer Service on our website. ! It is strictly prohibited to reproduce and use Station. - Page 12 Chapter Introduction low all existing traffic regulations. If you ex- CAUTION perience difficulty in operating the system When a route is calculated, the route and voice or reading the display, park your vehicle in guidance for the route are automatically set. a safe location and apply the handbrake be- Also, for day or time traffic regulations, only infor- fore making the necessary adjustments.
-
Page 13: Fuel Cost Management
Traffic information move around your map region. You are ob- ! Pioneer does not bear responsibility for the liged to always obey the restrictions dis- accuracy of the information transmitted. played on the road. -
Page 14: Notes Before Using The System
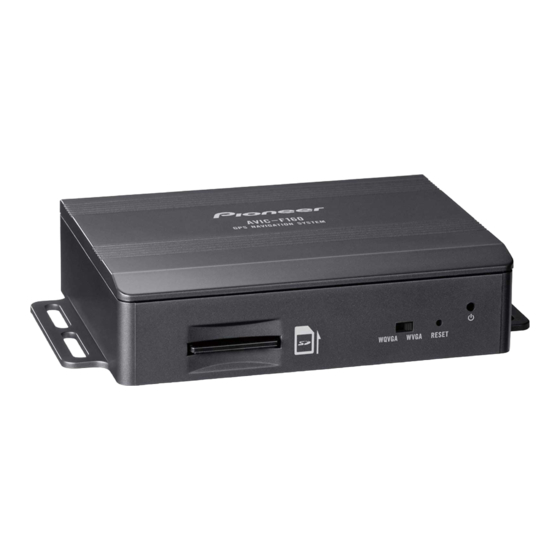
Checking part names and rage device for any reason, it is usually not functions possible to recover the data. Pioneer accepts no liability for damages, costs or expenses arising from data loss or corruption. ! Never insert or eject an SD memory card while driving. -
Page 15: Inserting An Sd Memory Card
The included SD memory card must be in- CAUTION serted into the SD card slot for prior to Please refer to the related section before clearing. using the AVIC-F160-2 or AVIC-F260-2 for the first time. The microprocessor should be reset under the following conditions:... -
Page 16: Before You Start
Chapter Before you start On first-time startup Read the terms carefully, checking its details, and then touch [Accept] if you When you use the navigation system for the agree to the conditions. first time, an initial setup process starts auto- matically. -
Page 17: Regular Startup
Chapter Before you start If needed, modify the default route wait (approximately 10 seconds) after re- planning options, then touch [Next]. start before pressing the MODE button. p Later you can change them in “Route Set- tings”. = For details, refer to Modifying the route cal- culation conditions on page 40. -
Page 18: How To Use The Navigation Menu Screens
Chapter How to use the navigation menu screens Screen switching overview Navigation screen Press the MODE button of the AV receiver. AV receiver screen (e.g. AVH-X5800DAB) Engb... -
Page 19: What You Can Do On Each Menu
Chapter How to use the navigation menu screens What you can do on each Operating list screens (e.g. menu route settings screen) 1 Map screen Touch [Show Map] on the “Navigation Menu” screen. 2 Quick menu Registering your favourite menu items in shortcuts allows you to quickly jump to the re- gistered menu screen by a simple touch on the quick menu screen. -
Page 20: Monitoring The Gps Reception Quality
Chapter How to use the navigation menu screens p When entering text, the first character appears in upper case while the rest of the text is in lower case. Touch enter an upper case letter or touch twice to turn on Caps Lock. Touch again and lower case letters return. -
Page 21: How To Use The Map
Chapter How to use the map Most of the information provided by your navigation system can be seen on the map. You need to be- come familiar with how information appears on the map. How to read the map screen p Information with an asterisk (*) appears Shows the turning direction after the next gui- only when the route is set. -
Page 22: Frequently Shown Route Events
Chapter How to use the map Touching this field displays route information Icon Description during navigation. By default, only one data field is displayed. Touch this field to see all Keep left. data fields. = For details, refer to Browsing the data field on page 24. -
Page 23: Checking The Detailed Information About The Current Position
Chapter How to use the map Touch [Show Map] on the “Navigation Checking the detailed information Menu” screen. about the current position The map screen appears showing the current You can get the detailed information about the position (a blue arrow by default), recom- current position (or about the last known posi- mended route (an orange line) and surround- tion if GPS reception is not available) from the... -
Page 24: Browsing The Data Field
Chapter How to use the map Browsing the data field Display during motorway driving The data fields are different when you are navi- gating the current route and when you have In certain locations of the motorway, lane in- no specified destination (the orange line is not formation is available, indicating the recom- displayed). -
Page 25: Operating The Map Screen
Chapter How to use the map An icon showing a petrol station or a restau- Touch to change the map scale. rant will appear on the map during you are driving on motorways. Touch the icon to open the details of the next few exits or service sta- tions. -
Page 26: Switching The Map Between 2D And 3D
Chapter How to use the map Touch anywhere on the map during na- Scrolling the map to the vigation. position you want to see The map stops following the current position Display the map screen. and control keys appear. = For details of the operations, refer to Screen Touch to tilt up/down or switching overview on page 18. -
Page 27: Searching For And Selecting A Location
Chapter Searching for and selecting a location p Some information regarding traffic regula- Touch [Town] and enter the name of the city/town on the keyboard. tions depends on the time when the route calculation is performed. Thus, the infor- mation may not correspond with a certain traffic regulation when your vehicle actually passes through the location in question. -
Page 28: Searching For A Location By Entering The Midpoint Of A Street
Chapter Searching for and selecting a location Searching for a location by If necessary, modify the country. = For details of the operations, refer to Search- entering the midpoint of a ing for a location by address on page 27. street Touch [Town] and enter the name of You can also navigate to the midpoint of a... -
Page 29: Searching For Points Of Interest (Poi)
Chapter Searching for and selecting a location Touch [Town] and enter the name of Searching for Points of the city/town using its postcode. Interest (POI) Information of various facilities (Points Of In- terest – POI), such as petrol stations, car parks or restaurants, is available. -
Page 30: Searching For Pois Using Preset Categories
Chapter Searching for and selecting a location p When the route is set, accommodation is The list of places opens with names contain- ing the entered character sequence. searched around the destination of the route. Scroll the list and touch the place you p When the route is not set, they are searched want. - Page 31 Chapter Searching for and selecting a location Touch [Find], then [Find Places]. Select one of the main place categories (e.g. Accommodation) or touch [List All Touch [Custom Search]. Places]. Select the area around which the POIs should be searched for. The screen appears showing all places around the selected location or along the route.
-
Page 32: Searching For A Poi Directly From The Name Of The Facilities
Chapter Searching for and selecting a location tion. (The result list will be ordered by the distance from this position.) ! Around Destination: Searches for a place around the destination of the current route. (The result list will be ordered by the distance from the destina- tion.) ! Along Route: Searches along the current route, and not... -
Page 33: Searching For A Nearby Poi
Chapter Searching for and selecting a location Using the keyboard, start entering the (or around the last known position if the cur- name of the place. rent position is not available). ! Car Repair Around Here: Car repair and roadside assistance services ! Health Around Here: Medical and emergency services ! Police Around Here:... -
Page 34: Selecting Destination From Stored Locations
Chapter Searching for and selecting a location Move and scale the map to locate your Touch [Favourites]. destination. The list of “Favourites” destinations appears. Touch [Select]. The selected location appears on the map screen. = For details, refer to Setting a route to your destination on page 37. -
Page 35: Selecting A Location You Searched For Recently
Chapter Searching for and selecting a location Selecting a location you searched for recently The places that you set as destinations or way- points previously are automatically stored in “History”. Smart History Touch the entry you want. Two of the most recently set destinations are The searched location appears on the map shown in the “History”... -
Page 36: Searching For A Location By Scrolling The Map
Chapter Searching for and selecting a location When finished, touch [Done]. The searched location appears on the map screen. = For subsequent operations, refer to Setting a route to your destination on page 37. Searching for a location by scrolling the map Specifying a location after scrolling the map enables you to set the position as destination, waypoint. -
Page 37: After The Location Is Decided
Chapter After the location is decided Setting a route to your Touch [Go!]. Your navigation system starts the route gui- destination dance. # Touch [More] to modify route parameters. You can set a route to your destination by using either a searched location or the “My Route”... -
Page 38: Setting A Route Using The "My Route" Menu
Chapter After the location is decided Touch any of the alternatives to see it Touch [Create Route]. on the map. p The start point of the route, normally it is If you cannot find a good alternative, touch the current GPS position, is displayed. [More Results] and scroll down for routes Touch with different routing methods. - Page 39 Chapter After the location is decided Touch [Go] to confirm the destination. After a short summary of the route para- meters, the map appears showing the entire route. The route is automatically calculated. p If you have already set the route to the desti- nation, [Next] will appears.
-
Page 40: Checking And Modifying The Current
Chapter Checking and modifying the current route 5 The symbol of the vehicle type used in route Displaying the route overview calculation Touch [Menu] on the map screen. 6 Route planning method (e.g. Fast) The “Navigation Menu” screen appears. 7 Estimated delay calculated from traffic = For details of the operations, refer to Screen events on your route switching overview on page 18. -
Page 41: Setting The Vehicle Parameters
You can select from the following vehicle Setting the vehicle parameters types: p Items marked with asterisk (*) appear only You can edit the parameters of the vehicle pro- on AVIC-F160-2. file. ! Default Car: Touch [Menu] on the map screen. ! Manoeuvre restrictions and directional The “Navigation Menu”... - Page 42 ! Engine Type*: For AVIC-F160-2 users Select the engine and fuel type of your vehi- p Note that this navigation system leads to a cle. This helps in estimating the CO...
-
Page 43: Setting The Route Calculation
“Fast” route, but it takes other The “Navigation Menu” screen appears. = For details of the operations, refer to Screen roads as well to save fuel. p This item is available for AVIC-F160-2 switching overview on page 18. only. Touch [More...], then [Settings]. -
Page 44: Setting The Waiting Time At Waypoints
Chapter Checking and modifying the current route Touch any of the listed road types. If the selected routing method is not “Green”, you can have your route compared to the best green alternative on the screen when confirming the route. If this alterna- tive is much better than the selected meth- od, you can quickly switch to “Green”... -
Page 45: Setting Driving Time Alerts
Chapter Checking and modifying the current route When finished, touch and hold [Back]. The map screen returns. Setting driving time alerts p This function is only available on AVIC- F160-2. You can set countdown timers to alert you When a break is initiated, the continuous driv- when you need a break or a sleep. -
Page 46: Selecting A New Destination When A Route Is Already Set
Chapter Checking and modifying the current route Selecting a new destination the route to a different location than the cur- rent GPS position. when a route is already set If you already have a recommended route and Touch [Menu] on the map screen. The “Navigation Menu”... -
Page 47: Editing The List Of Destinations
Chapter Checking and modifying the current route Touch [My Route] on the “Navigation Select the start point of the route the same way as you select a destination. Menu” screen. Touch [Edit Route] when you already have a route. Touch [Set Start]. Select [Go] when the new start point is set. -
Page 48: Checking Route Alternatives For The Current Route
Chapter Checking and modifying the current route Checking route alternatives Select one of the alternatives and touch [Back]. for the current route To recalculate the current route with a differ- ent route planning method, you can modify the settings for the route calculation (refer to Checking and modifying the current route on page 40). -
Page 49: Navigating In Off-Road Mode
Chapter Checking and modifying the current route Scroll down the list and touch [Simulate destinations in a straight line regardless of the Navigation]. road network and traffic regulations. Touch [More...], then [Settings]. Touch [Route Settings]. Touch [Navigation Mode], then select [Off-road]. -
Page 50: Registering And Editing Locations
Chapter Registering and editing locations Storing a location in Saving a location as an “Favourites” alert point Storing your favourite locations as “Favour- Alert points are preloaded in your navigation ites” provides you with the opportunity to save system. You can also download more from our the time and effort of re-entering this informa- website, or save any map location as an alert tion. -
Page 51: Editing An Alert Point
Chapter Registering and editing locations Set the necessary parameters. Scroll down the list and touch [Edit Alert Point]. ! Type of Alert: Set the type of alert point. Modify the necessary parameters. ! Direction of Alert: Set the direction from which you expect the alert. -
Page 52: Using Traffic Information
Chapter Using traffic information Receiving real-time traffic ! If you want to use the Traffic information information (TMC) function in Russia, access Traffic Message Channel (TMC) can provide www.naviextras.com you with the real-time status of the traffic. Your beforehand and activate the service. device contains the TMC receiver that is ! The service activation is subject to fees. -
Page 53: Checking The Traffic Incidents On The Map
Chapter Using traffic information p When the traffic data is available, a 2D map is displayed with road segments coloured by the severity of traffic incidents. Touch the event type icon at the road segment and then touch to get information about the traffic incident. -
Page 54: Customising Preferences
Chapter Customising preferences ! Ding: Turn off the attention tone preced- Displaying the settings screen ing verbal instructions or adjust its vo- Touch [Menu] on the map screen. lume. The “Navigation Menu” screen appears. ! Alert Beeps: These controls affect the = For details of the operations, refer to Screen volume of the non verbal alert sounds switching overview on page 18. -
Page 55: Customising The Quick Menu
Chapter Customising preferences ! When approaching: The audio alert is The maximum speed set in the vehicle pro- file is also used for this warning. This sys- always played when approaching one of tem alerts you if you exceed the preset these alert points. -
Page 56: Setting The Traffic Information
Displays the screen for setting the driving points are given. timers. ! Remove Next Waypoint: p This item is available for AVIC-F160-2 Skips the next waypoint from the route. only. ! Trip Monitor: Displays the “Trip Monitor” where you can... -
Page 57: Setting The User Profiles
Chapter Customising preferences You can also set the minimum delay that Touch [Map Settings]. The “Map Settings” screen appears. triggers route recalculation, and you can in- struct the application if you want to confirm Touch the setting item. every recalculation. You can see the effect when you change a set- ! Event Types: ting. -
Page 58: Setting The Visual Guidance
Chapter Customising preferences Show or suppress the 3D elevation of the Setting the visual guidance surrounding terrain. Adjust how this system helps you navigate ! Track Logs: with different kinds of route related informa- Turn on or off track log saving, that is, sav- tion on the map screen. -
Page 59: Customising The Display Settings
Chapter Customising preferences If you are approaching a motorway exit or a for the next section of the route. But you complex intersection and the needed infor- cannot modify the offered detour. ! Offer Parking Around Destination: mation exists, the map is replaced with a 3D view of the junction. -
Page 60: Customising The Regional Settings
Chapter Customising preferences Monitor” is available from the “More...” Customising the regional menu. settings Display the settings screen. These settings allow you to customise this sys- = For details of the operations, refer to Dis- tem for your local language, measurement playing the settings screen on page 54. -
Page 61: Resetting To The Default Settings
Chapter Customising preferences Select the language that you want to use for voice guidance messages, then touch [Next]. p Later you can change it in “Sound and Warnings” settings. = For details, refer to Setting the volume and the guidance voice for navigation system on page 54. -
Page 62: Other Operations
Chapter Other operations More menu sunset times for all your route points (your current location, all waypoints and the final The “More...” menu provides you with various destination). options and additional applications. ! Trip Monitor: If you save your trip logs when you arrive at Touch [Menu] on the map screen. -
Page 63: Important Safeguards
If the yellow lead’s insulation tears as a re- WARNING Pioneer does not recommend that you install sult of contact with metal parts, short-cir- your navigation system yourself. This pro- cuiting can occur, resulting in duct is designed for professional installation considerable danger. -
Page 64: Before Installing This Product
Chapter Installation Before installing this product To prevent damage ! Use this unit with a 12-volt battery and ne- WARNING gative earthing only. Failure to do so may ! The black lead is earth. Please earth this result in a fire or malfunction. lead separately from the earth of high-cur- ! To avoid shorts in the electrical system, be rent products such as power amps. -
Page 65: Precautions Before Installation
Chapter Installation ! Install the navigation system between the Precautions before driver’s seat and front passenger seat so installation that it will not be hit by the driver or pas- senger if the vehicle stops quickly. CAUTION ! Never install the navigation system in ! Never install this product in places where, front of or next to the place in the dash- or in a manner that:... -
Page 66: Connecting The System
11 mm (0.4 in) screw (supplied). Connect the other end of the cable to RGB IN input on the back of your Pioneer AV receiver. AV receiver RGB cable (supplied) 2.65 m... -
Page 67: Installing With The Hook And Loop Fastener
Chapter Installation Installing with the hook and loop fastener Thoroughly wipe off both surfaces be- fore affixing the hook and loop fastener. Peel off the protective sheet and attach the hook and loop fastener. Navigation unit Protective sheet Decide on the installation position. Peel off the other protective sheet and install the navigation unit on the surface of the glove box or similar location. -
Page 68: Appendix
Appendix Appendix ! In some driving conditions, signals from Positioning technology GPS satellites may not reach your vehicle. Positioning by GPS In this case, it is impossible for the system to use GPS positioning. The Global Positioning System (GPS) uses a network of satellites orbiting the Earth. - Page 69 Appendix Appendix ! If you make a slight turn. ! If the road has a series of hairpin bends. ! If there is a parallel road. ! If there is a loop or similar road configura- tion. ! If there is another road very nearby, such as in the case of an elevated motorway.
-
Page 70: Route Setting Information
Appendix Appendix ! If you enter or exit a multi-storey car park or ! When you drive around a roundabout. similar structure using a spiral ramp. ! When starting driving immediately after starting the engine. ! If your vehicle is turned on a turntable or si- milar structure. -
Page 71: Sd And Sdhc Logo
Appendix Appendix ! If the destination is too far, there may be in- Auto reroute function stances where the route cannot be set. (If ! If you deviate from the set route, the system you want to set a long-distance route going will re-calculate the route from that point across several areas, set waypoints along so that you remain on track to the destina-... -
Page 72: Display Information
Appendix Appendix Display information Page Page More... Find Updates and Extras Find Address Unit Converter Find Places 29, 30 Clothing Find on Map Calculator Favourites Fuel Consumption History Sunrise & Sunset Coordinate Trip Monitor My Route Country Information Create Route Help Edit Route 46, 47... -
Page 73: Glossary
Appendix Appendix Glossary matically by the system when you specify a destination. Current location The present location of your vehicle; your cur- Set route rent location is shown on the map by a blue The route marked out by the system to your triangle mark (default). -
Page 74: Specifications
Appendix Appendix Specifications General Rated power source ....14.4 V DC (allowable voltage range: 12.0 V to 14.4 V DC) Earthing system ....... Negative type Maximum current consumption ............. 0.21 A Dimensions (W × H × D): ..........134 mm × 29 mm × 84 mm Weight .......... - Page 75 Engb...
- Page 76 Visit www.pioneer-car.co.uk (or www.pioneer-car.eu) to register your product. Visitez www.pioneer-car.fr (ou www.pioneer-car.eu) pour enregistrer votre appareil. Si prega di visitare iI sito www.pioneer-car.it (o www.pioneer-car.eu) per registrare iI prodotto. Visite www.pioneer-car.es (o www.pioneer-car.eu) para registrar su producto. Zum Registrieren Ihres Produktes besuchen Sie bitte www.pioneer-car.de (oder www.pioneer-car.eu).