Table of Contents
Advertisement
Quick Links
INSTRUCTION MANUAL
MULTIBAND FM TRANSCEIVER
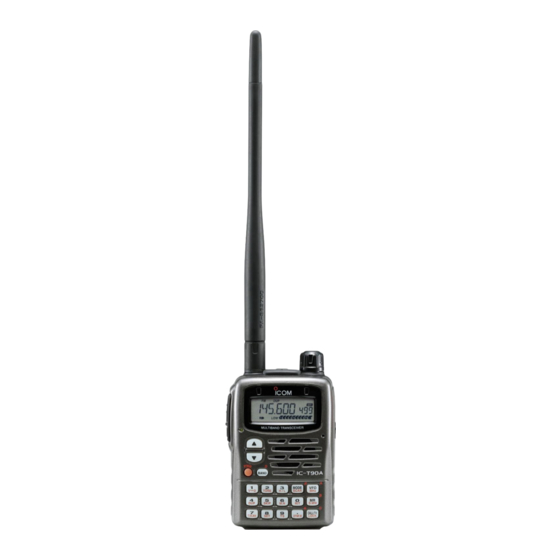
iT90A
This device complies with Part 15 of the FCC Rules. Operation is sub-
ject to the following two conditions: (1) This device may not cause
harmful interference, and (2) this device must accept any interference
received, including interference that may cause undesired operation.
WARNING: MODIFICATION OF THIS DEVICE TO RECEIVE CEL-
LULAR RADIO TELEPHONE SERVICE SIGNALS IS PROHIBITED
UNDER FCC RULES AND FEDERAL LAW.
Advertisement
Table of Contents

Related Manuals for Icom IC-T90


Summary of Contents for Icom IC-T90
- Page 1 INSTRUCTION MANUAL MULTIBAND FM TRANSCEIVER iT90A This device complies with Part 15 of the FCC Rules. Operation is sub- ject to the following two conditions: (1) This device may not cause harmful interference, and (2) this device must accept any interference received, including interference that may cause undesired operation.
- Page 2 FOREWORD Thank you for purchasing this Icom product. The IC-T90A We want to thank you for making your IC-T90A your radio of MULTIBAND TRANSCEIVER is designed and built with choice, and hope Icom’s superior technology and craftsmanship. With proper you agree with Icom’s philosophy of “technology first.” Many...
-
Page 3: Important
If disregarded, inconvenience only. No risk NOTE of personal injury, fire or electric shock. Icom, Icom Inc. and the logo are registered trademarks of Icom Incorporated (Japan) in the United States, the United Kingdom, Germany, France, Spain, Russia and/or other countries. -
Page 4: Cautions
Changes or modifications to this device, not ex- NEVER connect the transceiver to an AC outlet . Such a pressly approved by Icom Inc., could void your authority to connection will damage the transceiver. operate this device under FCC regulations. -
Page 5: Table Of Contents
TABLE OF CONTENTS I Split operation ........ 32 I Clearing a DTMF memory ..... 69 FOREWORD ..........i I Auto repeater function ....33 I Confirming a DTMF memory ..69 IMPORTANT ..........ii I 1750 Hz tone ......... 34 I Tone frequency and DTCS code .. -
Page 6: Quick Reference Guide
QUICK REFERENCE GUIDE I Accessory attachment I Installing the battery pack D Attaching the swivel belt clip q Open the latch. Then, attach the BP-217 Li-Ion battery The supplied swivel belt clip is useful for easy attaching/ pack or BP-216 optional battery case. detaching the transceiver to/from the belt. - Page 7 QUICK REFERENCE GUIDE e Insert the transceiver into the end of CAUTION! the clip as shown at right. HOLD THE TRANSCEIVER TIGHTLY, WHEN ATTACHING OR REMOVING THE TRANSCEIVER TO/FROM THE BELT CLIP. If the transceiver accidentally dropped and the swivel belt clip’s stopper is scratched, the swivel belt clip may not work properly.
- Page 8 QUICK REFERENCE GUIDE D Attaching the antenna CAUTION! Insert the supplied wide band antenna into the antenna con- TRANSMITTING WITHOUT AN ANTENNA MAY DAMAGE nector and screw down the antenna as shown below. THE TRANSCEIVER. NEVER HOLD • 50 MHz band adapter the anten- na when carrying the trans- Attach the 50 MHz band antenna adapter before operating on...
- Page 9 QUICK REFERENCE GUIDE I Charging the Li-Ion battery pack D Charging with the CP-19 Cigarette Lighter cable (optional) D Charging with the wall charger IC-T90A with BP-217 CP-19 (optional) to a 12 V BC-110AR/D/DR cigarette lighter socket DC power to AC outlet jack DC power jack q Insert the cigarette lighter adapter cable into the DC power...
- Page 10 QUICK REFERENCE GUIDE I Rapid charging I External power operation The optional BC-139 provides rapid charging of the battery An optional CP-19 cigarette lighter cable can be used for ex- pack. ternal power operation from a 12 V DC cigarette lighter socket.
- Page 11 We would like to take you power ON. through a few basic operation steps to make your first “On • The function display shows “ICOM,” current voltage then the op- The Air” an enjoyable experience. erating frequency.
-
Page 12: Panel Description
PANEL DESCRIPTION I Panel description q POWER SWITCH [PWR] Push for 1 sec. to turn the transceiver power ON and OFF. w BAND SWITCH [BAND] ➥ Push to select the operating band (5 MHz, Air, VHF, UHF, etc.). (p. 21) ➥... - Page 13 PANEL DESCRIPTION y PTT SWITCH [PTT] cigarette lighter cable. ➥ Push and hold to transmit in 50/144/430 (440) MHz am- !1 MODE/SCAN SWITCH [MODE SCAN] ateur bands; release to receive. (p. 28) ➥ Push to select the operating mode (FM, WFM, •...
- Page 14 PANEL DESCRIPTION ➥ While pushing [PTT], this key sends a DTMF “B”. ➥ Push for 1 sec. to activate the following tone functions in order. !4 CALL/LOCK SWITCH [CALL/TV LOCK] TONE • Subaudible tone encoder — “T” appears. (p. 29) ➥...
- Page 15 PANEL DESCRIPTION ➥ While pushing [PTT], this key sends the DTMF code “7”. @0 FREQUENCY SKIP SWITCH [5 SKIP] ➥ Push for 1 sec. to turn the frequency skip func- @3 SET MODE SWITCH [8 SET] tion ON and OFF in VFO mode. (p. 47) ➥...
-
Page 16: I Function Display
PANEL DESCRIPTION I Function display q FREQUENCY READOUT e RECEIVE MODE INDICATORS (p. 21) Shows the operating frequency, set mode contents, etc. Shows the receive mode. • The smaller “75,” “50” and “25” to the right of the readout indi- •... - Page 17 PANEL DESCRIPTION t TONE INDICATORS (p. 70) !0 MEMORY CHANNEL NUMBER READOUT (p. 20) ➥ Appears when the following tone functions are activated. Shows the memory or call channel number, etc. • Subaudible tone encoder — “T” appears. (p. 29) !1 S/RF INDICATORS (p.
-
Page 18: Battery Charging
ON overnight. Then, fully charge the battery pack again. If the battery pack still does not retain a charge (or very little), a new battery pack must be purchased. Use Icom battery packs, chargers and cables only. The use of Latch non-Icom products may impair transceiver performance and invalidate the warranty. -
Page 19: I Regular Charging
BATTERY CHARGING I Regular charging q Attach the battery pack to the transceiver. Prior to using the transceiver for the first time, the battery w Be sure to turn the transceiver power OFF. pack must be fully charged for optimum life and operation. e Connect the AC adapter* (BC-110AR/D/DR) as shown CAUTION: To avoid damage to the transceiver, turn the below. -
Page 20: I Rapid Charging
BATTERY CHARGING I Rapid charging BP-217 The optional BC-139 provides rapid charging of the battery Li-Ion battery pack pack. • Charging period: 2.5 hours (w/BP-217) Turn power CAUTION: To avoid damage to the transceiver, turn it OFF OFF. while charging. Check the orientation. -
Page 21: I Battery Case
BATTERY CHARGING I Battery case I External power operation (Option) An optional cable CP-19 (for 12 V cigarette lighter socket) can q Install 2 R6 (AA) size alkaline be used for external power operation. batteries into the optional Power supply range is between 5.5–11.0 V DC. •... -
Page 22: Basic Operation
• [Y]/[Z] and [DIAL] can be exchanged by [1 V↔D]. (p. 23) (p. 13) w Push [PWR] for 1 sec. to turn the power ON. • The function display shows “ICOM,” current voltage then the op- Shows volume level. erating frequency. -
Page 23: I Tuning Step
BASIC OPERATION I Tuning step D MHz tuning step D Setting the tuning step This is useful to change the frequency q Push [9 TS] for 1 sec. to enter tuning When using the tuning dial to change rapidly. the frequency, or when a scan function step set mode. -
Page 24: I Setting A Frequency
BASIC OPERATION I Setting a frequency D Setting the frequency with keypad q Select VFO mode with [VFO]. w Push the desired numeral buttons until inputting 1 kHz digit to set the frequency. Push numeral keys and [•] to input the desired frequency. -
Page 25: I Mode Selection
BASIC OPERATION I Mode selection D VFO mode D Memory mode D Call/TV/weather channels VFO mode is used for setting a desired Memory mode is used for operation of Call channels are used for most-often- frequency within the band range. memory channels which have pro- used frequencies for quick recall. -
Page 26: I Operating Band And Receive Mode Selection
BASIC OPERATION I Operating band and receive mode selection D Selecting the operating q Select VFO mode with [VFO]. D Selecting the receive mode w Push [BAND] several times to select Receive modes are determined by the band the desired band. physical properties of the radio signals. -
Page 27: I Setting The Squelch Level
BASIC OPERATION I Setting the squelch level e Release [SQL] to return to the previ- D Monitor function The squelch circuit mutes the received audio signal depending on the signal ous indication. This function is used to listen to weak strength. -
Page 28: I Receiving
BASIC OPERATION I Receiving D Exchange [DIAL] and [Y Y ]/[Z Z ] functions The functions of tuning dial and [Y]/[Z] switches can be ex- D Setting volume level changed, if desired. ➥ Push [Y] or [Z] to set the desired audio level. ➥... - Page 29 BASIC OPERATION D Receiving FM broadcast D Receiving amateur bands [EXAMPLE]: Receiving 88.200 MHz. [EXAMPLE]: Receiving 145.600 MHz. q Select VFO mode with [VFO]. q Select VFO mode with [VFO]. w For direct frequency input, push [8], [8], [•], [2], [0], [0]. w For direct frequency input, push [1], [4], [5], [•], [6], [0], [0].
- Page 30 BASIC OPERATION D Receiving TV channels Available TV channels depends on the version. Refer to the TV frequency table (p. 83) for details. Some channels are set [DIAL] as skip channels. Refer to the skip channel setting (p. 26) for details.
- Page 31 BASIC OPERATION D TV skip scan D TV skip channel setting The transceiver automatically programs the receivable TV The skip channel setting can be set manually. channels as non-skip channels and others as skip channels. q Select TV mode with [CALL/TV]. q Select TV mode with [CALL/TV].
-
Page 32: I Rit Function
BASIC OPERATION I RIT function I Attenuator function To compensate for the off frequency of a transmitting station, The attenuator prevents a desired signal from distorting when the transceiver has receive incremental tuning for receiving fre- very strong signals are near the desired frequency or when quencies above 630.000 MHz. -
Page 33: I Transmitting
BASIC OPERATION I Transmitting D Amateur band operation D Operating band and w Push and hold [PTT] to transmit, then speak into the microphone. frequency setting CAUTION: Transmitting without • TX/RX indicator lights red. q Select VFO mode with [VFO]. an antenna may damage the trans- •... -
Page 34: I Repeater Operation
BASIC OPERATION I Repeater operation r Push and hold [PTT] to transmit. When using a repeater, the transmit frequency is shifted from • The displayed frequency au- the receive frequency by the offset frequency. (p. 31) It is con- tomatically changes to the venient to program repeater information into memory chan- transmit frequency (repeater nels. - Page 35 BASIC OPERATION D Checking the repeater input signal D Off band indication The transceiver can check whether the other station’s trans- If the transmit frequency is out of the amateur band, the off mit signal can be received directly or not. band indication “OFF”...
-
Page 36: I Duplex Operation
BASIC OPERATION I Duplex operation D Setting duplex direction D Setting offset frequency ➥ Push [4 DUP] for 1 sec. to select “– DUP” or “DUP”. When communicating through a repeater, the transmit fre- • “–DUP” or “DUP” indicates the transmit frequency for minus shift quency is shifted from the receive frequency by an amount or plus shift, respectively. -
Page 37: I Split Operation
BASIC OPERATION I Split operation D Split frequency operation example Split frequency operation allows you to transmit and receive on two different frequencies in the same band. The split fre- [EXAMPLE]: VFO A FM 145.240 MHz quency operation is performed using 2 frequencies, one in VFO B FM 145.340 MHz VFO A and one in B. -
Page 38: I Auto Repeater Function
BASIC OPERATION I Auto repeater function • Korea version FREQUENCY RANGE SHIFT DIRECTION (U.S.A. and Korea versions only) 439.000–440.000 MHz “–DUP” appears The U.S.A. and Korea versions automatically activate the re- peater settings (duplex ON/OFF, duplex direction, tone en- q Select VFO mode with [VFO]. coder ON/OFF) when the operating frequency falls within or w Push [8 SET] for 1 sec. -
Page 39: I 1750 Hz Tone
BASIC OPERATION I 1750 Hz tone u Push and hold [PTT] to transmit. Some European repeaters require a 1750 Hz tone to be ac- i Release [PTT] to receive. cessed. For such European repeaters, perform the following. o Push and hold [SQL] to check whether the other station’s •... -
Page 40: Memory/Call Channels
MEMORY/CALL CHANNELS I General D Default memory contents example CHANNEL DESCRIPTION The transceiver has 500 memory channels, 50 scan edge • Regular memory channel channels and 5 call channels for storage of often-used fre- • Default memory channel example quencies. 000–499 Mch 000 151.000 MHz... -
Page 41: I Calling Up Memory Channels
MEMORY/CALL CHANNELS I Calling up memory channels ➲ CONVENIENT D Selecting with tuning dial Memory channels can be selected with the [DIAL] and keypad. The memory channels (000–099) can q Push [MR] to select memory mode. be selected with 1 or 2 digits plus [MR]. w Rotate [DIAL] to select the desired •... -
Page 42: I Programming Memory Channels
MEMORY/CALL CHANNELS I Programming memory channels D Programming a memory channel Program the desired frequency into a memory channel, call channel or scan edge channel as follows. [EXAMPLE]: 433.520 MHz into Mch 11 The memory channels are shared with all bands. Memory q Select VFO mode with [VFO]. -
Page 43: I Transferring Memory Contents
MEMORY/CALL CHANNELS I Transferring memory contents to VFO D Auto memory channel increment While programming a memory channel, the next memory This is convenient when operating around a memory or call channel can be selected automatically. This is convenient channel. when programming memory channels one after another. -
Page 44: I Copying Memory Contents
MEMORY/CALL CHANNELS I Copying memory contents I Memory names This is convenient when programming memory contents into Each memory, scan edge and call channels can be pro- a scan edge channel or call channel. grammed with an alphanumeric name such as a repeater •... - Page 45 MEMORY/CALL CHANNELS t Rotate the tuning dial to select the desired character. The memory names are automatically programmed into the memory channels. • See the following list for available characters. y Push [BAND] to advance the cursor. • Rotating the tuning dial while pushing [BAND] also selects the cursor.
-
Page 46: I Memory Bank
MEMORY/CALL CHANNELS I Memory bank The transceiver has 500 memory channels that can be as- Memory banks are used for arrangement of a memory signed to 18 banks for faster memory access, memory channel. When you edit the original memory channel con- arrangement, etc. - Page 47 MEMORY/CALL CHANNELS VFO mode Release [CALL/TV]. SKIP [DIAL] t Push [BAND] to select memory bank. q Push [MR] to select memory mode. y Rotate [DIAL] to select memory bank channel. w Select Mch with [DIAL]. [BAND] [MR S.MW] [CALL/TV] Memory bank and Selected memory channel.
-
Page 48: I Memory Clear
MEMORY/CALL CHANNELS I Memory clear r Push [MR S.MW] for 1 sec. to clear the selected memory Unwanted memory channels can be cleared (erased). Before clearing a memory channel make sure it is no longer needed channel. as cleared memories cannot be recalled. Scan edges (0A/0B) •... -
Page 49: I Call Channel
MEMORY/CALL CHANNELS I Call channel 5 call channels are available to store the most-often-used fre- • Call channel example (depends on version) quencies for quick recall. 50MHz band call channel UHF band call channel The call channels can be programmed in a similar manner to memory channel programming. -
Page 50: Scan Operation
SCAN OPERATION I Scan types Up to 25 programmed scan ranges (0A/0B to 24A/24B), full memory scan, select band scan and memory bank scan pro- vide scanning versatility. Each scan can have skip channels programmed. D VFO scans D Memory scans FULL SCAN (p. -
Page 51: I Vfo Scan
SCAN OPERATION I VFO scan q Select VFO mode with [VFO]. w Push [5 SKIP] for 1 sec. to toggle the frequency skip func- tion ON or OFF. The following scans are available for the VFO scan. • “P SKIP” appears when the frequency skip function is turned ON. e Set the squelch level, if desired. -
Page 52: I Frequency Skip Function
SCAN OPERATION I Frequency skip function I Skip channel setting Unwanted frequencies can be skipped and programmed as Memory channels can be set to be skipped for memory skip skip channels when full scan, band scan or programmed scan scan. In addition, memory channels can be set to be skipped is pausing. -
Page 53: I Memory Scan
SCAN OPERATION I Memory scan q Push [MR] to enter the memory bank mode. • Pushing [MR] toggles the memory channel and memory bank modes. Memory scan repeatedly scans all memory channels except • Program 2 or more memory channels to a memory bank in ad- skip channels. -
Page 54: I Scan Notes
SCAN OPERATION I Scan notes D Squelch setting D When receiving a signal Scanning stops when the squelch opens. Make sure the The scan pauses according to the scan pause time (default: squelch is set to the threshold point or desired squelch level. 10 sec.). -
Page 55: Priority Watch
PRIORITY WATCH I Priority watch types If the pocket beep function is activated, the transceiver au- tomatically selects the tone squelch function when priority Priority watch checks for signals on a frequency every 5 sec. watch starts. while operating on a VFO frequency or scan. The transceiver has 6 priority watch types to suit your needs. -
Page 56: I Priority Watch Operation
PRIORITY WATCH I Priority watch operation u Push [VFO] to exit set mode and start the priority watch. D Memory channel watch • The transceiver checks the memory channel frequency every While operating on a VFO frequency, priority watch checks 5 sec. - Page 57 PRIORITY WATCH D VFO scan with memory channel watch D Memory scan watch While scanning in VFO mode, priority watch checks for sig- While operating on a VFO frequency, priority watch checks nals in the selected memory channel every 5 sec. for a signal in memory channels every 5 sec.
- Page 58 PRIORITY WATCH D VFO scan with memory scan watch D Call channel watch While scanning in VFO mode, priority watch checks for sig- While operating on a VFO frequency, priority watch checks nals in memory channels every 5 sec. for a signal in the selected call channel every 5 sec. q Select memory mode.
- Page 59 PRIORITY WATCH D VFO scan with call channel watch While scanning in VFO mode, priority watch checks for sig- nals in the selected call channel every 5 sec. q Select VFO mode. w Push [CALL/TV] to select call channel mode. e Rotate [DIAL] to select the desired call channel.
-
Page 60: Set Mode
SET MODE I Set mode D Entering set mode DExpanded set mode ON/OFF q Push [8 SET] for 1 sec. to enter set q Push [8 SET] for 1 sec. to enter set Set mode is used for programming in- mode. -
Page 61: I Set Mode Items
SET MODE I Set mode items Set mode is used for programming infrequently changed val- ues or conditions of functions. EXP1 (Expanded set mode 1) General set mode STOP B Scan stop beep (p. 62) STOP L Scan stop LED (p. 62) R TONE Repeater tone (p. - Page 62 SET MODE • Repeater tone (R TONE) • DTCS squelch code (CODE) Selects the tone encoder frequency for accessing a repeater, Selects the DTCS squelch code from one of 104 available etc. from one of 50 available tone frequencies. codes. •...
- Page 63 SET MODE • Scan resume time (RESUME) • Priority watch (PRIO) Selects the scan resume time of a paused frequency after the Activates priority watch or priority watch with alert (BELL). received signal disappears. • OFF The priority watch is •...
- Page 64 SET MODE • Beep tone (BEEP) • Busy LED (BUSY) Turns the confirmation beep ON or OFF. The TX/RX indicator lights green while receiving a signal or when the squelch is open. This indication can be turned OFF • ON The confirmation beep is turned to conserve the battery power, if desired.
- Page 65 SET MODE • Power save (P SAVE) • Monitor switch action (MONI) The power save function reduces the current drain to con- The monitor switch can be set as a ‘sticky’ switch. When set serve battery power. This item sets the power save duty to the sticky condition, each push of [SQL] toggles the moni- cycle—the ratio of receive circuit on to receive circuit off while tor function on and off.
- Page 66 SET MODE • Auto repeater (AUTO RP) • Optional HM-75A function (MIC) The auto repeater function automatically turns ON or OFF the Microphone simple mode is used to change the function as- duplex operation with specified shift direction and tone en- signments for switches on the optional HM-75A REMOTE CON- coder, when the operating frequency falls within or outside of...
- Page 67 SET MODE • Weather Alert (WX ALT) • Scan stop LED (STOP L) Turns the scan stop LED ON or OFF. (USA version only) • Turn the expanded set mode 1 ON in advance. Turns the weather alert function ON or OFF. •...
- Page 68 SET MODE • Backlighting color (COLOR) • Auto power ON (AP ON) Selects the backlighting color between green, orange or red. Turns the transceiver power ON after 30 min. to 24 hrs. in 30 • Turn the expanded set mode 1 ON in advance. min.
- Page 69 SET MODE • PTT lock (PTT LK) • Opening message (OPN.MSG) Turns the PTT lock ON or OFF. Turns the opening message ON or OFF. • Turn the expanded set mode 1 ON in advance. • Turn the expanded set mode 1 ON in advance. •...
- Page 70 SET MODE • DTCS phase mode (DTCS P) • Time-out timer (TOT) Selects the DTCS phase mode. To prevent accidental prolonged transmission, etc., the trans- • Turn the expanded set mode 2 ON in advance. ceiver has a time-out timer. This timer cuts a transmission OFF after 1, 3, 5 or 10 min.
- Page 71 SET MODE • Split operation (SPLIT) • Morse code synthesizer (MC SYN) Turns the split operation ON or OFF. Split frequency opera- The transceiver announces the operating frequency or TV tion allows you to transmit and receive on two different fre- channel number in Morse code.
-
Page 72: Other Functions
OTHER FUNCTIONS I Programming a DTMF code r Push the desired keys to input the characters. DTMF codes are used for autopatching, accessing repeaters, • [VFO] inputs “A,” [MR] inputs “B,” [CALL/TV] inputs “C,” [BAND] controlling other equipment, etc. The transceiver has 10 inputs “D,”... -
Page 73: I Transmitting A Dtmf Code
OTHER FUNCTIONS I Transmitting a DTMF code D Transmitting from DTMF memory D Transmitting a DTMF code directly The selected DTMF code is transmitted at each push of the DTMF code can be transmitted via keypad directly while [SQL] switch while transmitting. transmitting. -
Page 74: I Clearing A Dtmf Memory
OTHER FUNCTIONS I Clearing a DTMF memory I Confirming a DTMF memory An unwanted DTMF memory can be cleared (erased). The DTMF memory can be confirmed with a DTMF tone. q Push [• DTMF.M] for 1 sec. to enter DTMF memory mode. q Push [•... -
Page 75: I Tone Frequency And Dtcs Code
OTHER FUNCTIONS I Tone frequency and DTCS code D Setting subaudible tones for D Setting DTCS code for • Subaudible (repeater) tone Some repeaters require subaudible repeater or tone squelch DTCS squelch or beep tones to be accessed. Subaudible tones are superimposed over your nor- q Push [8 SET] for 1 sec. -
Page 76: I Tone/Dtcs Squelch
OTHER FUNCTIONS I Tone/DTCS squelch I Pocket beep function q Set the desired operating frequency, CTCSS tone and q Set the desired operating frequency. w Set the desired CTCSS tone or DTCS code. DTCS code. w Push [2 TONE] for 1 sec. one or more times to activate the e Push [2 TONE] for 1 sec. -
Page 77: I Available Tone Frequencies
OTHER FUNCTIONS I Available tone frequencies I Available DTCS codes The transceiver has 50 tone frequencies for repeater and The transceiver has 104 DTCS codes for DTCS squelch and tone squelch (CTCSS)/pocket beep operation. Separate tone DTCS beep. frequencies can be set for repeater and tone squelch/pocket beep operation. -
Page 78: I Tone Scan
OTHER FUNCTIONS I Tone scan The transceiver can detect the subaudible tone frequency and Tone scan for tone squelch DTCS code in a received signal. By monitoring a signal that [DIAL] is being transmitted on a repeater input frequency, you can determine the tone frequency required to access the repeater. -
Page 79: I Beep Tones
OTHER FUNCTIONS I Beep tones I Lock function You can select to have confirmation beeps sound at the push The lock function prevents accidental frequency changes and of a switch. The output level can be adjusted within 32 levels accidental function access. or to the related level of the volume. -
Page 80: I Morse Code Synthesizer
OTHER FUNCTIONS I Morse code synthesizer I Power save The transceiver announces the operating frequency or TV The power save function reduces the current drain to con- channel number in Morse code. The keying speed can be ad- serve battery power. justed within 10 to 25 WPM in 5 WPM steps for your conve- nience. -
Page 81: I Time-Out Timer
OTHER FUNCTIONS I Time-out timer I Auto power OFF To prevent accidental prolonged transmission, etc., the trans- The transceiver can be set to automatically turn OFF after a ceiver has a time-out timer. This timer cuts a transmission specified period with a beep when no switch is pushed. OFF after 1, 3, 5 or 10 min. -
Page 82: I Weather Channel Operation
OTHER FUNCTIONS I Weather channel operation D D Weather alert function NOAA broadcast stations transmit weather alert tones before (USA version only) important weather announcements. When the weather alert There are 10 weather channels for moni- function is turned ON, the selected weather channel is moni- tored every 5 sec. - Page 83 OTHER FUNCTIONS NOTE: While receiving a signal (on a frequency other than the weather alert ON frequency), the receiving signal or audio will be interrupted momentarily every 5 sec. (approx.) in the case that the alert function is turned ON. This symp- tom is caused by the WX alert function.
-
Page 84: I Cloning Function
OTHER FUNCTIONS I Cloning function The optional CS-T90A and the optional CLONING SOFTWARE The IC-T90A has transceiver-to-transceiver data cloning ca- OPC-478 are available to clone and edit CLONING CABLE pability. This function is useful when you want to copy all of ®... -
Page 85: I Resetting
OTHER FUNCTIONS I Resetting D All reset D Partial reset The function display may occasionally display erroneous information (e.g. q Push [POWER] for 2 sec. to turn q Push [POWER] for 2 sec. to turn when first applying power). This may be power OFF. -
Page 86: Hm-75A Remote Control Microphone
HM-75A REMOTE CONTROL MICROPHONE OPTIONAL The optional HM-75A allows you to remotely select operating • NORM-1: (default) frequencies, memory channels, etc. [A] Selects band. [B] Toggles VFO and memory. Remote control functions can be selected from 3 settings. [Y] [UP] These can be selected in set mode. -
Page 87: Troubleshooting
TROUBLESHOOTING If your transceiver seems to be malfunctioning, please check the following points before sending it to a service center. PROBLEM POSSIBLE CAUSE SOLUTION REF. No power comes ON. • The batteries are exhausted. • Replace the batteries or charge the battery pack. pgs. -
Page 88: Tv Frequency Table
TV FREQUENCY TABLE The following tables show the channels versus video and audio frequencies depending on each version. I U.S.A. channels I CCIR channels Video Audio Video Audio Video Audio Video Audio Video Audio 55.25 59.75 543.25 547.75 687.25 691.75 41.25 46.75 551.25... - Page 89 TV FREQUENCY TABLE I Australian channels I Taiwan channels Video Audio Video Audio Video Audio Video Audio Video Audio 46.25 51.75 604.25 609.75 772.25 777.75 175.25 179.75 727.25 732.75 57.25 62.75 611.25 616.75 779.25 784.75 181.25 185.75 735.25 740.75 64.25 69.75 618.25 623.75...
- Page 90 TV FREQUENCY TABLE I China channels I Indonesian channels Video Audio Video Audio Video Audio Video Audio Video Audio 49.75 56.25 631.25 637.75 847.25 853.75 48.25 53.75 607.25 612.75 57.75 64.25 639.25 645.75 855.25 861.75 55.25 60.75 615.25 620.75 65.75 72.25 647.25 653.75...
- Page 91 TV FREQUENCY TABLE I Italian channels I FOT channels Video Audio Video Audio Video Audio Video Audio Video Audio 823.25 828.75 53.75 59.25 607.25 612.75 823.25 828.75 175.25 181.75 831.25 836.75 62.25 67.75 615.25 620.75 831.25 836.75 183.25 189.75 839.25 844.75 82.25 87.75...
-
Page 92: Specifications
SPECIFICATIONS D General • Usable temp. range : +14°F to +140°F; • Frequency coverage (unit: MHz) –10°C to +60°C Transmit Receive • Tuning steps : 5, 6.25, 8.33, 9, 10, 12.5, 15, 20, U.S.A 50–53.995, 0.495–824.000, 25, 30, 50, 100 and 200 kHz Canada 144–148, 430–450* 849–869.000,... - Page 93 SPECIFICATIONS D Receiver • Selectivity (except WFM) : Less than 15 kHz/–9 dB • Receive system : Double-conversion More than 30 kHz/–60 dB superheterodyne • Spurious and image rejection ratio: • Intermediate frequencies : 1st 69.45 MHz (FM/AM) 50, 144 MHz Less than –60dB 13.35 MHz (WFM) 430 (440) MHz...
-
Page 94: Options
OPTIONS AD-92SMA ANTENNA CONNECTOR ADAPTER BP-217 Li-Ion BATTERY PACK Allows you to connect an antenna with a BNC connector. 7.4 V/1300 mAh Lithium Ion battery pack. Approx. 6 hrs. and (SMA to BNC adapter) 20 min. operating time in 50MHz band with high power, Tx : Rx : Standby = 1:1:8. - Page 95 OPTIONS Flexible boom micro- Allows you to transfer data from memories, etc. and quickly VS-1 HS-94 ® phone and rotating ear- and easily edit and store data via a PC for Microsoft ® piece with a spring Windows 95/98 and ME. 1 RS-232C (COM) port is required. earhook.
- Page 96 Blank page...
-
Page 97: Pocket Guide
POCKET GUIDE Important operating instructions are summed up in this and the following page for your simple reference. By cutting along the line and folding on the dotted line, it will become a card sized operating guide which can easily be carried in a card case or wallet, etc. - Page 98 QUICK REFERENCE...
- Page 100 Count on us! A-6134H-1EX Printed in Japan 1-1-32 Kamiminami, Hirano-ku, Osaka 547-0003 Japan © 2002 Icom Inc.