Table of Contents
Advertisement
Available languages
Available languages
Quick Links
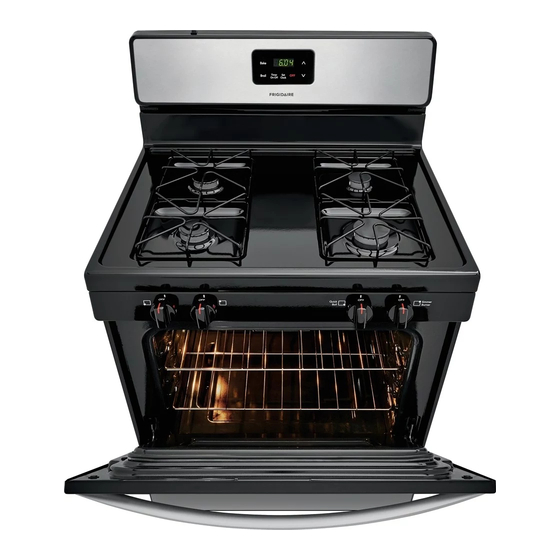
INSTALLATION INSTRUCTIONS - FREESTANDING GAS RANGE
INSTALLATION AND SERVICE MUST BE PERFORMED BY A QUALIFIED INSTALLER.
IMPORTANT: SAVE FOR LOCAL ELECTRICAL INSPECTOR'S USE. READ AND SAVE THESE
• A child or adult can tip the range
and be killed.
• Verify the anti-tip device has been
installed to fl oor or wall.
• Ensure the anti-tip device is re-engaged when the
range is moved to fl oor or wall.
• Do not operate the range without the anti-tip device in
place and engaged.
• Failure to follow these instructions can result in death
or serious burns to children and adults.
Range
leveling leg
To check if the anti-tip bracket is installed properly,
use both arms and grasp the rear edge of range back.
Carefully attempt to tilt range forward. When properly
installed, the range should not tilt forward.
Refer to the anti-tip bracket installation instructions
supplied with your range for proper installation.
If the information in this manual
is not followed exactly, a fi re or explosion may
result causing property damage, personal
injury or death.
FOR YOUR SAFETY:
— Do not store or use gasoline or other
flammable vapors and liquids in the
vicinity of this or any other appliance.
— WHAT TO DO IF YOU SMELL GAS:
• Do not try to light any appliance.
• Do not touch any electrical switch; do not
use any phone in your building.
• Immediately call your gas supplier from
a neighbor's phone.
supplier's instructions.
• If you cannot reach your gas supplier, call
the fi re department.
— Installation and service must be performed
by a qualifi ed installer, service agency or
the gas supplier.
INSTRUCTIONS FOR FUTURE REFERENCE.
Tip Over Hazard
Anti-Tip
bracket
Follow the gas
Refer to your serial plate for applicable agency
certifi cations
Provide proper fuel type
Before proceeding: Your range is factory preset to oper-
ate on natural gas. If L.P. conversion is needed, contact
your local L.P. Gas provider for assistance.
The L.P. conversion kit may be located on the lower rear
back panel of the range. If no L.P. kit is provided, contact
your product dealer to obtain the correct L.P. conversion
kit.
Important notes to the installer
•
Read all instructions contained in these installation
instructions before installing range.
•
Remove all packing material from the oven
compartments before connecting the gas and electrical
supply to the range.
•
Observe all governing codes and ordinances.
•
Be sure to leave these instructions with the consumer.
Important notes to the consumer
•
Keep these instructions with your Use & Care Guide
for future reference.
•
Be sure your range is installed and grounded properly
by a qualifi ed installer or service technician.
Special instructions for appliances installed in the State of
Massachusetts:
This appliance can only be installed in the State of
Massachusetts by a Massachusetts licensed plumber or
gas fi tter. When using a fl exible gas connector, it must
not exceed 3 feet (36 inches) in length. A "T" handle type
manual gas valve must be installed in the gas supply line
to this appliance.
1
316903002 Rev A (1304)
Advertisement
Table of Contents

Related Manuals for Frigidaire FFGF3016TM


Summary of Contents for Frigidaire FFGF3016TM
- Page 1 INSTALLATION INSTRUCTIONS - FREESTANDING GAS RANGE INSTALLATION AND SERVICE MUST BE PERFORMED BY A QUALIFIED INSTALLER. IMPORTANT: SAVE FOR LOCAL ELECTRICAL INSPECTOR’S USE. READ AND SAVE THESE INSTRUCTIONS FOR FUTURE REFERENCE. Tip Over Hazard • A child or adult can tip the range and be killed.
-
Page 2: Important Safety Instructions
INSTALLATION INSTRUCTIONS - FREESTANDING GAS RANGE IMPORTANT SAFETY INSTRUCTIONS DO NOT MAKE ANY ATTEMPT TO OPERATE THE ELECTRIC IGNITION OVEN DURING • Installation of this range must conform with local codes AN ELECTRICAL POWER FAILURE. RESET ALL OVEN or, in the absence of local codes, with the National CONTROLS TO “OFF”... - Page 3 INSTALLATION INSTRUCTIONS - FREESTANDING GAS RANGE Tools you will need Tools (Wear safety glasses when using tools): For leveling legs and Anti-Tip Bracket: • Adjustable wrench or channel lock pliers (Fig. a) Fig. a Fig. e • 5/16” Nutdriver or fl at head screwdriver (Fig. b) •...
- Page 4 INSTALLATION INSTRUCTIONS - FREESTANDING GAS RANGE Installation with cabinets Check location where the range will be installed for proper electric and gas supply, and stability of the fl oor. The dimensions shown here 30” must be used and are minimal 30”...
-
Page 5: Install Anti-Tip Bracket
INSTALLATION INSTRUCTIONS - FREESTANDING GAS RANGE Install anti-tip bracket IMPORTANT SAFETY WARNING! To reduce the risk of tipping of the range, the range must be secured to the fl oor by properly installed an- ti-tip bracket and screws packed with the range. Fail- ure to install the anti-tip bracket will allow the range to tip over if excessive weight is placed on an open door or if a child climbs upon it. -
Page 6: Provide An Adequate Gas Supply
INSTALLATION INSTRUCTIONS - FREESTANDING GAS RANGE Provide an adequate gas supply. Connect range to gas supply. Please note: Operation at elevations above 2000 ft., Note: To prevent leaks use pipe joint sealant on all male appliance rating shall be reduced at the rate of 4 percent (outside) pipe threads. -
Page 7: Checking Manifold Gas Pressure
INSTALLATION INSTRUCTIONS - FREESTANDING GAS RANGE c. Tighten the gas supply fi tting and/or appliance conduit Checking manifold gas pressure to fl are union adaptor on the right side of the pressure Do not use fl ame to check for gas leaks. regulator (refer to Fig. -
Page 8: Electric Requirements
INSTALLATION INSTRUCTIONS - FREESTANDING GAS RANGE Read the following electrical Check burner cap placement. connection details before It is very important to be sure that all surface burner caps connecting electricity to range. and burner grates are properly installed and in the correct locations before operating the appliance. -
Page 9: Check Ignition Of Surface Burners
INSTALLATION INSTRUCTIONS - FREESTANDING GAS RANGE Check ignition of surface burners. 5/8” Burner fl ame size Operation of electric igniters should be checked after range and supply line connectors have been carefully Cooktop checked for leaks and range has been connected to elec- tric power. -
Page 10: Make Sure Range Is Level
INSTALLATION INSTRUCTIONS - FREESTANDING GAS RANGE Adjust air shutter - lower oven. Make sure range is level. To determine if the oven burner fl ame is proper, remove Level the range by placing a level horizontally on an oven the oven bottom panel and lower burner baffl e (Refer to rack. - Page 11 INSTRUCCIONES DE INSTALACIÓN - ESTUFA INDEPENDIENTE LA INSTALACIÓN Y EL SERVICIO (DE MANTENIMIENTO/REPARACIÓN) DEBEN SER REALIZADOS POR UN INSTALADOR CALIFICADO. IMPORTANTE: CONSERVE ESTAS INSTRUCCIONES PARA USO DEL INSPECTOR LOCAL DE ELECTRICIDAD. LEA Y CONSERVE ESTAS INSTRUCCIONES PARA REFERENCIA FUTURA. WARNING: Riesgo de volcamiento •...
-
Page 12: Instrucciones Importantes De Seguridad
INSTRUCCIONES DE INSTALACIÓN - ESTUFA INDEPENDIENTE INSTRUCCIONES IMPORTANTES DE WARNING: NO INTENTE UTILIZAR EL ENCENDIDO ELÉC- SEGURIDAD TRICO DEL HORNO CUANDO HAYA UNA FALLA ELÉCTRICA. EN CASO DE FALLA ELÉCTRICA, RESTABLEZCA TODOS LOS • La instalación de esta estufa debe realizarse de acuerdo con CONTROLES DEL HORNO A LA POSICIÓN “APAGADO”. - Page 13 INSTRUCCIONES DE INSTALACIÓN - ESTUFA INDEPENDIENTE Herramientas necesarias Herramientas (Utilice lentes de seguridad cuando use las herramientas): Para nivelar las patas e instalar el soporte antivuelco • Llave regulable o pinzas Channel-Lock (Fig. a) Fig. a • Destornillador para tuercas de 5/16” o destornillador plano (Fig. b) Fig.
- Page 14 INSTRUCCIONES DE INSTALACIÓN - ESTUFA INDEPENDIENTE Instalación con gabinetes Verifi que que el piso sea estable y que haya suministros eléctrico y de gas ade- cuados en la ubicación de instalación de la estufa. Debe utilizar las dimensiones que se 30”...
-
Page 15: Instalación Del Soporte Antivuelco
INSTRUCCIONES DE INSTALACIÓN - ESTUFA INDEPENDIENTE Instalación del soporte antivuelco SOPORTE DE FIJACIÓN (ÚNICAMENTE PARA INSTALACIÓN EN EL PISO) ¡ADVERTENCIA IMPORTANTE DE Más Pata de 1 1/4" SEGURIDAD! niveladora (3 cm) Para minimizar el riesgo de vuelco, la estufa debe fi jarse al piso con los tornillos y el soporte antivuelco debidamente instalados que se proporcionan con la estufa. - Page 16 INSTRUCCIONES DE INSTALACIÓN - ESTUFA INDEPENDIENTE Proporcione un suministro Conexión de la estufa al suministro adecuado de gas. de gas. Tenga en cuenta lo siguiente: Para el uso de la estufa en altitudes Nota: Para evitar pérdidas, coloque sellador para juntas de tubería superiores a los 2.000 pies (610 m), el régimen nominal del electro- en todas las roscas macho (exterior).
- Page 17 INSTRUCCIONES DE INSTALACIÓN - ESTUFA INDEPENDIENTE Verifi cación de la presión de gas del múltiple c. Apriete el accesorio del suministro de gas y/o el conducto del electrodoméstico al adaptador de unión al lado derecho del WARNING: regulador de presión (consulte la Fig. 10) usando NO MÁS DE No use una llama para verifi...
- Page 18 INSTRUCCIONES DE INSTALACIÓN - ESTUFA INDEPENDIENTE Lea la siguiente información de Verifi que la colocación de la tapa conexión eléctrica antes de del quemador. conectar el suministro eléctrico a la Es muy importante asegurarse de que todas las tapas y rejillas de estufa.
- Page 19 INSTRUCCIONES DE INSTALACIÓN - ESTUFA INDEPENDIENTE Verifi que el encendido de los quemadores superiores. 5/8” Altura de la llama del quemador El funcionamiento de los encendedores eléctricos debe verifi carse después de que se hayan controlado atentamente los conectores de Cubierta de la línea de suministro y de la estufa en busca de escapes, y de que cocción...
- Page 20 INSTRUCCIONES DE INSTALACIÓN - ESTUFA INDEPENDIENTE Ajuste del obturador de aire del Asegúrese de que la estufa esté horno inferior. nivelada. Para determinar si la llama del quemador del horno es la correcta, Nivele la estufa mediante la colocación horizontal de un nivel en una retire el panel inferior del horno y el defl...