Advertisement
Available languages
Available languages
Quick Links
Advertisement

Related Manuals for Indesit IS5V5CCW/E


Summary of Contents for Indesit IS5V5CCW/E
- Page 1 IS5V5CCW/E IS5V5CCW/E IS5V5CCW/E...
- Page 2 Manuel d’utilisation Manuel d’utilisation Manuel d’utilisation Cuisinière pose-libre Cuisinière pose Cuisinière pose libre libre libre Table des matières Consignes de sécurité Consignes de sécurité Consignes de sécurité Consignes de sécurité GUIDE D'UTILISATION QUOTIDIENNE GUIDE D'UTILISATION QUOTIDIENNE GUIDE D'UTILISATION QUOTIDIENNE GUIDE D'UTILISATION QUOTIDIENNE Installation Installation Installation...
- Page 3 élevée lors de l'utilisation. Évitez tout contact avec les éléments chauffants. Les enfants de moins de CONSIGNES DE SÉCURITÉ 8 ans doivent être tenus à l'écart de l'appareil, à moins d'être sous surveillance constante IMPORTANT - À LIRE ET À RESPECTER Ne laissez jamais l'appareil sans surveillance Avant d’utiliser l’appareil, lire attentivement les pendant...
- Page 4 dell'apparecchio se non espressamente richiesto Se il cavo di alimentazione deve essere sostituito, rivolgersi a un centro di assistenza nel manuale d'uso. Tenere i bambini a distanza dal autorizzato. luogo dell'installazione. Dopo aver disimballato l'apparecchio, assicurarsi che non sia stato AVVERTENZA: Per evitare il rischio di scossa danneggiato durante il trasporto.
- Page 5 be vigilant when cooking foods rich in fat, oil or when adding alcoholic beverages - risk of fire. Use SAFETY INSTRUCTIONS oven gloves to remove pans and accessories. At the end of cooking, open the door with caution, IMPORTANT TO BE READ AND OBSERVED allowing hot air or steam to escape gradually Before using the appliance, read these safety before accessing the cavity - risk of burns.
- Page 6 WARNING: In order to prevent the For further information on the treatment, recovery and recycling of household electrical appliances, contact your local authority, the appliance from tipping, the retention chain collection service for household waste or the store where you purchased provided must be installed.
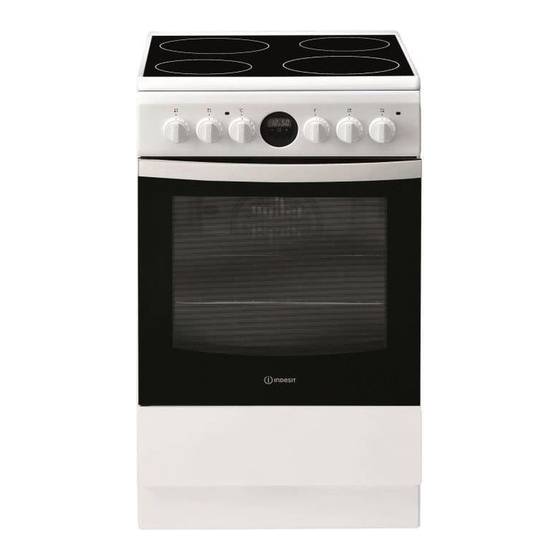
- Page 7 GUIDE D'UTILISATION QUOTIDIENNE Lire attentivement les Consignes de santé et de sécurité avant d'utiliser l'appareil. DESCRIPTION DU PRODUIT Plan de cuisson vitrocéramique Tableau de bord Support GRILLE Support LECHEFRITE GLISSIERES de coulissement niveau 5 niveau 4 niveau 3 niveau 2 niveau 1 Pied de réglage PANNEAU DE COMMANDES...
- Page 8 Conseils d’installation CARACTERISTIQUES TECHNIQUES Pour les modèles équipés d’une grille de réduction, Tension et voir plaquette signalétique fréquence n’utiliser cette dernière que pour le brûleur auxiliaire, d'alimentation : en cas d’utilisation de casseroles ayant moins de 12 cm de diamètre. - Consommation énergie ÉTIQUETTE ÉNERGIE et Utilisation du four...
- Page 9 Programmes de cuisson sans utiliser le tournebroche. Pour tous les programmes, vous pouvez sélectionner une température comprise entre 50°C et MAX., sauf Les cuissons GRIL, DOUBLE GRIL et DOUBLE GRIL pour : VENTILE doivent avoir lieu porte fermée. • GRIL et DOUBLE GRIL (il est conseillé dans ce cas En cas de cuisson en mode GRIL ou DOUBLE GRIL, de sélectionner MAX.);...
- Page 10 ATTENTION four est équipé d’un système d’arrêts de grilles qui permet de les retirer sans que ces dernières sortent entièrement du four.(1) P o u r s o r t i r complètement les grilles il suffit, comme illustré, de les soulever en les saisissant par l’avant et de les tirer (2).
- Page 11 Fonctionnement de l’horloge/Bip minute Programmation de la cuisson Icône PROCÉDURE DE CUISSON Sélectionnez un mode de cuisson avant la programmation. AFFICHAGE Programmation de la durée de cuisson •• •• Icône AUTO 1. Appuyez plusieurs fois sur le bouton jusqu’à ce que l’icône Icône MINUTERIE les chiffres DUR sur l’écran commencent à...
- Page 12 Utilisation du plan de cuisson vitrocéramique Conseils d’utilisation du plan de cuisson La colle utilisée pour les joints laisse des traces de • Utiliser des casseroles à fond plat et de forte épaisseur graisse sur le verre. Nous conseillons de les éliminer pour qu’elles adhèrent parfaitement à...
- Page 13 Tableau de cuisson Position du Aliments à cuire Poids Position Temps de Position Temps de sélecteur (Kg) gradins en préchauffage sélecteur de cuisson partant du bas (minutes) températures (minutes) Décongeler tout type Décongélation d’aliment Traditionnel Canard 65-75 Rôti de veau ou d 70-75 e bœuf Rôti de porc...
- Page 14 • Une fois que la table est propre, elle peut être traitée Veuillez vous référer au livret de garantie pour plus d'information sur la garantie. Les caractéristiques complètes de l’appareil, incluant les taux d’efficacité énergétique, peuvent être téléchargées de notre site Web www.indesit.com www.indesit.com www.indesit.com www.indesit.com...
- Page 15 CLICK & CLEAN - NETTOYER LA VITRE ENLEVER ET RÉINSTALLER LA PORTE Après avoir enlevé la porte et l'avoir placée sur une Pour enlever la porte, ouvrez-la complètement et surface matelassée, les poignées vers le bas, appuyez abaissez les loquets jusqu'à qu'ils soient déverrouillés. sur les deux fermetures en même temps et enlevez le bord supérieur de la porte en la tirant vers vous.
- Page 16 DAILY REFERENCE DAILY REFERENCE DAILY REFERENCE DAILY REFERENCE DAILY REFERENCE DAILY REFERENCE GUIDE GUIDE GUIDE GUIDE GUIDE GUIDE Read the safety instructions carefully before using the product PRODUCT DESCRIPTION 1.Glass ceramic hob 2.Control panel 3.Sliding grill rack 4.DRIPPING pan 5.Adjustable foot 6.GUIDE RAILS for the sliding racks 7.position 5 8.position 4...
- Page 17 START-UP AND USE Using the oven Oven light This is switched on by turning the SELECTOR knob The first time you use your appliance, heat the to any position other than “0”. It remains lit as long empty oven with its door closed at its maximum as the oven is operating.
- Page 18 Cooking modes FAN ASSISTED DOUBLE GRILL mode A temperature value can be set for all cooking modes The top heating element and the turnspit are activated between 50°C and Max, except for the following modes and the fan begins to operate. This combination of features increases the effectiveness of the unidirectional •...
- Page 19 Rotisserie To operate the rotisserie (see diagram) proceed as follows: 1. Place the dripping pan in position 1. 2. Place the rotisserie support in position 4 and insert the spit in the hole provided on the back panel of the oven. 3.
- Page 20 Clock/Minute Minder Operation Programming cooking COOKING PROCESS A cooking mode must be selected before icon programming can take place. DISPLAY •• •• AUTO Programming the cooking duration icon button several times until icon 1. Press the TIMER icon and the DUR digits on the DISPLAY begin to flash. 2.
- Page 21 Using the glass ceramic hob The glue applied on the gaskets leaves traces of Setting Normal or Fast Plate grease on the glass. Before using the appliance, we recommend you remove these with a special non- abrasive cleaning product. During the first few hours Cooking vegetables, fish of use there may be a smell of rubber which will Cooking potatoes (using steam) soups,...
- Page 22 Oven cooking advice table Selector knob Weight Cooking rack Preheating time Thermostat Cooking Food to be cooked setting (in kg) position from (minutes) knob time bottom setting (minutes) Defrosting All frozen food Convection Duck 65-75 Roast veal or beef 70-75 Pork roast 70-80 Biscuits (short pastry)
- Page 23 A complete product specification, including the energy efficiency ratings for this oven, can be read and downloaded from our website www.indesit.com...
- Page 24 REMOVING AND REFITTING THE DOOR To remove the door, open it fully and lower the After removing the door and resting it on a soft catches until they are in the unlock position. surface with the handle downwards, simultaneously press the two retaining clips and remove the upper edge of the door by pulling it towards you.
- Page 25 Min. 650 mm Min. 420 mm max. 15 mm...
- Page 26 380-400V 3N H05VV-F 5x2.5 CEI-UNEL 35746 380-400 V H05VV-F 4x4 CEI-UNEL 35746 220-230 V H05VV-F 3X4 CEI-UNEL 35746 After installing the power cable, screw the metal cover with three screws. Qidalandırma kabelini quraşdırdıqdan sonra üç vint ilə metal örtüyü bərkidin. След...
- Page 28 04/2022 - W11554844 XEROX FABRIANO www.indesit.com...