Table of Contents
Advertisement
Advertisement
Table of Contents

Related Manuals for Cateye Ergociser EC-1600


Summary of Contents for Cateye Ergociser EC-1600
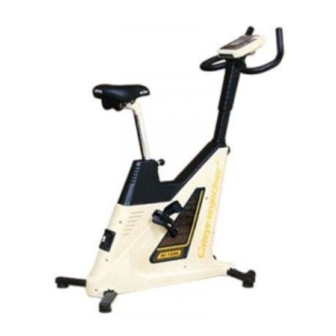
- Page 1 Cateye Ergociser MODEL EC-1600 OPERATING INSTRUCTIONS EC-1600...
-
Page 2: Table Of Contents
How to Use This Manual After you read the Starting up section of this manual, assemble your Cateye Ergociser™ and try it out . When you get used to the machine and de- velop a greater interest in it, please read the Opera- tion section in preparation to trying the machine's numerous functions. - Page 3 Name of parts ONTROL Printer Cover Thermal Paper EC-1600 HEART RATE TIME WORK RATE TIME Interval Training Preference INSTRUCTIONS TLD 1. 15 sec. work 45 sec. relief 1. Attach the pulse sensor. Dash (Sprint Power) Training 2. Press until desired program MODE TLD 2.
- Page 4 Select Switch Reading Stand (OPTION) Fixing Screw Holes Cable Inlet Paper Case Handlebar Lever Handlebar post Outer Cover Handlebar post Inner Cover Adjusting Knob Crank Pedal Front Leg/Leg pipe covers Caster Levelling Knob Control Unit Handlebar EC-1600 Paper Case Paper Case Guide Mounting screw holes Battery Case Pulse Sensor Jack...
-
Page 5: Important Safety Instructions
INTRODUCTION Thank you very much for your purchase of the Model EC-1600 Cateye Ergociser™. The model EC-1600 is a new high-tech exerciser with a built-in computerized training system designed specifically to promote cardiovascular fitness and overall endurance, the keystone of good health. With its endurance test program and four training programs, the EC-1600 will help you to maintain or improve your physical strength in a fun and pleasant way. -
Page 6: Assembling
Assembling Installing the control unit Adapting the pulse sensor How to adjust each part Your first ride The six programs of operation Using your Ergociser without a data card Make sure all components are included in a package. Control Unit Main Body Handlebar post Assembly Leg Covers (4 pcs.) - Page 7 Assembly 1. Attaching the legs 2. Mounting the handlebar post • Remove the two screws from the • Remove the handlebar post knob. respective leg pipes. The one with • Insert the handlebar post into the casters should be used as front leg. main body, with the post holes fac- •...
-
Page 8: Installing The Control Unit
NO.3-OFF ---------- kg judged. NO.3-ON ----------- lb • When the Model EC-1600 Cateye Ergociser™ leaves the factory, it is Caution: When oxygen uptake set for American use. max) is estimated in the... -
Page 9: Connecting The Pulse Sensor
Adapting the pulse sensor This model detects and 1. Connecting the pulse sensor displays your pulse rate during exercise by the pulse sensor from your • Insert the pulse sensor plug into earlobe. Being a sensitive the sensor jack on the back of con- trol unit. - Page 10 How to adjust each part 1. Adjusting the saddle 2. Adjusting the handlebar height height Handlebar height can be roughly se- lected in 3 steps, and further adjust- • Pulling on the spring lock pin will en- ment can be done by rotating the able you to move the seat post up or handlebar.
-
Page 11: Your First Ride
Model EC- when it is eligible for changing. Now, however, the 1600. goal is to get you acquainted with Model EC-1600, so if you change any of the numeral values, please return them to their original setting. -
Page 12: The Six Programs For Operation
(kg·m) and cadence stamina and energy. (rpm). • On the model EC-1600, 3 patterns of • In isopower training, you set the interval training programs are preset desired work intensity in watts. for developing dashing power, speed,... -
Page 13: Using Your Ergociser Without A Data Card
Using your Cateye Ergociser™ without a data card The red card you used on your first ride contains the data to select the type and condition of training. Without using this card, it is also possible to run through the same operations using the buttons on the control unit. - Page 14 Your strength level and training index Aerobic power measurement (Physical fitness test) Auto training Isopower (constant load) training Interval training Hill profile training Manual training Setting your own training pattern How to make a data card...
-
Page 15: Your Strength Level And Training Index
Your strength level and training index (1) Purpose of Exercise • Have you ever been out of breath after climbing a flight of stairs or after a brisk walk? When we are walking, running and even sleeping, our body is taking in oxygen and generating energy. Oxygen taken in by the lungs is sent to the entire body via the circulatory system. - Page 16 Your strength level and training index (2) The "Aerobic power measurement" program evaluates your physical fitness Physical Fitness Level level according to 5 levels, it also evaluates your maximum oxygen uptake and Training Index with an estimated value. Based on the result, you can choose your own train- ing index (program type and exercise intensity) from the following.
-
Page 17: Aerobic Power Measurement (Physical Fitness Test)
Aerobic power measurement (1) Select the Aerobic Power • For program selection see the Starting up section page 18. Measurement Program • Input your age, pulse limit, weight and sex. The initial display Input Conditions prior to input is as in the drawing. The numeric for age is blink- ing. - Page 18 (PWC max.) explained below, assuming that 1 litre of oxygen corresponds to 5.0 Kcal, and the human body efficiency rate for a bicycle exercise is 23% Maximum Physical Work Capacity (PWC max.) • In the Ergociser™ EC-1600 "Aerobic power measurement" program the weight of the pedals are changed at 3 levels, and the pulse rate at the end point of each level is measured.
-
Page 19: Automatic Training
Automatic training Select the Automatic • For program selection see the Starting up section page 18. Training Program Input Conditions • Input age, pulse limit, exercise time and the target pulse rate. The initial display before input is as in the drawing, with the nu- meric for age blinking. -
Page 20: Isopower (Constant Load) Training
Isopower (constant load) training Select the Isopower • For program selection see the Starting Up section page 18. Training Program • Input age, pulse limit, exercise time and set wattage. The initial Input Conditions display prior to input is as in the drawing. The numeric for age is blinking. -
Page 21: Interval Training
Interval training Select Interval Training • For program selection see the Starting up section page 18. Program • Input age, pulse limit, exercise time, set torque and the exercise Input Conditions pattern. • The initial display prior to input is as in the drawing. The nu- meric for age is blinking. -
Page 22: Hill Profile Training
Hill profile training Select the Hill Profile • For program selection see the Starting up section page 18. Training Program • Input pulse limit, exercise time, and the exercise pattern. The Input Conditions initial display prior to input is as in the drawing. The numeric for age is blinking. -
Page 23: Manual Training
Manual training Select the Manual Training • For program selection see the Starting up section page 18. Program • Input age, pulse limit, exercise time, and the setting torque Input Conditions value. The initial display prior to input is as in the drawing. The numeric for age is blinking. -
Page 24: Setting Your Own Training Pattern
Setting your own training pattern You can create your own training pattern as desired, for both interval training and hill profile training, and can keep them in memory for future use. Enjoy your exercise under your original training program on this model. It is 1 pattern each in the Interval training (TLD-4) and Hill profile training (PRF-9), that you can write in your own customized pattern. -
Page 25: How To Make A Data Card
How to make a data card If you record your training conditions to this "Data Card", you can set the conditions merely by inserting the card into the card inlet of the control unit. You can start a program just by inserting the card and pressing button, saving all the button operation process. -
Page 26: Setting The Date
External computer control via an RS232C terminal Using chestbelt heart rate sensor Setting the date Printing mechanism Troubleshooting and handling care Warranty service and optional parts Specifications... -
Page 27: External Computer Control Via Rs232C Terminal
External computer control via an RS232C terminal External computer control via an RS232C terminal If you connect the optional "RS232C Communication Kit," the Ergo- ciser™ can communicate with an external computer. Specifically, you can write a program with an external computer in Basic or in another computer language, and operate the Ergociser™... -
Page 28: Using Chestbelt Heart Rate Sensor
Using chestbelt heart rate sensor Wireless chestbelt sensor picks up your heart rate In place of the earlobe pulse sensor, the EC-1600 can also receive your pulse signal transmitted from a particular type of wireless chestbelt sensor. The "Wireless Pulse Sensor Kit" (an optional item) is recommended for the customers who may feel inconvenience in picking up the pulse rate from the earlobe. -
Page 29: Printing Mechanism
• Do not drive the printer without the thermal paper on it. If the ther- mal paper is unavailable, press the printer that the printer symbol • Please use the specified Cateye thermal paper (part #7226502) only. button and confirm on the LCD is not lit up before use. -
Page 30: Troubleshooting And Handling Care
Troubleshooting and handling care Troubleshooting Problems noted in the following chart are not disorders. Prior to seeking repair, read the contents of the entire chart first. Problem Item to check Display does not appear. Is the power supply connected? Is the power switch on? Isn't the cable of the AC Adapter damaged? Printer does not work. -
Page 31: Warranty Service And Optional Parts
Warranty service and parts Warranty service • Cat Eye Co., Ltd. guarantees that the Cateye Ergociser™ Model EC-1600 is free from material defects and malfunctions under cor- rect and normal use for three (3) years from the date of purchase. - Page 32 CO.,LTD. 2-8-25, Kuwazu, Higashi Sumiyoshi-ku, OSAKA, 546-0041 JAPAN PHONE: 81-6-6719-7781 FAX: 81-6-6719-2362 0689131 (E)