Table of Contents
Advertisement
Quick Links
Instructions for Set-up, Operation, Maintenance & Storage
H
W
OT
ATER
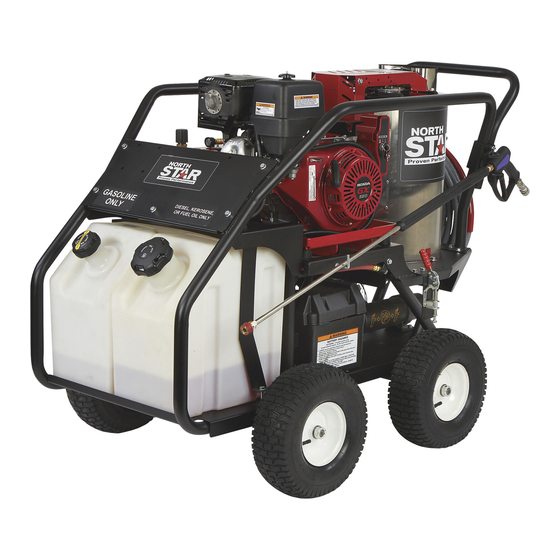
This pressure washer produces both cold and hot water high-pressure spray as well as wet steam. Cleaning
chemicals may be incorporated into the spray if desired. The pressure pump for this equipment is powered
by a gasoline internal combustion engine and the water is heated by a diesel, kerosene/fuel-oil fired, down
draft burner.
READ and UNDERSTAND this Owner's Manual and the Engine Owner's Manual completely
before attempting to set up and use the pressure washer! Failure to properly set up, operate, and
maintain this pressure washer could result in serious injury or death to operator or bystanders.
CO Poisoning
Skin/Eye Injury
Burns
Slips/FallsNOTE
Flying Debris
Fire/
Explosion
Chemical Exposure
Electric shock
A summary of
important
Any Questions, Comments, Problems, or Parts Orders
Owner's Manual
/S
P
TEAM
RESSURE
Portable Outdoor-Use Only
WARNING – READ THIS MANUAL
WARNING – SPECIAL HAZARDS
•
Exhaust from both the engine and burner contains carbon monoxide, a
poisonous gas that can cause carbon monoxide poisoning and possible death
if inhaled. ONLY run pressure washer OUTDOORS and at least 20 feet from
the home, away from windows, vents and air intakes, to allow proper
ventilation. If you start to feel sick, dizzy, or weak while using the pressure
washer, shut off the engine and get to fresh air RIGHT AWAY.
•
High-pressure spray can cause serious skin or eye injury, including injection
injury if fluid pierces the skin. Injection injury can result in blood poisoning
and/or severe tissue damage.
•
Hot spray can scald and burn skin.
•
Hot surfaces of wand, engine and burner, as well as hot exhaust from
both the engine and burner can cause burns.
•
Spray discharge can cause puddles and slippery surfaces.
•
Spray-gun kickback can cause operator loss of balance and falls.
•
High-pressure spray can cause surface damage and flying debris.
•
Engine and burner sparking can ignite fuel or other flammable liquids
or vapors in the vicinity.
•
Hot exhaust from engine and burner can ignite combustible materials.
•
Cleaning chemical vapors or contact with skin may be hazardous.
•
Spray contact with electrical sources can cause electric shock.
safety information is provided at the end of the manual.
Call NorthStar Product Support 1-800-270-0810
M157117B
ITEM NUMBER: 157117
SERIAL NUMBER: _____________
– 3500
W
ASHER
1
/ 3.5
PSI
GPM
Advertisement
Table of Contents

Related Manuals for North Star 157117


Summary of Contents for North Star 157117
- Page 1 M157117B ITEM NUMBER: 157117 SERIAL NUMBER: _____________ Owner’s Manual Instructions for Set-up, Operation, Maintenance & Storage – 3500 / 3.5 ATER TEAM RESSURE ASHER Portable Outdoor-Use Only This pressure washer produces both cold and hot water high-pressure spray as well as wet steam. Cleaning chemicals may be incorporated into the spray if desired.
- Page 2 Hazard Signal Word Definitions Equipment Protection Quick Facts STOP! Closely inspect to make sure no components are missing or damaged. See the Inspect Upon “Assembly and Initial Set-Up” section for instructions on whom to contact to report missing or Delivery damaged parts.
-
Page 3: Table Of Contents
Table of Contents About Your Pressure Washer ........................4 Specifications ..............................5 Component Identification ..........................6 Safety Labeling .............................. 8 Special Equipment Safety Features ......................9 Assembly and Initial Set-Up ........................10 Step 1. Unpacking & Delivery Inspection ....................10 Step 2. -
Page 4: About Your Pressure Washer
About Your Pressure Washer Thank you for purchasing a NorthStar hot water pressure washer! Your machine is designed for long life, dependability, and the top performance you demand. This pressure washer is designed to: 1) Produce a high-pressure wet steam spray or water spray (heated or unheated) -- up to 3.5 gallons per minute at 3500 psi. -
Page 5: Specifications
Specifications MODEL Model # 157117 FLOW OUTPUT Pressure Rating 3500 psi Flow Rate 3.5 gpm Maximum Temperature 250 F DIMENSIONS / COMPONENTS Length 59" Width 35.625" Height 43" Weight (fueled) 548 lbs. Pump Type 66DX Engine Model Honda GX390 Engine Type... -
Page 6: Component Identification
Component Identification SEE DETAIL D DETAIL D DETAIL C SEE DETAIL B SEE DETAIL A DETAIL A DETAIL B PRESSURE WASHER PUMP BURNER FUEL PUMP FUEL PUMP SHEAVE BELT, MICRO-V J 4 FAN, FLYWHEEL, RIB X 36" & STATOR ASSEMBLY AIR, FUEL, IGNITION SYSTEM Fig06883 Ref #... - Page 7 Component Identification cont’d REFERENCE GUIDE This is a backup safety feature, if the system pressure exceeds the set 1. High, PSI limit switch pressure this device will stop the burner from firing. 2. Flow Switch Mechanical device that senses water flow Steel piping wound together with an inlet for incoming cold water 3.
-
Page 8: Safety Labeling
Safety Labeling Fig157117-2 VIEW ROTATED FOR CLARITY Always make sure safety labels are in place and in good condition. If a safety label is missing or not legible, order new labels or unsafe operation could result. To order replacement safety labels, call NorthStar Product Support at 1-800-270-0810. -
Page 9: Special Equipment Safety Features
Special Equipment Safety Features High Pressure WARNING: If the high-pressure safety device ever discharges water, turn the Safety Device engine off and do not use the machine. Call Product Support at 1-800-270-0810. (Rupture Disc) This unit is equipped with a high-pressure safety feature. -
Page 10: Assembly And Initial Set-Up
Assembly and Initial Set-Up STEPS FOR ASSEMBLY / INITIAL SET-UP STEP 1. UNPACKING & DELIVERY INSPECTION STEP 2. ASSEMBLY STEP 3. INITIAL PUMP & ENGINE PREPARATION STEP 4. BATTERY INSTALLATION Each of these steps is discussed below: STEP 1. UNPACKING & DELIVERY INSPECTION Find and separate the components identified in Fig157117-3 –... - Page 11 Assembly and Initial Set-Up Steam Nozzle Nozzle Pack M8-1.25 Nylock Nut Qty-1 Qty-1 Qty-2 Part #801090 Part #800652 Part #777495 Bolt, 5/16-18 Hex Head Flange Bolt Qty-2 Hose Hook Part #82621 Qty-1 Part #800615 Chemical Injector Qty-1 Part #779614 Nut, 5/16-18 Hex Washer, 5/16 flat Flange Nyloc Qty-2...
-
Page 12: Step 2. Assembly
Assembly and Initial Set-Up STEP 2. ASSEMBLY You must assemble your pressure washer before it can be used. Refer to Fig157117-4 and follow the steps listed below: 5/16-18 X 3/4" TWO (2) INSTALL HOSE HOOK INTO FLANGE NUTS RIGHT SIDE OF HANDLE USING TWO (2) 5/16-18 X 3/4"... -
Page 13: Step 3. Initial Pump & Engine Preparation
Assembly and Initial Set-Up STEP 3. INITIAL PUMP & ENGINE PREPARATION Prepare Verify pump oil level. OIL CAP Water Pump Note: The pump is shipped with oil. OIL SIGHT GLASS 1. Remove shipping tape and black vent plug (if present) from oil fill cap. PLUG 2. -
Page 14: Moving And Handling
Moving and Handling WARNING The pressures washer is heavy. It can crush and cause serious injury if it rolls out of control or tips over. Follow the instructions below for safely moving the pressure washer. MOVING AND HANDLING HANDLE Fig157117-6 Moving your 1. -
Page 15: Before Each Use
Before Each Use Follow the steps below prior to each use of the pressure washer. STEPS TO FOLLOW BEFORE EACH USE STEP 1. CHECK EQUIPMENT STEP 2. ADD FUEL(S) STEP 3. SELECT SUITABLE WORKSITE STEP 1. CHECK EQUIPMENT Check/add Check/add pump oil. pump oil Caution: Never run the pump without sufficient lubrication! 1. -
Page 16: Step 2. Add Fuel(S)
Before Each Use 2) Check and clean the nozzle orifice. 3) Clean inlet filter. (See Maintenance instructions) Inspect fuel Always inspect (engine and burner) fuel systems & check for leaks BEFORE system starting pressure washer. Do not start pressure washer until all needed repairs have been completed. WARNING: Fuel leak hazard Gasoline and burner fuels are highly explosive and fuel leaks can result in fire or explosions. - Page 17 Before Each Use 2) Fill fuel tank OUTDOORS – never indoors. Fuel vapors can ignite if they collect inside an enclosure and explosion can result. 3) Stay away from all sources of heat, sparks, and flames. Do not smoke. 4) Never pump fuel directly into the gas tank or burner at a gas station – it could cause a static electric spark. Follow these steps to avoid static electric sparking during fueling: •...
-
Page 18: Step 3. Select A Suitable Worksite
Before Each Use STEP 3. SELECT SUITABLE OUTDOOR WORKSITE Before using the pressure washer, you must understand the criteria for selecting a suitable location for operation. Note that this pressure washer is for OUTDOOR USE only. WARNING: You must choose a suitable site for operating your pressure washer to avoid equipment damage and/or injury and possible death from carbon monoxide poisoning, fire/explosion, uncontrolled equipment movement/tip over, or slips and falls. - Page 19 Before Each Use 2. Away from Do not locate and use the pressure washer in the presence of flammable vapors, combustible dust, gases, or other potentially combustible materials. Burner is an open flame, dust, liquids, or which can ignite airborne dusts and flammable vapors. Operate only where open flame vapors or torch is permitted.
-
Page 20: Operation
Operation After you have checked and fueled the equipment and positioned it in a suitable worksite, it is time to start your pressure washer. The following are the procedures necessary for safe, successful operation of your pressure washer. WARNING Carefully read and make sure you understand all instructions and safety information before using the pressure washer. - Page 21 Operation Attach garden Acquire a suitable garden hose and attach to the water supply. hose to water supply 1. Acquire a suitable garden hose: a. The water supply garden hose must have an inside diameter of at least 5/8”. If the hose is more than 100 ft.
- Page 22 Operation Release the collar, making sure it springs back and re-seats to its original (non- retracted) position. (Fig. 8b). Check the connection by pulling on the hose to ensure a positive connection. Correct Insertion Not Fully Inserted Collar NOT Seated Fig.
-
Page 23: Step 2. Set Up For Chemical Spray (If Desired)
Operation Lance Coupler Nozzle Collar Fig. 9a 3. Release the collar, making sure it springs back and re-seats to its original (non- retracted) position. (Fig. 9b). Check the connection by pulling on the nozzle to ensure a tight connection -- if correctly inserted, nozzle will rotate but not pull out. WARNING: Make sure the nozzle is correctly inserted. -
Page 24: Step 3. Spraying
Operation • It mixes the cleaning chemical into a low-pressure spray. Cleaning chemicals applied under low pressure adhere better to the surface being cleaned, allowing the formula time to react and remove dirt more effectively. Note: An external chemical injector pump is not recommended for use with this pressure washer, and if used would obviously alter the 15 to 1 dilution ratio. - Page 25 Operation Instruct all operators. The pressure washer’s owner must instruct all operators and potential renters in safe set-up and operation. Do not allow anyone to operate the pressure washer who has not read the Owner’s Manual and been instructed on its safe use.
- Page 26 Operation be a small puncture wound that does not look serious. However, severe infection or reaction can result if proper medical treatment is not administered immediately by a doctor who is familiar with injection injuries. Seek medical aid for suspected carbon monoxide poisoning. The running engine gives off carbon monoxide, a poisonous gas that can kill you.
- Page 27 Operation DANGER: Do not inhale engine exhaust. It contains dangerous carbon monoxide that can kill you. Apply cleaning If desired, spray cleaning chemical at low pressure (with or without heated water). chemical (if desired) 1. Make sure the chemical injector is properly set up according to the instructions in Step 2, “Set Up for Chemical Spraying”.
- Page 28 Operation accumulated, causing potential explosion or fire hazard. • Do not attempt to set temperature limit above the preset limit. • Never touch hot burner surfaces and stay clear of burner exhaust. All are extremely hot and will burn you. •...
- Page 29 Operation injury or property damage. Do not spray brittle surfaces or breakable, fragile, or unsecured objects such as: o stucco or laminar flagstone o some painted surfaces o windows or glass doors (because they may break) o light fixtures, flowerbeds, mailboxes o unsecured, lightweight objects Procedure: Put on one of the high-pressure spray nozzles (always relieve system pressure...
-
Page 30: Step 4. Stopping
Operation UNLOADER Fig157117-9 If temporarily interrupting spraying, rotate trigger safety latch downward to the locked position to guard against accidental trigger release. Always turn off the engine and activate spray gun trigger to relieve system pressure when: • the sprayer is unattended, or •... -
Page 31: Storage
Storage STORAGE When you are finished using the pressure washer, you must prepare the sprayer for storage and store it in a proper location. Note: o If you will be storing the sprayer in freezing conditions, follow the instructions for preparing the sprayer for storage in freezing conditions. - Page 32 Storage RV Antifreeze Supply Bucket Hose Spray Bucket Fig. 06841_1 Materials list: 1) Two 5 gallon buckets. 2) 4-5 foot long garden hose or equivalent (recommend 5/8” to ¾” diameter with male ¾” Garden hose threads on one end) Procedure: 1) In a 5 gallon pour at least 2 gallons of environmentally safe antifreeze.
- Page 33 Storage Alternately the system can be blown out with compressed air: Note: although this method can be effective for winterizing, the above antifreeze method is preferred because it ensures the entire plumbing system is flushed and lubricated. Materials: 1) Properly rated fittings (80 psi or higher) to connect air supply to inlet connection (¾”...
- Page 34 Storage 2. Lubricate cylinder and piston: a. Disconnect spark plug wire and remove spark plug b. Add one teaspoon oil through spark plug hole c. Place rag over spark plug hole and turn starter (or pull the recoil) a few times to lubricate the combustion chamber.
-
Page 35: Burner Adjustment
Burner Adjustment OIL BURNER ADJUSTMENT (ONLY NEEDED IF WHITE EXHAUST SMOKE APPEARS) The oil burner is preset, and performance tested at the factory (elevation 1100 feet). Different altitudes may require a one-time initial burner adjustment. CAUTION: If white smoke appears from the burner exhaust vent during start-up or operation, discontinue use and readjust air bands. -
Page 36: Maintenance And Repair
Maintenance & Repair Inspect and maintain your pressure washer as specified below in order to keep it in safe and optimal working order. Follow all safety rules and recommended maintenance instructions. WARNING ALWAYS shut off water supply, bleed water pressure, turn off engine and disconnect the spark plug before cleaning, adjusting, or servicing the pressure washer. - Page 37 Maintenance & Repair MAINTENANCE & REPAIR-DETAILED INSTRUCTIONS Follow safety rules Read and follow these safety rules whenever you will be servicing the pressure washer: • Turn off / relieve pressure first. Always turn off pressure washer and relieve system pressure before inspection or maintenance. Remove spark plug or spark plug wire to prevent accidental starting.
- Page 38 Maintenance & Repair WARNING: High pressure fluid injection hazard High-pressure fluid discharge from leaks (even pin-sized) or ruptured components can pierce skin and inject fluid into the body. Injection injury can result in blood poisoning and/or severe tissue damage leading to infection, gangrene, and possibly amputation. •...
- Page 39 Maintenance & Repair 4) Replace air cap. Recharge and Inspect, recharge, and maintain battery according to your battery maintain Battery manufacturer's instructions. Do not store with battery charger always connected. Batteries that are over-charged can boil themselves dry and produce excessive amounts of hydrogen, an explosive gas.
- Page 40 Maintenance & Repair Maintain burner’s Drain water from burner’s filter bowl as needed and replace filter after every fuel filter/water 500 hours of use or as needed. separator 1) After each use of the burner, visually check the filter bowl. If any water has accumulated, drain it via the water drain at the bottom of the bowl.
- Page 41 Maintenance & Repair WARNING SCALE BUILD-UP/EXPLOSION HAZARD • Failure to properly maintain the coil can result in a steam explosion. • Scale or lime build-up will act as an insulator and decrease coil efficiency. • Weakening of the coil tube due to hot spots can result in a coil rupture. CHEMICAL EXPOSURE HAZARD •...
- Page 42 Maintenance & Repair 10) Dispose of the cleaning solution where it is not harmful to animals or the environment. Follow the coil cleaner manufacturers disposal instructions. 11) Fill the 5-gallon bucket with fresh water. 12) Place the end of Return Hose back into the 5-gallon bucket with fresh water. 13) Place the end of Supply Hose B back into the 5-gallon bucket with fresh water.
- Page 43 Maintenance & Repair Cleaning Flow Inspect and clean the flow switch as needed Switch Mineral build-up and/or debris within the flow switch can occur and may affect burner operation if not periodically cleaned. Mineral build-up and/or debris can stop the movement of the shuttle inside the flow switch body. Shuttle movement is important because the burner will not fire if the shuttle does not move.
- Page 44 Maintenance & Repair Shuttle Magnet Assembly (Side View) Assembly (Bottom View) 4) Observe the “Shuttle Assembly” and internal portion of “Body” for obstructions, hard water deposits and any other foreign debris. Remove the foreign debris with light scraping or compressed air. If no additional cleaning is required continue to Step 7.
- Page 45 Maintenance & Repair Body (female) Guides) Shuttle (Male) Tabs) FIG03514 Rounded End First FIG03514 9) Inspect the O-ring on the “Cap”, if it is damaged, replace the entire flow switch assembly. To order a replacement flow switch assembly, call Northstar Product Support at 1-800-270-0810. If the O-ring is not damaged, re-install the “Cap”...
- Page 46 Maintenance & Repair Inspect heating coil Inspect and desoot coil annually. and desoot as needed Most coils never require desooting. However, poor grades of fuel oil or inadequate combustion air will cause heavy soot build-up on the outside surface of the heating coil tubing.
- Page 47 Maintenance & Repair Inspect electrodes Inspect electrodes yearly and replace as needed. 1) Loosen front (2) bolts using a 1/2” socket. Loosen side (2) bolts using a 1/2” socket and wrench. 2) Remove (3) screws using a 5/32” hex key Allen wrench from the combustion head.
- Page 48 Maintenance & Repair Instructions for inspecting: 1) Remove flame sensor bracket Flame sensor bracket Fig157114-4 2) Following normal starting procedure with burner and thermostat off. With unit running look through flame sensor sight glass to observe if there is a spark Ignition coil Instructions for setting Gap: 1) Disconnect engine spark plug wire.
- Page 49 Maintenance & Repair BELT TENSION BRACKET FIG A MOUNT BOLTS FUEL PUMP FUEL PUMP MOUNT LOWER FUEL PUMP FIG B MOUNT BOLT TENSION BRACKET FIG 157114-11 TENSIONING NUT FIG C Note: Some general rules of belt tension are: • The ideal tension is the lowest tension without belt slippage •...
- Page 50 Maintenance & Repair NOTE: TO COMMERCIAL USERS: All mechanical equipment, no matter how well designed, will need maintenance and repairs. A NorthStar pressure washer is no exception. At times, a NorthStar pressure washer may become inoperable because repairs are required. NorthStar Product Support will assist in these repairs as needed, but if an inoperable pressure washer creates a major expense to your business, then we strongly recommend the following: •...
-
Page 51: Troubleshooting
Troubleshooting ENGINE WILL NOT START Causes Solutions Low Oil Shutdown Fill engine with the adequate amount of oil. Cold Engine Choke engine to start. No Fuel Add gas to engine; make sure fuel shutoff valve is open. Dead Battery Recharge/Replace battery. Spark plug wire not attached Attach spark plug wire to spark plug. - Page 52 Troubleshooting PRESSURE WASHER SURGES OR CYCLES WHILE IN BYPASS Causes Solutions Leak between unloader and gun. Check all connections between unloader and gun for leaks. Tighten loose components and replace damaged components. Gun leaking internally Replace spray gun. SMOKE FROM HEAT EXCHANGER Causes Solutions Engine not at full throttle...
-
Page 53: Major Components
Major Components Fig157117 MAJOR COMPONENTS Ref.# Description Page# Frame Heat Exchanger Blower and ignition flywheel Engine, Water pump, Fuel pump and drive parts Accessories- Gun, hose, chemical injector These components go into more detail on the following pages. -
Page 54: Parts Explosion: Frame - Rev B
Parts Explosion: Frame – Rev B Fig157117-1... - Page 55 Parts Explosion: Frame – Rev B ITEM PART# DESCRIPTION 800120 WELDMENT, AXLE 33" 800121 WELDMENT, AXLE 33" W/3-1/2" BRACKET 305200 RETAINER, WHEEL - PW,TE 778295 TIRE, VALLEY TURF -PW 799989 WELDMENT, ROLL CAGE 799967 WELDMENT, CORE HWPW 82621 BOLT, 5/16 X .75 HHFB 82630 5/16 FLANGE NYLOC NUT 800619...
- Page 56 Parts Explosion: Frame – Rev B ITEM PART# DESCRIPTION 800618 GROMMET, 1.25 ID - .125 HWPG 800118 TUBE, ROLL CAGE HANDLE 82095 BOLT, HHSF GR5Z 5/16-18 X 2 1/2 82021 WASHER, 5/16 USS FLAT Z 82222 NUT, 1/4-20 NYLON INSERT LK-TE 800107 PLATE, BILLBOARD 788920...
-
Page 57: Parts Explosion: Heat Exchanger - Rev B
Parts Explosion: Heat Exchanger – Rev B 1.25 1.2 1.3 1.26 1.24 1.27 1.23 1.15 1.22 1.16 1.17 1.21 1.18 1.31 1.10 1.20 1.11 1.28 1.12 1.19 1.13 1.30 1.29 1.32 1.14 1.33 Fig06885... - Page 58 Parts Explosion: Heat Exchanger – Rev B ITEM PART# DESCRIPTION Medium heat exchanger assembly 82621 Bolt, 5/16-18 x 3/4" hex head flange 797692 Fuel line guard, top 798383 Decal, Flame Sensor Lens Cleaning Instructions 796496 Decal, Electrical Shock Hazard 793645 Clip, hose/wire 800624 Flame sensor...
-
Page 59: Parts Explosion: Blower & Emf - Rev B
Parts Explosion: Blower & EMF – Rev B Fig06847 ITEM PART# DESCRIPTION ASSEMBLY FAN & HUB STATOR 82015 5/16-18 X 3/4 HHSF BOLT 792268 FAN, 200MM X 47.5MM - PW 799845 STATOR ADAPTER PLATE, DC 800230 HUB STATOR ASSY 82109 3/8-16 X 3.25"... - Page 60 Parts Explosion: Blower & EMF – Rev B Fig06884 ITEM PART# DESCRIPTION SEE ABOVE TABLE 82015 5/16-18 X 3/4 HHSF BOLT 788016 2 MM SPACER M5 FLAT WASHER 802202 STATOR ASSEMBLY 800469 IGNITION COIL ASSEMBLY 800782 FLYWHEEL HUB 800468 #8-32 X 1" SHCS 802343...
-
Page 61: Parts Explosion: Engine, Water & Fuel Pumps, Drive Parts - Rev B
Parts Explosion: Engine, Water & Fuel Pumps, Drive Parts – Rev B Fig157117-12... - Page 62 Parts Explosion: Engine, Water & Fuel Pumps, Drive Parts – Rev B ITEM PART# DESCRIPTION 102893 ENGINE-13HP HONDA GX390UT2QAE2 801096 FITTING, MJIC-6 X 12 MM ELBOW 801089 HOSE, OIL DRAIN 801097 FITTING, 3/8 FPT CAP 799630 PUMP-66DX40DSG1 CAT W/UNLOADER 800442 HARNESS, WIRE FUEL PUMP HWPG 786501 DECAL, ADD OIL...
- Page 63 Parts Explosion: Engine, Water & Fuel Pumps, Drive Parts – Rev B ITEM PART# DESCRIPTION 800662 DECAL, OP INSTRUCTIONS 786632 DECAL, ROTATING MACH. WARN.- PW 801490 HOSE, 1/4" FUEL LINE (CARB 2020) 28'' 799879 HOSE, 3/8 X 43" 3000PSI 796632 GAS TANK FILLER BRCKT/RECTIFIER 795015 COUPLER, PUMP/MOTOR, AC, PW...
-
Page 64: Parts Explosion: Accessories- Gun, Hose, Chemical Injector - Rev B
Parts Explosion: Accessories- Gun, Hose, Chemical Injector – Rev B Fig157117-13 ITEM PART# DESCRIPTION GRIP, LANCE 5000 PSI 777421 1/4 QUICK COUPLER 791274 796379 O-RING (NOT SHOWN) 777420 SPRAY GUN 777422 QUICK COUPLE SOCKET, 3/8" MPT GP2701020 O-RING (NOT SHOWN) 777915 3/8"... -
Page 65: Pump Explosion-66Dx- Rev B
Pump Explosion-CAT 66DX- Rev B REF# PART# DESCRIPTION REF# PART# DESCRIPTION CA12 5824 Screw, HHC (M6x16) CA46730 Washer Seal, Plunger Retainer - 90D CA46901 Cover, Bearing CA48201 Retainer, Plunger CA43222 Seal, Oil, Crankshaft CA48755 Retainer, Seal CA14 028 O-Ring, Bearing Cover - 70D CA4518 8 Seal, LPS w/S-Spg CA12 5351... - Page 66 Pump Explosion-CAT 66DX- Rev B REF# PART# DESCRIPTION REF# PART# DESCRIPTION — CA49100 Handle, Adjusting (Black) Valve/Ball Assembly — CA49099 Cap, Adjusting Seat — CA12 5521 Nut, Locking (M25x1) O-Ring, Seat - 70D — CA88953 Screw, Set (M4x4) Valve Body CA4519 8 Spring, Pressure CA49121...
-
Page 67: Wiring Diagram - Rev B
HI PRESSURE LIMIT 5 6 7 8 1 2 3 4 BURNER PLUG CONTROL BOARD THERMISTOR BATTERY PLUG FLAME 5 POSITION 157117 SENSOR LEVER LOCK BRN=BROWN BURNER FUEL BLK=BLACK SOLENOID WHT=WHITE BL=BLUE Fig157117-14 Balloon # Description Part Number Switch, Toggle... - Page 68 (1A OR 3A) SOLENOID BLK = BLACK BATTERY YLW = YELLOW FUEL PUMP GRN = GREEN WHT = WHITE GR = GRAY CONTROL BOX BL/W = BLACK / WHITE 157117 Fig157117-15 Balloon # Description Part Number Harness, Wire Fuel Pump 800442...
-
Page 69: Summary Of Important Safety Information
Summary of Important Safety Information This section provides a summary of the various safety procedures and measures that have been presented throughout the manual. Keep this summary handy and refer to it to refresh your memory about how to safely use your pressure washer. WARNING Carefully read and understand the following safety information before using the pressure washer. - Page 70 Summary of Important Safety Information • Connection/disconnection sequence. ALWAYS connect and disconnect cables to the correct battery terminals in the proper sequence: o When CONNECTING the battery, connect the RED cable to the POSITIVE terminal FIRST. o When DISCONNECTING the battery, disconnect the BLACK cable from the NEGATIVE terminal FIRST.
- Page 71 Summary of Important Safety Information • Spills. Clean up fuel spills immediately. Move pressure washer away from spilled fuel on the ground. Wipe fuel off engine and wait 5 minutes for excess fuel to evaporate before starting engine. Fuel soaked rags should be disposed of properly. •...
- Page 72 Summary of Important Safety Information During use • Safety latch locked before starting engine. Always engage the safety latch on the spray gun trigger before starting the engine. • Incoming water supply on. Do not run the pump without the water supply connected and turned on.
- Page 73 Summary of Important Safety Information • Do not exceed pressure and or temperature limits. Do NOT operate this pump with components (such as hose, connections, and spray gun) rated for lower pressure and or temperature limits than the machine’s maximum rated pressure and temperature, or component could rupture and cause serious personal injury from escaping high pressure fluids.
- Page 74 Summary of Important Safety Information SAFETY - INSPECTION/MAINTENANCE Inspect and maintain your pressure washer on a regular basis and repair as needed to keep it in safe working condition: • Turn off / relieve pressure first. Turn off pressure washer and relieve system pressure before inspection or maintenance.
-
Page 75: Limited Warranty
Limited Warranty Dear Valued Customer: The NorthStar Product you just purchased is built with the finest material and craftsmanship. Use this product properly and enjoy The benefits from its high performance. By purchasing a NorthStar product, you show a desire for quality and durability. Like all mechanical equipment this unit requires a due amount of care. - Page 76 Limited Warranty “Consumer use” means personal residential household use by a consumer. “Commercial use” means all other uses, including use for commercial, income producing or rental purposes or when purchased by a business. This warranty applies to the original purchaser of the equipment (verification of purchase, in the form of a receipt, is the responsibility of the buyer), is non-transferable, and covers parts and labor.
- Page 77 California Proposition 65 Information This page is intentionally left blank.
-
Page 78: California Proposition 65 Information
California Proposition 65 Information WARNING : This product can expose you to chemicals including gasoline engine exhaust, which is known to the State of California to cause cancer, and carbon monoxide, which is known to the State of California to cause birth defects or other reproductive harm. For more information go to www.P65Warnings.ca.gov.