
Related Manuals for Mx Onda MX-HE2663


Summary of Contents for Mx Onda MX-HE2663
- Page 1 MANUAL DE USUARIO E INSTALACIÓN HORNO DE ENCASTRE DE 60 CM MX-HE2663 y MX-HE2670 MODELOS: ANTES DE SU USO LEA ATENTAMENTE ESTE MANUAL...
- Page 2 INTRODUCCIÓN MX ONDA le agradece la deferencia que ha tenido al adquirir este producto. Este horno de encastre ha sido fabricado con materiales de alta calidad, su diseño hace que se adapte a cualquier tipo de cocina. Entre otros tiene las siguientes características:...
-
Page 3: Medidas De Seguridad
ANTES DE CONECTAR EL HORNO • Lea atentamente estas instrucciones y guárdelas para un posterior uso. • Después de quitar el embalaje, verifique que el aparato no esté dañado. En caso de duda no lo utilice; póngase en contacto con el personal de asistencia técnica. •... - Page 4 • Este aparato está diseñado solamente para uso doméstico, no profesional. MX ONDA no aceptará ninguna responsabilidad y la garantía carecerá de validez en caso de uso inadecuado o incumplimiento de las instrucciones.
- Page 5 • No utilice el horno si está bajo medicación que pueda mermar sus capacidades. • No coloque la bandeja del horno, recipientes o papel de aluminio en la base del horno. El calor acumulado puede dañar la base del mismo. •...
- Page 6 • En caso de avería, anomalías, sí la puerta de cristal está dañada (arañazos, fisuras, etc.), la clavija o el cable u otras partes presentan deterioro, desenchufe el aparato y no intente repararlo por su cuenta. Póngase en contacto con el Servicio Técnico Oficial MX ONDA más cercano.
-
Page 7: Panel De Control
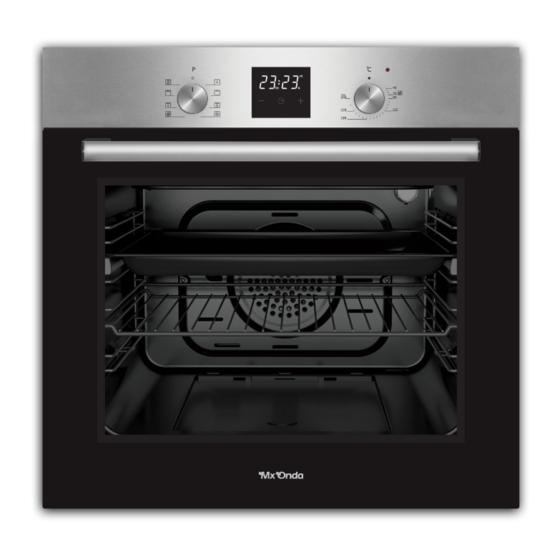
CONTROLES Y ELEMENTOS 1. Panel frontal 2. Bandeja honda (opcional) 3. Soporte rustepollos (opcional) 4. Parrilla 5. Bandeja esmaltada 6. Puerta del horno PANEL DE CONTROL A. Encendido/apagado y selector de funciones B. Pantalla LCD multifunción C. Selector de temperatura... - Page 8 PANTALLA LED MULTIFUNCIÓN La pantalla multifunción además de mostrar la hora actual, el estado de funcionamiento, el temporizador, y el bloqueo infantil, incorpora tres botones para el ajuste de las distintas funciones. D. Botón de disminución E. Botón de ajuste F.
- Page 9 Importante: El reloj de este horno toma como referencia la frecuencia de la tensión de la red 50 Hz, y puede que en algún caso el reloj del horno se adelante o se atrase. Esto no es un mal funcionamiento y puede ser causado por alteraciones en el suministro de electricidad.
- Page 10 Cocción semiautomática El modo de cocción semiautomática consiste en qué una vez transcurrido un tiempo previamente fijado, el horno se apaga automáticamente. Para el ajuste de la cocción semiautomática siga los pasos siguientes: 1. Introduzca los alimentos en el horno, elija el modo de funcionamiento mediante el selector de funciones A y seleccione la temperatura mediante el selector de temperatura C.
- Page 11 Finalización de la cocción semiautomática o automática Finalizada la cocción (semiautomática o automática) sonará un avisador acústico, el horno se apagará y el símbolo también se apagará. Pulse cualquier botón para detener el avisador acústico. Si no pulsa ningún botón el avisador acústico dejará...
-
Page 12: Instalación
Si el corte de suministro es superior a 50 segundos, la hora actual, así como la programación en el modo de cocción automática se borrarán, la pantalla mostrará los dígitos horarios 12:00 así como la indicación parpadeando. Siendo necesario ajustar la hora actual tal y como se ha explicado en el apartado correspondiente. - Page 13 Advertencia: No instale el horno al lado del frigorífico o refrigerador. EL calor emitido por el horno aumenta el consumo de energía de los aparatos de refrigeración. Advertencia: No utilice la puerta o el asa de la puerta para trasladar o coger el horno.
- Page 14 Instalación en un mueble elevado El mueble ha de tener las dimensiones indicadas en la Figura 4. Para obtener una refrigeración óptima y eficiente, deberá dejar un espacio en la parte posterior, superior e inferior del mueble tal y como se indica en la Figura 4.
- Page 15 Requisitos de la instalación • Las dimensiones del horno se indican en la Figura 3. • El material del mueble donde vaya a ser instalado el horno deben ser resistentes al calor para evitar una deformación causada por la radiación del calor, debe soportar una temperatura mínima de 100 ºC.
- Page 16 Colocar y fijar el horno • Para colocar el horno en el mueble se recomienda que al menos sean dos personas. • Compruebe que el cerco del horno y el borde frontal del mueble coinciden de manera uniforme. • El cable de alimentación no debe estar debajo del horno, atrapado entre las paredes del horno y el mueble o que permanezca doblado.
- Page 17 • Si el cable está dañado, para ser sustituido o reemplazado, la operación debe ser realizada por un Servicio Técnico Oficial Mx Onda. • El instalador autorizado debe asegurarse de que se haya realizado la conexión eléctrica correcta y que cumpla con las normas de seguridad.
- Page 18 2. Pase un paño ligeramente humedecido por el interior del horno y cierre la puerta del mismo. 3. Ajuste el selector de temperatura al nivel máximo 240 ºC. 4. Gire el botón de encendido/apagado y selector de funciones hacia la posición de calor en la parte inferior y superior 5.
- Page 19 POSICIÓN SÍMBOLO FUNCIÓN QUE REALIZA EL HORNO Modo reposo o apagado Convección Calor en la parte superior e inferior Calor en la parte superior e inferior + Convección Modo turbo + Convección Limpieza con vapor Función Grill + Convección Función Grill Plus Cocción multifunción (3D) Convección Utilice esta función cuando haya finalizado el proceso de cocción y desee...
- Page 20 Función Grill + Convección Este modo de funcionamiento es apto para cocinar alimentos cárnicos. En función del alimento a cocinar le recomendamos colocar una bandeja en la parte inferior con un poco de agua, para evitar que el alimento quede demasiado seco.
-
Page 21: Mantenimiento Y Limpieza
MANTENIMIENTO Y LIMPIEZA Advertencia: Antes de proceder a la limpieza desconecte el horno de la red eléctrica (enchufe o interruptor magnetotérmico). Y asegúrese que el horno esté totalmente frío. No utilice alcohol ni productos abrasivos (cepillo de ceras, lana de acero u objetos cortantes) y no permita que el aparato entre en contacto con agentes volátiles como gasolina, disolventes, insecticidas, etc. - Page 22 5. Finalizado el tiempo previamente fijado, abra la puerta del horno y retire la grasa y los restos sólidos con un paño ligera-mente húmedo. 6. Para la suciedad más incrustada, en un paño húmedo vierta líquido para lavar platos y frote hasta la eliminar toda la suciedad, después seque con un paño limpio y seco.
- Page 23 Limpieza del cristal de la puerta del horno Para extraer el cristal de la puerta del horno y en función del modelo que usted tenga, deberá proceder como se indica en el punto 1 o en el punto 2. 1. Presione los pestillos de plástico situados a ambos lados (derecho e izquierdo) del perfil tal y como se muestra en la Figura 10, después extraiga el perfil tirando del mismo hacia afuera como se muestra en la Figura 11.
- Page 24 Sustitución de la luz interior Advertencia: Antes de cambiar la bombilla desconecte el horno de la red eléctrica (enchufe o interruptor magnetotérmico). Y asegúrese de que el horno esté totalmente frío. Retire la protección de cristal girándola en el sentido contrario a las agujas del reloj, utilice guantes de goma si tiene dificultad para extraer la protección de cristal.
- Page 25 Compatibilidad Electromagnética y la 2014/35/EC (LVD) en materia de seguridad de baja tensión. “MX, MX ONDA” y sus logotipos son marcas registradas de MX ONDA, S.A. Teléfono de información y Servicio Técnico: 902 551 501 MX ONDA, S. A.
- Page 26 USER AND INSTALLATION MANUAL 60 CM BUILT-IN OVEN MX-HE2663 y MX-HE2670 MODELS: BEFORE USE PLEASE READ THIS MANUAL CAREFULLY...
- Page 27 INTRODUCTION MX ONDA thanks you for the deference you have shown by purchasing this product. This built-in oven has been manufactured with high quality materials, its design makes it adapt to any type of kitchen. Among others it has the following characteristics: •...
-
Page 28: Before Connecting The Oven
BEFORE CONNECTING THE OVEN • Please read these instructions carefully and save them for later use. • After removing the packaging, check that the appliance is not damaged. If in doubt do not use it; contact technical support personnel. • All operations related to the electrical installation and / or repair must be carried out by a specialized and authorized installer. - Page 29 • This appliance is designed for household, non-professional use only. MX ONDA will not accept any responsibility and the guarantee will be invalid in case of improper use or non- compliance with the instructions.
- Page 30 • Do not use the oven if you are under medication that may impair its capabilities. • Do not place the oven tray, containers or aluminum foil on the base of the oven. The accumulated heat can damage the base of the same.
- Page 31 • In case of breakdown, anomalies, if the glass door is damaged (scratches, cracks, etc.), the plug or the cable or other parts show deterioration, unplug the appliance and do not try to repair it yourself. Contact the closest MX ONDA Official Technical Service.
-
Page 32: Controls And Elements
CONTROLS AND ELEMENTS 1. Front panel 2. Deep tray (optional) 3. Chicken roast stand (optional) 4. Grill 5. Enameled tray 6. Oven door CONTROL PANEL A. On / off and function selector B. Multifunction LCD display C. Temperature selector... - Page 33 MULTIFUNCTION LED DISPLAY The multifunction screen, in addition to showing the current time, the operating status, the timer, and the child lock, incorporates three buttons for adjusting the different functions. D. Decrease button E. Adjust button F. Increase button Display symbols SYMBOL FUNTION Oven status indicator...
- Page 34 Important: The clock of this oven takes as reference the frequency of the mains voltage 50 Hz, and it may be that in some cases the clock of the oven will be ahead or behind. This is not a malfunction and can be caused by disturbances in the electricity supply.
- Page 35 To adjust semi-automatic cooking, follow these steps: 1. Put the food in the oven, choose the operating mode using the function selector A and select the temperature using the temperature selector C. 2. Press the button twice to access the semi-automatic cooking mode, the symbol will start flashing.
- Page 36 Child lock This function locks the buttons on the screen, to prevent inadvertent use (for example, children changing the timer or the automatic or semi-automatic cooking mode). Momentarily press the button and the display will show the symbol warning you that the buttons are locked. To deactivate the child lock, press and hold the button for 3 seconds, until the symbol disappears from the...
-
Page 37: Installation
INSTALLATION Warning: Before installing the oven, check that there is no damage to the oven. DO NOT install the oven if after removing the packaging you notice damage to it, bumps, broken or cracked glass, damaged cord or plug, etc. Very important: The cooling fan extracts heat to prevent overheating of external surfaces during oven operation. - Page 38 Cautions You must choose the location of the oven by making the appropriate measurements and taking into account that you must have a mains power outlet with sufficient power before starting the installation. Do not install the oven in areas with strong drafts. At least two people will be required to move the oven.
- Page 39 Fig. 2 Installation in a raised kitchen cabinet The furniture must have the dimensions indicated in Figure 4. For optimal and efficient cooling, you should leave a space at the back, top and bottom of the cabinet as indicated in Figure 4.
- Page 40 Fig. 4 Installation requirements • The dimensions of the oven are indicated in Figure 3. • The material of the cabinet where the oven is to be installed must be heat resistant to avoid deformation caused by heat radiation, it must withstand a minimum temperature of 100 ºC.
-
Page 41: Electrical Connection Of The Oven
Place and fix the oven • To place the oven in the cabinet, it is recommended that there be at least two people. • Check that the oven frame and the front edge of the cabinet coincide evenly. • The power cord must not be under the oven, caught between the oven walls and the cabinet, or remain bent. - Page 42 • If the cable is damaged, to be substituted or replaced, the operation must be carried out by an Official Mx Onda Technical Service. • The authorized installer must ensure that the correct electrical connection has been made and that it complies with safety regulations.
- Page 43 6. During operation, there may be a little smoke and odor, this is normal and is due to the removal of traces of oil to protect the internal elements from the manufacture. 7. Once the oven is completely cool, wipe it with a cloth slightly dampened with soapy water, then wipe it dry with a clean, dry cloth.
- Page 44 POSITION SYMBOL FUNCTION PERFORMED BY THE OVEN OFF mode Convection Heat at the top and bottom Heat at the top and bottom + Convection Turbo mode + Convection Steam cleaning Grill + Convection function Grill Plus function Multifunction cooking (3D) Convection Use this function when you have finished the cooking process and want to keep food warm using residual heat through the convection system.
-
Page 45: Tips For The Use Of The Oven
Grill Plus function Use this operating mode to gratin or roast meat or fish, etc. Depending on the food to be cooked, we recommend placing a tray in the lower part with a little water, to prevent the food from being too dry. Multifunction cooking (3D) This operating mode is suitable for baking and roasting. - Page 46 Cleaning the outside of the oven • Clean the outside with a damp cloth, followed by a dry one. • Avoid getting water through the ventilation holes. • Always keep the door clean on both sides and the sealing gaskets. Clean these parts with a damp cloth with warm soapy water.
- Page 47 Removing and installing the oven door The oven door can be removed to facilitate cleaning, to do this, follow the steps below: 1. Fully open the oven door 90º, then unlock it by pulling the hinge lock up with the help of a screwdriver as shown in Figure 8.1. 2.
- Page 48 Figure 11. The glass will be free after removing the profile, as shown in Figure 12. Pull the released glass very carefully towards you, if it includes a central glass it can also be removed in the same way, the outer glass is fixed to the door frame.
- Page 49 Once the bulb has been replaced, replace the glass protection and re-establish the power supply to the oven (plug or magnetothermic switch). G9 Lamp type E14 Lamp type Fig. 16 Fig. 17 Support guides Warning: It is very important to correctly position the support guides. Do not place the guides touching the back of the oven.
-
Page 50: Technical Specifications
This product complies with the European Directives 2014/30 / EC (EMC) on Electromagnetic Compatibility and 2014/35 / EC (LVD) on low voltage safety. "MX, MX ONDA" and their logos are registered trademarks of MX ONDA, S.A. Information and Technical Service telephone number: 902 551 501 MX ONDA, S.