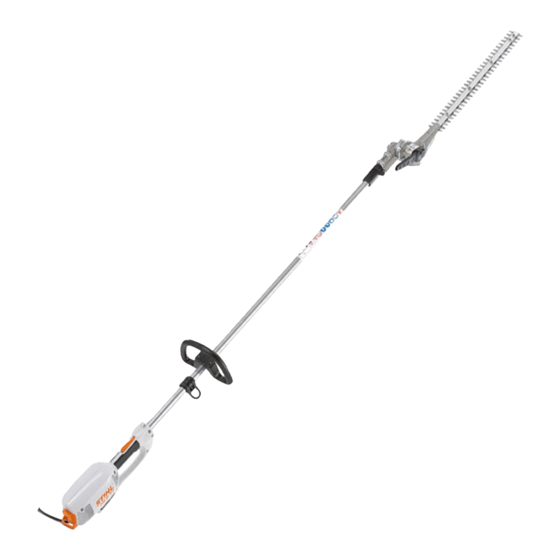
Stihl HLE 71 Instruction Manual
Hide thumbs
Also See for HLE 71:
- Instruction manuals (344 pages) ,
- Instruction manual (340 pages) ,
- Instruction manual (28 pages)
Table of Contents
Advertisement
Quick Links
Advertisement
Table of Contents

Related Manuals for Stihl HLE 71


Summary of Contents for Stihl HLE 71
- Page 1 STIHL HLE 71 2 - 19 Instruction Manual...
-
Page 2: Table Of Contents
Connecting to Power Supply.....11 Switching On..........12 Engineering improvements Switching Off..........12 Overload Cutout........12 STIHL's philosophy is to continually improve all Lubricating the Gearbox......13 of its products. For this reason we may modify Storing the Machine........13 the design, engineering and appearance of our Sharpening Instructions...... - Page 3 The connector and coupling of the extension cord must be waterproof or routed in such a way that they cannot come into contact with water. STIHL can supply a comprehensive range of per‐ sonal protective equipment. Only use cutting blades and accessories that are...
- Page 4 Make sure you always have a good footing and bent or warped), correctly mounted and thor‐ hold the machine so that the cutting blades are oughly sprayed with STIHL resin solvent (lubri‐ always facing away from your body. cant) Some versions of the machine can be carried on –...
- Page 5 If the hedge is very dusty or dirty, spray the cut‐ Clear away fallen branches, scrub and cuttings. ting blades with STIHL resin solvent from time to time during cutting. This will significantly reduce Watch out for obstacles: tree stumps, roots – risk...
- Page 6 Never attempt to modify your power tool in any not use any grease solvents for this purpose. way since this will increase the risk of personal Spray the cutting blades with STIHL resin sol‐ injury. vent. Run the motor briefly so that the solvent is Regularly check that the insulation of the power evenly distributed.
-
Page 7: Using The Unit
3 Using the Unit English Using the Unit WARNING Cutting season The K variant is not approved for cutting near the Observe country-specific or municipal rules and ground. regulations for cutting hedges. 3.5.2 Vertical cut (with angled cutter bar) Do not use your power tool during other people's rest periods. -
Page 8: Mounting The Drive Tube
English 4 Mounting the Drive Tube Mounting the Drive Tube 3.5.4 Top trimming (with angled cutting bar) Hold and swing the hedge trimmer vertically, this results in a larger range. WARNING Overhead working positions are tiring and should be used only for short periods for reasons of work safety. -
Page 9: Mounting The Loop Handle
5 Mounting the Loop Handle English Mounting the Loop Handle Mounting the Gearbox ► Loosen the clamp screws (1) ► Line up the sliding sleeve (2) – it must be in line with the opening in the angle drive ► Push the gearbox (3) onto the drive tube (4), turn the gearbox back and forth as necessary ►... -
Page 10: Adjusting The Cutter Bar
English 7 Adjusting the Cutter Bar Adjusting the Cutter Bar WARNING Adjustment mechanism 125° Make adjustments only when the cutting blades are at a standstill – motor switched off. WARNING The gearbox becomes hot during operation. Never touch the gear housing – risk of burns! WARNING Never grab the blade when making adjustments –... -
Page 11: Fitting The Harness
8 Fitting the Harness English Shoulder strap WARNING The cutter bar must only be moved from working position into transport position or the other way around when the motor is switched off and the blades are covered by the blade guard. WARNING The gearbox becomes hot during operation. -
Page 12: Switching On
English 10 Switching On 10 Switching On ► Insert the plug (1) into the extension cord cou‐ ► make sure you have a firm and secure stance pling (2) ► Hold your unit with both hands – right hand on the control handle –... -
Page 13: Lubricating The Gearbox
NOTICE 13.1 Blade drive Do not completely fill the gear unit with lubricant. For the blade drive, use STIHL gear lubricant for ► Unscrew lubricant tube hedge trimmers (special accessory). ► Refit locking screw (2) and tighten securely 14 Storing the Machine If the machine is to remain out of use for approx. -
Page 14: Maintenance And Care
All accessible screws and Retighten nuts Safety labels Replace 1)STIHL recommends an authorized STIHL servicing dealer.2)Spray with STIHL resin solvent after cleaning 17 Minimize Wear and Avoid The user is responsible for all damage caused by Damage non-observance of the safety precautions, oper‐... -
Page 15: Main Parts
STIHL recommends that you have servicing and repair work carried out exclusively by an author‐ ized STIHL servicing dealer. STIHL dealers are... -
Page 16: Maintenance And Repairs
19.5.3 Vibration level a to EN 60745‑2‑15 When repairing the machine, only use replace‐ HLE 71: ment parts which have been approved by STIHL Left handle: 7.6 m/s for this power tool or are technically identical. Right handle: 3.6 m/s... -
Page 17: Ec Declaration Of Conformity
Done at Waiblingen, 15.07.2021 ANDREAS STIHL AG & Co. KG STIHL products must not be thrown in the gar‐ bage can. Take the product, accessories and packaging to an approved disposal site for envi‐ ronment-friendly recycling. -
Page 18: General Power Tool Safety Warnings
European standard for hand-held motor-oper‐ cord suitable for outdoor use. Use of a cord suit‐ ated electric tools. STIHL is required by law to able for outdoor use reduces the risk of electric print these standardized texts verbatim. - Page 19 24 General Power Tool Safety Warnings English protection. Protective equipment such as dust for operations different from those intended could mask, non-skid safety shoes, hard hat, or hear‐ result in a hazardous situation. ing protection used for appropriate conditions will 24.5 5) Service reduce personal injuries.c)Prevent unintentional...
- Page 20 *04582770121B* 0458-277-0121-B...