Table of Contents
Advertisement
Advertisement
Table of Contents

Related Manuals for Casio PL-40R


Summary of Contents for Casio PL-40R
- Page 1 PL40NE01-1.book 1 ページ 2002年7月23日 火曜日 午後6時52分...
- Page 2 PL40NE01-1.book 2 ページ 2002年7月23日 火曜日 午後6時52分 426-E-002A...
-
Page 3: Safety Precautions
PL40NE01-1.book 1 ページ 2002年7月23日 火曜日 午後6時52分 Safety Precautions Congratulations on your selection of the CASIO Digital Piano. This piano is a sophisticated musical instrument that blends the very best of traditional piano feel and sound quality with the latest that modern electronics technology has to offer. - Page 4 Doing so creates the risk of electric shock, burn injury, or other personal injury. Leave all internal inspection, adjustment, and maintenance up to your original retailer or authorized CASIO Service Provider. Dropping and Impact Continued use of this product after it has...
- Page 5 PL40NE01-1.book 3 ページ 2002年7月23日 火曜日 午後6時52分 CAUTION Relocating the Product Before relocating the product, always unplug the AC cord from the wall outlet and disconnect all other cables and connecting cords. Leaving cords connected creates the risk of damage to the cords, fire, and electric shock.
- Page 6 PL40NE01-1.book 4 ページ 2002年7月23日 火曜日 午後6時52分 Safety Precautions CAUTION At least two people should lift the digital piano when placing it onto the stand or moving it. Trying to move the digital piano alone can cause the stand to fall over, creating the risk of personal injury. Do not drag the stand or tilt it forward or back when placing the digital piano onto the stand or moving it.
-
Page 7: Main Features
PL40NE01-1.book 5 ページ 2002年7月23日 火曜日 午後6時52分 Main Features Simple, compact design A simple, compact design fits right in and complements just about any interior layout. Advanced Lesson System (pages E-35, 39) Choose from among 70 built-in auto accompaniment tunes for your listening pleasure, or turn off the melody or another part and practice by playing along. -
Page 8: Table Of Contents
PL40NE01-1.book 6 ページ 2002年7月23日 火曜日 午後6時52分 Contents Safety Precautions ... E-1 Main Features ... E-5 Contents ... E-6 General Guide ... E-9 About the Display ...E-12 Connecting to a Power Outlet ... E-14 Using the AC Adaptor ...E-14 Power On Alert...E-15 Settings and Memory Contents...E-15 Connections ... -
Page 9: Contents
MIDI Settings... E-68 Connecting to a Computer ... E-69 USB Mode and MIDI Mode ... E-69 Obtaining USB Driver Upgrades and the Latest PL-40R Information ... E-70 Keyboard Settings ... E-71 Using the Keyboard Setup Menus... E-71 Parameter Setting Items... E-73... -
Page 10: Operational Precautions
PL40NE01-1.book 8 ページ 2002年7月23日 火曜日 午後6時52分 Contents Reference Troubleshooting ... E-84 Specifications ... E-87 Operational Precautions ... E-90 Appendix ... A-1 Tone List ...A-1 Drum Assignment List ...A-7 Rhythm List ...A-10 Effect Table ...A-11 Fingered/Full Range Chord Table...A-12 Song List ...A-15 Parameter List...A-17 MIDI Data Format ... -
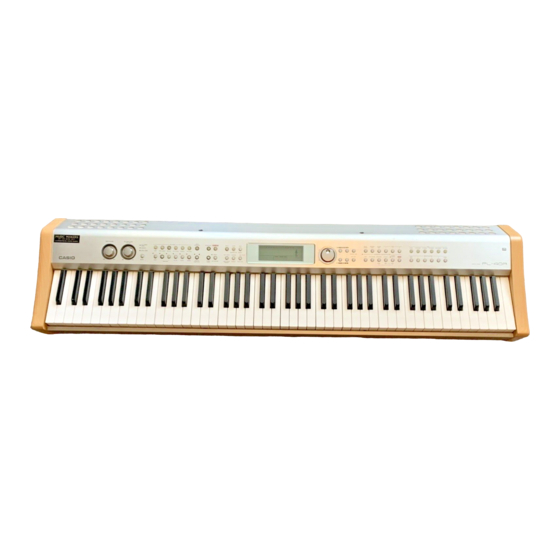
Page 11: General Guide
PL40NE01-1.book 9 ページ 2002年7月23日 火曜日 午後6時52分 General Guide LINE OUT jacks (R, L/MONO) DAMPER PEDAL jack, SOFT/SOSTENUTO PEDAL jack POWER button DC 15V jack MIDI IN terminal, MIDI OUT terminal PHONES jack USB port 426-E-011A General Guide... - Page 12 PL40NE01-1.book 10 ページ 2002年7月23日 火曜日 午後6時52分 General Guide MAIN VOLUME knob ACCOMP/SONG VOLUME knob MODE button RHYTHM buttons POPS button ROCK/DANCE button E-10 BALLAD button JAZZ/LATIN button VARIOUS button FOR PIANO button AUTO HARMONIZE button SEQUENCER button RECORD button 426-E-012A...
- Page 13 PL40NE01-1.book 11 ページ 2002年7月23日 火曜日 午後6時52分 SPLIT button LAYER/(GROUP A/B) button PART/(MIXER) button INTRO button VARIATION 1/2 buttons FILL-IN button BREAK button ENDING button SYNCHRO START/STOP button START/STOP button METRONOME/(BEAT) button ONE TOUCH PRESET/(KEY LIGHT) button EFFECT/(L. METER) button FUNCTION/ button Selector dial TRANSPOSE buttons [ ], [ ENTER/YES button...
-
Page 14: About The Display
PL40NE01-1.book 12 ページ 2002年7月23日 火曜日 午後6時52分 General Guide About the Display Operation Indicators These indicators show what type of settings you are making and the type of information currently displayed in the message area. The applicable indicator appears while you are making tone (TONE), part (U1, U2, L1, L2), song (SONG), rhythm (RHYTHM), mixer (MIXER), or function (FUNCTION) settings. -
Page 15: Level Meter Screen
PL40NE01-1.book 13 ページ 2002年7月23日 火曜日 午後6時52分 Chord name display Shows chord names while auto accompaniment is being used. Pointers A pointer appears next to the applicable function when you have voice fingering guide, touch response, or key lighting turned on. Display examples shown in this User’s Guide are intended for illustrative purposes only. -
Page 16: Connecting To A Power Outlet
Never twist or stretch the cord. Should the electric cord or plug become damaged, contact your original retailer or authorized CASIO Service Provider. Never touch the AC adaptor while your hands are wet. Doing so creates the risk of electric shock. -
Page 17: Power On Alert
It is up to you to contact your nearest CASIO service provider about having the lithium battery replaced periodically. Note that you will be charged separately for lithium battery replacement. -
Page 18: Connections
PL40NE01-1.book 16 ページ 2002年7月23日 火曜日 午後6時52分 Connections Connections Connecting to an audio or musical instrument amplifier provides even clearer, more powerful sound through external speakers. Whenever connecting external equipment, first set the MAIN VOLUME knob of the digital piano and the volume controller of the external equipment to relatively low volume settings. - Page 19 PL40NE01-1.book 17 ページ 2002年7月23日 火曜日 午後6時52分 426-E-019A...
-
Page 20: Tone List
PL40NE01-1.book 18 ページ 2002年7月23日 火曜日 午後6時52分 Basic Operations Basic Operations MAIN VOLUME Selector dial This section provides information on performing basic piano operations. Getting Started To play the piano Press the POWER button to turn on the piano. Use the MAIN VOLUME knob to set the volume to a relatively low level. -
Page 21: Upper1, Upper2, Lower1, Lower2
PL40NE01-1.book 19 ページ 2002年7月23日 火曜日 午後6時52分 Polyphony The term polyphony refers to the maximum number of notes you can play at the same time. This piano has 64-note polyphony, which includes the notes you play as well as the rhythms and auto-accompaniment patterns that are played by the piano. -
Page 22: Using Split
PL40NE01-1.book 20 ページ 2002年7月23日 火曜日 午後6時52分 Basic Operations Using Split With split you can assign two different tones (a main tone and a split tone) to either end of the keyboard, which lets you play one tone with your left hand and another tone with your right hand. -
Page 23: Turning The Key Light System On And Off
PL40NE01-1.book 21 ページ 2002年7月23日 火曜日 午後6時52分 Layer/split is produced by using mixer Group A Upper1, Upper2, Lower1, and Lower2 at the same time. This means you can use the mixer to change the volume balance and stereo pan position parameters for each of the tones. See “Using the Mixer”... -
Page 24: Auto Accompaniment
PL40NE01-1.book 22 ページ 2002年7月23日 火曜日 午後6時52分 Auto Accompaniment Auto Accompaniment MODE Selector dial VARIATION 1/2 ENDING METRONOME/(BEAT) [+]/[–] This piano automatically plays bass and chord parts in accordance with the chords you finger. The bass and chord parts are played using sounds and tones that are automatically selected to match the rhythm you are using. -
Page 25: Selecting A Rhythm
EXIT/NO button. Some rhythms consist of chord accompaniments only, without any drums or other percussion instruments. Such rhythms do not sound unless CASIO CHORD, FINGERED, or FULL RANGE CHORD is selected as the 426-E-025A Auto Accompaniment accompaniment mode. - Page 26 You can expand the range of the accompaniment keyboard by moving the keyboard’s split point to the right (page E-20). E-24 Chord Types CASIO CHORD accompaniment lets you play four types of chords with minimal fingering. Chord Types Example Major chords...
-
Page 27: Fingered/Full Range Chord Table
PL40NE01-1.book 25 ページ 2002年7月23日 火曜日 午後6時52分 FINGERED In this mode, you specify chords by playing them as you would on a piano, inside the accompaniment keyboard range. To specify a C-chord, you would play C-E-G. FINGERED accompaniment keyboard and melody keyboard On the keyboard shown above, Lower1 and Lower2 are assigned to the accompaniment keyboard range and Upper1 and Upper2 are assigned to the melody keyboard range. -
Page 28: Adjusting The Tempo
PL40NE01-1.book 26 ページ 2002年7月23日 火曜日 午後6時52分 Auto Accompaniment Adjusting the Tempo You can adjust the tempo (number of beats per minute) of rhythm play within a range of 30 to 255. To adjust the tempo While the indicator lamp above the TEMPO buttons is lit, use the TEMPO buttons [ to adjust the tempo. -
Page 29: Using A Fill-In Pattern
PL40NE01-1.book 27 ページ 2002年7月23日 火曜日 午後6時52分 Using a Fill-in Pattern Fill-in patterns let you momentarily change the rhythm pattern to add some interesting variation to your performances. To insert a fill-in Press the START/STOP button to start rhythm play. Press the FILL-IN button to insert a fill-in pattern for the rhythm you are using. -
Page 30: Finishing With An Ending Pattern
PL40NE01-1.book 28 ページ 2002年7月23日 火曜日 午後6時52分 Auto Accompaniment Using Synchro Start/Stop while Auto Acompaniment is Playing Synchro stop is the opposite of synchro start. It causes the currently playing auto accompaniment pattern to stop when the keys in the accompaniment keyboard range are released. This feature is more than just a simple way to stop auto accompaniment play. -
Page 31: Using Auto Harmonize
If you have two tones (Upper1, Upper2) layered on the keyboard, harmonize notes are added to both. Auto harmonize is enabled only when the auto accompaniment mode is Fingered or CASIO Chord. Auto Harmonize Types You can select from among the 12 different types of auto harmonize listed below. -
Page 32: Using One-Touch Preset
PL40NE01-1.book 30 ページ 2002年7月23日 火曜日 午後6時52分 Auto Accompaniment About Auto Harmonize notes and tones The notes you play on the keyboard are called “melody notes”, while the notes added to the melody by auto harmonize are called the “harmonize notes”. Auto harmonize normally uses the tone you selected for the melody notes as the tone for the harmonize notes, but you can use the mixer (page E-46) to specify a different tone for the harmonize notes. -
Page 33: Transposing The Piano
426-E-033A Auto Accompaniment Tuning the Piano The tuning feature lets you fine tune the piano to match the tuning of another musical instrument. To tune the piano Press the FUNCTION button. Use the [ ] and [ dial to display the “Tune”... -
Page 34: Using Touch Response
PL40NE01-1.book 32 ページ 2002年7月23日 火曜日 午後6時52分 Auto Accompaniment Using Touch Response Turning on touch response causes the volume and sound quality of piano output to change in accordance with the amount of pressure applied to the keyboard. To set the touch response sensitivity Press the FUNCTION button.