Table of Contents
Advertisement
Quick Links
Advertisement
Table of Contents

Related Manuals for Beko BDPB904HW


Summary of Contents for Beko BDPB904HW
- Page 1 Dryer User Manual BDPB904HW BDPB904HG 2960313252_EN/080322.0936...
- Page 2 Dear Customer, Please read this guide prior to use this product! Thank you for choosing Beko product. We would like you to achieve the optimal efficiency from this high quality product which has been manufactured with state of the art technology. Please make sure you read and understand this guide and supplementary documentation fully before use.
-
Page 3: Table Of Contents
1 Safety Instructions .................. 5 1.1 Intended use ......................5 1.2 Safety of children, vulnerable persons and pets ............5 1.3 Electrical Safety ....................6 1.4 Transporting safety ....................6 1.5 Installing safety .....................7 1.6 Usage safety ......................8 1.7 Maintenance and cleaning safety ................10 1.8 Lighting safety ....................10 2 Environmental instructions.............. - Page 4 6 Running the product ................19 6.1 Control Panel ......................19 6.2 Symbols ......................19 6.3 Preparation of drying machine ................19 6.4 Program selection and consumption chart ............20 6.5 Auxiliary functions ....................23 6.6 Warning indicators ....................24 6.7 Starting the program ...................24 6.8 Child Lock ......................24 6.9 Changing the program after it is started ..............24 6.10 Cancelling the program ..................25 6.11 End of program ....................25...
-
Page 5: Safety Instructions
1 Safety Instructions This section includes the safety instructions necessary to prevent the risk of personal injury or material damage. • Our company shall not be held responsible for damages that may occur if these instructions are not observed. • Installation and repair operations shall always be performed by Authorized Service. -
Page 6: Electrical Safety
• Keep the packaging materials away from children. Risk of injury and suffocation. • Keep all additives used with the product away from children. • Before disposing of the product, cut the power cord and destroy the loading door. 1.3 Electrical Safety •... -
Page 7: Installing Safety
1.5 Installing safety • To prepare the product ready for installation, ensure that the electrical installation and water drain is proper by checking the information in the user manual. If it is not suitable for installation, call a qualified electrician and plumber to arrange the utilities as necessary. -
Page 8: Usage Safety
• Do not plug the product to loose, broken, dirty, greasy sockets or sockets that has come out their seats or sockets with a risk of water contact. • The new hose sets supplied with the product shall be used. Do not re-use the old hose sets. - Page 9 • Empty the pockets of the clothes and remove items such as matches and lighters. • If all items cannot be removed rapidly and cannot be placed where heat can dissipate, do not stop the drying machine before drying cycle completed. •...
-
Page 10: Maintenance And Cleaning Safety
1.7 Maintenance and cleaning safety • Do not wash the product by spraying or pouring water on it. Do not use a pressure cleaner, steam cleaner, hose or pressurised gun to clean the product. • Do not use sharp or abrasive tools to clean the product. •... -
Page 11: Environmental Instructions
: < 100mW Conformity declaration for CE Arcelik A.S. hereby declares that this appliance complies with Directive 2014/53/ The complete text of the EU declaration of conformity is available in the following internet address: – Products, from :support.beko.com Dryer / User Manual... -
Page 12: Your Drying Machine
3 Your drying machine 3.1 Technical specifications Height (Min. / Max.) 84,6 cm / 86,6 cm* Width 59,8 cm Depth 60,5 cm Capacity (max.) 9 kg** Net weight (± %10) 44 kg Voltage Rated power input See type label*** Model code * Min. -
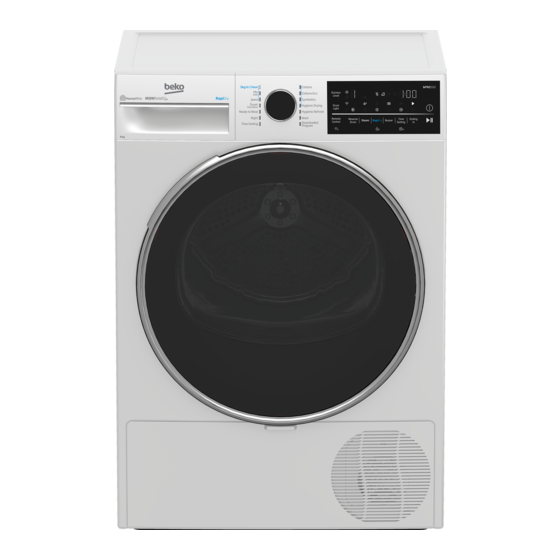
Page 13: General Appearance
3.2 General appearance 3.3 Scope of delivery 1. Water 6. Water discharge filling cap* hose* 2. Filter 7. Pure drawer spare Water* sponge* 8. Odour 3. User Capsule Manual Group* 4. Drying 9. Brush* basket* 5. Drying 10. Filter 1. Top panel basket user cloth* manual*... -
Page 14: Installation
4 Installation • Once the drying machine is installed, the connections must stay stable. After placing the drying machine, ensure that the back wall does not come in contact Read the “Safety Instructions” first! with any extrusion (a water tap, electrical outlet etc.). -
Page 15: Connection Of Water Drain Hose On Products With Vapour Feature
4.3 Connection of water drain hose 1 Pull hose at the behind of the dryer by hand in order to disconnect it from where it is on products with vapour feature connected. Do not use any tools to remove You can directly drain accumulated water the hose. -
Page 16: Moving The Drying Machine
4.5 Moving the drying machine • Drain the water in the drying machine completely. • If the product is connected via direct discharge, remove the hose connections. The drying machine is recommended to be moved in upright position. Otherwise, tilt it to the right side when viewed from the front and move the drying machine. -
Page 17: Preparation
5 Preparation 5.3 Preparing the laundry to be dried Items such as coins, metal parts, needles, nails, screws, stones etc. may damage the drum group of the Read the “Safety Instructions” first! product or may cause functional operation issues. Therefore check all laundry that will be loaded to the 5.1 Laundry suitable for product. -
Page 18: Correct Load Capacity
• If you are using environment friendly filter, you are not required to clean the filter after every cycle. When the environment friendly icon is lit on the screen, change the filter cloth. 5.5 Correct load capacity NOTICE If the laundry in the product exceed maximum load capacity, it may not... -
Page 19: Running The Product
6 Running the product 6.1 Control Panel 1. Program selection button. 7. Express Dry (RapiDry) button and child lock selection button. 2. On / Off button. 8. Steam selection button. 3. Start / Pause button. 9. Reverse drum selection button. 4. -
Page 20: Program Selection And Consumption Chart
6.4 Program selection and consumption chart Table of steam functioned cycles Programmes Programme Description 1,5 (6 pieces) Is a cycle aimed to reduce the wrinkle level on shirts and t-shirts using a steam function. This cycle usually eliminates the need for ironing for casual shirts after Ready to Wear* drying. - Page 21 Table of non-steam functioned cycles You may dry your cotton laundry to be ironed in this Cottons Iron program to have them slightly damp for ease of ironing. 1000 (Shirt, T-shirt, tablecloth, etc.) It is the programme that you can dry your washed products you want to provide with extra hygiene (baby clothes, underwear, towels, etc.).
- Page 22 Downloaded Program Use it to dry your clothes made of synthetics, cotton Outdoor/Sports or mixed fabrics or waterproof products such as 1000 (Goretex) functional jacket, raincoat etc. Turn them inside out prior to drying. It provides hygienic drying for your underwear via high Underwear 1000 temperature.
-
Page 23: Auxiliary Functions
2. Select the drying program. Allergy UK is the trademark of the British Allergy Foundation. 3. Press the End Time selection button and set the delay time you wish. End time LED The Seal of Approval has been turns on. (When pressed and hold the created to guide people requesting an advice that the button, End Time proceeds non-stop). -
Page 24: Warning Indicators
Press the Audible Warning button for 3 seconds in order to activate the child lock. The child lock has to be deactivated to be able to start a new program after the current program is finished or to be able to interfere with the program. -
Page 25: Cancelling The Program
If the Wrinkle Prevention mode Adding laundry after the drying is active and the laundry is not operation starts may cause the removed after the program is dried laundry inside the drying completed, the wrinkle prevention machine to mix with wet laundry function activates for 2 hours to and leave the laundry damp at the prevent the laundry inside the... -
Page 26: Homewhiz Function
This symbol indicates that you can run the drying cycle with a maximum load of 1.5 kg (6 pieces). To be able to dry 1 piece or 3 pieces of laundry, you need to tap the ‘Steam’ option on the screen to make the required adjustment in loading level settings. - Page 27 • The remote control is cancelled when the door is opened. • The remote control is cancelled when the program button is turned • If the Wifi icon is illuminated continuously, it means that it is active and connected to network •...
-
Page 28: Maintenance And Cleaning
7 Maintenance and cleaning with the brush on the air deflector. You can clean the hair in the filters with a vacuum cleaner. Read the “Safety Instructions” first! 7.1 Lint filters (internal and external filters) / Cleaning of the Interior Surface of the Loading Door The hair and fibres that are separated from the laundry during drying process is collected by... -
Page 29: Cleaning The Sensor
Clean the metal surfaces of the sensor 4 times a year. Do not use metal tools to clean the sensors’ metal surfaces. • Clean the inner surface of the loading door Due to fire and explosion hazard, do and the gasket with a soft damp cloth or the not use solutions, cleaning materials brush on the air deflector. -
Page 30: Cleaning The Condenser
Drain the water in the tank. Pull the brush to the left to remove it. You can use the cleaning brush to clean filter, condensing metal surface and accumulated fibre on the door. If fibre is accumulated in the funnel on the water tank, remove it under running water. - Page 31 You can clean by hand, provided you wear protective gloves. Do not try to clean with bare hands. The condenser fins may damage your hands. Cleaning from left to right may damage the condenser fins. This may lead to drying issues. When the air deflector cover is removed, it is normal to have water at the plastic section in front of the...
-
Page 32: Troubleshooting
8 Troubleshooting Drying operation takes too long. Fibre filter (interior and exterior filter) pores may be clogged. >>> Wash the fibre filters with warm water and dry. Condenser front side may be clogged. >>> Clean the front side of the condenser. The ventilation grills in front of the machine may be closed. - Page 33 Wrinkle prevention icon or light is lit. Anti-Crease mode that prevents the laundry in the drier to crease may be activated. >>> Turn the drier off and remove the laundry Fibre filter cleaning icon is lit. Fibre filter (interior and exterior filter) may be unclean. >>> Wash the filters with warm water and dry.. A layer may be formed on the fibre filter pores that leads to clogging.
- Page 36 www.beko.com.au...