Table of Contents
Advertisement
Advertisement
Table of Contents

Related Manuals for Beko BDP83HW


Summary of Contents for Beko BDP83HW
-
Page 1: User Manual
Dryer User Manual BDP83HW BDP83HW/271017.1521... -
Page 2: Please Read This User Manual First
Please read this user manual first! Dear Customer, Thank you for prefering a Beko Euromed product. We hope that your product which has been manufactured with high quality and technology will give you the best results. We advise you to read through this manual and the other accompanying documentation carefully before using your product and keep it for future reference. -
Page 3: Important Instructions For Safety And Environment
Important instructions for safety and environment This section contains safety instructions that will help protect from risk of personal injury or property damage. Failure to follow these instructions shall void any warranty. 1.1 General safety • The dryer can be used by children at and above 8 years old and by persons whose physical, sensory or mental capabilities were not fully developed or who lack experience and knowledge provided that they are... -
Page 4: Electrical Safety
Important instructions for safety and environment • You may only put laundry that is not dirty or stained but permeated with unpleasant odour in steam (odour removal) program. • Do not use any dry cleaning sets or additional materials in a steam program or in any program. -
Page 5: Product Safety
Important instructions for safety and environment If the dryer is faulty, it must not be operated unless it is repaired by an authorized service agent! There is the risk of electric shock! 1.1.2 Product safety Superheating of the clothes inside of the dryer can occur if you cancel the programme or in the event of a power failure whilst the dryer is running, this concentration of heat can cause self-combustion and... - Page 6 Important instructions for safety and environment Below specified laundry or items must not be dried in the dryer due to the fire hazard: • Garments or pillows bolstered with rubber foam (latex foam), shower bonnets, water resistant textiles, materials with rubber reinforcement and rubber foam pads.
- Page 7 Important instructions for safety and environment Underwear that contains metal reinforcements should not be dried in the dryer. Dryer may be damaged if metal reinforcements come loose and break off during drying. Use softeners and similar products in accordance with the instructions of their manufacturers. Always clean the lint filter before or after each loading.
-
Page 8: Mounting Over A Washing Machine
Important instructions for safety and environment • The final step of the drying cycle (cool-down cycle) occurs without applying heat to ensure that the items are left at a temperature that will not damage them. 1.2 Mounting over a washing machine •... -
Page 9: Intended Use
Important instructions for safety and environment 1.3 Intended use • Dryer has been designed for domestic use. It is not suitable for commercial use and it must not be used out of its intended use. • Use the dryer only for drying laundry that are marked accordingly. -
Page 10: Compliance With The Weee Regulation And Disposing Of The Waste Product
Important instructions for safety and environment 1.5 Compliance with the WEEE regulation and disposing of the waste product This product complies with EU WEEE Directive (2012/19/EU). This product bears a classification symbol for waste electrical and electronic equipment (WEEE). This product has been manufactured with high quality parts and materials which can be reused and are suitable for recycling. -
Page 11: Technical Specifications
Important instructions for safety and environment 1.8 Technical Specifications Height (min. / max.) 84,6 cm / 86,6 cm* Width 59,5 cm Depth 60,9 cm Capacity (max.) 8 kg** Net weight (plastic front door 48,5 kg usage) Net weight (glass front door 51 kg usage) Voltage... -
Page 12: Your Dryer
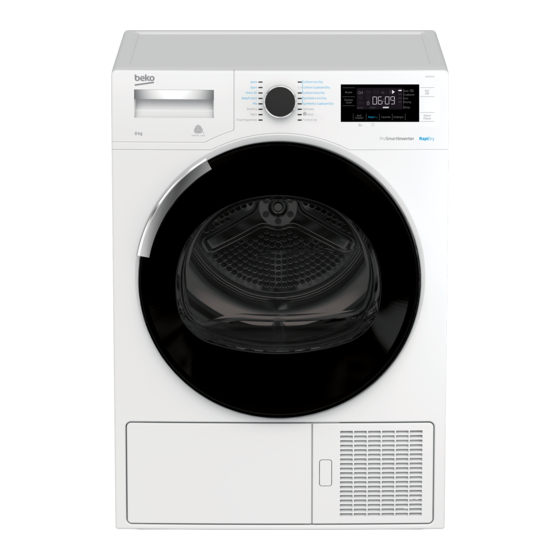
Your Dryer 2.1 Overview 1. Top panel 2. Control panel 3. Loading door 4. Kick plate opening button 5. Ventilation grids 6. Adjustable legs 7. Kick plate 8. Type label 9. Lint filter 10. Water tank drawer 11. Power cord 2.2 Package Contents 1. -
Page 13: Appropriate Installation Location
Installation Before the calling the nearest Authorized Do not place the dryer on the Service for the installation of the dryer, power cable. ensure that electrical installation and water drain is appropriate referring to the user’s 3.2 Removing the manual. If they are not suitable, contact a transportation safety qualified electrician and technician to make assembly... -
Page 14: Warnings About Sounds
Installation 3.6 Warnings about sounds It is normal to hear a metallic noise from the compressor sometimes during operation. Water drain hose should be attached to a height of maximum 80 cm. Make sure that the water drain hose is not stepped on and it is not Water collected during operation is folded between the drain and the pumped to water tank. -
Page 15: Laundry Not Suitable For Drying In The Dryer
Preparation 4.1 Laundry suitable for drying in operation • For models with a condenser unit: clean in the dryer the condenser once in a month or after Always obey the instructions given on the every 30 operations regularly. . garment tags. Dry only the laundry having a •... - Page 16 Preparation Following weights are given as examples. Approximate Laundry weights (g)* Cotton quilt covers 1500 (double) Cotton quilt covers 1000 (single) Bed sheets (double) Bed sheets (single) Large tablecloths Small tablecloths Tea napkins Bath towels Hand towels Blouses Cotton shirts Shirts Cotton dresses Dresses...
-
Page 17: Control Panel
Operating the product 5.1 Control panel 1. Programme Selection knob 2. Dryness Level Adjustment button 3. Audio Warning Level button 4. Display 5. On /Off/Cancel button 6. Start/Pause button 7. End Time button 8. Favourite button 9. Rapidry / Timer Programmes Selection button 10. -
Page 18: Programme Selection
Operating the product 5.3 Preparing the machine • Synthetics Plug in your machine. Dry less durable laundry with this Place the laundry in the machine. programme. Recommended for synthetics. Press the On/Off/Cancel button for 1 5.6 Additional programmes second (long). 4. -
Page 19: Timer Programmes
Operating the product • WoolProtect • Freshen Up Use this programme to dry woolen garments Only ventilation is performed for 10 minutes such as jumpers that are washed according to without blowing hot air. You can air the the instructions. clothes that have been kept at closed It is recomended that garments would be environments for a long time and deodorize... -
Page 20: Programme Selection And Consumption Table
Operating the product 5.7 Programme selection and consumption table Approximate Spin speed Capacity amount of Energy consumption RapiDry Programs in washing (kg) remaining value kWh (minutes) machine (rpm) humidity Cottons / Coloreds A Extra dry 1000 % 60 A Cupboard dry 8 / 4 1000 % 60... -
Page 21: Auxiliary Functions
Operating the product 5.8 Auxiliary functions Dryness level adjustment selection Dryness level adjustment button is Audio Warning used to adjust the required dryness level. The machine will give an audio warning Programme duration can change depending when the programme comes to an end. Use on the selection. - Page 22 Operating the product Anti-creasing 5.9 RapiDry Anti-creasing programme duration may This application is available for all be changed with the Anti-creasing programmes highlighted with dark colour on selection button. You can use Anti-creasing the control panel. function to prevent laundry from creasing if For example in case of “wardrobe ready for you will not take the laundry out after the cotton”...
-
Page 23: Warning Symbols
Operating the product Canceling End time function • Open the loading door and put the laundry in. If you want to cancel the End Time • Select the drying program. countdown and start the programme immediately: • End Time is deactivated when the dryer is switched off and on with On/Off/ Cancel button. -
Page 24: Cleaning The Filter Drawer
Operating the product Cleaning the filter drawer 5.13 Child Lock Warning symbol flashes to remind that the Machine is equipped with a Child Lock filter drawer needs to be cleaned. which prevents interfering with the current programme flow by pressing any button. For detailed information, see 6 To activate the Child Lock: Maintenance and cleaning. -
Page 25: Canceling The Programme
Operating the product 5.15 Canceling the programme Adding / removing laundry while the dryer is in operation To cancel the programme after the dryer is started: • In order to add or take out laundry after • Press and hold Start / Pause button for the drying programme has started: 1 seconds to pause the programme and •... -
Page 26: Maintenance And Cleaning
Maintenance and cleaning 6.1Loading Door Inner Surface Ensure that hair, fibre and cotton The hair and fibres that are separated from balls do not fall into the slot the laundry during drying process is collected .where the filters are installed by the Fibre Filter. -
Page 27: Cleaning The Sensor
Maintenance and cleaning • Clean the loading door interior and its washer with a soft damp cloth. 6.3 Draining the water tank Dampness of the laundry is removed and condensed during drying process and the water that arise accumulates in the water tank. -
Page 28: Cleaning The Evaporator
Maintenance and cleaning • Drain the water in the tank. • Clean the fibres on the evaporator with a damp cloth / vacuum cleaner with a brush by moving upwards and downwards. • After the cleaning process is completed, • If there is lint accumulation in the funnel place the air router door to its place, move of the water tank, clean it under running... -
Page 29: Troubleshooting
Troubleshooting Drying operation takes too long. • Fibre filter (interior and exterior filter) pores may be clogged. >>> Wash the fibre filters with warm water and dry. • Evaporator front side may be clogged. >>> Clean the front side of the evaporator. •... - Page 30 Troubleshooting Water drips from the loading door. • Fibres might have gathered on the inner sides of the loading door and the loading door gasket. >>> Clean the inner surfaces of the loading door and the loading door gasket surfaces. Loading door opens by itself.