Table of Contents
Advertisement
Quick Links
Advertisement
Chapters
Table of Contents

Related Manuals for Pyle view PLVW1048VGA


Summary of Contents for Pyle view PLVW1048VGA
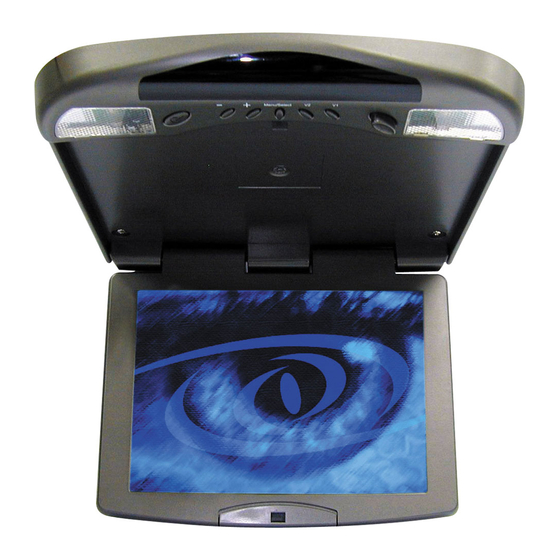
- Page 1 PLVW1048VGA 10.4” FLIP-DOWN IN-CAR DISPLAY (+VGA) USER MANUAL V1.0...
-
Page 2: Table Of Contents
Specification Installation OSD function Content of OSD function Accessories Outside dimension Precaution Remark INDEX CONTENT PAGE... -
Page 3: Specification
CAR-TV 10.4” + VGA function Resolution 800(H) x 600(V) Size 10.4” TFT LCD 200 cd/㎡ (Typ) Brightness Composite Video(RCA)(F) ×2 Video input (NTSC,PAL,SECAM) Stereo Sound Input (RCA)(F) ×2 Audio input PC Sound Input (Phone Jack) ×1 Analog 0.7Vp-p/75ohms, Sync PC input Separate, TTL level. -
Page 4: Installation
2. Installation Step 1: Attention: It’s directional for the iron slice. slice Instruction to fix the screw of the iron... - Page 5 Instruction to fix the screw of the monitor Screw hole 4 mm...
- Page 6 Step 2: Install the monitor on the roof. Car roof Iron slice Car roof Mounting plate...
- Page 7 Step 3: Fix the monitor on the iron slice with the screws. See step 1 Completed...
-
Page 8: Osd Function
VIDEO control keys: 1. Power : When you push this button, it will Power ON or OFF the LCD. 2. ” — “:When you push this button, it will decrease the degree of the function that you selected. 3. ” ┼ “:When you push this button, it will decrease the degree of the function that you selected. - Page 9 PC/VIDEO remote control function: 1. POWER:When you push this button, it will Power On or Off the LCD. 2. V1/V2: You could select V1 or V2 or PC with this button. 3. MENU : Show Function Menu List and Select the function on the menu, when you push this key.
-
Page 10: Content Of Osd Function
4. Content of OSD Function OSD Adjustment for PC function Press “MENU” Button,display will show following picture. P I P E n a b l e A u t o T u n e B r i g h t n e s s C o n t r a s t C o l o r Q u a l i t y... - Page 11 4.1 PIP CHANNEL SELECT( Under PC Mode ) V I D E O 1 V I D E O 2 P I P O F F R E T U R N VIDEO 1: Set VIDEO 1 Input (Press “MENU” to enter) VIDEO 2: Set VIDEO 2 Input (Press “MENU”...
- Page 12 4.4 CONTRAST CONTRAST: Adjust white color level 0~63 of the image. 4.5 COLOR 9 3 0 0 7 5 0 0 6 5 5 0 U S E R R E T U R N 9300K : Set color to 9300K(Use “MENU” to enter) 7500K : Set color to 7500K(Use “MENU”...
- Page 13 4.6 QUALITY S I Z E P H A S E T E S T / G F X S H A R P N E S S R E T U R N SIZE : Adjust size of the image. PHASE : Adjust phase level 0~63 of the image.
-
Page 14: 0 0
4.8 MUTE M u t e O f f M u t e O n H : 3 7 . 6 K H z Mute Off : Choose this to close the mute function. Mute On : Choose this to open the mute function 4.9 FM F M 8 8 . -
Page 15: 9 . 7 H Z
Channel in frequency modulation FM88MHz that the radio is adjusted Receive the sound to export. Adjusting range: 88.0MHz~88.9MHz RETURN : Back to new setting 4.10 DEFAULT 5 OSD Adjustment for VIDEO function Press “MENU” Button,display will show following picture. B r i g h t n e s s M u t e P I C M o d e C o n t r a s t... -
Page 16: Default : Set Default Value. See 5.8
PIC MODE : See 5.4 CONTRAST : See 5.5 SATURATION : See 5.6 HUE : See 5.7 DEFAULT : Set default value. See 5.8 SAVE EXIT : Save all of adjustment & exit to OSD function. 5.1 BRIHTNESS BRIGHTNESS: Adjust LCD brightness level 0~63 of the image 5.2 MUTE M u t e O f f M u t e O n... - Page 17 5.3 FM F M 8 8 . 0 M H Z F M 8 8 . 1 M H Z F M 8 8 . 2 M H Z F M 8 8 . 3 M H Z F M 8 8 . 4 M H Z F M 8 8 .
- Page 18 5.5 CONTRAST CONTRAST: Adjust white color level 0~63 of the image. 5.6 SATURATION. -128 SATURATION: Adjust color Saturation level ~128~127. 5.7 HUE -128 HUE: Adjust color Hue level –128~127 5.8 DEFAULT CONTRAST SATURATION DEFAULT +127 +127...
- Page 19 5. Description of Accessories Accessory Description Video, audio, power input See chart 1 Power cable+ Fuse(spec:3A/250V) Yellow:video input 1, video input 2 Red:audio input (R)1, audio input(R)2 White:audio input(L)1, audio input(L)2 Power input connector: Red: Anode Black: Ground See chart 2 IR transmitter: Receive 2.3MHz &...
- Page 20 Sound cable: PC audio output connect to audio input of monitor PC audio input RGB cable: connect PC to video input of monitor PC video input...
- Page 21 Description of accessories: Chart 1:...
- Page 22 Chart 2:...
-
Page 23: Outside Dimension
6. Outside dimension L:306.65mm W:304.40mm H:42.50mm... -
Page 25: Precaution
1. It does not support mono signal. 2. When there’s no input signal of PIP function, the feedback of OSD key may become slow. You could just turn off the PIP window. Do not apply Pressure to the screen 4. Do not sprinkle any liquid to clean LCD. If you need to clean it, please use LCD Clean cloth. -
Page 26: Remark
8. Remark × × 1:M4 0.7 L= 5 mm screw × ψ L= 10 mm screw...