Table of Contents
Advertisement
Available languages
Available languages
UTILITECH & logo design are trademarks or registered
trademarks of LF, LLC. All rights reserved.
ATTACH YOUR RECEIPT HERE
Serial Number ___________________________ Purchase Date ___________________________
Questions, problems, missing parts? Before returning to the store, call our customer
service department at 1-866-994-4148, 8 a.m. - 8 p.m., EST, Monday - Sunday. You could
also contact us at partsplus@lowes.com or visit www.lowespartsplus.com.
SM21618
READ AND SAVE THESE INSTRUCTIONS
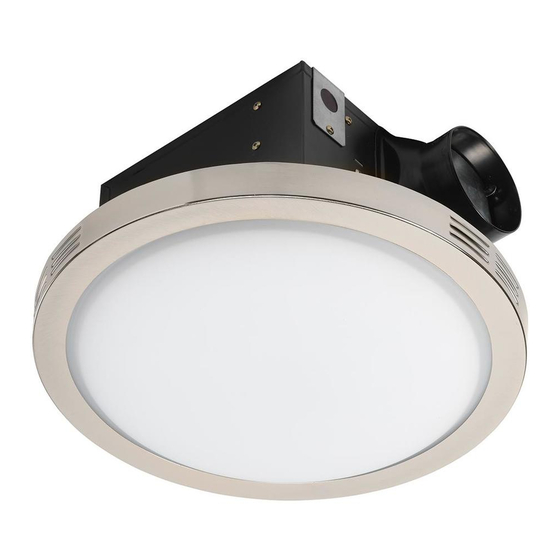
VENTILATION FAN
WITH LED LIGHT
ITEM # 1074715
MODEL 7105-06
Español p.13
04/2022
Advertisement
Chapters
Table of Contents

Related Manuals for Utilitech 7105-06


Summary of Contents for Utilitech 7105-06
- Page 1 ITEM # 1074715 VENTILATION FAN WITH LED LIGHT UTILITECH & logo design are trademarks or registered MODEL 7105-06 trademarks of LF, LLC. All rights reserved. Español p.13 ATTACH YOUR RECEIPT HERE Serial Number ___________________________ Purchase Date ___________________________ Questions, problems, missing parts? Before returning to the store, call our customer service department at 1-866-994-4148, 8 a.m.
-
Page 2: Table Of Contents
TABLE OF CONTENTS Product Specifications ........................2 Package Contents ..........................3 Hardware Included ..........................3 Safety Information ..........................4 Preparation ............................4 Installation Instructions ........................6 Care and Cleaning..........................10 Troubleshooting ..........................11 Warranty ............................12 PRODUCT SPECIFICATIONS Airflow: 90 CFM Fan power consumption: 28W 120 V, 60Hz LED light power consumption: 20W Duct diameter: 4 in. -
Page 3: Package Contents
PACKAGE CONTENTS PART DESCRIPTION PART DESCRIPTION Fan Housing Suspension Bracket Grille with LED Light Suspension Bracket Trim Ring Suspension Bracket Glass Diffuser Duct Connector HARDWARE CONTENTS (not shown actual size) Wood Long Machine Small Machine Metal Screw Screw Screw Washer Qty. -
Page 4: Safety Information
SAFETY INFORMATION Please read and understand this entire manual before attempting to assemble, operate or install the product. • Always disconnect the power supply prior to servicing the fan, WARNING: To reduce the risk of fire, electric shock, motor or junction box. or injury to persons, observe the following: •... - Page 5 PREPARATION (Continued) Check area above installation location to be sure that wiring can run to the planned location and that duct work can be run and the area is sufficient for proper ventilation. Inspect duct work and wiring before proceeding with installation. Before installation, provide inspection and future maintenance access at a location that will not interfere with installation work.
-
Page 6: Installation Instructions
INSTALLATION INSTRUCTIONS BEFORE INSTALLATION WARNING: RISK OF ELECTRIC SHOCK! Ensure the electricity to the wires you are working on is shut off. Either remove the fuse or turn off the circuit breaker before removing the existing bath fan or installing the new one. - Page 7 INSTALLATION INSTRUCTIONS (Continued) The tabs (5.1) will help hold the fan housing (A) in place in the ceiling opening while installing the suspension brackets. Insert suspension bracket (E) into the rails on the fan housing (A) on the side with the duct opening. Insert suspension bracket (F) into the rails on the opposite side of the fan housing (A) and then slide suspension bracket (G) into suspension bracket (F).
- Page 8 INSTALLATION INSTRUCTIONS (Continued) Secure the suspension brackets (E, F, G) to the fan housing (A) using the small machine screws (CC). Hardware Used Small machine screw Slide the duct connector (H) into the tabs on the fan housing (A) until the duct connector (H) snaps firmly into place over the opening in the fan housing (A).
- Page 9 INSTALLATION INSTRUCTIONS (Continued) Plug in the connectors on the grille with LED light (B) into the fan housing (A). Join the connectors (two hole and four hole) from the fan motor to the fan housing (A). holes connector holes Secure the grille with LED light (B) to the fan housing (A) using 4 long machine screws (BB) and metal washers (DD).
-
Page 10: Care And Cleaning
INSTALLATION INSTRUCTIONS (Continued) Rotate the trim ring (C) until it hits the stop and cannot be rotated further. Carefully pull hands away to verify the trim ring (C) and glass diffuser (D) are securely attached to the fan housing (A). Turn on the power source. -
Page 11: Troubleshooting
CARE AND CLEANING (Continued) Remove dust and dirt from around the grille with LED light (B) and fan housing (A) with a vacuum cleaner. Wipe the grille with LED light (B) with a soft, dry cloth. Rotate the trim ring (C) until it hits the stop and cannot be rotated further. -
Page 12: Warranty
LIMITED 5-YEAR WARRANTY If this product fails due to a defect in materials or workmanship at any time during the first FIVE years of ownership, the manufacturer will replace it free of charge, postage-paid at their option. This warranty does not cover products that have been abused, altered, damaged, misused, cut or worn. - Page 13 ARTÍCULO # 1074715 VENTILADOR CON LUZ LED UTILITECH y el diseño del logotipo son marcas MODELO 7105-06 comerciales o marcas registradas de LF, LLC. Todos los derechos reservados. ADJUNTE SU RECIBO AQUÍ Número de serie _________________________ Fecha de compra ________________________ ¿Preguntas, problemas, piezas faltantes? Antes de volver a la tienda, llame a nuestro...
-
Page 14: Especificaciones Del Producto
TABLA DE CONTENIDO Especificaciones del producto ......................14 Contenido del paquete ........................15 Materiales incluidos ..........................15 Información de seguridad ........................16 Preparación ............................16 Instrucciones de instalación ......................18 Cuidado y limpieza ...........................22 Solución de problemas ........................23 Garantía............................24 ESPECIFICACIONES DEL PRODUCTO Flujo de aire: 90 CFM Consumo de energía del ventilador: 28 W 120 V, 60 Hz Consumo eléctrico del LED: 20 W... -
Page 15: Contenido Del Paquete
CONTENIDO DEL PAQUETE PARTE DESCRIPCIÓN CANTIDAD PARTE DESCRIPCIÓN CANTIDAD Carcasa del ventilador Soporte de suspensión Rejilla con luz LED Soporte de suspensión Anillo de ajuste Soporte de suspensión Difusor de vidrio Conector de conducto MATERIALES INCLUIDOS (no se ilustran en tamaño real) Tornillo para Tornillo grande Tornillo pequeño... -
Page 16: Información De Seguridad
INFORMACIÓN DE SEGURIDAD Por favor, lea y comprenda este manual en su totalidad antes de intentar ensamblar, operar o instalar el producto. • Siempre desconecte la fuente de alimentación antes de darle ADVERTENCIA: para reducir el riesgo de incendio, servicio al ventilador, motor o caja eléctrica. choque eléctrico o lesiones a las personas, respete lo siguiente: •... - Page 17 PREPARACIÓN (Continuación) Compruebe el área sobre la ubicación de instalación para asegurarse de que el cableado puede correr a la ubicación prevista y que los conductos se puede correr y el área es suficiente para una ventilación adecuada. Inspeccione los conductos y el cableado antes de proceder con la instalación. Antes de la instalación, proporcione acceso para la inspección y el mantenimiento en un lugar que no interfiera con el trabajo de instalación.
-
Page 18: Instrucciones De Instalación
INSTRUCCIONES DE INSTALACIÓN PREVIO A LA INSTALACIÓN ADVERTENCIA: ¡RIESGO DE DESCARGA ELÉCTRICA! Asegúrese de cortar el suministro eléctrico en los cables con los que trabajará. Extraiga los fusibles o apague el cortacircuitos antes de quitar el ventilador de baño existente o instalar uno nuevo. Retire el ventilador existente. - Page 19 INSTRUCCIONES DE INSTALACIÓN (Continuación) Las pestañas (5.1) ayudarán a mantener la carcasa del ventilador (A) en su lugar en la abertura del techo mientras se instalan los soportes de suspensión. Inserte el soporte de suspensión (E) en los rieles de la carcasa del ventilador (A) en el lado con la abertura del conducto.
- Page 20 INSTRUCCIONES DE INSTALACIÓN (Continuación) Fije los soportes de suspensión (E, F, G) a la carcasa del ventilador (A) utilizando tornillos para metales (CC). Aditamentos utilizados Tornillo pequeño para metales Deslice el conector del conducto (H) en las pestañas de la carcasa del ventilador (A) hasta que el conector del conducto (H) encaje firmemente en su lugar sobre la abertura de la carcasa del ventilador (A).
- Page 21 INSTRUCCIONES DE INSTALACIÓN (Continuación) Enchufe la rejilla con luz LED (B) en la carcasa del ventilador (A). Conecte los conectores de alambre (dos agujeros y cuatro agujeros) del motor del ventilador a la carcasa 4 agujeros del ventilador (A). agujeros Fije la rejilla con luz LED (B) a la carcasa del ventilador (A) con los 4 tornillos para metal largo (BB) y con las arandelas para metal (DD).
-
Page 22: Cuidado Y Limpieza
INSTRUCCIONES DE INSTALACIÓN (Continuación) Gire el anillo de ajuste (C) hasta que tope el máximo y no pueda rotarlo más. Quite las manos cuidadosamente para verificar el anillo de ajuste (C) y el difusor de vidrio (D) estarán fijos a la carcasa del ventilador (A). Encienda la fuente de alimentación. -
Page 23: Solución De Problemas
CUIDADO Y LIMPIEZA (Continuación) Retire el exceso de polvo y suciedad alrededor de la rejilla con luz LED (B) y la carcasa del ventilador (A) con una aspiradora. Limpie la rejilla con luz LED (B) con paño suave y seco. Gire el anillo de ajuste (C) hasta que tope el máximo y no pueda rotarlo más. -
Page 24: Garantía
GARANTÍA LIMITADA DE 5 AÑOS Si el ventilador falla debido a un defecto en el material o la mano de obra en cualquier momento durante los primeros CINCO años de poseerlo, elfabricante lo reemplazará sin cargos y con el franqueo pagado a su discreción. Esta garantía no cubre productos que hayan sido objeto de abuso, alteración, daño, mal uso, corte o desgaste.