Table of Contents
Advertisement
Quick Links
Advertisement
Table of Contents

Related Manuals for Joyner Dirt Devil SZ250DS 2006


Summary of Contents for Joyner Dirt Devil SZ250DS 2006
- Page 2 SZ250DS Limited Warranty The warranty policy applies to those cases where the new seller vehicle is unloaded from its shipping container, set up and delivered by authorized dealer, and under normal use and service is found to have defects in parts or workmanship under the following terms and conditions.
-
Page 3: Table Of Contents
CONTENTS OWNER’SMAUNUAL 1. FOREWORD..................... A FEW WORDS ABOUT SAFETY............IMPORTANT SAFETY INFORMATION..........SAFETY LABELS.................. ARE YOU READY TO DRIVE..............IS YOUR VEHICLE READY TO DRIVE..........11 7.SAFE DRIVING PRECAUTIONS..............13 8.SPECIFICATIONS..................15 9.OPERATION....................16 10.SERVICE INSTRUCTIONS............... 20 11. REPAIR..................... 24 12. -
Page 4: Foreword
FOREWORD Thank you for choosing our Go-Kart. We hope you will have fun with it. Before you start operating the Go-Kart, please read through this Owner’s Manual carefully as it contains important safety and maintenance information. Failure to follow the warnings contained in this manual can result in serious injuries. -
Page 5: A Few Words About Safety
A FEW WORDS ABOUT SAFETY In order to keep everyone safe, you must take responsibility for the safe operation of your Go-Kart. To help you make informed decisions about safety, we have provided operating procedures and other information on labels and in this manual. This information alerts you to potential hazards that could hurt you or others. -
Page 6: Important Safety Information
IMPORTANT SAFETY INFORMATION Your Go-Kart will provide you with many years of service and pleasure. Providing you take responsibility for your own safety and understand the challenges you can meet while driving. There is much that you can do to protect yourself when you drive. You’ll find many helpful recommendations throughout this manual. - Page 7 Never run your Go- Kart indoors or in enclosed spaces with poor ventilation. The exhaust from the engine contains a tasteless, odorless and poisonous gas called carbon monoxide. Keep away from moving parts of the Go-Kart The operator of the Go-Kart should never place their hands or other parts of their body near any moving part of the Go-Kart.
-
Page 8: Safety Labels
SAFETY LABELS This section presents some of the most important information and recommendations to help you drive your Go-Kart safely, Please a few moments to read these pages. The labels are considered permanent parts of the Go-Kart. If a label comes off or becomes hard to read, contact your dealer for warning labels replacements. -
Page 9: Are You Ready To Drive
ARE YOU READY TO DRIVE? Before each drive, you need to make sure you and your Go-Kart are both ready to drive. To help get you prepared, this section discusses how to evaluate your driving readiness, what items you should check on your Go-Kart, and adjustments to make for your comfort, convenience, or safety. - Page 10 and a chest/shoulder protector. Drive Training Developing your driving skills is an on-going process. Even if you have driven other Go-Karts, take time to become familiar with how this Go-Kart works and handles. Practice driving the Go-Kart in a safe area to build your skills. Do not drive in rough terrain until you get accustomed to the Go-Kart’s controls, and feel comfortable with its size and weight.
-
Page 11: Is Your Vehicle Ready To Drive
IS YOUR VEHICLE READY TO DRIVE? Before each drive, it is important to inspect your Go-Kart and make sure any problems you find are corrected. A pre-drive inspection is a must, not only for safety, but because having a breakdown, or even a flat tire, can be a major inconvenience. If your Go-Kart has overturned or has been involved in a collision, do not drive it until your dealer has inspected your Go-Kart, There may be damages or other problems you cannot see. - Page 12 ■ Throttle Check the free play and adjust if needed. Press the throttle to make sure it moves smoothly without sticking, and snaps back automatically when it is released. ■ Brakes Press the rear brake pedal several times, check for proper brake pedal free play. Make sure there is no brake fluid leakage.
-
Page 13: Safe Driving Precautions
SAFE DRIVING PRECAUTIONS Off-Road Use Only You Go-Kart and its tires are designed and manufactured for off-road use only, not for pavement. Driving on pavement can affect handling and control. You should not drive your Go-Kart on pavement. When driving off-road, also remember to always obey local off-road driving laws and regulations. - Page 14 Use Care on Unfamiliar or Rough Terrain Before driving in a new area, always check the terrain thoroughly. Don’t drive fast on unfamiliar terrain or when visibility is limited. (It’s sometimes difficult to see obstructions like hidden rocks, bumps, or holes in time to react). Never drive past the limit of visibility.
-
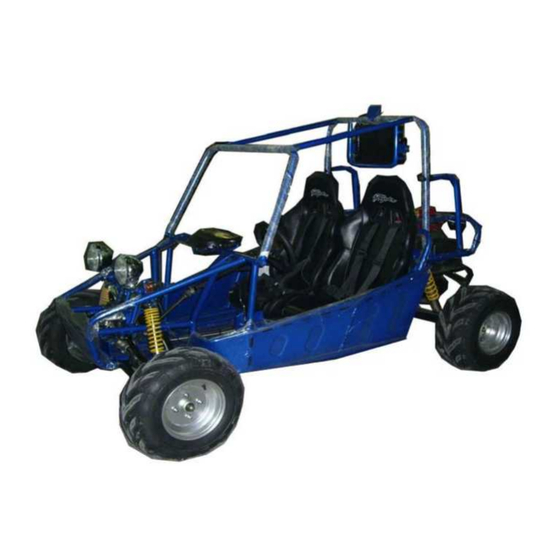
Page 15: Specifications
SPECIFICATIONS DIMENSIONS Overall Length---------------------------------------------------------------------------------------93 in. (2380mm) Overall Width--------------------------------------------------------------------------------------54.3 in. (1380mm) Overall Height---------------------------------------------------------------------------------------65.4 in. (1660mm) Wheelbase--------------------------------------------------------------------------------------------72.8 in. (1850mm) Front Track------------------------------------------------------------------------------------------47 in. (1200mm) Rear Track------------------------------------------------------------------------------------------43.5 in. (1105mm) Ground Clearance-----------------------------------------------------------------------------------4.7 in. (120mm) ENGINE Type------------------------------------------------------------------------------------------Liquid-cooled. 4-Stroke Bore x Stroke--------------------------------------------------------------------------------------------72mmx60mm Displacement------------------------------------------------------------------------------------------------------244 cc Corrected compression ratio------------------------------------------------------------------------------------9.2:1 Carburetor-----------------------------------------------------------------------KEI HIN;... -
Page 16: Operation
OPERATION A. Operation controls WARNING-Do not attempts to start or operate the engine until completely familiar with the location and use of each control necessary to operate this vehicle. The operator must know how to stop this machine before starting and driving it. a. - Page 17 Figure 3 B. Pre-Drive Inspection Check for Engine Oil Level. Check for leaks, add oil if required. Check for Fuel Level. Add fuel as necessary and do not overfill. Check for leaks. Check for Brakes. Depress the rear brake pedal several times, and then check for proper brake pedal free play.
- Page 18 Passengers The vehicle allows for two riders only. Combine maximum weight of driver And the passenger should not exceed 180kg or 400lbs. Seat Adjustment The seat must always be securely fastened in the position which best affords the operator control of the foot pedals, steering wheel, and the remote stop button.
- Page 19 E. Shift Adjustment Figure 5 Press down the shift lever to the “F” position so that the unit can move forward, Pull back the shift to “N” position so that the unit can’t move because of in the neutral, pull back the lever to “R”...
-
Page 20: Service Instructions
F. Parking Adjustment a. Press down the reverse lever to the “F” position so that the unit can move forwards; pull back the lever to “P” so that the unit can park. (See Fig. 6) Adjust Nut #1; Make sure cable is not too tight or too loose. - Page 21 B. Engine Lubrication You must change the oil in the crankcase after the first 5 hours of operating of your new engine (See Fig. 9) and after 10 hours of use thereafter. That will insure proper lubrication of internal parts and prevent costly repairs due to excessive wear. Remove fill plug located on rear side of engine.
- Page 22 D. Spark Plug Remove the spark plug and inspect it each time you change the oil. (Use a spark plug wrench) The electrodes should be kept clean and free of carbon. The presence of carbon or excess oil will greatly reduce proper engine performance. If possible, check the spark plug gap (area between electrodes) using a wire feeler gauge.
- Page 23 I. Chain Adjustment Check the chain adjustment after first two hours of use. Readjust if it has more than 1/2” flex. (See figure 12) Loosen 12 Bolts Insert the special tools into the holes, Rotate the axle clockwise to adjust the chain for a right position.
-
Page 24: Repair
REPAIR A. Front Wheel Replacement Do not disassemble the castle nuts when you replace the front wheels. It is only necessary to tighten the nuts so that the wheel turns freely on the axle with minimum end play. (See Fig. 13) Tighten the nuts after replacing the wheels. B. -
Page 25: Periodical Check And Services
PERIODICAL CHECK AND SERVICES The maintenance intervals in the following table are based upon average driving conditions. Driving in unusually dusty areas, require more frequent servicing. Time of Service Monthly Quarterly Yearly Items Initial service (First week) Tire pressure/wear Brake performance Tightness of screws Air cleaner Carburetor... -
Page 26: Wiring Diagram
WIRING DIAGRAM... -
Page 27: Parts Manual
ENGLISH 172MM-011200 Right crankcase comp. 152MI-011010 Outer bush, engine hanger 152MI-011008 O-ring, 15.8X2.4 152MI-011009 Inner bush, engine hanger 152MI-011013 O-ring, 7.5X1.5 172MM-011003 Gasket, crankcase 172MM-011100 Left crankcase comp. 172MM-011014 Cushion washer, brake shoe 172MM-011400 Inner oil pipe set 172MM-011002 Seal ring, inner oil pipe 172MM-011300 Heat insulator comp. - Page 28 ENGLISH 172MM-012001 Left side cover 172MM-012007 Sealing bar, left side cover 172MM-012004 Retaining plate 172MM-012003 Bolt, cover plate 152MI-012200 Cushion block comp. 152MI-011007 Dowel pin, Φ10X16 172MM-012008 Plug, inspection GB/T818-2000-M5 X 8 Flat screw 172MM-012100 Clamp set 152MI-090005 Bolt, M6X16 172MM-012002 Anti-dust bar A 172MM-012006...
- Page 29 ENGLISH 172MM-013013 Hose, breather 172MM-013100 Hose comp., right side cover 172MM-013015 Hose, air cleaner 172MM-013016 Hose clip 172MM-013002 Right side cover 172MM-013008 Retaining plate 172MM-013012 Gasket, right side cover 172MM-013007 Cover, strainer 152MI-013100 Filter element comp. 172MM-013006 Spring 172MM-013001 Guide, oil level 172MM-013019 T joint, breather 152MI-021008...
- Page 30 ENGLISH 172MM-021009 Clip 172MM-021001 Cover, cylinder head 172MM-021006 Retaining plate 152MI-021011 Gasket, cylinder head cover 172MM-021100 Axle comp, intake rocker 172MM-021200 Axle comp, exhaust rocket 172MM-021400 Outer oil pipe comp. 152MI-021001 Rubber right, oil pipe 172MM-021431 Holder, oil pipe 152MI-021003 Cushion bar 152MI-021004 Joint bolt A, M8x25...
- Page 31 ENGLISH 172MM-022100 Cylinder head comp. 172MM-022700 Flange comp, exhaust pipe 152MI-022014 Cover, camshaft bearing 172MM-022008 Nut, exhaust pipe 172MM-022010 Gasket, cylinder head 172MM-022900 Joint comp, carburetor 172MM-022500 Clamp set, intake 152MI-022810 Thermostat comp. 152MI-022803 Upper case, thermostat 152MI-022021 Cooling hose 1, carburetor 172MM-022601 Lower case, thermostat 172MM-022400...
- Page 32 ENGLISH 152MI-022500 Seal ring set 172MM-022300 Camshaft comp. 152MI-021007 Arm, valve rocker 172MM-022001 Valve, intake 172MM-022005 Valve, exhaust 172MM-022002 Outer spring, valve 172MM-022003 Inner spring, valve 152MI-022005 Retainer, valve spring 152MI-022001 Seat, valve spring 152MI-022006 Valve clip NTN:16002 Bearing GB894.1-86-15 Circlip 172MM-022310 Sprocket comp.
- Page 33 ENGLISH 172MM-023100 Cylinder body comp. 172MM-023002 Gasket, cylinder 152MI-023300 Tensioned comp. 152MI-023003 Bolt, spring holder 152MI-023002 Spring 152MI-023004 Gasket, tensioned 172MM-023007 Hose, water inlet 172MM-023009 Guard shield, water pipe QC/T621-1999-B24 Clamp 152MI-023009 Washer Φ8.5 GB/T848-85-6-D.Zn Washer 152MI-021005 Dowel, Φ10x14 152MI-023008 Bolt, M6x18 152Mi-080013 Bolt, M6x22...
- Page 34 ENGLISH 172MM-022200 Chain, camshaft driver 172MM-023200 Tensioner set, chain 172MM-023001 Guide, chain GB96-85-6-D.Zn Washer GB/T5781-2000-M6X12-D.Zn Bolt, M6x12...
- Page 35 ENGLISH 172MM-094000 Overriding clutch comp. 172MM-033000 Coil, pick up 172MM-013008 Holder, wire 172MM-031000 Rotor comp. 172MM-032000 Coil assembly, starter GB/T70.1-2000-M8X18 Screw, inner hex head 172MM-040001 Nut, M16x1 172MM-040002 Washer, 16.3x30x2 152MI-030002 Bolt, M5x16 152MI-060012 Bolt, M6x30...
- Page 36 ENGLISH 172MM-041000 Crankshaft comp. 172MM-040008 Piston ring, 1st 172MM-040009 Piston ring, 2nd 172MM-042000 Oil ring set 172MM-040005 Piston 172MM-040007 Pin, piston 152MI-040011 Joint, oil passage 152MI-040010 Spring, joint 152MI-040006 Circular key 172MI-040006 Circlip, piston pin GB/T119-2000-2X14 Pin 2x14...
- Page 37 ENGLISH 172MM-051004 Sliding piece 172MM-051005 Drive face comp. 172MM-051003 Collar, drive face 172MM-051100 Movable drive face comp. 172MM-051200 Weight rotor comp. 172MM-051001 Cover, drive face 172MM-051002 Ramp plate GB3452.1-82-112X2.65 O-ring 112x2.65 GB9074.14-88-M4X10 Bolt set 172MM-051007 Nut, M14x1.5 172MM-051006 Washer, 14.5x1.5 152MI-051103 Seal, 27x34x3.5...
- Page 38 ENGLISH 172MM-052500 Clutch outer comp. 172MM-052400 Hub, clutch release 172MM-052003 End plate, clutch 172MM-052006 Return spring, clutch 172MM-052600 Weight set, clutch GB/T8931-86-28 Circlip 172MM-052700 Drive belt 172MM-052300 Driven face comp. 172MM-052100 Movable driven face comp. 172MM-052002 Guide pin 172MM-052001 Roller, guide 172MM-052004 Spring, clutch 172MM-052200...
- Page 39 ENGLISH 172MM-062000 Breather hose comp. 172MM-060009 Cover, gearbox 172MM-061000 Gasket comp, gearbox cover 172MM-060001 Drive shaft 172MM-060003 Counter shaft comp. 172MM-060006 Gear, counter shaft 172MM-060007 Final shaft 172MM-060008 Final gear 172MM-060010 Bolt, M8x38 172MM-060011 Bolt, M8x28 152MI-060003 Thrust washer Φ14 172MM-060004 Thrust washer Φ14 152MI-060009...
- Page 40 ENGLISH 152MI-071000 Oil pump comp. 152MI-071002 Oil pump body 152MI-071003 Cover plate, oil pipe 152MI-071001 Shaft, oil pipe 152MI-070001 Sprocket, oil pipe 152MI-073000 Chain, oil pipe 152MI-071004 Inner rotor, oil pump 152MI-071005 Outer rotor, oil pump 152MI-070002 Separate plate comp. A 152MI-072000 Separate plate comp.
- Page 41 ENGLISH 172MM-080004 Impeller, water pump 152MI-081000 Water seal comp. 172MM-080003 Cover, water pump 172MM-080002 Gasket, water pump cover 172MM-080001 Shaft, water pump 152MI-013009 Bolt, M6x40 152MI-021017 Bolt, M6x25 GB/T893.1-86-19 Circlip 152MI-080007 Washer 7.5x13x1.2 152MI-080011 Washer 6x12x1 NTN: 6800 Bearing 172MM-080005 Oil seal 10x20x5 152MI-080008 Dowel pin Φ8X14...
- Page 42 ENGLISH 172MM-090001 Shaft, gear compound 172MM-092000 Driven gear comp 172MM-091000 Gear compound 172MM-090007 Holder 172M-093000 Starting motor comp. 152MI-080013 Bolt, M6x22 172MM-090008 Bolt, M6x14...
- Page 43 ENGLISH 172MM-100000 Carburetor assy.
- Page 44 ENGLISH DS250.01.01.00.00 Frame Comp 222.10 Washer, flat Φ10mm 555.10 Washer, lock Φ10mm 444.10.50 Bolt, hex M10x1.5x30 DS250.01.02.00.00 Protective bar, front 444.10.45 Bolt, flanged M10x1.25x45 555.10 Nut, flange M10x1.25 DS250.01.00.00.01 Protective bar, top DS250.01.05.00.00 Protective bar, rear 444.10.70 Bolt M10x1.5x70 222.10 Washer Φ10mm D250.11.001 Round rubber seat...
- Page 45 ENGLISH 444.12.85 Bolt, flange M12x1.5x85 JD0268200 Seal, Lower A-arm JD0268001 Bearing JD0360006 Bush, lower A 333.12 Nut, flange M12x1.5 Front shock DS250.02.00.00.02 444.12.45 Bolt, flange M12x1.5x45 444.10.60 Bolt, flange M10x1.25x60 JD0110004 Rubber, upper arm 333.10 Nut, flange M10x1.25 Upper arm DS250.02.02.00.00 333.16 Nut M16x1.5...
- Page 46 ENGLISH 444.6.20 Bolt, flange M6x20 DS250.02.00.00.01 Steering wheel 333.6 Nut, lock M6 DS250.10.00.00.01 Assorted on-off Assembly 444.10.20 Bolt, flange M10x1.25x20 333.10 Nut. Flange M10x1.25 DS250.03.01.00.00 Steering shaft 444.8.35 Bolt M8x35 DS250.02.02.00.00 Steering knuckle DS250.02.02.00.00 Steering gear 444.10.25 Bolt, flange M10x1.25x25 333.10 Nut M12x1.25 DS250.02.00.00.02...
- Page 47 No.. ENGLISH 444.10.45 Bolt, flange M10x1.25x45 D250.04.002 Bush, con' rod D250.04.001 Con'rod 333.10 Nut, flange M10x1.25 444.10.210 Bolt, flange M10x1.25x210 DS250.02.00.00.02 Cushion blocking DS250.02.00.00.03 Fixed rod, front engine DS250.02.00.00.04 Fixed rod, rear engine DS250.02.00.00.01 Engine rack 444.10.55 Bolt flange M10x1.25x55 440.14.240 Bolt flange M14x1.5x240 222.14...
- Page 48 ENGLISH 440.16.185 Bolt M16X185 D250.05.003 Spacer, swing arm D250.05.004 Bushing, swing arm D250.05.801 RR. swing arm comp, under 555.16 Washer, Lock Φ16mm 330.16 Nut, M16x1.5 330.12 Nut, flange lock M12x1.5 D250.05.005 Bushing, swing arm D250.05.006 Spacer, swing arm 444.12.65 Bolt-washer M12x1.5x65 D250.05.002 Clamp piece, prejudicial tray 444.8.30...
- Page 49 ENGLISH D250.02.010 Hub cover, rear wheel 888.3.40 Cotter pin, shaft, 3x40 330.16 Nut, M16x1.5 DS250.06.011 Adjusting washer Φ18mm 330.10 Nut, wheel, M10x1.25 555.10 Washer lock Φ10mm 222.10 Washer, flat Φ10mm DS250.06.002 Hub, rear DS250.06.014 Bolt, M10x1.25x30 330.30 Nut, wheel, M30x1.5 D250.06.006 Spacer 999.38.62.8...
- Page 50 ENGLISH D250.07.900 Turning signal, front N6.200 Nylon, clamp, 6x200 D250.07.901 Headlight (35/25W) D250.07.903 Tail Lamp D250.07.801 Harness, wiring D250.07.802 Battery (12v, 9Ah) D250.07.904 Turning signal, Rear DS250.10.00.00.02 Panel D250.07.911 Function display 2 D250.07.906 Function display 1 DS250.10.00.00.05 Horn button D250.07.909 Ignition switch D250.07.907 Speedometer...
- Page 51 ENGLISH DS250.07.00.00.01 Cable for reverse DS250.07.00.00.02 Spring DS250.01.01.02.08 Seat for reverse lever 333.8 Nut, flange M8 333.12 Nut, M12x1.5 D250.08.990 Sensor JD1082101 Handgrip DS250.07.00.00.03 Lever, reverse gear REV-35 Spring REV-36 Sliding 444.8.55 Nut, hex M8x55 444.4.16 Bolt, M6x16 555.4 Washer, lock Φ4mm 222.4 Washer, flat Φ4mm 444.8.20...
- Page 52 ENGLISH D250.09.901 Water tank D250.09.902 Fanner D250.09.001 Water pipe for enter D250.09.002 Water pipe for out D250.09.903 Standby water tank D250.09.004 Water pipe for tank D250.09.904 Cover for add water D250.09.008 Cooling pipe 333.10 Nut, M10 222.10 Washer, flat Φ10mm 444.10 Bolt, M10x25 3130008...
- Page 54 ENGLISH DS250.07.01.00.03 Nut, M34 444.2.20 Bolt, M8x20 555.8 Washer, lock Φ8mm 222.8 Washer Φ8mm DS250.07.01.00.01 Shaft seat DS250.07.01.00.02 Gasket head cover DS250.07.01.00.04 Small shaft DS250.07.01.00.06 Washer DS250.07.01.00.07 Prick gear DS250.07.01.00.05 Compart spacer DS250.07.01.00.12 Joint spacer DS250.07.01.02.00 Poker DS250.07.01.00.18 Shaft DS250.07.01.00.10 Shaft for enter DS250.07.01.00.11 Prick gear...
- Page 55 ENGLISH D250.11.037 Seal, exhaust pipe DS250.11.01.00.11 Exhaust pipe - Header 444.8.30 Bolt, flange M8x30 333.8 Nut, lock M8 DS250.11.01.00.12 Exhaust pipe – Canister D250.11.880 Mounting, exhaust pipe 444.8.20 Bolt, flange M8x20 444.8.45 Bolt, flange M8x45 444.8.40 Bolt, flange M8x40 DS250.11.01.00.02 Rubber band 222.8 Washer, flat Φ8mm...
- Page 56 ENGLISH D250.12.008 Long-hair warning D250.02.004 China warning D250.12.005 Luggage carrier warning D250.12.003 Safety belt warnlng D250.12.002 Colligate warning D250.12.006 Shift reverse gear D250.12.007 Age warning D250.12.008 Hand indication...
- Page 57 ENGLISH 999.28.47.7 Seal, FB 28x47x7 606.204 Bearing, Inner 6204 D250.02.006 Spacer, FR hub, inter D250.11.062 Bolt, tire M10x1.25x25 D250.02.004 Hub, FR wheel D250.02.005 Spacer, FR hub 666.203 Bearing, outer 6203 999.25.40.7 Seal, FB 25x40x7 D250.02.007 Spacer, FR hub, outer 555.16 Lock washer, front axle Φ16mm 888.4.40 Cotter pin 4x40...