Table of Contents

Related Manuals for Hisense WFMC6010E


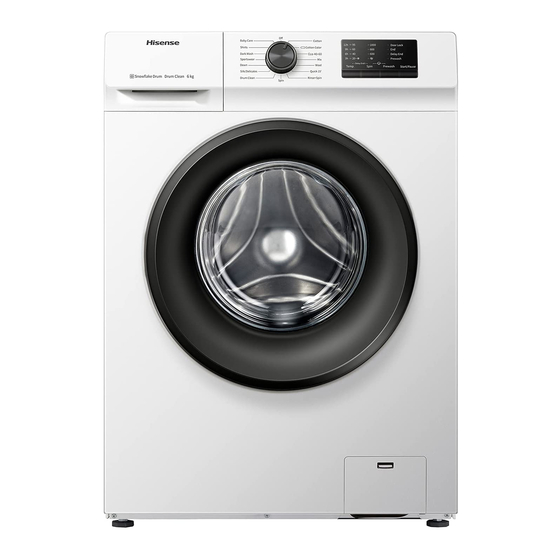
Summary of Contents for Hisense WFMC6010E
- Page 1 USER’S OPERATION MANUAL WFMC6010E/WFMC6010ES/WFMC6010ET WFVC6010E/WFVC6010ES/WFVC6010ET WFHC6010E/WFHC6010ES/WFHC6010ET WFRC6010E/WFRC6010ES/WFRC6010ET Before operating this unit, please read this manual thoroughly, and retain for future reference...
-
Page 2: Table Of Contents
TABLE OF CONTENTS 1. SAFETY INFORMATION................1 2 PRECAUTIONS AND GENERAL RECOMMENDATIONS......3 2.1 Packaging....................3 2.2 Disposing package and scrapping used washing machines.......3 2.3 Location and surroundings................3 2.4 Safety......................3 3 DESCRIPTION OF THE WASHING MACHINE ..........4 3.1 Overview......................4 3.2 Parts supplied....................5 3.3 Control panel....................5 4 INSTALLATION....................6 4.1 Choosing an appropriate installation location..........6 4.2 Removing the packaging and inspection.............6... - Page 3 8.5 Reload in process..................21 8.6 Change programme or optional function during operation......22 8.7 Programme end..................22 8.8 Opening/closing door................22 8.9 Child lock....................22 9 CLEANING AND MAINTENANCE.............23 9.1 Removing the filter..................23 9.2 Draining residual water................24 9.3 Care and maintenance................24 10 TROUBLESHOOTING GUIDE..............25 11 OPERATING DATA...................30...
-
Page 4: Safety Information
SAFETY INFORMATION The manufacturer reserves the right for any modifications on the product which might be deemed necessary or useful without informing about it in this IFU. Before operating your new washing machine, please read this instruction carefully, and keep it for future reference. If you have lost it accidentally, ask customer service for e- copy or hard copy. - Page 5 For appliances with ventilation openings in the base, that a carpet must not obstruct the openings. Children of less than 3 years should be kept away unless continuously supervised. The maximum permissible inlet water pressure, 1 MPa, for appliances intended to be connected to the water mains. The minimum permissible inlet water pressure, 0.1 MPa, if this is necessary for the correct operation of the appliance.
-
Page 6: Precautions And General Recommendations
2 PRECAUTIONS AND GENERAL RECOMMENDATIONS 2.1 Packaging The packaging material is entirely recyclable, and marked with the recycling symbol Adhere to current local regulations when disposing of packaging material. 2.2 Disposing package and scrapping used washing machines The washing machine is built from reusable materials. It must be disposed of in compliance with current local waste disposal regulations. -
Page 7: Description Of The Washing Machine
Clean the outside of the washing machine with a damp cloth. Do not use abrasive detergents. Never open the door forcibly or use it as a step. This appliance is not intended for use by persons (including children) with reduced physical, sensory or mental capabilities, or lack of experience and knowledge, unless they have been given supervision or instruction concerning use of the appliance by a person responsible for their safety. -
Page 8: Parts Supplied
3.2 Parts supplied User’s operation Manual 4 Plastic Caps warranty card (depends on model) Cold inlet hose “U” - bend Hot inlet hose (if available, depending on models) 3.3 Control panel A:“Start/Pause” button D:“Spin” button G:Programme selector B:“Prewash” button E:“Delay End” button C:“Child lock”... -
Page 9: Installation
4 INSTALLATION 4.1 Choosing an appropriate installation location Minimum housing dimensions: Width: 600 mm Height: 850 mm Depth: refer to the Specification Do not place the product on a floor without sufficient capacity to carry the load. Do not install the product in places where there is the risk of freezing. Move the appliance without lifting it by the worktop. -
Page 10: Removing The Transportation Bolt
4.3 Removing the transportation bolt Transport bolts which are not removed can cause damage to the appliance. The washing machine is fitted with transportation bolts to avoid any possible damage to the interior during transport. Step 1: Screw off all transportation bolts for approx. 30mm with wrench following the direction of arrow shown (not fully screw it off). -
Page 11: Adjusting The Feet
Step 4: To ensure safety and reduce noise, you should install the transportation bolt cover supplied with the unit (see the annex accompanying the unit). Lean and place the transportation bolt into hole and press it following the shown direction until it clicks. -
Page 12: Connecting The Water Supply
Step 3: Important: tighten the locknut by turning it anti-clockwise towards the appliance casing. 4.5 Connecting the water supply Notes: Connect the water supply inlet hose in accordance with the regulations of your local water company. Water tap: 3/4’’ threaded hose connector Water pressure (flow pressure): 100-1000KPa(1-10 bar). - Page 13 Check the inlet hose regularly for brittleness and cracks and replace it necessary. The washing machine can be connected without a non-return valve. Cold fill For Models with Single Inlet Fix the inlet hose to the cold water tap Inlet valve and to the inlet valve on the rear side of the machine as Fig.
-
Page 14: Connecting Drain Hose To The Drain
Ensure that: All connections are tightly fixed. Do not allow children to operate, crawl on, be near or inside your washing machine. Note that during the wash cycles, the surface temperature of the porthole door may increase. Close supervision of children is necessary when the appliance is used near children. -
Page 15: Electrical Connection
4.7 Electrical connection Electrical supply must be adequate for the machine’s 16A Current Rating. Electrical connections must be carried out by a qualified technician in compliance with the manufacturer’s instructions and current standard safety regulations. Electrical connections must be made in accordance with local regulations. -
Page 16: Before The First Wash Cycle
Before any maintenance on the washing machnie disconnect it from the mains supply. After installation, access to the mains plug or to disconnection from the mains supply must be ensured at all times via a double-pole switch. Do not operate the washing machine if it has been damaged during transport. -
Page 17: Preparing Laundry For Washing
By loading Wash items of different sizes in the same load to improve washing efficiency and distribution in the drum. By delicates Wash small items (e.g. nylon stockings, belts etc.) and items with hooks (e.g. bras) in a cloth bag or pillow case with zip. Always remove curtain rings or wash curtains with the rings inside a cotton bag. -
Page 18: Detergents And Additives
6.3 Detergents and additives Always use high efficiency, low foam detergent for a front load machine. The choice of detergent depends on: Type of fabric (cottons, easy care/synthetics, delicate items, wool) Note: Use only specific detergents for washing wool. Colour The wash temperature Degree and type of soiling Remarks:... - Page 19 Where to put detergent and additives The detergent drawer has three chambers (fig. “A”) Prewash chamber Detergent for prewash Mainwash chamber Detergent for main wash Stain remover Water softener (water hardness class 4) Softener chamber Fabric softener Liquid starch Pour additives only up to the “Max” mark.
- Page 20 Notes: Keep detergents and additives in a safe, dry place out of the reach of children. Liquid detergents can be used for programmes with prewash. However, in this case a powder detergent must be used for the main wash. Do not use liquid detergents when activating the “Delay End” functioin (if available on your washing machine).
-
Page 21: Programmes Instructions
7 PROGRAMMES INSTRUCTIONS 7.1 Programme table Washing Function Selection Detergents Max. spin Reload Main speed Program Max load (kg) Prewash wash Softener process Temp. Prewash Delay End Spin Baby Care 1000 ,40ºC, 60ºC, 95ºC Shirts ,40ºC, 60ºC Dark Wash 1000 ,40ºC, 60ºC Sportswear 1000... -
Page 22: Programmes
7.2 Programmes You can follow the manufacturer’s recommendations on clothing tags. Program to effectively extinguish bacteria in textiles. It is appropriate for Baby care clothes of babies who are sensitive to clothes Non-iron shirts or blouses made of cotton, linen, synthetic Shirts fibres or blended fabrics. -
Page 23: Heed The Labels On The Laundry
7.3: Heed the labels on the laundry. Max. washing Max. washing Max. washing Max. washing Hand wash Do not temp. 95°C temp. 40°C temp. 60°C temp. 30°C wash only Normal wash; Sensitive laundry Bleaching in cool water Bleaching not allowed Bleaching Dry cleaning in kerosene Petroleum solvent... -
Page 24: Delay End
Prewash Suitable for heavily soiled (e.g., soil, dust). The programme is prolonged for 20 minutes. Spin The programme defaults to the partial max. spin speed. Press buttons to select other spin speeds. If spin speed “ ” selected, the last spin process will be canceled and the machine only dewaters before the end of programme. -
Page 25: Change Programme Or Optional Function During Operation
If the door lock indicator doesn’t flash, it indicates that current temperature is over 50°C or you have passed the time for reloading in the process, namely no clothes allowed to load into the machine. 8.6 Change programme or optional function during operation Turn the programme selector knob on position "OFF"... -
Page 26: Cleaning And Maintenance
9 CLEANING AND MAINTENANCE 9.1 Removing the filter We recommend that you check and clean the filter regularly, at least two or three times a year. Especially: If the appliance is not draining properly or if it fails to perform spin cycles. If the pump is blocked by a foreign body (e.g. -
Page 27: Draining Residual Water
9.2 Draining residual water Before emptying the residual water, switch the appliance off and unplug it from the mains socket. Remove the plinth. Place a container beneath it. Open the filter but do not remove it completely. Slowly turn the filter counterclockwise until the water begins to drain out. -
Page 28: Troubleshooting Guide
Door seal Clean with a damp cloth when necessary. Check the condition of the door seal periodically. Water supply hose Check the supply hose regularly for brittleness and cracks and replace it if necessary using a new hose of the same type (available from After-Sales Service or specialist dealer). - Page 29 The appliance stops during the programme Check whether: The door has been opened and the “Start/Pause” button not be pressed. Close the door and press the “Start/Pause” button again. Check if there is too much foam inside, machine enters kill-foam routine. The machine will run again automatically after a period.
- Page 30 If the laundry is still too wet at the end of the cycle, remove some articles of laundry and repeat the spin cycle. Excessive foam formation may prevent spinning. Use the correct amount of detergent. Check that the spin speed selector has been set to “ ”.
- Page 31 The drain hose is frozen up. Plug in the appliance again. If the fault persists, unplug the appliance and contact After-Sales Service(see “After-Sales Service” ). fig.2 Electronic module fails(F05, F04,F23,F07,F06). (fig.3,fig.4,fig.5,fig.6,fig.7) Electronic module fails. Turn the programme selector knob on position "OFF" for 3 seconds to turn off the machine and select the desired programme;...
- Page 32 Water inflow fault(F01):(fig.8) The appliance has none or insufficient water supply.Check whether: The water tap is fully open and there is sufficient water supply pressure. Kinks are present in the water hose. The mesh filters of the water supply are blocked (see “Care And Maintenance” or “Mesh Filters for Water Connection”).
-
Page 33: Operating Data
11 OPERATING DATA In accordance with delegated regulation (EU)No.2019/2014 WFMC6010E/WFMC6010ES WFHC6010E/WFHC6010ES Model WFMC6010ET/WFVC6010E WFHC6010ET/WFRC6010E WFVC6010ES/WFVC6010ET WFRC6010ES/WFRC6010ET Rated Capacity Max. spin speed 1000 rpm 220-240V ~ 50Hz Voltage/Frequency Gross Power 1800 W Water Pressure 0.1 MPa - 1MPa Dimensions (WxDxH) 595×458×845mm 595×460×850... - Page 35 2153814-X08060691C...