Muratec MFX-C2700 User Manual
Muratec all in one printer user manual
Hide thumbs
Also See for MFX-C2700:
- Brochure & specs (6 pages) ,
- Brochure & specs (2 pages) ,
- Configuration manual (119 pages)
Table of Contents
Advertisement
Quick Links
Advertisement
Table of Contents

Related Manuals for Muratec MFX-C2700


Summary of Contents for Muratec MFX-C2700
- Page 1 User Guide...
-
Page 2: Preface
The most up-to-date drivers and manuals are available from: http://www.muratec.com Copyright © 2010. All rights reserved. Muratec is a registered trademark of Muratec America, Inc. Energy Star is a trademark of the United States Environmental Protection Agency. Microsoft, MS-DOS and Windows are registered trademarks of Microsoft Corporation. -
Page 3: Emergency First Aid
Seek medical attention. Spillages should be treated with cold water and soap to help reduce risk of staining skin or clothing. ANUFACTURER Muratec America Inc. 3301 East Plano Parkway, Suite 100 Plano, TX 75074 U.S.A. Phone: 469-429-3300 www.muratec.com... -
Page 4: Table Of Contents
ONTENTS Preface ...........2 Emergency first aid . - Page 5 Operation ..........37 Multi-tasking.
- Page 6 Index ...........164 Muratec contact details........165...
-
Page 7: Notes, Cautions And Warnings
OTES CAUTIONS AND WARNINGS NOTE A note provides additional information to supplement the main text. A caution provides additional information which, if ignored, may result in equipment malfunction or damage. A warning provides additional information which, if ignored, may result in a risk of personal injury. For the protection of your product, and in order to ensure that you benefit from its full functionality, this model has been designed to operate only with genuine original toner cartridges. -
Page 8: About This Guide
BOUT THIS GUIDE NOTE Images used in this manual may include optional features that your product does not have installed. OCUMENTATION SUITE This guide is part of a suite of online and printed documentation provided to help you become familiar with your product and to make the best use of its many powerful features. The documentation is summarised below for reference and is found on the manuals DVD unless indicated otherwise: >... -
Page 9: On-Line Usage
LINE USAGE This guide is intended to be read on screen using Adobe Reader. Use the navigation and viewing tools provided in Adobe Reader. There are many cross-references within this book, each highlighted as click on a cross-reference the display will instantly jump to the part of the manual containing the referenced material. -
Page 10: Introduction
NTRODUCTION Congratulations on choosing this Multi Function Product (MFP). It is designed with advanced features, to give you clear, vibrant color prints and crisp black and white pages at high speed on a range of office print media. With this MFP, you can instantly scan paper-based documents and deliver the electronic image to various destinations including e-mail addresses, printers, ftp servers or someone else's computer on the network. - Page 11 > Automatic two-sided (duplex) printing for economical use of paper and compact printing of larger documents. Additionally, the following optional features are also available: > Additional paper tray for loading a further 530 sheets to minimise operator intervention, or different paper stocks for letterhead stationery, alternative paper sizes or other print media.
-
Page 12: Overview
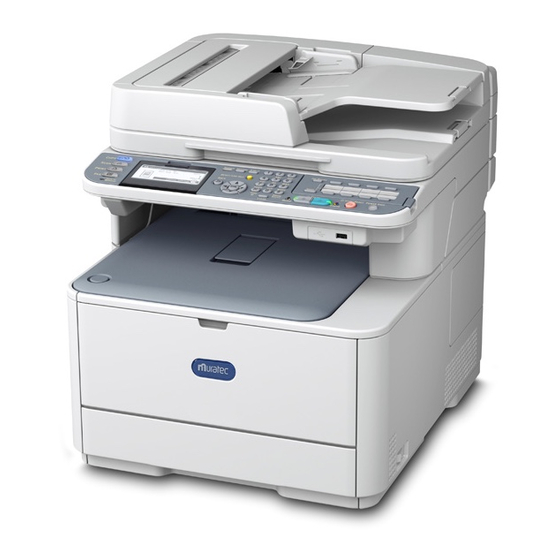
VERVIEW RONT VIEW 1. ADF unit. 2. ADF paper tray. 3. Operator panel. Menu driven operator controls and LCD panel 4. USB memory port. 5. Output stacker, face down. Standard printed copy delivery point. Holds up to 150 sheets at 80g/m². 6. -
Page 13: Rear View
EAR VIEW 1. ON/OFF switch. 2. Access panel. 3. AC power socket. 4. USB interface. 5. SD card slot. a. The Network Interface may have a protective “plug” which must be removed before connection can be made. When the rear paper stacker is folded down paper exits the printer through the rear of the printer and is stacked here face up. -
Page 14: Control Panel
ONTROL PANEL REF. DESCRIPTION Liquid crystal display (LCD) Displays operating instructions and status of your machine. Panel adjust recess The LCD panel can be swivelled upwards from its base position for ease of use. Main function buttons COPY: Pressing this button selects copy mode. This allows you to control the copying process whereby documents to be copied are scanned in the scanner unit (document glass or ADF) and the copies are automatically printed in the printer unit. - Page 15 REF. DESCRIPTION STOP: Pressing this button stops the copying or scanning process. BACK: Used to cancel selections and go back to the top level of the setting. The key is also used to cancel any previous input. POWER SAVE: Pressing this button switches the power save mode on or off, its LED being illuminated when power save mode is on.
-
Page 16: Keypad - Character Switching
EYPAD CHARACTER SWITCHING Numbers, upper and lower case letters and symbols can be entered using the keypad. Press the key multiple times to switch between characters. NOTE When pressing multiple times, you must re-press the key within 2 seconds of the previous press. -
Page 17: Qwerty Keyboard
WERTY KEYBOARD You can also enter upper and lower case letters and symbols using the qwerty keyboard. You can switch the entry mode from normal mode, CAPS mode and CTRL mode. The mode change is reflected on the screen keyboard display. Normal mode You can enter lower-case letters. -
Page 18: Getting Started
ETTING STARTED WITCHING ON Check that the power switch is OFF. Plug the power cable into the power socket of your machine. Plug the power cable into the electric socket. Check that no documents are on the document glass or ADF, and the ADF cover is closed. -
Page 19: Power Saving Mode
OWER SAVING MODE If you do not use the machine for a while, it will enter power saving mode to control the power consumption of the device. To cancel or initiate power saving mode, press the Power Save button on the control panel. NOTE If your machine is connected locally (via USB), when it transitions to Sleep mode its status is viewed as off-line. -
Page 20: Installing Drivers And Utilities
NSTALLING DRIVERS AND UTILITIES NOTE Example screenshots have been used throughout and may not represent your machine, however the procedure is the same. NOTE You must be logged on as an administrator or a member of the Administrators group in order to complete this procedure. If your computer is connected to a network, network policy settings may also prevent you from completing this procedure. -
Page 21: Windows - Scanner And Printer Drivers
INDOWS SCANNER AND PRINTER DRIVERS The scanner driver is used for “Pull Scan”, i.e. Initiating a scan from your PC via software. Compare this to “Push Scan” where you start the scan by pressing a button on the MFP's front panel. NOTE The driver installer program is the recommended installation method. -
Page 22: Mac - Printer Driver
PRINTER DRIVER The information in this section is based on Mac OS X Leopard (10.5). Other versions may appear slightly different, but the principles are the same. Insert the DVD-ROM and run the driver installer program. Follow the on-screen instructions to install the printer driver. Attach the printer to a USB port of your computer. -
Page 23: Fax Driver
AX DRIVER The fax driver allows you to send faxes directly from your computer without printing the document first. Windows XP has built-in fax support - you can use your computer's modem to send faxes directly from your computer. With the fax driver you are sending the fax data from your computer to the MFP, and then the MFP automatically sends the document. -
Page 24: Configuration Tool
ONFIGURATION TOOL Installation of the Configuration Tool is optional and can be found on the DVD in the Utilities folder. Follow the on-screen instructions to complete the Configuration Tool installation. The Configuration Tool can discover devices over USB or network connections. To search and install, select Tools >... -
Page 25: Actkey Utility
EY UTILITY NOTE The ActKey utility only supports Windows. You must have the scanner driver installed. The ActKey utility enables the MFP to receive one key touch commands from a connected computer. Installation of the ActKey utility is optional and can be found on the DVD in the Utilities folder. - Page 26 To use ActKey in Local PC mode (i.e. push scanning), it must be set as the program to handle scanner events: NOTE The following example uses Windows XP. The steps may vary if you are using any other operating system, but the principle is the same. Select Start >...
-
Page 27: Paper Recommendations
APER RECOMMENDATIONS Your MFP will handle a variety of print media, including a range of paper weights and sizes. This section provides general advice on choice of media, and explains how to use each type. The best performance will be obtained when using standard 75~90g/m² paper designed for use in copiers and laser printers. -
Page 28: Multi Purpose Tray
ULTI PURPOSE TRAY The multi purpose tray can handle the same sizes as the cassette trays but in weights up to 220 . For very heavy paper stock use the face up (rear) paper stacker. This ensures g/m² that the paper path through the printer is almost straight. The multi purpose tray can feed paper widths from 76mm to 215.9mm and lengths from 127.0mm to 1320mm (banner printing). -
Page 29: Loading Paper
OADING PAPER ASSETTE TRAYS Remove the paper tray from the machine. Fan the paper to be loaded at the edges (1) and in the middle (2) to ensure that all sheets are properly separated, then tap the edges of the stack on a flat surface to make it flush again (3). - Page 30 Load paper (letter headed paper face down and top edge towards the front of the printer), as shown. Adjust the rear stopper (a) and paper guides (b) to the size of paper being used. Close the paper tray gently. Set the correct paper size. Refer to “Registering custom sizes”...
- Page 31 > Do not pull the paper tray out during printing (except as described below for the 2nd tray). NOTE > If you have two trays and you are printing from the 1st (upper) tray, you can pull out the 2nd (lower) tray during printing to reload it. However, if you are printing from the 2nd (lower) tray, do not pull out the 1st (upper) tray.
-
Page 32: Multi Purpose Tray
ULTI PURPOSE TRAY Open the multi purpose tray (a). Fold out the paper supports (b). Press gently down on the paper platform (c) to ensure it is latched down. Load the paper and adjust the paper guides (d) to the size of paper being used. >... -
Page 33: Registering Custom Sizes
EGISTERING CUSTOM SIZES To load custom size paper, you need to register the width and length of the paper before printing. The range of the sizes you can set differs according to the paper tray. TRAY Tray 1 Tray 2 (optional) MP tray NOTE For tray 1 and tray 2, you can configure the... -
Page 34: User Authentication And Access Control
SER AUTHENTICATION AND ACCESS CONTROL If your Administrator has enabled access control on your machine, it will automatically start up in access control mode. You will not be able to use it until you have provided valid login information. If the access control setting is: >... -
Page 35: Operation From The Computer
PERATION FROM THE COMPUTER NOTE The authentication type specified on the computer overrides the one specified on the machine. Printing from Windows NOTE You cannot use the PCL XPS printer driver for this function. This procedure uses Windows 7 and NotePad as an example. The procedures and menus may differ depending on the OS you use. - Page 36 Faxing (Windows only) NOTE This procedure uses Windows 7 and NotePad as an example. The procedures and menus may differ depending on the OS you use. Open the file you want to fax. From the File menu, select Print. Select your machine (fax driver) in Select Printer and click Preferences. On the Setup tab, click User Authentication...
-
Page 37: Operation
PERATION With its intuitive control panel, this Multi Function Product (MFP) is designed to be easy to use. After the machine has been configured, operating is quite straight forward. NOTE If your Administrator has enabled access control on your machine, it will automatically start up in access control mode. -
Page 38: Multi-Tasking
ULTI TASKING Your machine can handle more than one task at a time. The table below details which combination of tasks can be performed. Copy Scan to email/ network Internet Fax (Tx) Copy Scan to email/ network Internet Fax (Tx) Scan to memory Fax Tx... -
Page 39: Loading Document(S)
OADING DOCUMENT The MFP can scan/copy/send document(s) either from the ADF (Automatic Document Feeder) or on the glass. If you need to send multiple pages, load your papers in the ADF. The ADF can hold up to 50 pages at one time. If you need to scan/copy/send pages from books, newspaper clippings, or paper with wrinkles or curls, place them on the glass. -
Page 40: Placing Document(S) In The Adf
LACING DOCUMENT IN THE If you have multiple pages, fan the pages to avoid paper jams. The ADF holds up to 50 pages at one time. Place the document with the text face UP in the ADF: > If your document is portrait, load with the top edge of the document in first. >... -
Page 41: Placing Document(S) On The Glass
LACING DOCUMENT ON THE GLASS Open the document cover. Place your document with the text face DOWN on the glass: > If your document is portrait, align its top edge to the upper-left corner of the glass. > If your document is landscape, align its right edge to the upper-left corner of the glass. -
Page 42: Copying
OPYING NOTE If your Administrator has enabled access control on your machine, it will automatically start up in access control mode. You will not be able to use it until you have provided valid login information. Refer to and access control” on page 34 ASIC OPERATION Place your document(s) with text face UP in the ADF or face DOWN on the glass. -
Page 43: Advanced Operation
DVANCED OPERATION Using the options available you can alter the copy output to suit your needs: Press the Right arrow key. Select required parameter with Down arrow key and press the OK button or the Right arrow key to display the available options. Using Up or Down arrow keys, select value and press OK. - Page 44 FEATURE OPTION Image Density Settings Document Type Scan Resolution Background Removal Contrast Saturation Direction Portrait, Landscape N-In-1 2-in-1 4-in-1: Vertical 4-in-1: Horizontal Repeat ID Card Copy ON, OFF DESCRIPTION -3, -2, -1, 0, +1, Adjust density +2, +3 Darker: Keep color intensity and darker image.
-
Page 45: Resetting Copy Settings
FEATURE OPTION Continue ON, OFF Scan Mixed Size ON, OFF Margin ON, OFF Edge Erase ON, OFF Press the Left arrow key or Back button to return to the start menu. If access control is enabled, logout once you are finished to avoid any unauthorised access. -
Page 46: Scanning
CANNING NOTE If your Administrator has enabled access control on your machine, it will automatically start up in access control mode. You will not be able to use it until you have provided valid login information. Refer to and access control” on page 34 Place your document(s) with text face UP in the ADF or face DOWN on the glass. -
Page 47: Scan To E-Mail
CAN TO E MAIL NOTE For illustration purposes only, the features shown are as accessed from the control panel. Using the options available, you can enter e-mail information and alter the scan output to suit your needs: Place your document(s) with text face UP in the ADF or face DOWN on the glass. Press the Scan button on the control panel to prompt the Scan Menu screen. - Page 48 FEATURE OPTION Scan Settings Image Settings (cont.) Reply To Density -3, -2, -1, 0, +1, +2, +3 Document Text, Text&Photo, Type Photo, Photo (Glossy) Resolution 75dpi, 100dpi, 150dpi, 200dpi, 300dpi, 400dpi, 600dpi Background OFF, 1, 2, 3, 4, 5, 6 Removal Contrast -3, -2, -1, 0, +1,...
- Page 49 FEATURE OPTION Scan Settings Edit E-mail (cont.) File Name Continue Scan Greyscale File Format Encrypted PDF Compression Rate Edge Erase E-mail Send History NOTE > If you want to use the address book or group list features, be sure to register the e-mail addresses in advance.
- Page 50 Press the Mono button to scan your document(s) in black and white, or the Color button to scan your document(s) in color. NOTE If you wish to cancel the scan process, press the Stop button to abort the operation. On completion the machine will beep and a confirmation message displays. NOTE MDN (message disposition notification) and DSN (delivery status notification) can enabled/disabled by the administrator.
-
Page 51: Scan To Network Pc
CAN TO NETWORK NOTE The MFP must be connected to a Network server to enable Scan to Network PC to be set up. Refer to Before sending your document to a file server, profiles should be set up first to speed up the process. - Page 52 FEATURE OPTION Image Settings Density Document Type Background Removal Resolution Contrast Saturation File Name User defined Subfolder User defined Continue Scan ON, OFF Greyscale ON, OFF File Format Color: PDF, TIFF, JPEG, XPS Mono (Grayscale): PDF, TIFF, JPEG, XPS Mono (Binary): PDF, TIFF, XPS Encrypted PDF Not Encrypt...
- Page 53 FEATURE OPTION Compression Color: Rate High, Medium, Low Mono (Grayscale): High, Medium, Low Mono (Binary): High, Medium, Raw Edge Erase ON, OFF Press the Mono button to scan your document(s) in black and white, or the Color button to scan your document(s) in color. NOTE If you wish to cancel the scan process, press the Stop button to abort the operation.
-
Page 54: Scan To Usb Memory
CAN TO MEMORY Plug the USB memory into the USB port at the front of the machine. Place your document(s) with text face UP in the ADF or face DOWN on the glass. Press the Scan button on the control panel to prompt the Scan Menu screen. Using the Down arrow key, scroll to USB Memory and press OK. - Page 55 FEATURE OPTION Image Settings (cont.) Saturation File Name User defined Continue Scan ON, OFF Greyscale ON, OFF File Format Color: PDF, TIFF, JPEG, XPS Mono (Greyscale): PDF, TIFF, JPEG, XPS Mono (Binary): PDF, TIFF, XPS Encrypted PDF Not Encrypt Encrypt Compression Color: Rate...
-
Page 56: Scan To Local Pc
CAN TO LOCAL You can save scanned data into your local computer. When you press the START button, the scan job starts and the ActKey utility and the scanner driver start automatically. You can send the scanned document to a specified application, save it into a specified folder, or send it by fax. -
Page 57: Actkey Interface
When the PC-Fax function is selected, the Actkey Utility executes PC Scan in accordance with your settings for “Scan to PC-Fax”. The scanned image data is saved in the specified folder and is ready for the software to send as an attachment. -
Page 58: Scan To Remote Pc
Select the File menu and choose Scan or Get Photo. A dialogue box with a list of scanning sources displays. Select TWAIN: Muratec MFX C2700 Twain. You need to select the source only once, unless you want to choose another scanner. - Page 59 Press the Scan button to display the scanning options. Press the required scan button (1) to start scanning. Press Quit to continue: Press Scan More Pages (2) to continue scanning further documents. Press Scan Other Side (3) to scan the reverse side of the original document. Press Done (4) to finish scanning.
-
Page 60: Managing Profiles
ANAGING PROFILES DDING A NEW NETWORK PROFILE Register the information you configured on the computer as a profile. It is necessary when you perform Scan To Network PC with the computer. Press the SETTING button on the control panel to prompt the Setting screen. Using the Down arrow key, scroll to Profile and press OK. -
Page 61: Deleting A Network Profile
Press OK to register the settings and save the profile entry. The setup for Scan To Network PC is complete. ELETING A NETWORK PROFILE To delete a network profile: Press the SETTING button on the control panel to prompt the Setting screen. Using the Down arrow key, scroll to Profile List and press OK. -
Page 62: Managing The Address Book
ANAGING THE ADDRESS BOOK ETTING SENDER AND REPLY TO E You can set the e-mail address from which e-mails are sent and the address to which responses are sent. Press the SETTING button on the control panel. Using the Down arrow key, scroll to Admin Setup and then press OK. Using the arrow keys and on-screen keyboard, enter the administrator password. -
Page 63: Creating E-Mail Templates
REATING E MAIL TEMPLATES You can create up to five e-mail templates with various subject lines and body text. Registering a subject Press the SETTING button on the control panel. Using the Down arrow key, scroll to Admin Setup and then press OK. Using the arrow keys and on-screen keyboard, enter the administrator password. -
Page 64: Adding An E-Mail Address Entry To The Address Book
DDING AN E MAIL ADDRESS ENTRY TO THE ADDRESS BOOK The machine can hold up to 100 e-mail addresses in the address book. To assign a new e-mail address to the address book: Press the SETTING button on the control panel. Using the Down arrow key, scroll to Address Book and press OK. -
Page 65: Modifying An E-Mail Address Entry From The Address Book
Press the Left arrow key to exit the menu. ODIFYING AN E MAIL ADDRESS ENTRY FROM THE ADDRESS BOOK To edit an e-mail address entry from the address book: Press the SETTING button on the control panel. Using the Down arrow key, scroll to Address Book and press OK. Press OK to select E-mail Address. -
Page 66: Deleting A Group Address Entry From The Address Book
ELETING A GROUP ADDRESS ENTRY FROM THE ADDRESS BOOK To delete a group address entry from the address book: Press the SETTING button on the control panel. Using the Down arrow key, scroll to Address Book and press OK. Using the Down arrow key, scroll to E-mail Group and press OK. Using the arrow keys, scroll to the required entry position and press OK. -
Page 67: Printing
RINTING NOTE If your Administrator has enabled access control on your machine, it will automatically start up in access control mode. You will not be able to use it until you have provided valid login information. Refer to and access control” on page 34 This chapter details how to use the following print options from the control panel: >... -
Page 68: Print Job
RINT JOB This section gives a brief overview of how to select and print an encrypted job or a print job that has been stored in the machine. For full details of how to access and use the security features, please refer to the Security Guide. Press the Print button (1) on the control panel to prompt the Print Menu screen. -
Page 69: Print From Usb Memory
RINT FROM MEMORY NOTE Supported file systems: FAT12, FAT16, FAT32. Supported file formats: JPEG, PDF (v1.7), M-TIFF (v6 Baseline), PRN (PCL, PS). Supported: Up to 32 GB capacity of USB memory. Not Supported: USB hubs, external USB HDDs and encrypted PDFs. NOTE Up to 100 files in supported file formats stored in USB memory are displayed on the file list. -
Page 70: Advanced Operation
If your file is contained within a folder: Using the arrow keys, scroll to the required folder and press OK. NOTE If required, scroll to Folder Property and press OK to check the file information. Press OK to select Open Folder. Using the arrow keys scroll to the file you want to print and press the OK. -
Page 71: Switching Online/Offline
WITCHING ONLINE OFFLINE If you wish to alter the print status of your machine: Press the Print button (1) on the control panel to prompt the Print Menu screen. Using the Down arrow key, scroll to Switch Online/Offline and press OK. Using the arrow keys, scroll to your required option and press OK. -
Page 72: Faxing
AXING NOTE If your Administrator has enabled access control on your machine, it will automatically start up in access control mode. You will not be able to use it until you have provided valid login information. Refer to and access control” on page 34 When faxing, you can load only A4, letter, or legal size documents in the ADF, and A4 or letter size documents on the document glass. -
Page 73: Advanced Operation
DVANCED OPERATION Using the options available, you can alter the fax output to suit your needs: FEATURE OPTION Add Destination Speed Dial List Group List Direct Input Tx History Rx History Fax Functions Scan Size Resolution Density Duplex Scan Continue Scan DESCRIPTION Select the required speed dial number. - Page 74 FEATURE OPTION Fax Functions (cont.) TTI Select Transmit Confirmation Report Delayed Tx Fcode Polling Fcode Tx Memory Tx Fax Job View/ Cancel Fax History Tx History Rx History Manual feed If you wish to send multiple sets of documents from the ADF or flatbed, enable the “continuous scan”...
- Page 75 Broadcasting This function allows you to send a fax to multiple recipients at the same time. By combining abbreviation dials, groups and entering addresses using the numeric keypad, you can specify up to 100 destinations at one time. NOTE When real time transmission (Memory Tx set to OFF) or polling is executed during broadcasting data, they are executed preferentially.
- Page 76 F Code communication F Code transmission is a function to communicate, using sub addresses or passwords in accordance with the ITU-T standard. By creating F code boxes/sub addresses/passwords, you can execute secure communication, bulletin box communication and polling communication. NOTE Up to 16 F code boxes can be registered.
- Page 77 Press OK to select Register. Select a type of F code box: > Bulletin Box - refer to > Confidential Box - refer to Registering an F code Bulletin box Press OK to select Bulletin Box. Press the Right arrow key to select Box Name. Using the arrow keys and on screen keyboard, enter a box name.
- Page 78 Using the Down arrow, scroll to Sub-Address and press the Right arrow key. Using the keypad enter the sub address. Highlight Done and press OK. NOTE A sub address can be registered using up to 20 digits. Numbers, # and * can be registered.
- Page 79 Deleting an F code box NOTE You cannot delete an F code box in which documents are stored, it must be empty. Press the SETTING button on the control panel. Using the Down arrow key, scroll to Admin Setup and press OK. Using the arrow keys and on-screen keypad, enter the Administrator password.
- Page 80 Receiving using a sub address (F code polling) By entering a sub address and ID code, a document stored in the bulletin box of a recipient machine can be taken out (polling). NOTE Before operating, ensure you have the necessary sub address and ID code to hand.
- Page 81 Printing stored documents Print secure received documents, documents received in the bulletin box and documents stored in the bulletin box. NOTE When a document is received into an F code box, the F code receiving notice is printed. Check the F code box number and print the stored document. Press the SETTING button on the control panel.
-
Page 82: Fax Receiving
Fax job view/cancel If you no longer require a stored fax job, you can cancel and remove it from your MFP’s memory. Press the Fax button on the control panel to prompt the Fax Mode screen. Using the arrow keys, scroll to Fax and press OK. Using the Down arrow key, scroll to Fax Job View/Cancel and press OK. - Page 83 Receiving faxes The machine automatically starts fax reception. Receiving calls The telephone starts ringing when it receives calls. Pick up the handset to talk when the machine rings. If necessary, press the mono START button and then put down the handset to receive faxes.
- Page 84 This mode allows the machine to detect a distinctive ring if it has been enabled on the phone line. In this mode, the machine distinguishes the DRD type of the sender. The machine then answers only when it matches the registered DRD type. You can register up to four DRD types: Type 1: short-long Type 2: long-long...
-
Page 85: Managing The Phone Book
ANAGING THE PHONE BOOK The following section describes how to add/remove/modify speed and group dial entries to/ from the Phone Book. DDING A SPEED DIAL ENTRY TO THE PHONE BOOK The machine can hold up to 100 speed dial numbers in the phone book. To add a new speed dial number to the phone book: Press the SETTING button on the control panel. -
Page 86: Adding A Group Entry To The Phone Book
Press the Left arrow key to exit the menu. DDING A GROUP ENTRY TO THE PHONE BOOK The machine can hold up to 20 group dial settings. To add a new group dial number to the phone book: Press the SETTING button on the control panel. Using the Down arrow key, scroll to Phone Book and press OK. -
Page 87: Modifying A Speed Dial Entry
Using the arrow keys, scroll to Delete and press OK. At the prompt select Yes to continue or select No to cancel the operation. Press OK. Press the Left arrow key to exit the menu. ODIFYING A SPEED DIAL ENTRY To modify a speed dial entry: Press the SETTING button on the control panel. -
Page 88: Internet Fax
NTERNET FAX ENDING A FAX FROM YOUR NOTE You must have the fax driver installed on your PC. Download the latest fax driver from your support website. Basic operation At the MFP: Place your document(s) with text face UP in the ADF or face DOWN on the glass. - Page 89 Enter comments if required. If required select the Add an outside call number checkbox and enter the Outside call number as appropriate. On the Recipient tab: Click the Recipient... button. Select a fax number from the Phone book panel on the right hand side. Refer “Adding fax numbers to the phone book”...
-
Page 90: Advanced Operation
Advanced operation Using the options available, you can alter the fax output to suit your needs: FEATURE OPTION Internet Fax Destination Bcc: Scan Setting Scan Size Density Resolution Background Removal Reply to Edit E-mail Address Book Email Group List Email Send History Direct Input LDAP Simple Search... -
Page 91: Receiving An Internet Fax
FEATURE OPTION Scan Setting File Name (cont.) Duplex Scan Continue Scan Compression Rate Internet Fax Tx History ECEIVING AN INTERNET FAX The machine automatically prints the internet faxes it receives. If the document is larger than Letter size, the machine automatically reduces it to the size of the paper in the specified paper tray. -
Page 92: Adding Fax Numbers To The Phone Book
DDING FAX NUMBERS TO THE PHONE BOOK NOTE you can register up to 1000 destinations. To add a fax destination number to the phone book: From your application’s File menu, select Print. In the Select Printer window, highlight the fax driver option. Press the Preferences button to display the fax driver window. -
Page 93: Importing And Exporting Fax Numbers
Add recipients to the group list: NOTE Maximum 100 recipients in any one group. Select a fax number from the Phone book panel on the right hand side. NOTE You can add a new fax number directly by clicking the New (FAX number)... button and adding an entry to the phone book panel. -
Page 94: Functions Common To Copy, Fax And Scan Operations
UNCTIONS COMMON TO COPY ONTINUOUS SCAN MODE If you need to scan, copy or fax multiple sets of documents from the ADF or document glass, enable the “Continue Scan” option. NOTE The example below uses the fax feature, however, the scan and copy features follow the same process. -
Page 95: Job Macros
OB MACROS If you have a routine copy, fax or scan job that you perform on a regular basis, you can program the steps into your MFP and create a “short cut” allowing you to perform the steps at the touch of a button. You can create up to ten short cuts using the Job Macro function. You can create a macro for the following functions: >... - Page 96 Using: To use a pre-programmed short cut: Press the Job Macro button on the control panel to prompt the Job Macro screen. Using the arrow keys, scroll to the macro you wish to use then press OK. Ensure Restore is highlighted then press OK. Check the settings and then press OK.
-
Page 97: Maintenance
AINTENANCE EPLACING CONSUMABLE ITEMS Only use genuine original consumables to ensure the best quality and performance from your hardware. Non original products may adversely affect your printer's performance and invalidate your warranty. ONER CARTRIDGE REPLACEMENT NOTE When the LCD display indicates TONER LOW, or if print appears faded, first open the top cover and try tapping the cartridge a few times to evenly distribute the toner powder. - Page 98 Gently raise the scanner. Press the cover release (a) and open the top cover (b) fully. If the MFP has been powered on, the fuser will be hot. This area is clearly labelled. Do not touch. WARNING! Maintenance > 98...
- Page 99 Note the positions of the four cartridges. It is essential that they go back in the same order. 1. Yellow cartridge 3. Cyan cartridge Slide the colored release collar on the cartridge to be replaced fully towards the right hand side of the printer. Lift the right-hand end of the cartridge and then draw the cartridge to the right to release the left-hand end as shown, and withdraw the toner cartridge out of the printer.
- Page 100 Clean the top of the ID unit with a clean, lint free cloth. Remove the new cartridge from its box but leave its wrapping material in place for the moment. Gently shake the new cartridge from end to end several times to loosen and distribute the toner evenly inside the cartridge.
- Page 101 Gently wipe the LED head surface with a clean, lint free cloth. Close the top cover and press down firmly so that the cover latches closed. Gently lower the scanner. Maintenance > 101...
-
Page 102: Image Drum Replacement
MAGE DRUM REPLACEMENT The image drum assembly comes complete with its own installation details which give full instructions on replacement. You are advised to follow these instructions carefully. EPLACING THE TRANSFER BELT UNIT The belt unit is located under the image drum assembly. Switch off the MFP and allow the fuser to cool for about 10 minutes before opening the cover. - Page 103 Place the assembly in a safe place away from direct sources of heat and light. The green image drum surface at the base of each cartridge is very delicate and light sensitive. Do not touch it and do not expose it to normal room light for more than 5 minutes.
- Page 104 Holding the image drum assembly by its handles, lower it into place in the machine, locating the pegs at the sides into their slots in the sides of the printer cavity. Close the top cover and press down firmly so that the cover latches closed. Gently lower the scanner.
-
Page 105: Fuser Replacement
USER REPLACEMENT The fuser is located inside the printer just behind the toner cartridges. If the MFP has recently been powered on, some fuser components will be very hot. Handle the fuser with extreme care, holding it only by its handle, which will only be mildly warm to the touch. A warning label clearly indicates the area. - Page 106 Holding the new fuser by its handle, make sure that it is the correct way round. The retaining levers (b) should be fully upright, and the two locating lugs (c) should be towards you. Lower the fuser into the printer, locating the two lugs (c) into their slots in the sides of the printer cavity.
-
Page 107: Cleaning
LEANING Use a clean, moist, lint-free cloth for cleaning. Do not use benzine, thinners or alcohol as a cleaning agent. THE UNIT CASING Switch the printer off. Refer to Wipe the unit surface with a soft cloth moistened sparingly with water or neutral detergent. - Page 108 Gently wipe the LED head surface with a clean, lint free cloth. Do not use methyl alcohol or other solvents on the LED head as damage to the lens surface will occur. Close the top cover and press down firmly at both sides so that the cover latches closed.
-
Page 109: The Paper Path In The Adf
THE PAPER PATH IN THE If marks are found on an image which has been read by the ADF, or the ADF does not feed documents smoothly, follow the cleaning procedure below. Switch the MFP OFF. Refer to Open the ADF top cover. Moisten a soft, clean, lint-free cloth and wipe the feed rollers (1) by moving the cloth from side to side. -
Page 110: The Document Glass
THE DOCUMENT GLASS The document glass needs to be cleaned occasionally to ensure optimum image quality and performance. Open the document cover. Moisten a soft, clean, lint free cloth and remove any marks, as shown. Close the document cover. Maintenance > 110... -
Page 111: Installing Upgrades
NSTALLING UPGRADES This section explains how to install optional equipment into your MFP. This includes: > additional RAM memory > SD card > additional paper tray EMORY UPGRADE The basic models come equipped with 256MB of main memory. This can be upgraded with an additional memory board of 256MB or 512MB, giving a maximum total memory capacity of 768MB. - Page 112 Notice that the memory board has a small cutout in the edge connector, which is closer to one end than the other. Identify the RAM expansion slot in the printer. If the RAM expansion slot already contains a memory upgrade board, that board will have to be removed before you can install the new one.
- Page 113 Replace the access cover and latch it closed. Reconnect the power cable and switch the MFP on. When the machine is ready, print a menu map as follows: Press the SETTING button. Press the OK button to select Reports. Press the OK button to select Configuration. Press the OK button once more to execute.
-
Page 114: Sd Card
CARD The SD card enables collating of printed pages and can be used to store overlays and macros, fonts, and secure or proof documents waiting to be printed. Your machine is fitted with a 4GB class 6 SD card as standard. If you wish you can upgrade this as your machine supports 16GB class 6 SD cards. - Page 115 Gently push the SD card into the slot as shown. Replace the inner access cover (b) and turn locking screw (a) clockwise to secure it shut. Replace the access cover and latch it closed. Reconnect the power cable and switch the MFP on. When the machine is ready, print a menu map as follows: Press the SETTING button.
-
Page 116: Additional Paper Tray
DDITIONAL PAPER TRAY Switch the MFP off and disconnect the power cable. Refer to page 18 for details. Place additional paper tray on desired location. Observing safety rules for lifting and, using locating guides, place machine on top of the additional paper tray. Fit retaining clips as shown. -
Page 117: Setting The Driver Device Options
ETTING THE DRIVER DEVICE OPTIONS Once your new upgrade has been installed, you may need to update the printer driver so that the additional features are available to your applications. Accessories such as additional paper trays will only be usable if the printer driver on your computer knows they are there. - Page 118 Panther (Mac OS X 10.3) Open the Mac OS X Print & Fax Preferences. Click Printing. Click Set Up Printers…. Ensure your machine is selected and click Show Info…. Click the menu and choose Installable Options…. Select all hardware options appropriate to your machine and click Apply Changes….
-
Page 119: Troubleshooting
ROUBLESHOOTING ’ HECKING THE MACHINE S STATUS From the STATUS key on the control panel, you can check the status of your machine. The STATUS key illuminates or flashes when any trouble is occurring in your machine. Press the STATUS key on the control panel to open the status menu. Ensure that System Status is selected and then press OK. -
Page 120: Clearing Paper Jams
LEARING PAPER JAMS Provided that you follow the recommendations in this guide on the use of print media, and you keep the media in good condition prior to use, your MFP should give years of reliable service. However, paper jams occasionally do occur, and this section explains how to clear them quickly and simply. -
Page 121: In The Printer Section
N THE PRINTER SECTION If a sheet is well advanced out of the top of the printer, simply grip it and pull gently to draw it fully out. If it does not remove easily, do not use excessive force. It can be removed from the rear later. - Page 122 he assembly down gently onto a piece of paper to prevent toner from marking Put t your furniture and to avoid damaging the green drum surface, and cover. The green image drum surface at the base of the Image Drum is very delicate and light sensitive.
- Page 123 Look into the printer to check whether any sheets of paper are visible on any part of the belt unit. Do not use any sharp or abrasive objects to separate sheets from the belt. This may damage the belt surface. To remove a sheet with its leading edge at the front of the belt (a), lift the plastic guard (e) at the front of the printer, then carefully lift the sheet from the belt and pull it forwards into the internal drum cavity and withdraw the sheet.
- Page 124 through the drum cavity area. Then allow the pressure release lever to rise again. NOTE If the sheet is well advanced into the fuser (only a short length is still visible), do not attempt to pull it back. To remove a sheet in the fuser, move the two retaining levers (e) towards the front of the machine to release the fuser.
- Page 125 If you were duplex printing when the jam occurred, check the duplex paper path: Pull the locking levers at each side of the transfer belt up and towards the front of the machine. Using the locking levers (a), lift the belt (b) upwards and withdraw from the machine.
- Page 126 Holding the image drum assembly by its handles, lower it into place in the machine, locating the pegs at the sides into their slots in the sides of the printer cavity. Lower the top cover but do not press down to latch it closed yet. This will protect the drum from excessive exposure to room lighting while you check the remaining areas for jammed sheets.
- Page 127 Pull out the paper tray and ensure that all paper is stacked properly, is undamaged, and that the paper guides are properly positioned against the edges of the paper stack. When satisfied, replace the tray. Close the top cover and press down firmly so that the cover latches closed. Gently lower the scanner.
-
Page 128: Dealing With Unsatisfactory Printing
EALING WITH UNSATISFACTORY PRINTING SYMPTOMS Vertical white lines can be seen on the printed page. Printed images are fading vertically. Printing is light. Partially faded images. White spots and lines appear in solid printing. Vertical lines appear. POSSIBLE CAUSES STEPS TO TAKE The LED head is dirty. -
Page 129: Dealing With Unsatisfactory Copying
SYMPTOMS Horizontal Lines and spots appear periodically. White area of paper is lightly stained. Periphery of the letters is smudged. Toner comes off when it is rubbed. Glossiness is not uniform. EALING WITH UNSATISFACTORY COPYING As well as the suggestions provided in ensure that the scanner unit glass is clean at all times. -
Page 130: Fax Problem Checklist
AX PROBLEM CHECKLIST If a problem occurs, read through the list of problems and solutions before calling for service. The machine will not dial a telephone number: Check the power cable and wall outlet. Make sure that the telephone line (not external telephone or handset) is connected to the LINE socket on the back of the machine. - Page 131 Machine is connected to a PBX but it is not possible to dial out: Be certain that the dial prefix is entered before the telephone number for each number dialled or programmed into the machine. Additionally, the machine must be programmed for PBX operation before it will work with a PBX (refer to the Configuration Guide for details).
-
Page 132: Specifications
PECIFICATIONS MFXC2700 ITEM Dimensions Weight Power supply Power consumption Sleep: Power saving: Stand-by: Operating (Average): Operating (Max.): Operating environment Print environment Noise (Sound pressure level) Operating: Print Copy Standby: Power saving: SPECIFICATION MFX - C2700 427 x 509 x 445mm (W x D x H) 29Kg approx. -
Page 133: Appendixa - Menu System
PPENDIX MENU SYSTEM The top-level function menus are: > Reports > Paper Setup > Address Book > Phone Book > Profile > Network Scan Destination > Store Document Settings > View Information > Shutdown > Easy Setup > Admin Setup The menu trees are given to the lowest menu item level. -
Page 134: Reports
EPORTS ITEM OPTION Configuration Yes, No System File List Demo Page Error Log MFP Usage Network Information Speed Dial List Group List Fax Tx/Rx Log Fcode Box List Block Junk Fax E-mail/Internet Fax Journal Report Address Book Print PCL Font List PSE Font List PPR Font List FX Font List... -
Page 135: Paper Setup
APER SETUP ITEM OPTION Tray 1 Paper Size Custom Media Type Media Weight Tray 2 Paper Size Custom Media Type Media Weight OPTION/DESCRIPTION A4/A5/A6/B5/ Sets paper in Tray 1. Letter/Legal13/ Legal13.5/Legal14/ Executive/ 16K(184x260mm)/ 16K(195x270mm)/ 16K(197x273mm)/ Custom Width: Enter paper width and length. 105~210~216mm Length: 148~297~356mm... - Page 136 ITEM OPTION MP Tray Paper Size Custom Media Type Media Weight Select Tray Copy OPTION/DESCRIPTION A4/A5/A6/B5/ Select the size of paper to be fed from the Letter/Legal13/ multi purpose tray. Legal13.5/Legal14/ Executive/ 16K(184x260mm)/ 16K(195x270mm)/ 16K(197x273mm)/ Custom/COM-9 Envelope/COM-10 Envelope/Monarch Envelope/DL Envelope/C5 Envelope/Index Card Width:...
-
Page 137: Address Book
DDRESS BOOK ITEM OPTION E-mail Address Register Name E-mail Address Group No. Edit Delete Yes, No Sort By Name Sort By Number E-mail Group Register Name Address No. Edit Delete Yes, No Sort By Name Sort By Number OPTION/DESCRIPTION Select an address number. Max. -
Page 138: Phone Book
HONE BOOK ITEM OPTION Speed Dial Register Name Fax Number Group No. Edit Delete Yes, No Sort By Name Sort By Number Group No. Register Name Speed Dial Edit Delete Yes, No Sort By Name Sort By Number OPTION/DESCRIPTION Select a speed dial number. Max. -
Page 139: Profile
ROFILE ITEM OPTION Register Profile Name Protocol Target URL Port No. PASV Mode User Name Password CIFS Character Encode Communication Scan Size Image Settings File Name Greyscale VALUE/DESCRIPTION Select a profile number. user defined Sets a profile name. Max. 16 characters. CIFS, FTP, HTTP Selects a protocol to use for storing files. - Page 140 ITEM OPTION Register File Format (cont.) Encrypted PDF Compression Rate Edge Erase Edit Delete Yes, No Sort By Name Sort By Number VALUE/DESCRIPTION Color PDF, TIFF, JPEG, Mono (Greyscale) PDF, TIFF, JPEG, Mono (Binary) PDF, TIFF, XPS Not Encrypt Encryption disabled. Encrypt Low, Medium, High Color...
-
Page 141: Network Scan Destination
ETWORK SCAN DESTINATION ITEM OPTION Register Destination Destination Address Port No. Edit Destination Destination Address Port No. Delete Yes, No Sort By Name Sort By Number TORE DOCUMENT SETTINGS ITEM OPTION Store Fcode Bulletin Board Delete Fcode Bulletin Board Received Documents Print Fcode Box Reserved Tx Doc. -
Page 142: View Information
IEW INFORMATION ITEM OPTION System Serial No. Information Asset No. Lot No. CU Version PU Version Scanner Version Total Memory Flash Memory SD Memory Card Network IPv4 Address Subnet Mask Gateway Address MAC Address NIC Program Version IPv6 Address (Local) IPv6 Address (Global) a. -
Page 143: Easy Setup
ASY SETUP NOTE The Easy Setup menu is blocked by the Admin password. ITEM OPTION Date/Time Setting user defined Not Summer Time Now Summer Time Fax Number Fax Setting Sender ID Network Setting Manual Auto OPTION/DESCRIPTION Using the arrow keys, select your time zone, in relation to GMT, from the list. -
Page 144: Admin Setup
ITEM OPTION E-mail Setting Set IP Address of Mail Server From No Authentication SMTP Auth POP Before SMTP DMIN SETUP NOTE The Admin Setup option is blocked by a password. ITEM OPTION Copy Setup Default Settings OPTION/DESCRIPTION user defined Enter the IP address of the mail server. user defined Enter the sender’s address User Name... - Page 145 ITEM OPTION Default Settings Fax Setup Fcode Box Register Edit Delete Security Function DEFAULT VALUE/DESCRIPTION Resolution Normal Density Scan Size Continue Scan Transmit Confirmation Report Memory Tx Confidential Box Box Name user defined Sub-Address user defined Hold Time I.D.Code user defined Bulletin Box Box Name user defined...
- Page 146 ITEM OPTION Other Settings Fax Setup (cont.) DEFAULT VALUE/DESCRIPTION Redial Tries 2 time(s) Redial Interval 1 minute(s) Forced Memory Rx Setting I.D.Code user defined Block Junk Fax Setting Registered List select from list Ring Response 1 Ring Dialling Pause Duration 2 second(s) Rx Reduc.
- Page 147 ITEM OPTION Fax Setting Fax Setup (cont.) Internet Fax Default Settings Setup Scanner Default Settings Setup DEFAULT VALUE/DESCRIPTION Service Bit Country Code International H/Modem Rate (For Tx) 33.6 Kbps H/Modem Rate (For Rx) 33.6 Kbps PBX Line Forwarding Setting TAD Mode Type 3 Tel Priority Mode CNG Detection...
- Page 148 ITEM OPTION Scanner Default Settings Setup (cont.) (cont.) E-mail Setup File Name Template From / Reply To Broadcast Destination MDN Response A/R Full Print MCF Report Timeout of MCF Report Print Check Message DEFAULT VALUE/DESCRIPTION Encrypted PDF Setting Document Open Password: user defined Permissions Password:...
- Page 149 ITEM OPTION Scanner USB Memory Setup (cont.) Setup TWAIN Setup Scanner Calibration Print From Default Settings USB Memory Setup Print Setup Print Menu DEFAULT VALUE/DESCRIPTION File Name user defined Network TWAIN Port No. 9967 PC Scan Mode Simple Scan Mode Timeout Setting 5 minute(s) Execute...
- Page 150 ITEM OPTION Print Setup Print Menu (cont.) (cont.) DEFAULT VALUE/DESCRIPTION Print Setup Copies: Duplex: Binding: Long Edge Bind Resolution: 600x1200dpi Toner Save Mode: Mono-Print Speed: Auto Orientation: Portrait Lines Per Page: 64 Line(s) Edit Size: Cassette Size Width: 210 mm Length: 297 mm Printer Adjust...
- Page 151 ITEM OPTION Print Setup Color Menu (cont.) DEFAULT VALUE/DESCRIPTION Density Control Auto Adjust Density Execute Color Tuning/Print Yes, No Pattern Cyan Highlight Cyan Mid-Tone Cyan Dark Magenta Highlight Magenta Mid-Tone Magenta Dark Yellow Highlight Yellow Mid-Tone Yellow Dark Black Highlight Black Mid-Tone Black Dark Cyan Darkness...
- Page 152 ITEM OPTION Print Setup Color Menu (cont.) (cont.) System Configuration Menu DEFAULT VALUE/DESCRIPTION Adjust Registration Execute Cyan Reg Fine Adj Magenta Reg Fine Adj Yellow Reg Fine Adj Ink Simulation CMY100% Density Disable CMYK Conversion Personality Auto Emulation Appendix A - menu system > 152 Performs automatic color registration adjustment.
- Page 153 ITEM OPTION Print Setup System (cont.) Configuration Menu (cont.) PCL Setup DEFAULT VALUE/DESCRIPTION Alarm Release Manual Auto Continue Error Report Font Source Resident Font No. Font Pitch 10.00 CPI Font Height 12.00 point(s) Symbol Set PC-8 A4 Print Width 78 Column White Page Skip Appendix A - menu system >...
- Page 154 ITEM OPTION Print Setup PCL Setup (cont.) (cont.) PS Setup SIDM Setup DEFAULT VALUE/DESCRIPTION CR Function LF Function Print Margin Normal True Black Pen Width Adjust Tray ID# Tray 2 : MP Tray : L1 Tray Type 1 SIDM Manual ID# SIDM Manual2 ID# SIDM MP Tray ID# Appendix A - menu system >...
- Page 155 ITEM OPTION Print Setup SIDM Setup (cont.) (cont.) IBM PPR Setup DEFAULT VALUE/DESCRIPTION SIDM Tray1 ID# SIDM Tray2 ID# Character Pitch 10 CPI Font Condense 12CPI to 20CPI Character Set SET-2 Symbol Set IBM-437 Letter O Style Disable Zero Character Normal Line Pitch 6 LPI...
- Page 156 ITEM OPTION Print Setup IBM PPR Setup (cont.) (cont.) EPSON FX Setup DEFAULT VALUE/DESCRIPTION Fit To Letter Disable Text Height Same Character Pitch 10 CPI Character Set SET-2 Symbol Set IBM-437 Letter O Style Disable Zero Character Normal Line Pitch 6 LPI White Page Skip CR Function...
- Page 157 ITEM OPTION Print Setup EPSON FX (cont.) Setup (cont.) Network Network Setup Menu DEFAULT VALUE/DESCRIPTION Text Height Same TCP/IP Enable IP Version IPv4 NetBEUI Disable NetBIOS Over TCP Enable NetWare Disable EtherTalk Disable Frame Type Auto IP Address Set Auto IPv4 Address xxx.xxx.xxx.xxx Subnet Mask...
- Page 158 ITEM OPTION Network Network Setup Menu (cont.) (cont.) DEFAULT VALUE/DESCRIPTION Gateway Address xxx.xxx.xxx.xxx DNS Server (Primary) user defined DNS Server (Secondary) user defined WINS Server (Primary) user defined WINS Server user defined (Secondary) Enable Telnet Disable Disable IPSec Disable SNMP Enable Appendix A - menu system >...
- Page 159 ITEM OPTION Network Network Setup Menu (cont.) (cont.) Mail Server Setup DEFAULT VALUE/DESCRIPTION Network Scale Normal HUB Link Setting Auto Negotiate Network PS-Protocol Factory Defaults Execute SMTP Server user defined SMTP Port SMTP Encryption None POP3 Server user defined POP3 Port POP3 Encryption None Authentication Method...
- Page 160 ITEM OPTION Network LDAP Server Menu (cont.) Setting Secure Protocol Server Setting Management Default Mode Operation Clear Sound Control Local Interface System Setup DEFAULT VALUE/DESCRIPTION Server Setting LDAP Server: user defined Port No.: Timeout: 30 second(s) Max. Entries: 100 Entries Search Root: user defined Attribute...
- Page 161 ITEM OPTION Management System Setup (cont.) (cont.) Power Save Memory Setup Storage Maintenance Setup DEFAULT VALUE/DESCRIPTION Status In Near Life Enable Address Information 3 minute(s) Lock Time Out USB Memory Interface Enable Panel Contrast Power Save Time 30 minutes Sleep Time 10 minutes Silent Mode ECO Mode...
- Page 162 ITEM OPTION Management Encryption (cont.) Setup Language Maint Setup Admin Password Reset Settings Job Log Setup Print Statistics User Install Time Setup Set Daylight Saving Time Zone Power Save High Humid Mode MF(Tone)/DP(Pulse) DEFAULT VALUE/DESCRIPTION Job Limitation Disable Initialize Execute New Password user defined Enter Password (Verify)
- Page 163 ITEM OPTION User Install Reception Mode (cont.) DRD Type Dial Tone Detection Busy Tone Detection TTI Register/ Edit Standard TTI TTI Number TTI Calendar Type Super G3 Erase Privacy Data DEFAULT VALUE/DESCRIPTION Fax Ready Mode Type 1 TTI 1: user defined TTI 2: TTI 3: TTI 1...
-
Page 164: Index
NDEX Address book adding a group entry ... 65 adding an email entry ... 64 deleting a group entry ... 66 deleting an email entry ... 64 editing a group entry ... 66 editing an email entry ... 65 Belt how to replace ... -
Page 165: Muratec Contact Details
CONTACT DETAILS Muratec America, Inc. 3301 East Plano Parkway, Suite 100 Plano, TX 75074 Phone: 4694293300 http://www.muratec.com Contact details > 165... - Page 166 Muratec America Inc. 3301 East Plano Parkway, Suite 100 Plano, TX 75074 Phone: 4694293300 www.muratec.com...