Table of Contents
Advertisement
Quick Links
Advertisement
Chapters
Table of Contents

Related Manuals for Philips VTR7300


Summary of Contents for Philips VTR7300
- Page 1 扫描词典笔 VTR7300 使用手册 User manual...
-
Page 3: Table Of Contents
目录 1 欢迎 1.1 产品特点 2 重要须知 2.1 安全 3 您的智能扫描词典笔 供货范围 概览 3.1 开 / 关机 3.2 扫描使用引导... - Page 4 4 功能介绍 4.1 扫描查词 4.2 录音转写 4.3 对话翻译 4.4 笔记摘抄 4.5 收藏夹 4.6 听力练习 4.7 AI 助手 4.8 WIFI 连接 4.9 USB 充电 4.10 电脑连接 4.11 音量调节...
- Page 5 4.12 强制关机 4.13 系统更新 5 常见问题 6 技术参数...
-
Page 6: 产品特点
1 欢迎 欢迎来到飞利浦世界!您能选择和购买飞利浦的产品,我们非常高兴。您可在 我们的官方网站上获得飞利浦公司的全方位技术支持,如:使用手册、软件下 载、保修信息等。 www.philips.com 1.1 产品特点 • 快速扫描查词和翻译; • 丰富的词库查询; • 口语发音测评; • 语音转文字,实现边录音边转写;... - Page 7 • 离线扫描、翻译、播报; • 长时间录音,持久续航。...
-
Page 8: 重要须知
2 重要须知 2.1 安全 • 为了避免短路,切勿将产品放置在触水受潮处。 • 不要将产品放在加热设备附近或阳光直射的地方。 • 请注意,切勿挤压电缆,特别是插头处。 小心 • 特别声明:使用本产品前请仔细阅读本说明书,如因人为操作或不可抗力因素 而导致数据丢失,本公司一概不予负责。特别提醒用户小心操作,注意将资料 另外备份。 • 图像仅作参考。飞利浦保留更改颜色 / 外观 / 设计 / 参数 / 产品功能的权利, 硬件、软件、APP、丝印如有更新,恕不另行通知。... -
Page 9: 您的智能扫描词典笔
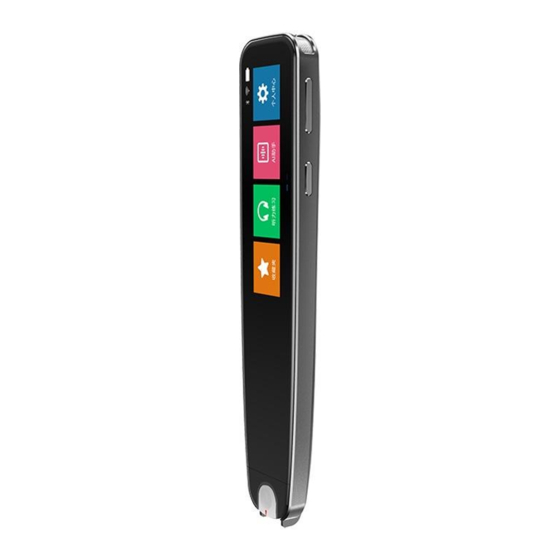
3 您的智能扫描词典笔 供货范围:... - Page 10 概览: USB接口 录音键 显示 音量键 电源键 喇叭网 MIC网 摄像头...
-
Page 11: 开 / 关机
3.1 开 / 关机 (1) 开机:在关机状态下,长按”电源键”三秒机器开机,并显示 philips, 开启后进入主菜单界面。 (2) 关机:在开机状态下,长按“电源键”三秒弹出关机选择界面,点击关机... -
Page 12: 扫描使用引导
图标设备会关机。 3.2 扫描使用引导 手握笔,如图所示:... - Page 13 把笔头对准线置于文字中间,如图所示:...
- Page 14 轻压下笔头,亮灯后手持笔向右匀速移动扫描,如图所示:...
- Page 15 在文字末端抬笔即可查词扫描内容。...
-
Page 16: 功能介绍
4 功能介绍 4.1 扫描查词 (1) 在主菜单界面直接扫描书本文字,或主菜单点 图标进入,扫描书本文 字,扫描成功会显示如下画面。 可以点击扫描结果句子的每个词,查看词的释义。... - Page 17 点击 图标,会打开笔画描写界面。 (2) 当设备联网时, 扫描出的句子会组词, 可以点击每个词语, 查看词语的释义。...
- Page 18 (3)查词学习中,点 图标查词发音,点 图标收藏重点单词,如果扫描 的是英语句子则会显示 图标,点击 图标进入口语发音练习及测评。 口语测评 扫描结果是英文时才有口语测评功能。 点击 ,可以对整个句子口语测评,测评结束会打分。...
- Page 19 点击 可以对单个单词口语测评,测评结束会打分。...
- Page 20 (4)查词学习中,从屏幕边缘向左滑动,可拉出菜单,菜单主要分词典、朗读、 编辑三大功能,用户可以设置功能习惯。...
- Page 21 滑出菜单图示 词典 英语类词典分:现代英汉词典、英汉词典。 中文类词典分:现代汉英词典、汉语词典、古汉语词典、英汉词典。 用户可以根据使用习惯选择词典。...
- Page 22 朗读 可以修改朗读语速,语速分:慢速、中速、快速。 可以修改朗读发音,发音分:英式和美式。 当打开静音模式开关,扫描后的结果不会语音播报。...
- Page 23 编辑 可以对扫描的结果进行修改,删除操作。...
-
Page 24: 录音转写
4.2 录音转写 在主界面点击 图标进入录音界面,进入录音界面会自动开始录音,当设备 连接网络时,会一边录音一边转写文本;没有连接网络时,只会录音不会转写 文本。... -
Page 25: 对话翻译
4.3 对话翻译 主菜单点击 图标进入语音翻译,长按住音量 - 键或音量 + 键说话。 按住音量 - 键不放,说英文,说完松开手后可直接翻译成中文,并发音朗读。 按住音量 + 键不放,说中文,说完松开手后可直接翻译成英文,并发音朗读。... -
Page 26: 笔记摘抄
注意 • 该功能必须联网才可以使用。 4.4 笔记摘抄 主菜单点 图标计入笔记摘抄,点击 后,进入扫描模式,按住 笔扫描,扫描成功后可以编辑笔记(注意:从屏幕右边边缘往左侧滑动会打开 编辑功能)。... -
Page 28: 收藏夹
4.5 收藏夹 主菜单点 图标进入收藏夹。进入收藏夹可以看到你收藏的词条列表,词条 来源于扫描词典模块对字、词、句的收藏。... -
Page 29: 听力练习
4.6 听力练习 主菜单点击 图标进入听力练习。录音文件里面是录音转写功能里面的录音 文件和转写文本;其他里面显示的是通过电脑拷贝到扫描笔的音频文件(仅支 持 MP3 格式的音频)。 4.7 AI 助手 点主界面 进入 AI 助手,点击右边录音图标页面跳转后开始说话。 您可以说 “你叫什么名字” 、 “给我背一首唐诗” 、 “xx 今天的天气怎么样” 等。 注意 • 该功能必须联网才可以使用。... -
Page 30: Wifi 连接
4.8 WIFI 连接 点主菜单 图标,找到 图标点击进入,选择要连接的 WIFI 热点,进 入后输入 WIFI 密码,点【ok】确认,右上角出现 WIFI 图标后,表示网络连接 成功。 在户外使用本产品时,可选择使用手机数据热点,进行 WIFI 连接。 4.9 USB 充电 在使用产品中,当系统提示电量不足时,请及时充电,充电时间为 2-3 小时。 充电时请使用本产品标配的专用数据线或者手机 Type-C 数据线,连接到 DC5V1A-3A 有 3C 认证的手机充电器进行充电。... -
Page 31: 电脑连接
4.10 电脑连接 请使用本产品标配的专用数据线把扫描翻译笔和电脑连接,在弹出界面选择 【是】图标。在电脑出现笔的磁盘后,进行文件拷贝等操作。 4.11 音量调节 短按音量 + 键 / 音量 - 键,调大或调小音量。 4.12 强制关机 长按电源键 10 秒,设备强制关机。... - Page 32 4.13 系统更新 点主菜单 图标,点 图标进入,选择 会检查是否有现版 本更新,如有新版本更新,可点 图标,进入系统文件下载,下载完 成会弹出的菜单选择是,进入系统安装,完成后,系统自动重新启动后,系统 更新完成。 ( 备注:系统更新前要让扫描翻译有充足的电量,在系统安装中请不要做任何 操作,这样能避免系统安装中断,升级失败,笔无法正常使用!遇到磁盘空间 满提示无法下载文件,请连接电脑清理出磁盘空间再操作 )
- Page 33 5 常见问题 不开机 请充电后使用 不连电脑 请使用标配专用数据线 单词不发音 请在菜单设置 TTS 发音 不能语音翻译 请连接 WIFI 网络 触摸不作用 请长按电源键 10 秒复位 扫描不识别 请正确握笔扫描 其他 请联系客服...
- Page 34 6 技术参数 系统:Linux 系统 录音格式:MP3 存储 / 容:EMCP (1G+16GB) 显示屏:2.98 英寸 LCD(268*800) 触摸屏:单点触摸,电容触摸屏 电源输入:5V/1A 耳机:Type-C 通用 USB:Type-C 支持蓝牙:是 支持 WIFI:是...
- Page 35 Content 1 Welcome 1.1 Product features 2 Important Notice 2.1 Safety 3 Your Smart Scanning Dictionary Pen What’s in the box Overview 3.1 Power on/off 3.2 Scan using guide...
- Page 36 4 Function Introduction 4.1. Scan and word searching 4.2 Record-to-text 4.3. Dialogue translation 4.4. Notes excerpt 4.5. Favorites 4.6. Listening practice 4.7. AI assistant 4.8. WIFI connection 4.9. USB charge 4.10 Connect to a computer 4.11 Volume control 4.12 Forced shutdown 4.13 System update...
- Page 37 5 FAQs 6 Technical Parameters...
-
Page 38: Welcome
1 Welcome Welcome to the world of Philips! We are honoured by your choice and purchase of Philips’ products. You can have Philips’ comprehensive techni- cal supports from our website, e.g. user manuals, software download and warranty information etc. www.philips.com 1.1 Product features... -
Page 39: Important Notice
2 Important Notice 2.1 Safety • To avoid short circuits, DO NOT expose the product to humidity. • DO NOT place the product near a location with heat source or direct sunlight. • Be careful not to pinch the cable, especially the plug. - Page 40 We specially recommend that users make additional copies of the files in the device. • Images are for reference only. Philips reserves the right to change the color / appearance / design / parameters/product functions. Hardware,...
-
Page 41: Your Smart Scanning Dictionary Pen
3 Your Smart Scanning Dictionary Pen What’s in the box:... -
Page 42: Overview
Overview: USB interface Record key Display Volume Power key Speaker net Mic net Camera... -
Page 43: Power On/Off
3.1 Power on/off (1)Power on: In the off state, long press the "Power" button for three seconds to switch the device on, and “PHILIPS" will be displayed. (2) Power off: In the on state, long press the "Power" button for three... -
Page 44: Scan Using Guide
power off icon to shut down the device. 3.2 Scan using guide Hold the device in your hand, as shown in the following:... - Page 45 Put the alignment line in the middle of the text, as shown in the following: Slightly press the head of the device, and when the light is on, hold the device to scan the text with uniform speed, as shown in the following:...
- Page 46 At the end of the text, you can lift the device up to look up the words and scan the content.
-
Page 47: Function Introduction
4 Function Introduction 4.1. Scan and word searching (1)You can scan the tex directly in the main interface, or click the main interface to scan the text. After you scan successfully, the following picture will be displayed: You can click each word of the scan result to see the definition of the word. - Page 48 Click to open the interface of stroke depiction. (2)When the device is connected to the Internet, the scanned sentences can group words of the sentence. You can click each word to see their...
- Page 49 definition. (3)In the process of word searching and learning, click to listen to the pronunciation and click to collect the key words. If the scanning rusult is English sentences, will be displayed. Click to enter the oral pronunciation practice and test. Oral test Only when the scanning result is English, can the function of oral test will be provided.
- Page 50 Click to carry out the oral test on the whole sentence, and the score will be given at the end.
- Page 51 Click to carry out the oral test on a single word, and the score will be given at the end.
- Page 52 (4)During the word searching, slide to the left from the edge of the screen to pull out the menu. The menu is mainly divided into three func- tions: dictionary, reading and edit. Users can set the function habits. Demonstration of pulling out the menu Dictionary English dictionaries: Modern English-Chinese Dictionary, English-Chinese Dictionary...
- Page 53 nary, Ancient Chinese Dictionary, English-Chinese Dictionary. Users can choose dictionaries based on their usage habits. Reading Users can change the speed of reading, which can be divided into: slow, me- dium, fast. Users can change the pronunciation of reading, which can be divided into: British and American.
- Page 54 Edit Users can modify and delete the scanning results.
-
Page 55: Record-To-Text
4.2 Record-to-text Click in the main interface to enter the recording interface, which will automatically start recording. When the device is connected to the network, it will transcrie the text while recording. When the device discon- nected to the network, it will only record but not transcribe the text. -
Page 56: Dialogue Translation
4.3. Dialogue translation In the main menu, click to enter the dialogue translation. Long press and hold the “Volume -” or “Volume +” to speak. Press and hold the “Volume -” to speak English, then the device can directly translate it into Chinese and read aloud after you release your hand. Press and hold the “Volume +”... -
Page 57: Notes Excerpt
Note • This function must be connected to the Internet before it can be used. 4.4. Notes excerpt Click in the menu to enter the notes excerpt. Click enter scan mode, press and hold the device to scan. After scanning, you can edit the notes (Note: sliding from the right edge of the screen to the left will open the edit function). -
Page 59: Favorites
4.5. Favorites Click in main menu to enter the Favorites. In the favorites, you can see the list of your favorite entries, which come from the collection of words, speeches and sentences of the scan dictionary module. 4.6. Listening practice Click in the main menu to enter the listening practice. -
Page 60: Ai Assistant
Files” are the recording files and transcribed text from the record-to-text function; “Others” are the audio files that are copied through a computer (only MP3 format audio is supported). 4.7. AI assistant Click in the main interface to enter the AI assistant, click the recording icon on the right and start talking. -
Page 61: Wifi Connection
4.8. WIFI connection Click in the main interface, then click to select the WIFI to be connected and input the WIFI password, click “OK” to confirm. When the WIFI icon appears in the upper right corner, it indicates that the network connection is successful. -
Page 62: Connect To A Computer
cable to connect to the DC5V1A-3A mobile phone charger with 3C certifi- cation for charging. 4.10 Connect to a computer Please use the standard special data cable to connect the device with the computer and select the "Yes" icon in the pop-up interface. After the disk of the “Pen”... -
Page 63: Forced Shutdown
4.12 Forced shutdown Long press the power button for 10 seconds, the device will be forced to shut down. 4.13 System update Click in the main interface and click .If you choose the device will check whether there is a current version to update. If there is a new version, click to download the system file , and the menu will pop up when the download is completed. - Page 64 avoid system installation interruption, upgrade failure and failure of nomal use! When the disk space is full, you are unable to download the file. Please connect to the computer and clear the disk space before operation.)
- Page 65 5 FAQs Fail to start: Please charge it timely Unable to connect to computer: Please use the standard special data cable Words cannot pronounce: Please set TTS pronunciation in the menu Unable to translate: Please connect to WiFi network Unable to touch: Please press the power button for 10 seconds to reset Unidentifiable when scaning: Please hold the device correctly...
- Page 66 Others: Please contact customer service...
- Page 67 6 Technical Parameters System:Linux Recording format: MP3 Storage / capacity: EMCP (1G+16GB) Display: 2.98 inch LCD(268*800) Touch screen: single-touch, capacitive touch screen Power input: 5V/1A Earphone: Type-C USB: Type-C Support Bluetooth: Yes Support WIFI: Yes...
- Page 69 VTR7300...
- Page 72 © 2021 Speech Processing Solutions GmbH. Register your product and get support at www.philips.com/welcome 版权所有文档版本 1.0, 2021/03/18...