Table of Contents
Advertisement
Quick Links
AUTO-SCANNING WITH DIGITAL CONTROL
COLOR DISPLAY MONITOR
NSB1107STTUW
MODEL
USER'S GUIDE
For future reference, record the serial
number of your display monitor in the
space below:
SERIAL No.
The serial number is located on the
rear cover of the monitor.
Internet Home Page: http://www.mitsubishi-display.com/
®
Supplying Windows
95/98 INF File download service, new product
information, etc.
Advertisement
Table of Contents

Related Manuals for Mitsubishi NSB1107STTUW


Summary of Contents for Mitsubishi NSB1107STTUW
- Page 1 AUTO-SCANNING WITH DIGITAL CONTROL COLOR DISPLAY MONITOR NSB1107STTUW MODEL USER’S GUIDE For future reference, record the serial number of your display monitor in the space below: SERIAL No. The serial number is located on the rear cover of the monitor.
- Page 2 - 2 -...
-
Page 3: Table Of Contents
CAUTION The power cord provided with this monitor is de- signed for safety and must be used with a properly grounded outlet to avoid possible electrical shock. Do not remove the monitor cabinet as this can expose you to very high voltages and other hazards. MANUFACTURER DECLARATION FOR CE-MARK- ING: We, Mitsubishi Electric Corp., declare under our sole... - Page 4 (2) this device must accept any interference received, in- cluding interference that may cause undesired opera- tion. For questions regarding this declaration, contact: Mitsubishi Electronics America, Inc. 5665 Plaza Drive, P.O. Box 6007, Cypress, California 90630-0007 or, call 714-220-2500 To identify this product, refer to the model number found on the product.
- Page 5 Congratulations! You have just purchased a TCO’99 approved and labelled product! Your choice has provided you with a product developed for professional use. Your purchase has also contributed to reducing the burden on the environment and also to the further development of environmentally adapted electronics products.
-
Page 6: Introduction
INTRODUCTION Congratulations on your purchase of the high resolution color monitor. We designed this monitor to provide you with years of reliable trouble-free operation. This guide tells you how to connect, adjust and care for your monitor. This guide also provides technical specifications and instructions for troubleshooting any basic problems you may experience with your monitor. -
Page 7: Internal Preset Memory Capability
Internal Preset Memory Capability To minimize adjustment needs, the factory has preset popular display standards into the monitor, as shown in Table 1. If any of these display standards are detected, the picture size and position are automatically adjusted. All of the factory presets may be overwritten by adjusting the user controls. -
Page 8: Unpacking
Unpacking After you unpack the box you should have all of the items indicated in Figure 1. Save the box and packing materials in case you transport the monitor. Complete and mail in warranty cards. Figure 1. 4. User's Guide 1. -
Page 9: Part Name
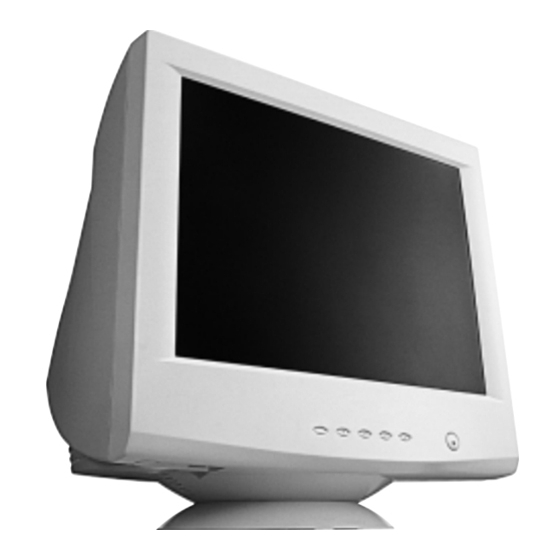
PART NAME Control Names See Figures 3 and 4 for the location of the user controls, indicator and connectors. Each part is identified by number and is described individually. FRONT Figure 3 Function 1. POWER SWITCH: A push-on / push-off switch for AC power. -
Page 10: Installation And Connection
INSTALLATION AND CONNECTION On the back of the monitor four kinds of plug-in connections are provided: AC power connector for the AC input, DB9- 15P connector and BNC connector for video signal input and USB ports for USB communication. AC Power Connection One end of the AC power cord is connected to the AC power connector on the back of the monitor. -
Page 11: Connecting To A Unix Workstation & Third Party Graphics Card
3.2.3 Connecting to a Unix Workstation & Third Party Graphics Card Figure 7 shows the SC-B104 or 75Ω coaxial cable (not supplied) connection to the graphics video card (PC-CAD and workstation). Power off, both the monitor and the computer. Connect one end of the SC-B104 cable or the 75Ω coaxial cable to the output connector on the computer, or on the video board. -
Page 12: Installation Of Usb Function
Installation of USB Function The following procedure permits your computer to recog- nize or "enumerate"(A USB term) the Mitsubishi USB HUB. Power on the display monitor and then the com- puter. Start "Enumeration" from the Windows N O T E •... - Page 13 (2) Click “Next” on Figure 11 and Figure 12 will appear. Figure 12 (3) Click “Next” on Figure 12 and Figure 13 will appear. Figure 13 (4) Click “CD-ROM Drive(C)” , and click “Next”. Figure 14 will appear. Figure 14 (5) Click “Finish”...
-
Page 14: Osd(On Screen Display) Functions
(On Screen Display) FUNCTIONS How to adjust the screen The monitor has an OSD(On Screen Display) function. The following procedure shows how to adjust the screen using the OSD function. (1) Turn on the monitor. (2) Press button screen. (3) Select the group icon on Main Menu by pressing (4) Select the item icon on Sub Menu by pressing button. -
Page 15: Adjustment Items
Adjustment Items Items CONTRAST Adjusts the contrast level. BRIGHT Adjusts the black level of the screen COLOR NO Select the desired color from Color 1, Color 2, and Color 3 presets. R-GAIN Adjusts the red-color balances for the selected color. G-GAIN Adjusts the green-color balances for the selected color. - Page 16 Group Item Item Icon Icon CONTRAST BRIGHT COLOR NO R-GAIN G-GAIN B-GAIN COLOR TEMPERATURE COLOR RESET HORIZ-SIZE HORIZ-PHASE HORIZ-POSITION VERT-SIZE VERT-POSITION PINCUSHION KEYSTONE TOP-PIN BOTTOM-PIN PIN-BALANCE KEY-BALANCE ROTATION ZOOM GEOMETRY RESET Press the Minus Button To decrease the contrast. To increase the contrast. To decrease the brightness.
- Page 17 Group Item Item Icon Icon TEXT MODE BLACK LEVEL HORIZ-CONVERGENCE VERT-CONVERGENCE VERT-CONV-TOP VERT-CONV-BOTTOM HORIZ-CONV-RIGHT HORIZ-CONV-LEFT CORNER PURITY(TL) CORNER PURITY(TR) CORNER PURITY(BL) CORNER PURITY(BR) MOIRE CANCEL MOIRE CANCEL LEVEL CLAMP PULSE POSITION DEGAUSS POWER SAVE CONTROL LOCK OSD POSITION ALL RESET GTF AUTO ADJUST DIAGNOSIS LANGUAGE...
- Page 18 Group Item Item Icon Icon USB UP-STREAM USB PORT COMBINATION N O T E USB Monitor Control will be available when installing "USB Monitor Control Software" into the computer. The "USB Monitor Control Software" can be downloaded from Mitsubishi Internet Home Page: http://www.mitsubishi-display.com/ Press the Minus Button The USB functions of the com-...
-
Page 19: Troubleshooting
TROUBLESHOOTING PROBLEM • Contrast and brightness controls. LED On (Green) • Power switch. LED Off • AC power cord disconnected. picture • Signal cable disconnected. • BNC cables are misconnected or the green cable is discon- LED On nected. (Amber) •... - Page 20 PROBLEM • Thin vertical black lines on one or both sides of the screen. This minor condition is caused by grille element overlap which can occur during shipping. Position an open white window over the affected area of the screen and maximize the brightness and contrast Black vertical controls.
-
Page 21: Specifications
Approx. 31.0kg (68.3lbs.) TILT/SWIVEL Tilt Angle BASE Swivel Angle Safety REGULATIONS X-Ray Other NSB1107STTUW 55cm/22"(51cm/20" Diagonal Viewable Image) Aperture grille In-line Red, Green, Blue EBU (medium short persistence) 0.24mm 0.25mm Anti-glare, Anti-reflection and Anti-static coating Dynamic Beam Forming (DBF) 0.7Vp-p analog RGB Sync. -
Page 22: Appendix
APPENDIX Monitor Signal Input Connector (DB9-15P) (Female) DB9-15P MOUNTED ON THE REAR PANEL PIN ASSIGNMENTS Pin No. Signal RED VIDEO GREEN VIDEO or COMPOSITE SYNC with GREEN VIDEO BLUE VIDEO GROUND DDC GROUND RED GROUND GREEN GROUND BLUE GROUND SYNC GROUND GROUND HORIZONTAL SYNC or COMPOSITE SYNC... - Page 23 “AD-A205 Mac Adapter Setting Chart” shows all available modes for Macintosh systems and all possible combinations with the monitor. We recommend that you use the monitor with a preset timing. (See Section 1.2 Internal Preset Memory Capability) Please refer to the instruction book of your computer about the resolution setting. Resolution may not be changed on some computers.
- Page 24 CP871C164A90 MITSUBISHI ELECTRIC CORPORATION HEAD OFFICE: MITSUBISHI DENKI BLD, MARUNOUCHI, TOKYO 100-8310 TELEX J24532 CABLE MELCO TOKYO http://www.mitsubishi-display.com...