Advertisement
Available languages
Available languages
Quick Links
Advertisement

Related Manuals for Hyundai PT3900-JY


Summary of Contents for Hyundai PT3900-JY
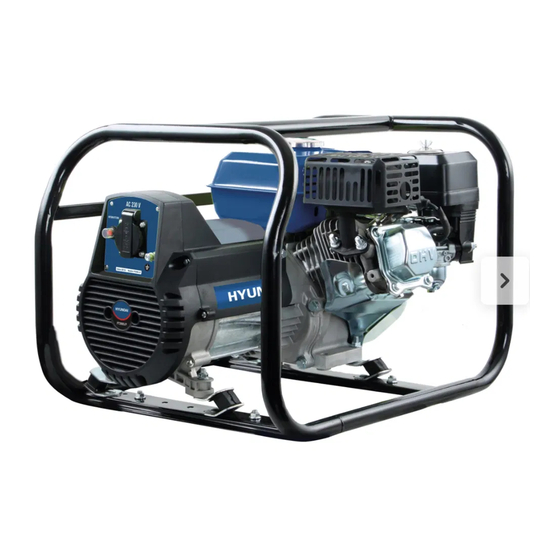
- Page 1 GENERATORE DI CORRENTE BENZINA Cod. 65121 Mod. PT3900-JY - ISTRUZIONI ORIGINALI -...
- Page 2 INTRODUZIONE Gentile Cliente, grazie per avere scelto un prodotto Hyundai Power Products. I nostri prodotti sono costruiti con i più elevati standard qualitativi per permettere una esperienza di uso semplice, piacevole e sicura. E’ importante dedicare qualche momento alla lettura di questo libretto di istruzioni: le informazioni che seguono sono fondamentali per la sicurezza e per ottenere il massimo delle potenzialità...
- Page 3 CONDIZIONI DELLA GARANZIA LEGALE NORME DI SICUREZZA GENERALI ATTENZIONE!!! LEGGERE TUTTE LE INDICAZIONI CHE SERVONO PRIMA DI EFFETTUARE IL PRIMO UTILIZZO DEL GENERATORE Nel rispetto della normativa attuale circa le condizioni di garanzia, la copertura decade in caso di uso improprio o errata manutenzione del prodotto. Questo generatore è...
- Page 4 CONDIZIONI DELLA GARANZIA LEGALE NORME DI SICUREZZA GENERALI 2) UTILIZZO DI CARBURANTI NON IDONEI. Questo generatore è progettato per funzionare con carburanti per autotrazione civile (gasolio, benzina verde, miscela per motori 2 tempi con oli speci- fici). In caso di utilizzo di carburanti diversi (a titolo esemplificativo e non esaustivo: biodiesel, olio di colza, etanolo e sue miscele, miscele per motori 2 tempi con oli non specifici) la garanzia decade.
- Page 5 CONDIZIONI DI DECADENZA DELLA GARANZIA LEGALE NORME DI SICUREZZA GENERALI TABELLA CALCOLO POTENZA GENERATOPRE NECESSARIA POTENZA RICHIESTA (W) POTENZA DI ESERCIZIO Tipo DICHIARATA (W) Utenza Coefficiente di spunto Compressore aria 1600 Smerigliatore da banco 2500 1400 Frullatore Sega circolare 2300 1400 Asciugatrice 6750...
- Page 6 NORME DI SICUREZZA GENERALI ATTENZIONE! Prima di usare la macchina, per eseguire correttamente il trasporto, la messa in servizio, l’avviamento, l’uso, l’arresto e la manutenzione, leggete ed applicate attentamente le istruzioni di seguito riportate che fanno riferimento ai disegni ed ai dati tecnici contenuti nel foglio allegato.
- Page 7 NORME DI SICUREZZA GENERALI 4) RISCHIO DI SCOSSA ELETTRICA O FOLGORAZIONE ATTENZIONE! Rischio di scossa elettrica o folgorazione. L’energia elettrica è potenzialmente pericolosa e, se non opportunamente utilizzata, produce scosse elettriche o folgorazioni, provocando gravi lesioni o morte, ed incendi e guasti alle apparecchiature elettriche.
- Page 8 NORME DI SICUREZZA GENERALI ATTENZIONE! L’uso della macchina è vietato ai bambini e alle persone non perfettamente a conoscenza delle istruzioni d’uso contenute nel presente manuale. Leggi e regolamenti locali possono prevedere una età minima per l’uso della macchina. ATTENZIONE! L’operatore è responsabile verso terzi di eventuali incidenti o danni causati dall’uso della macchina, della sicurezza a persone e cose nella zona di utilizzo dell’energia prodotta.
- Page 9 INTRODUZIONE - PARTI E COMPONENTI (1) filtro aria- elemento spugnoso removibile, lavabile che limita l’ingresso di polvere all’interno del motore (2) leva aria- regola la quantità d’aria in ingresso nel motore. (3) indicatore livello carburante- indica la quantità di carburante presente nel serbatoio. (4) tappo serbatoio carburante- accesso al serbatoio per rifornire carburante.
- Page 10 PRIMA DELL’USO MONTAGGIO DEL KIT RUOTE...
- Page 11 PRIMA DELL’USO MONTAGGIO DEL KIT RUOTE...
- Page 12 PRIMA DELL’USO 1 - RIFORNIMENTO CARBURANTE APERTO CHIUSO ATTENZIONE: •La benzina e I suoi vapori sono estremamente infiammabili. •Non rifornire in prossimità di oggetti infiammabili. •Non lasciar fuoriuscire la benzina. IN CASO DI UTILIZZO DI CARBURANTI DIVERSI (BIOCARBURANTI, MISCELE BENZINA ALCOL ETILICO O ALTRO) LA GARANZIA DECADE. Questo generatore è...
- Page 13 PRIMA DELL’USO 2 - RIFORNIMENTO OLIO MOTORE ATTENZIONE: IL GENERATORE E’ SPROVVISTO DI OLIO. SI RACCOMANDA DI RAGGIUNGERE IL LIVELLO DI OLIO RICHIESTO PRIMA DI PROCEDERE ALLA MESSA IN MOTO Capienza serbatoio olio motore: 0,6 litri circa ATTENZIONE: •Non usare olio con additivi o per motori a due tempi •Olio motore raccomandato: SAE 10W-30.
- Page 14 PRIMA DELL’USO 3 - MESSA A TERRA paletto e cavi non compresi ATTENZIONE: collegamenti elettrici sbagliati possono causare pericolo di scariche elettriche. Mettere a terra il generatore piantare il paletto e collegando l’apposito cavo elettrico al terminale indicato nella figura A (paletto e cavo non compresi nella confezione). Contattare un elettricista qualificato oppure l’assistenza tecnica al 0141 1766315 ITALIANO...
- Page 15 AVVIAMENTO DEL GENERATORE 4 - AVVIAMENTO MANUALE Dopo aver eseguito tutte le operazioni nella sezione “PRIMA DELL’USO” (in particolare aprire il rubinetto carburante come indicato a p.9) procedere come segue per avviare il generatore manualmente. APERTO CHIUSO ITALIANO...
- Page 16 AVVIAMENTO DEL GENERATORE 4 - AVVIAMENTO MANUALE Per avviare il motore procedere nel seguente modo: 1. Preme il tasto posto sul pannello in posizione ON 2. Mettete la leva dell’aria in posizione APERTO. 3. Estrarre la manopola fino al punto in cui si avverte una forte resistenza e quindi reinserirla nella posizione iniziale.
- Page 17 SPEGNIMENTO VERSIONE AVVIAMENTO MANUALE 7 - SPEGNIMENTO VERSIONE AVVIAMENTO MANUALE APERTO CHIUSO 1. Spegnere interruttore protezione indicato in figura posizionadolo su OFF 2. Scollegare gli apparecchi utilizzati dal generatore, fare funzionare per qualche minuto senza carico. 3. Portate in posizione OFF l’interruttore posto sul pannello. 4.
- Page 18 CONTROLLI PERIODICI E MANUTENZIONE 8 - SOSTITUZIONE OLIO MOTORE Mettere il generatore su di una superficie piana ed orizzontale. Togliere l’olio quando è ancora tiepido, per assicurare un completo e rapido svuotamento. - Togliere il tappo dell’olio “A” - Svitare la vite di drenaggio “B”, mettere un recipiente sotto al motore in corrispondenza del tappo scarico olio,lasciare colare tutto l’olio.
- Page 19 CONTROLLI PERIODICI E MANUTENZIONE 9 - SOSTITUZIONE/PULIZIA FILTRO ARIA Un filtro dell’aria sporco limiterà il flusso di aria al carburatore. Per evitare malfunzionamenti del carburante, controllare il filtro dell’aria regolarmente. Controllare più frequentemente se il generatore lavora in aree molto polverose. AVVERTENZE Pulire solo con acqua e sapone o con solventi non infiammabili.
- Page 20 VITE CONTROLLI PERIODICI E MANUTENZIONE 10 - SOSTITUZIONE/PULIZIA CANDELA ELEMENTO FILTRA 3. Rimontare il filtro e il c 3. PULIZIA COPPA SE 1. Ruotare il rubinetto be Rimuovere il pozzetto seguendo la direzione l’anello O-ring ed il filtr infiammabile o ad alto 2.
- Page 21 CONTROLLI PERIODICI E MANUTENZIONE ILTRANTE 10 - SOSTITUZIONE/PULIZIA COPPA CARBURANTE RUBINETTO BENZINA o e il copri-filtro. PA SEDIMENTI BENZINA tto benzina in posizione “Off”. POZZETTO zzetto del filtro e l’anello ad O-ring, zione della freccia. Lavare il pozzetto, d il filtro con un solvente non d alto punto di infiammabilità.
- Page 22 CONSERVAZIONE DEL GENERATORE 11 - RIMESSAGGIO PER LUNGHI PERIODI ATTENZIONE Attendere che il generatore sia freddo prima di immagazzinarlo. Non toccare parti calde del motore o dello scarico, possono causare bruciature o incendi. Se il generatore viene immagazzinato per un lungo periodo, assicurarsi che l’area non sia troppo umida o polverosa.
- Page 23 RISOLUZIONE PROBLEMI INDIVIDUAZIONE PROBLEMI IL MOTORE NON SI AVVIA: Riempire il serbatoio di C’è benzina nel serbatoio? benzina. C’è abbastanza olio nel Aggiungere l’olio motore? raccomandato. Ancora contattare l’assistenza La candela fa la scintilla? Sostituire la Portare il generatore Non la fa? alloi 0141 1766315 candela ad un distributore...
- Page 24 Fatte salve le “condizioni di decadenza della garanzia legale” riportate in questo libretto, il Rivenditore Hyundai Power Products applicherà le condizioni previste dalla normativa in vigore. Vinco Srl, in qualità di Licenziatario per l’Italia dei prodotti Hyundai Power Products, applica una garanzia commerciale a supporto dell’attività del Rivenditore.
- Page 25 • Fax. Nel caso non fosse disponibile l’utilizzo di una casella e-mail è possibile inviare la propria richiesta di assistenza al numero: 0141 35.12.85 Assistenza Tecnica Vinco Hyundai Power Products, Viale Giordana 7, 10024 Moncalieri Attenzione: il servizio di Assistenza Tecnica non è aperto al pubblico. Contattare il numero telefonico 0141 176.63.15 per qualsiasi necessità.
- Page 26 SCHEMA ELETTRICO ITALIANO...
- Page 27 CERTIFICATO DI GARANZIA Vinco s.r.l. - P.zza Statuto,1 - 14100 Asti - Italy Modello: Codice: Data di acquisto QUESTO CERTIFICATO NON DEVE ESSERE SPEDITO MA CONSERVATO UNITAMENTE ALL’IMBALLO ORIGINALE La garanzia ha validità soltanto se corredata da RICEVUTA FISCALE, Vi consigliamo quindi di allegarla al presente certificato di garanzia. La garanzia ha valore per un periodo di 2 anni dalla data di acquisto (un anno in caso di beni strumenta- li) e viene comprovata da un documento valido agli effetti fiscali, rilasciato dal venditore autorizzato, riportante la ragione sociale dello stesso e la data in cui è...
- Page 28 CODICE: 65119 - 65121 LOTTO: rif. apposita etichetta apposta su ogni unità MODELLO: PT3900-JY NUMERO DI SERIE: univoco per ogni unità, rif. bordo macchina L’oggetto della presente dichiarazione è conforme a tutte le seguenti normative di armonizzazione pertinenti dell’Unione Europea, nel momento della messa sul mercato: - Dir.
- Page 29 SCHEDA TECNICA CODICE 65121 Pontenza max: monofase 3,5 Kw Potenza nom: monofase 3,3 Kw Modalità avviamanto: Manuale Prese: 1x16A Tensione/Frequenza: 230V / 50Hz Capacità carburate: 3,6 L Rumorosità Lpa / Lwa: 85 / 96 dB(A) Modello motore: 7,0 HP Cilindrata: 212 cc Dimensioni prodotto: 602X457X447 mm...
- Page 30 ENGLISH...
-
Page 31: Table Of Contents
ORIGINAL INSTRUCTION > EN Gasoline Generator Instruction Manual Model: PT3900-JY Warning: Please read the manual carefully before using the unit! CONTENTS 1. SAFETY INSTRUCTION 2. COMPONENT IDENTIFICATION 3. CONTROLS 1) Engine Switch 2) Recoil Starter 3) Fuel Valve 4) Choke... -
Page 32: Safety Instruction
5) Fuel Sediment Cup Cleaning 6) Spark Plug Service 8. TRANSPORTING AND STORAGE 9. TROUBLESHOOTING 10. WIRING DIAGRAM 11. SPECIFICATIONS 12. EC DECLARATION OF CONFORMITY 1. SAFETY INSTRUCTION Warning: 1. Attention! Exhaust gases are toxic. Do not operate the generator in a room without ventilation system! 2. - Page 33 • Use safety equipment. Wear protective gear such as an anti-dust mask, non-slip safety shoes, a helmet or hearing protection. Stay vigilant, watch what you are doing and show good sense when you use the generator. Do not use if you •...
- Page 34 extension must not exceed 60m when the section of the wire is 1.5mm and must not exceed 100m when the section of the wire is 2.5mm Additional requirements for low-power generating sets for use by laymen Protect children by keeping them at a safe distance from the generating set. •...
- Page 35 This generator only uses petrol (gasoline); any other kind of fuel will damage the motor. • • Do not overfill the tank with petrol to avoid spilling. If you notice a spill, it must be wiped up completely with a dry cloth before starting the motor. •...
- Page 36 applicable laws and norms in the field of electricity. Incorrect connections will cause leakage of the current from the generator into the lines of the public electricity company. Such leakage could electrocute the workers of the public electricity company working on the network or other persons in contact with the line during a power cut.
-
Page 37: Controls
Add engine oil. Guaranteed sound power level No naked flames Ground connection 2. CONTROLS 1) Engine Switch To start and stop the engine. Switch position: OFF: To Stop the engine. Key can be removed/inserted. ON: To run the engine after starting. START: To start the engine by turning the starter motor. - Page 38 3) Fuel Valve The fuel valve is located between the fuel tank and carburetor. When the valve lever is in the ON position, fuel is allowed to flow from the fuel tank to the carburetor. Be sure to return the lever to OFF after stopping the engine.
-
Page 39: Generator Use
6) Ground Terminal The generator ground terminal is connected to the panel of the generator, the metal non-current carrying parts of the generator, and the ground terminals of each receptacle. Before using the ground terminal, consult a qualified electrician, electrical inspector or local agency having jurisdiction for local codes or ordinances that apply to the intended use of the generator. - Page 40 To prevent electrical shock from faulty appliances, the generator should be grounded. Connect a length of heavy wire between the ground terminal and the ground source. The generators have a system ground that connects generator frame components to the ground terminals in the AC output receptacles.
- Page 41 In any case, the total power requirements (VA) of all appliances connected must be considered. Appliance and power tool manufacturers usually list rating information near the model number or serial number. 4) AC Operation ①Start the engine ②Switch the AC circuit breaker ON. ③...
- Page 42 WARNING The battery gives off explosive gases; keep spark, flames and cigarettes away. Provide adequate ventilation when charging or using batteries. 2) Connect the positive (+) battery cable to the battery positive (+) terminal. 3) Connect the other end of the positive (+) battery cable to the generator. 4) Connect the negative (-) battery cable to the battery negative (-) terminal.
-
Page 43: Pre-Operation Check
At high altitude, the standard carburetor air-fuel mixture will be excessively rich. Performance will decrease, and fuel consumption will increase. High altitude performance can be improved by installing a smaller diameter main fuel jet in the carburetor and readjusting the pilot screw. If you always operate the engine at altitudes higher than 5000 feet (1500 meters) above sea level, have an authorized generator dealer perform this carburetor modification. - Page 44 1. Remove the oil filler cap and wipe the dipstick clean. 2. Check the oil level by inserting the dipstick into the filler neck without screwing it in. 3. If the level is low, add the recommended oil to the upper mark on the dipstick. 2) Fuel Recommendation 1.
- Page 45 Never use stale or contaminated gasoline or oil/gasoline mixture. Avoid getting dirt or water in the fuel tank. Occasionally you may hear light “spark knock" or “pinging" (metallic rapping noise) while operating under heavy loads. This is no cause for concern. If spark knock or pinging occurs at a steady engine speed, under normal load, change brands of gasoline.
-
Page 46: Starting/Stopping The Engine
Oxygenated fuels can damage paint and plastic. Be careful not to spill fuel when filling your fuel tank. Damage caused by spilled fuel is not covered under warranty. 5. STARTING/STOPPING THE ENGINE Starting the engine 1. Make sure that the AC circuit breaker is in the OFF position. The generator may be hard to start if a load is connected. -
Page 47: Maintenance
In normal use: 1. Turn the AC circuit breaker to the OFF position. Disconnect the DC battery charging cables. 2. Turn the engine switch to the OFF position. 3. Turn the fuel valve to the OFF position. 7. MAINTENANCE Good maintenance is essential for safe, economical, and trouble-free operation. It will also help reduce air pollution. - Page 48 The maintenance schedule applies to normal operating conditions. If you operate your generator under severe conditions, such as sustained high-load or high-temperature operation, or use it in unusually wet or dusty conditions, consult your servicing dealer for recommendations applicable to your individual needs and use.
- Page 49 Please dispose of used motor oil in a manner that is compatible with the environment We suggest you take it in a sealed container to your local service station or recycling center for reclamation. Do not throw it in the trash or pour it on the ground. 4) Air cleaner service A dirty air cleaner will restrict air flow to the carburetor.
- Page 50 5) Fuel Sediment Cup Cleaning The sediment cup prevents dirt or water which may be in the fuel tank from entering the carburetor. If the engine has not been run for a long time, the sediment cup should be cleaned. 1) Turn the fuel valve to the OFF position.
- Page 51 4) Visually inspect the spark plug. Discard it if the insulator is cracked or chipped. Clean the spark plug with a wire brush if it is to be reused. 5) Measure the plug gap with a feeler gauge. Correct as necessary by carefully bending the side electrode.
- Page 52 WARNING Contact with a hot engine or exhaust system can cause serious bums or fires. Let the engine cool before transporting or storing the generator. Take care not to drop or strike the generator when transporting. Do not place heavy objects on the generator.
- Page 53 The fuel of this machine is combustible and deflagrating. After the machine has been shut down, the additional fuel must be treated properly and the local environmental requirements must be met. 2) Change the engine oil 3) Remove the spark plug, and pour about a tablespoon of clean engine oil into the cylinder. Crank the engine several revolutions to distribute the oil, then reinstall the spark plug.
- Page 54 E-mail: info@vincoasti.it - www.vincoasti.it CENTRO RICAMBI E ASSISTENZA: Viale Giordana, 7 - 10024 Moncalieri (TO) - ITALIA Tel: +39 0141/1766315 Assistenza e-mail: assistenza@vincoasti.it - Ricambi: ricambi@vincoasti.it MADE IN CHINA Licensed by Hyundai Corporation, Korea Le immagini potrebbero differire dal reale design delle stesse...