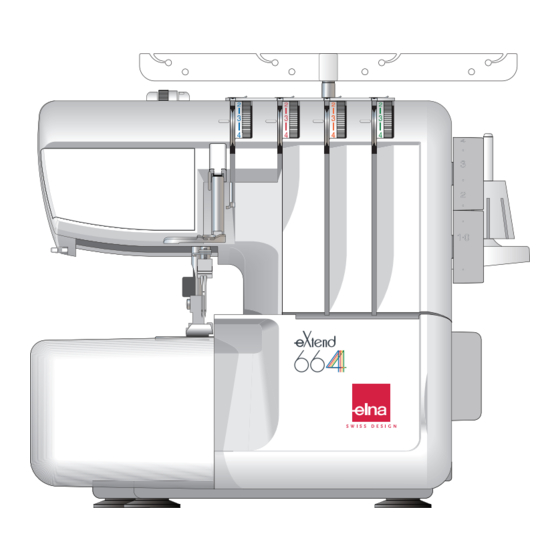
ELNA eXtend 664 Instruction Manual
Hide thumbs
Also See for eXtend 664:
- Instruction manual (88 pages) ,
- Brochure (2 pages) ,
- Reference manual (14 pages)

Related Manuals for ELNA eXtend 664


Summary of Contents for ELNA eXtend 664
- Page 1 664 | Instruction Manual | | Manuel d’instructions | | Bedienungsanleitung | 798-800-633 (E/F/G)
- Page 2 EN 60335-1: 2012; A11; A13; A1; A14; A2 EN 60335-2-28: 2003; A1; A11 EN 62233: 2008 EN 55014-1: 2017; A11 EN 55014-2: 2015 EN IEC 61000-3-2: 2019 EN 61000-3-3: 2013; A1 Lieferant: Elna International Corp. SA Adresse: Rue de Veyrot 14 - 1217 Meyrin - Switzerland...
- Page 3 Please note that on disposal, this product must be safely recycled in accordance with relevant National legislation relating to electrical/electronic products. If in doubt please contact your retailer for guidance. (European Union only) Fournisseur: Elna International Corp. SA Adresse: Rue de Veyrot 14 - 1217 Meyrin - Switzerland...
- Page 4 Selon la législation nationale ce produit doit être recyclé en toute sécurité en accord avec les règles prévues pour les appareils électriques ou électroniques. En cas de doute contactez votre revendeur de machine à Supplier: Elna International Corp. SA Address: Rue de Veyrot 14 - 1217 Meyrin - Switzerland...
- Page 5 Fehlersuche WICHTIGE SICHERHEITSHINWEISE Fehler Bezug Ursache Bei der Benutzung eines elektrischen Geräts sind stets grundlegende Sicherheitsvorkehrungen zu treffen, darunter: Das Gewebe wird Diese Nähmaschine wurde rein für den privaten Gebrauch entwickelt und hergestellt. Lesen Sie vor Inbetriebnahme dieses Geräts alle Anweisungen. nicht gleichmäßig zugeführt.
- Page 6 épa Cause Référence 1. es sont Le tissu n’avance pas pied-de-biche pied-de-biche régulièrement L’aiguille casse Le fil casse Points La couture n’est pas nette murale La couture fronce murale La machine ne fonctionne pas e chute -de-biche Le tissu n’est pas coupé...
-
Page 7: Table Of Contents
TABLE OF CONTENTS Troubleshooting Reference Condition Cause PREPARATION See page 74. 1. The feed dog is packed with lint. The fabric is not Names of Parts ..........................8 Lower the presser foot. 2. The presser foot has been raised. being fed Standard Accessories ........................ - Page 8 TABLE DES MATIÈRES Ölen der Maschine Huiler la machine Appliquer quelques gouttes d’huile pour machine à Versehen Sie die mit Pfeilen gekennzeichneten Teile PRÉPARATION coudre de bonne qualité aux pièces indiquées par mit einigen Tropfen qualitativ hochwertigen Dénomination des composants ....................9 des flèches.
- Page 9 Oiling the Machine INHALTSVERZEICHNIS Apply a few drops of fine quality sewing machine oil VORBEREITUNG to the parts indicated with arrows. Bezeichnungen der Teile ....................... 9 Standardzubehör ......................... 11 It is recommended to apply oil once a week in normal Anschließen der Maschine an den Netzstrom ..................1 3...
-
Page 10: Names Of Parts
Transporteurs Nettoyage des griffes d’entraînement Reinigung des PREPARATION 1. Schalten Sie den Netzschalter aus und ziehen Sie 1. Éteindre l’interrupteur et débrancher la machine. Names of Parts den Netzstecker aus 2. Ouvrir le couvercle du boucleur et le couvercle der Steckdose. Left needle thread tension dial latéral. -
Page 11: Préparation
Cleaning the Feed Dog PRÉPARATION VORBEREITUNG Dénomination des composants 1. Turn off the power switch and unplug the Bezeichnungen der Teile machine. Fadenspannungs-Einstellrad für die linke Nadel Molette de tension du fil d’aiguille gauche 2. Open the looper cover and side cover. 3. -
Page 12: Standard Accessories
PFLEGE IHRER MASCHINE ENTRETIEN DE LA MACHINE Standard Accessories VORSICHT: ATTENTION: Screwdriver (Large) Schalten Sie die Maschine am Netzschalter aus und Mettez l’interrupteur d’alimentation sur la position Screwdriver (Small) ziehen Sie den Stecker ab, bevor Sie die Maschine arrêt et débranchez la machine avant de procéder Tweezers reinigen oder warten. -
Page 13: Accessoires Standard
CARE OF YOUR MACHINE Accessoires standard Standardzubehör CAUTION: Tournevis (gros) Schraubendreher (groß) Turn the power switch off and unplug the machine Tournevis (petit) Schraubendreher (klein) before cleaning or maintenance. Pinces Pinzette Ensemble d'aiguilles n°11, n° 14 Satz mit Nadeln Nr.11, Filets Nr.14 Netze Replacing the Upper Knife... -
Page 14: Connecting The Machine To The Power Supply
Roulotté Connecting the Machine to the Power Supply Rollsäumen Tirer légèrement l’extrémité de la chaîne de fils vers Turn off the power switch, and connect the machine Am Anfang und Ende der Naht ziehen sie die l’arrière au début et à la fin de la couture. plug to the machine socket. -
Page 15: Raccordement De La Machine Au Secteur
an den Netzstrom Raccordement de la machine au secteur Rolled hemming Anschließen der Maschine Couper l’interrupteur et et insérer la fiche de la Pull the end of thread chain to the back lightly in the Schalten Sie den Netzschalter aus und schließen beginning and end of sewing. -
Page 16: How To Turn The Handwheel
Tension des fils pour roulotté (ourlet roulé) How to Turn the Handwheel Fadenspannung für Rollsäumen Always turn the handwheel toward you Tension équilibrée Ausgeglichene Spannung (Counterclockwise). L’illustration de gauche montre les résultats de Die Abbildung links zeigt die Ergebnisse mit couture avec les bons réglages de tension. -
Page 17: Comment Tourner Le Volant
Comment tourner le volant Thread Tension for Rolled Hemming Drehen des Handrades Toujours tourner le volant vers soi (mouvement anti- Drehen Sie das Handrad stets auf sich zu Balanced tension horaire). (Entgegen dem Uhrzeigersinn). The illustration at left shows sewing results with Volant balanced tension settings. -
Page 18: Raising Or Lowering The Presser Foot
adenspannung (3 Fäden) Tension des fils (3 fils) Raising or Lowering the Presser Foot Ausgeglichene Spannung By raising or lowering the presser foot lifter, the Tension équilibrée Die Abbildung links zeigt die Ergebnisse mit der presser foot goes up or down. richtig eingestellten Fadenspannung. -
Page 19: Soulever Ou Baisser Le Pied-De-Biche
Soulever ou baisser le pied-de-biche Thread Tension (3 threads) Heben oder Senken des Nähfußes Wenn Sie den Nähfuß anheben oder En soulevant ou en baissant le levier du pied- Balanced tension senken, bewegt sich der Nähfuß nach oben de-biche, le pied-de-biche monte et descend. oder unten. -
Page 20: The Position Of Thread Guide Bar
The Position of Thread Guide Bar Surjet à 3 fils 3 Faden-Overlocknähen Pull the thread guide bar up as far as it will go. Verwendung nur der rechten Nadel Emploi de l’aiguille droite seulement 3-Faden-Overlock - schmale Turn the thread guide bar so that the thread (pour ourlet étroit à... -
Page 21: Position De La Barre Du Guide-Fil
der Teleskop-Fadenführung Position de la barre du guide-fil Position 3-Thread Serging Monter la barre du guide-fil aussi haut que possible. Ziehen Sie die Teleskop-Fadenführung so weit Using the needle on the right only Tourner la barre du guide-fil pour que les guide-fils wie möglich nach oben heraus. -
Page 22: Changing Needles
Tension du fil du boucleur non équilibrée (1) Spannung des Greiferfadens ist nicht Changing Needles ausgeglichen (1) L’illustration montre les résultats de couture lorsque Turn off the power switch and unplug the machine. la tension du fil du boucleur inférieur est trop serrée Die Abbildung zeigt Nähergebnisse, wenn die et/ou la tension du fil du boucleur supérieur est trop Raise the needle to its highest position. -
Page 23: Changement De L'aiguille
Looper thread tension is out of balance (1) Auswechseln der Nadel Changement de l’aiguille The illustration shows sewing results when the lower Schalten Sie die Maschine am Netzschalter aus und Éteindre l’interrupteur et débrancher la machine. looper thread tension is too tight and/or upper looper ziehen Sie den Stecker aus der Steckdose. -
Page 24: Stitch Definition
Fadenspannung (4 Fäden) Tension des fils (4 fils) Stitch Definition Ausgeglichene Spannung Tension équilibrée Die Abbildung links zeigt die Ergebnisse mit der L’illustration de gauche montre les résultats de richtig eingestellten Fadenspannung. In Abhängigkeit z z z z z Safety 4 Thread couture avec les réglages de tension équilibrée. -
Page 25: Programmes De Point
Programmes de point Thread Tension (4 threads) Stichprogramme Balanced tension The illustration at left shows sewing results with z z z z z 4-Faden-Overlock Safety 4 fils balanced tension settings. However, adjusting the Ein Overlock-Stich Un point surjet qui a deux fils d’aiguille, un fil dans le mit zwei oberen Nadelfäden thread tension may be required depending upon the boucleur inférieur et un fil dans le boucleur... - Page 26 Arrêter les extrémités des fils b b b b b 3 Thread Sichern der Fadenenden The same characteristics as the 3 Thread Wide. This Damit sich die Naht nicht wieder aufribbelt ist es Pour éviter l’effilochage, il est nécessaire de laisser narrower version is suitable for light to medium erforderlich, am Anfang und am Ende der Naht eine une chaîne de fils d’environ 5 cm (2˝) de long au...
- Page 27 3-Faden-Overlock (schmal) Overlock 3 fils b b b b b Securing Ends Die gleichen Merkmale wie bei 3-Faden-Overlock Les mêmes caractéristiques que pour le point To avoid unravelling, it is necessary to leave a (breit). Diese schmale Variante eignet sich für leichte overlock 3 fils large.
-
Page 28: Adjustment Of Stitch Length
POINTS D’ESSAI PROBENÄHEN Adjustment of Stitch Length Beginn des Nähvorgangs Commencer à coudre Schieben Sie den Stoff unter die Vorderseite des Fußes. Insérer le tissu sous l'avant du pied-de-biche. (Il To select stitch length, turn the dial. (Es ist nicht erforderlich, den Fuß anzuheben.) n’est pas nécessaire de soulever le pied-de-biche). -
Page 29: Réglage De La Longueur De Point
TEST STITCHING Réglage de la longueur de point Einstellung der Stichlänge Starting Sewing Pour sélectionner la longueur de point, tourner la Insert the fabric under the toe of the foot (It is not ur Wahl der Stichlänge drehen Sie das Einstellrad. necessary to raise the foot.) molette. -
Page 30: Adjustment Of Needle Plate Setting Knob
Adjustment of Needle Plate Setting Knob 4. Passez le fil sous le guide-fil r de la droite vers 4. Führen Sie den Faden unter die Fadenführung r (Changing to Standard Serging or Rolled la gauche. von rechts nach links. Hemming) 5. -
Page 31: Réglage Du Bouton De La Plaque Aiguille
4. Pass the thread under the thread guide r from Réglage du bouton de la plaque aiguille Einstellung des Stichplatten-Einstellknopfs the right to the left. (Passer au surfilage standard ou roulotté) (Wechsel zu Standard-Overlocknähen oder Rollsaumnähen) 5. Slip the thread into the slit t of the take-up lever Le bouton de réglage de la plaque aiguille est cover from the bottom. -
Page 32: To Deactivate The Upper Knife
Enfiler l’aiguille gauche Einfädeln der Nadel auf der linken Seite To Deactivate the Upper Knife 1. Turn off the power switch and unplug the machine. Placer la bobine de fil sur la tige porte- Setzen Sie die Garnrolle auf den bobine gauche. -
Page 33: Désactiver Le Couteau Supérieur
Threading the Needle on the Left Désactiver le couteau supérieur Deaktivieren des oberen Messers 1. Éteindre l’interrupteur et débrancher la machine. Place the spool of thread on the left side spool pin. 1. Schalten Sie den Netzschalter aus und ziehen Sie 2. -
Page 34: Adjustment Of Cutting Width
Enfilage de l’aiguille avec l’enfile-aiguille Einfädeln mit dem Nadeleinfädler Adjustment of Cutting Width When cutting width is too narrow or too wide against seam width, adjust it as follows. IMPORTANT: WICHTIG: Avant l’untilisation de l’enfile-aiguille, veillez aux Achten Sie beim Entfernen und Einsetzen der Nadeln Open the side cover and deactivste the upper knife. -
Page 35: Réglage De La Largeur De Coupe
Threading the Needle with the Needle Réglage de la largeur de coupe Einstellung der Schnittbreite Threader Lorsque la largeur de coupe est trop étroite ou trop Wenn die Schnittbreite gegenüber der Nahtbreite large par rapport à la largeur de couture, la régler eng oder weit ist, können Sie sie wie folgt einstellen: comme suit: IMPORTANT:... -
Page 36: Threading The Machine
Threading the Machine 4. Passez le fil sous les guide-fil r et t de la droite 4. Führen Sie den Faden unter die Fadenführung r vers la gauche. und t von rechts nach links. The illustration shows the machine threaded with four threads. -
Page 37: Enfilage De La Machine
Enfilage de la machine Einfädeln der Maschine 4. Pass the thread under the thread guides r and Die Abbildung zeigt die Maschine, eingefädelt t from the right to the left. L’illustration de gauche montre la machine enfilée mit vier Fäden. avec les quatre fils. - Page 38 • If one of the threads is broken, follow the Enfiler l’aiguille droite Einfädeln der Nadel auf der rechten Seite re-threading procedure as follows: Setzen Sie die Garnrolle auf den zweiten Placer la bobine de fil sur la deuxième tige * Turn off the power switch and unplug the porte-bobine à...
- Page 39 • Si l’un des fils est cassé, suivre la procédure de * Wenn einer der Fäden gerissen ist, führen Sie das Threading the Needle on the Right réenfilage comme suit : Neueinfädeln wie folgt durch: Place the spool of thread on the spool pin second * Schalten Sie den Netzschalter aus und ziehen Sie * Éteindre l’interrupteur et débrancher la machine.
-
Page 40: Threading The Lower Looper
4. Accrocher le fil sur le coin et faire passer le fil 4. Haken Sie den Faden an der Ecke (B) ein und Threading the Lower Looper dans le guide-fil du boucleur. führen Sie den Faden dann durch die Open the looper cover. Greiferfadenführung. -
Page 41: Enfiler Le Boucleur Inférieur
4. Hook the thread on the corner , and then pass Enfiler le boucleur inférieur Einfädeln des unteren Greifers the thread through the looper thread guide. Ouvrir le couvercle du boucleur. Öffnen Sie die Greiferabdeckung. Setzen Placer la bobine de fil sur la tige porte-bobine droite. Sie die Garnrolle auf den rechten Looper thread guide Garnrollenstift. -
Page 42: Enfiler Le Boucleur Supérieur
4. Hook the thread on the corner , and then pass Enfiler le boucleur supérieur Einfädeln des oberen Greifers the thread through the looper thread guide. Placer une bobine de fil sur la deuxième tige Schieben Sie eine Spule auf den 5. - Page 43 4. Accrocher le fil sur le coin A , puis faire passer 4. Haken Sie den Faden an der Ecke ein und Threading the Upper Looper führen Sie den Faden dann durch die le fil dans le guide-fil du boucleur. Greiferfadenführung.
- Page 44 10. Move the lower looper to its rightmost position 10. Déplacer le boucleur inférieur dans sa position 10. Drehen Sie das Handrad, um den unteren Greifer by turning the handwheel, and draw the thread la plus à droite en tournant le volant et faire auf seine äußerst rechte Position zu verstellen with a pair of tweezers through the hole on the passer le fil à...