Table of Contents
Advertisement
Quick Links
Contents
Important safety instructions ............................................................................................................................... 2
The evolution wireless series ew 300 IEM G3 ...................................................................................................... 4
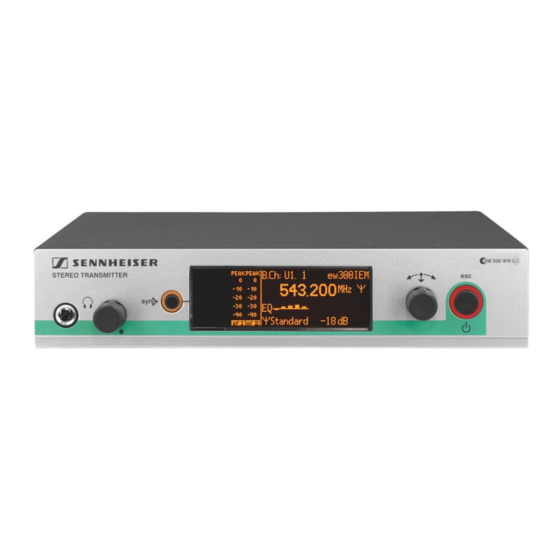
The SR 300 IEM rack-mount transmitter .............................................................................................................. 4
The frequency bank system .................................................................................................................................... 4
Delivery includes ..................................................................................................................................................... 5
Product overview .................................................................................................................................................... 6
Overview of the SR 300 IEM transmitter .............................................................................................................. 6
Overview of the displays .......................................................................................................................................... 7
Putting the transmitter into operation ............................................................................................................... 8
Preparing the transmitter for use .......................................................................................................................... 8
Connecting external devices ................................................................................................................................ 11
Connecting transmitters in a network ............................................................................................................... 12
Connecting the mains unit ................................................................................................................................... 12
Using the transmitter .......................................................................................................................................... 13
Switching the transmitter on/off ....................................................................................................................... 13
Monitoring the audio signal via headphones ................................................................................................... 13
Synchronizing a receiver with the transmitter ................................................................................................ 14
Adjusting the audio channels .............................................................................................................................. 15
Daisy-chaining audio signals ............................................................................................................................... 15
Deactivating the lock mode temporarily ........................................................................................................... 16
Activating/deactivating the RF signal ............................................................................................................... 16
Using the operating menu .................................................................................................................................. 17
The buttons ............................................................................................................................................................. 17
Overview of the operating menu ........................................................................................................................ 17
Adjustment tips .................................................................................................................................................... 19
Synchronizing the transmitter with a receiver ................................................................................................ 19
Cleaning the transmitter ..................................................................................................................................... 20
If a problem occurs ... ........................................................................................................................................... 21
Specifications ........................................................................................................................................................ 22
Manufacturer Declarations ................................................................................................................................. 24
For more detailed information on the individual sections of this instruction manual, visit the
corresponding product page on our website at www.sennheiser.com.
Contents
1
Advertisement
Table of Contents

Related Manuals for Sennheiser SR 300 IEM


Summary of Contents for Sennheiser SR 300 IEM
-
Page 1: Table Of Contents
The frequency bank system ............................ 4 Delivery includes ..............................5 Product overview ..............................6 Overview of the SR 300 IEM transmitter ......................6 Overview of the displays ............................7 Putting the transmitter into operation ....................... 8 Preparing the transmitter for use .......................... 8 Connecting external devices .......................... -
Page 2: Important Safety Instructions
(including amplifiers) that produce heat. • Only use attachments/accessories specified by Sennheiser. • When replacement parts are required, only use replacement parts specified by Sennheiser or those having the same characteristics as the original part. Unauthorized substitutions may result in fire, electric shock, or other hazards. - Page 3 Danger due to high volumes This is a professional transmitter. Commercial use is subject to the rules and regulations of the trade association responsible. Sennheiser, as the manufacturer, is therefore obliged to expressly point out possible health risks arising from use.
-
Page 4: The Evolution Wireless Series Ew 300 Iem G3
The SR 300 IEM rack-mount transmitter With the 2-channel/stereo monitoring system of the SR 300 IEM transmitter, musicians, video and sound amateurs, reporters/broadcasters, etc. can directly monitor the received sound signals without troublesome cables or monitor speakers being required. In addition, the system can also be used for any application where talkback signals are to be transmitted. -
Page 5: Delivery Includes
For an overview of the frequency presets, please refer to the supplied frequency information sheet. Updated versions of the frequency information sheet can be downloaded from the corresponding product page on our website at www.sennheiser.com. The frequency banks “U1” to “U6” allow you to freely select and store transmission frequencies. -
Page 6: Product Overview
Product overview Product overview Overview of the SR 300 IEM transmitter PEAK B.Ch: ew300IEM Stereo Transmitter 516.000 Standard -18dB AF I AF II PUSH PUSH Stereo Transmitter SR 300 IEM FREQ Range-D 780-822 MHz IDENT NO 627925 0682 SER NO 2518100155... -
Page 7: Overview Of The Displays
Product overview Overview of the displays After switch-on, the transmitter displays the standard display. B.Ch: ew300IEM 516.000 Standard -18dB Display Meaning Audio level Modulation of the left (I) and right (II) audio “AF IN L(I)” and channel with peak hold function “AF IN R(II)”... -
Page 8: Putting The Transmitter Into Operation
Preparing the transmitter for use When using more than one transmitter, we recommend connecting remote antennas and, if necessary, using Sennheiser antenna accessories. Fore more information, visit the ew G3 product page at www.sennheiser.com. Setting up the transmitter on a flat surface Place the transmitter on a flat, horizontal surface. - Page 9 Make sure that the ambient temperature within the rack does not exceed the permissible temperature limit specified in the SR 300 IEM specifications. Ensure sufficient ventilation; if necessary, provide additional ventilation.
- Page 10 To mount the antennas: Use remote antennas, if necessary in conjunction with the AC 3 antenna combiner. For more information, visit the ew G3 product pages at www.sennheiser.com. To mount the transmitters into the 19” rack: Slide the transmitters into the 19” rack.
-
Page 11: Connecting External Devices
A 1031 passive omni-directional antenna Use a low-attenuation 50-Ω cable to connect the antenna to the transmitter. Ready- made antenna cables from Sennheiser are available as accessories with length of 1 m, 5 m and 10 m. If possible, use a short antenna cable and as little connections as possible, since long cables and many connectors lead to an attenuation of the antenna signal. -
Page 12: Connecting Transmitters In A Network
“Wireless Systems Manager” (WSM) software can be downloaded from the corresponding product page on our website at www.sennheiser.com. ¸ Connect a standard network cable (at least Cat 5) to the LAN socket of the transmitter. -
Page 13: Using The Transmitter
Using the transmitter Using the transmitter To establish a transmission link, proceed as follows: 1. Switch the transmitter on (see below). 2. Switch the receiver on (see the instruction manual of the receiver). The transmission link is established. It is vital to observe the notes on frequency selection on page 19. If you cannot establish a transmission link between transmitter and receiver: Make sure that transmitter and receiver are set to the same frequency bank and to the same channel. -
Page 14: Synchronizing A Receiver With The Transmitter
Using the transmitter · Set the headphone volume control to the minimum position. ³. Connect headphones with a ¼” (6.3 mm) stereo jack plug to the headphone output Gradually increase the volume and monitor the audio signal with the lowest possible volume. -
Page 15: Adjusting The Audio Channels
Using the transmitter Adjusting the audio channels Via the “Mode” menu item, you can adjust the audio channels. Select “Stereo” if you want to output a separate signal via the output sockets LOOP OUT BAL L(I) ¹ LOOP OUT BAL L(I) ¹ LOOP OUT BAL R(II) (e.g. -
Page 16: Deactivating The Lock Mode Temporarily
Using the transmitter Deactivating the lock mode temporarily You can activate or deactivate the automatic lock mode via the “Auto Lock” menu item. If the lock mode is activated, you have to temporarily deactivate it In order to be able to operate the transmitter: Press the jog dial. -
Page 17: Using The Operating Menu
• Changes the setting of a menu item Overview of the operating menu For more detailed information on the operating menu, refer to the instruction manual of the SR 300 IEM. This instruction manual can be downloaded from the SR 300 IEM product page at www.sennheiser.com. Hauptmenü... - Page 18 Using the operating menu Display Function of the menu item Main menu “Menu” Sensitivity Adjusts the input sensitivity Mode Switches between mono and stereo operation Frequency Preset Changes the frequency bank and the channel Name Enters the transmitter name Equalizer Changes the frequency response of the output signal using a graphic equalizer AutoLock Activates/deactivates the automatic lock mode...
-
Page 19: Adjustment Tips
Adjustment tips Adjustment tips Synchronizing the transmitter with a receiver When synchronizing the transmitter with a receiver, please observe the following: Only use a transmitter and a receiver from the same frequency range (see the type plate on the transmitter and the receiver). Make sure that the desired frequencies are listed in the enclosed frequency information sheet. -
Page 20: Cleaning The Transmitter
Only use frequencies that are approved and legal in your country (see page 19). To ensure that the desired frequencies are intermodulation-free, proceed as follows: Calculate intermodulation-free frequencies using the “Sennheiser Intermodulation and Frequency Management (SIFM)” software (see www.sennheiser.com). Set each transmitter to the same frequency bank. -
Page 21: If A Problem Occurs
If a problem occurs that is not listed in the above table or if the problem cannot be solved with the proposed solutions, please contact your local Sennheiser partner for assistance. To find a Sennheiser partner in your country, search at www.sennheiser.com under “Service &... -
Page 22: Specifications
RF output power at 50 Ω typ. 10/30 mW (Low/Standard), switchable AF characteristics Modulation wideband FM stereo (MPX pilot tone) Compander system Sennheiser Nominal/peak deviation ±24 kHz/±48 kHz MPX pilot tone (frequency/deviation) 19 kHz / ±5 kHz AF frequency response 25 Hz–15 kHz AF input... - Page 23 Specifications Approved by Canada Industry Canada RSS 210, IC: 2099A-G3SREK limited to 806 MHz FCC-Part 74 FCC-ID: DMOG3SREK limited to 698 MHz NT 2-3 mains unit Input voltage 100 to 240 V~, 50/60 Hz Current consumption max. 120 mA Output voltage 12 V Secondary output current 400 mA...
-
Page 24: Manufacturer Declarations
Manufacturer Declarations Manufacturer Declarations Warranty Sennheiser electronic GmbH & Co. KG gives a warranty of 24 months on this product. For the current warranty conditions, please visit our web site at www.sennheiser.com or contact your Sennheiser partner. In compliance with the following requirements •...