Kenwood DPX-4010 Instruction Manual
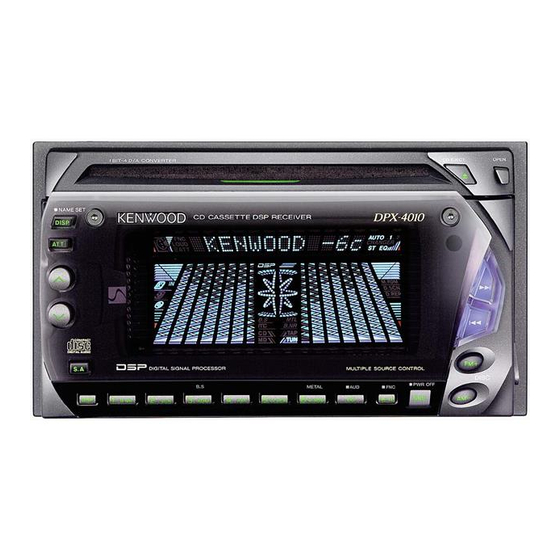
Double din sized cd/cassette receiver
Hide thumbs
Also See for DPX-4010:
- Mode d'emploi (38 pages) ,
- Service manual (29 pages) ,
- Instruction manual (39 pages)
Table of Contents
Advertisement
DPX-4010
DOUBLE DIN SIZED CD/CASSETTE RECEIVER
INSTRUCTION MANUAL
AMPLI-TUNER CD/CASSETTE DOUBLE TAILLE
MODE D'EMPLOI
RECEPTOR DE CD/CINTAS DE TAMAÑO DOBLE
MANUAL DE INSTRUCCIONES
Take the time to read through this instruction manual.
Familiarity with installation and operation procedures will help you obtain the
best performance from your new double din sized CD/cassette receiver.
For your records
Record the serial number, found on the back of the unit, in the spaces designated on
the warranty card, and in the space provided below. Refer to the model and serial
numbers whenever you call upon your KENWOOD dealer for information or service on
the product.
Model DPX-4010 Serial number
© B64-1724-00 (KW)
Advertisement
Table of Contents

Related Manuals for Kenwood DPX-4010


Summary of Contents for Kenwood DPX-4010
-
Page 1: Instruction Manual
Record the serial number, found on the back of the unit, in the spaces designated on the warranty card, and in the space provided below. Refer to the model and serial numbers whenever you call upon your KENWOOD dealer for information or service on the product. -
Page 2: Table Of Contents
Contents Before use 2Warning ...3 Safety precautions ...4 Handling Compact discs ...6 General features Power...7 Volume ...7 Attenuator ...7 Switching Modes ...8 Audio Control Setting...8 Switching Display...9 Adjusting Time ...9 Tuner features Tuning ...10 Station Preset Memory...10 Station Name Preset (SNPS) ...10 Switching Display for Tuner...11 Cassette player features Playing Cassette Tapes...12... - Page 3 KENWOOD CORPORATION 2967-3, ISHIKAWA-CHO, HACHIOJI-SHI TOKYO, JAPAN KENWOOD CORP. CERTIFIES THIS EQUIPMENT CONFORMS TO DHHS REGULATIONS N0.21 CFR 1040. 10, CHAPTER 1, SUBCHAPTER J. Location : Bottom Panel FCC WARNING This equipment may generate or use radio frequency energy.
-
Page 4: 2Warning
• If the unit starts to emit smoke or strange smells, turn off the power immediately and consult your Kenwood dealer. • Make sure not to get your fingers caught between the faceplate and the unit. - Page 5 NOTE • If you experience problems during installation, consult your Kenwood dealer. • If the unit does not seem to be working right, try pressing the reset button first. If that does not solve the problem, consult your Kenwood dealer.
-
Page 6: Handling Compact Discs
Handling Compact discs Playing a CD that is dirty, scratched or warped can cause the sound to skip and the unit to operate incorrectly, resulting in worsened sound quality. Take the following precautions to prevent your CDs from getting scratched or damaged. Handling CDs •... -
Page 7: General Features
General features NAME SET DISP DISP DISP METAL D.SCN M.RDM ATT indicator Clock display Power Turning on the power: Press the SRC (source) button. NOTE Turn the power on before carrying out the following procedures. CD EJECT OPEN Turning off the power: Press the PWR OFF button for at least one second. -
Page 8: Switching Modes
General features Switching Modes Switching Modes: Each time you press the SRC (source) button, the mode switches as follows: Tuner mode Tape mode CD mode External disc control mode 1 External disc control mode 2/AUX mode Standby mode Selecting standby mode: Press the SRC button repeatedly and switch to "ALL OFF"... -
Page 9: Switching Display
Switching Display You can switch the display during the standby mode as mentioned below. Changing the Display: Each time you press the DISP button, the display changes as follows: Character + Graphic Clock + Graphic Clock Adjusting Time Adjust the time. When the time is not displayed, first press the DISP button to display the time. -
Page 10: Tuner Features Tuning
Tuner features Tuning Press the SRC (source) button repeatedly to select the tuner mode. "TUNER" is displayed when the tuner mode has been selected. Press either the FM or AM button to select the band. Each time you press the FM button, the band switches between the FM1, FM2 and FM3. -
Page 11: Switching Display For Tuner
Alphabet (upper case)/Numerals/Symbols: A ~ Z 0~9 / + – * = < > [ ] Alphabet (lower case)/Numerals/Symbols: a ~ z 0~9 / + – * = < > [ ] Continue steps 3 and 4 until all the characters are chosen for the name. -
Page 12: Cassette Player Features
Cassette player features NAME SET DISP DISP DISP METAL D.SCN M.RDM M.RDM B NR METAL Mode display Tape counter display indicator B.S indicator MTL indicator B NR indicator Playing Cassette Tapes Loading and Playing Cassettes: A press of the OPEN button results in the faceplate dropping open to the front, thereby exposing the cassette insertion slot. -
Page 13: Fast Forwarding And Rewinding Cassette Tapes
2CAUTION • When the faceplate has been dropped open, it might interfere with the shift lever or something else. If this happens, pay attention to safety and move the shift lever or take an appropriate action, then operate the unit. •... -
Page 14: Using Direct Program Search System (Dpss)
Cassette player features Using Direct Program Search System (DPSS) Skip forward or backward to other tracks during playback. Skipping to Beginning of Current Track or to Previous Tracks (Rewind DPSS): Press the 4 button. Press once to rewind to the beginning of the current track, twice to rewind to the beginning of the previous track, and so forth. -
Page 15: Music Repeat
Music Repeat Repeatedly plays the track currently being listened to. Turning Music Repeat On/Off: Press the REP button to switch music repeat on/off. "Repeat On" is displayed when music repeat is turned on. Canceling Music Repeat: Press either the REP or 38 button. NOTE Music repeat "knows"... -
Page 16: Cd/External Disc Control Features Playing Cds
CD/External disc control features Playing CDs Playing CDs: If no CDs are inserted, insert one in the slot with the label facing up. If a CD is already inserted, press the SRC button repeatedly to select the CD mode. "CD" is displayed when the CD mode has been selected. The CD will start playing. -
Page 17: Switching Display For Discs
Switching Display for Discs Switch the display that appears while discs are playing. Switching Display for Discs: Each time you press the DISP button, the display during disc play switches as follows: Track time Total disc playing time (CD only) Disc name (DNPS) (CD only) Disc title* (Units featuring CD text/MD only) Track title* (Units featuring CD text/MD only) -
Page 18: Track Search
CD/External disc control features Track Search Search forward or backward through the tracks on the disc until you reach the one that you want to listen to. Making a Reverse Track Search: Press the 4 button to display the desired track number. Press once to search back to the beginning of the current track, twice to search back to the beginning of the previous track, and so forth. -
Page 19: Track Scan
Track Scan Successively play the beginning of each track on a disc until you find the track that you want to listen to. Starting the Track Scan : Press the SCN button. "Track Scan" is displayed and the first 10 seconds of each track will be played, in order. The track number currently being heard blinks in the display. -
Page 20: Random Play
CD/External disc control features Random Play Play all the tracks on the current disc in random order. Press the RDM button to switch random play on and off. "Random" is displayed when random play is turned on. The track number will change over and over in the display as the next track is being selected. -
Page 21: Presetting Disc Names (Dnps)
Presetting Disc Names (DNPS) Store the names of discs to be displayed when played. Play the disc whose name you want to preset. NOTE • This function is available only for the CD player of this unit and disc changers that feature the Disc Name Preset function. •... -
Page 22: Dsp/Equalizer/Analyzer Control Features
DSP/Equalizer/Analyzer control features NAME SET DISP METAL D.SCN M.RDM Sound field control name/ DSP indicator Preset Equalizer name/ Spectrum analyzer name Spectrum analyzer display DSP (Digital Signal Processor) A DSP is a device which uses digital control to correct the audio signal and produce sound effects that can compensate for the small passenger compartment of a vehicle. -
Page 23: Equalizer Level Adjusting
Preset Equalizer Selection You can choose the equalizer from four settings whose sound qualities are preset to match music or vehicle characteristics. Switching the Preset Equalizer: Press the EQ button. "EQ mode" is displayed once the equalizer mode is entered. Each time you press the EQ button, the preset equalizer switches as follows;... -
Page 24: Function Set System
Function Set System NAME SET DISP METAL D.SCN M.RDM FNC indicator Function mode and setting display Function Set System To accommodate a greater number of functions, a function set system has been employed for making settings. Press the FNC button to enter the function set mode and then display the function to make the setting. -
Page 25: Selecting Display Mode
Function items in Standby mode: Selecting Display Mode The Display Mode sets the number of display colours used by the Spectrum Analyser. Display and setting: "DISP MODE A" : The display can be set to use three colours: white, light blue and blue. "DISP MODE B"... -
Page 26: Auto Memory Entry
Function Set System Auto Memory Entry You can automatically store all the receivable frequencies in the band currently being listened to, and then recall them with the touch of a button later. This function is especially useful when you are travelling and do not know what stations are available. -
Page 27: Basic Operations
2CAUTION Do not set the remote on hot places such as above the dashboard. Loading and Replacing the Batteries: Use two "AAA"-size batteries. Slide the cover while pressing downwards to remove it as illustrated. – Insert the batteries with the poles aligned properly, following the illustration inside the case. -
Page 28: Tuner Features
Basic Operations of remote Tuner features • 4/¢ (TUNE) buttons Press the 4 button to make decreasing seeks (using the preset tuning mode). Press the ¢ button to make increasing seeks (using the preset tuning mode). Use to move the cursor left or right during station name input. •... -
Page 29: Accessories
Accessories External view External view ... Number of items (M5 6mm) ...6 (M4 6mm) ...1 ...1 ...1 ...1 ...1 ...1 2CAUTION The use of any accessories except for those provided might result in damage to the unit. Make sure only to use the accessories shipped with the unit, as shown above. -
Page 30: Connecting Wires To Terminals
Front right output (Red) Rear left output (White)/ Non-fading left output (White) Rear right output (Red)/ Non-fading right output (Red) KENWOOD disc changer control input NOTE To connect the Disc changer, consult your Disc changer manual. To front left –... -
Page 31: Installation (For Toyota, Nissan Car Etc.)
Installation (for TOYOTA, NISSAN Car etc.) 2CAUTION When performing a check of the CD operation prior to installation, place this unit in a hirizontal position and perform a loading/eject of the CD. Installation Install onto the car bracket using the supplied screws (M5 mm). - Page 32 Some bracket requires three screws (Accessory1) on each side. DPX-4010 NOTE If accessories 6 and 7 hit the inside of the console, preventing the unit from being attached tightly, snap their end parts off as shown below.shipped with the unit, as shown above.
-
Page 33: Troubleshooting Guide
Troubleshooting Guide What might seem to be a malfunction in your unit may just be the result of slight misoperation or miswiring. Before calling service, first check the following table for possible problems. PROBLEM The power does not turn on. The fuse has blown. - Page 34 Troubleshooting Guide PROBLEM The memory is erased when The battery wire has not been connected to the proper the ignition is turned off. terminal. The ignition and battery wire are incorrectly connected. A CD ejects as soon as it is The CD is upside-down.
- Page 35 Disc Control Mode PROBLEM The disc control mode cannot No cable has been connected to the disc changer input be selected. terminal on the unit. The specified disc does not The specified CD is quite dirty. play, but another one plays The CD is upside-down.
- Page 36 The tape player is malfunctioning. Eject the tape and try inserting it again. Contact the Kenwood dealer if this indicator continues blinking or the tape cannot be ejected. The CD player is malfunctioning. Eject the CD and try inserting it again.
-
Page 37: Specifications
Specifications Specifications subject to change without notice. FM tuner section Frequency range (200 kHz space) ...87.9 MHz – 107.9 MHz Usable sensitivity (S/N = 30dB) ...9.3dBf (0.8 µV/75 Ω) Quieting Sensitivity (S/N = 50dB) ...15.2dBf (1.6 µV/75 Ω) Frequency response (±3.0 dB)...30 Hz – 15 kHz Signal to Noise ratio (MONO) ...70 dB Selectivity (±400 kHz) ...≥...