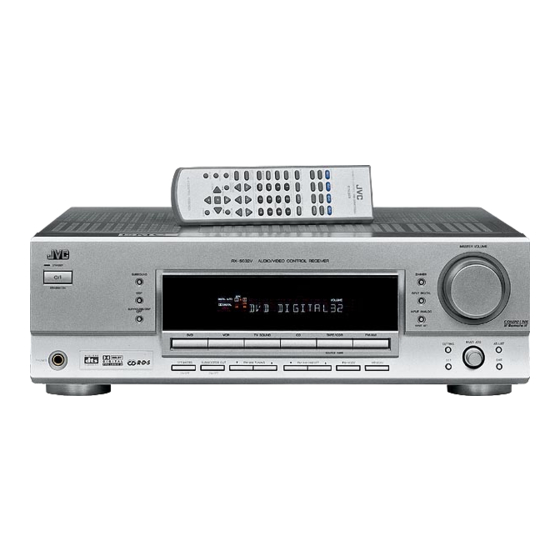
JVC RX-5032VSL Instructions Manual
Jvc audio/video control receiver instruction
Hide thumbs
Also See for RX-5032VSL:
- Instruction manual (244 pages) ,
- Instructions for use manual (141 pages) ,
- Instructions manual (83 pages)
Table of Contents
Advertisement
AUDIO/VIDEO CONTROL RECEIVER
RX-6030VBK/RX-6032VSL
RX-5030VBK/RX-5032VSL
STANDBY
TA/NEWS/INFO
STANDBY/ON
DISPLAY MODE
PHONES
RX–6030V
AUDIO/VIDEO CONTROL RECEIVER
SURROUND
DSP
DIGITAL AUTO
SPK
1 2
ONE TOUCH OPERATION
BASS BOOST
INPUT ATT
ANALOG
L
C
R
PRO LOGIC DSP H.PHONE AUTO MUTING TUNED STEREO TA NEWS INFO
LINEAR PCM
S.WFR LFE
SURROUND/DSP
DIGITAL
LS
S
RS
OFF
CH–
DVD MULTI
DVD
VCR
TV SOUND
CD
D I G I T A L
SPEAKERS
SUBWOOFER OUT
FM/AM TUNING
FM/AM RESET
P R O L O G I C
ON/OFF
ON/OFF
INSTRUCTIONS
MASTER VOLUME
DIMMER
INPUT DIGITAL
EON RDS
SLEEP
VOLUME
INPUT ANALOG
INPUT ATT
TAPE/CDR
FM
AM
MULTI JOG
SETTING
ADJUST
SOURCE NAME
SET
EXIT
FM MODE
MEMORY
For Customer Use:
Enter below the Model No. and Serial
No. which are located either on the rear,
bottom or side of the cabinet. Retain this
information for future reference.
Model No.
Serial No.
LVT0984-001B
[J]
Advertisement
Chapters
Table of Contents
Troubleshooting

Related Manuals for JVC RX-5032VSL


Summary of Contents for JVC RX-5032VSL
- Page 1 AUDIO/VIDEO CONTROL RECEIVER RX-6030VBK/RX-6032VSL RX-5030VBK/RX-5032VSL STANDBY SURROUND TA/NEWS/INFO STANDBY/ON DISPLAY MODE SURROUND/DSP PHONES D I G I T A L P R O L O G I C INSTRUCTIONS RX–6030V AUDIO/VIDEO CONTROL RECEIVER DIMMER INPUT DIGITAL DIGITAL AUTO ONE TOUCH OPERATION...
- Page 2 Warnings, Cautions, and Others/ Mises en garde, précautions et indications diverses CAUTION RISK OF ELECTRIC SHOCK DO NOT OPEN CAUTION: TO REDUCE THE RISK OF ELECTRIC SHOCK. DO NOT REMOVE COVER (OR BACK) NO USER SERVICEABLE PARTS INSIDE. REFER SERVICING TO QUALIFIED SERVICE PERSONNEL. The lightning flash with arrowhead symbol, within an equilateral triangle is intended to alert the user to the presence of uninsulated...
-
Page 3: Table Of Contents
Sound Adjustments Using MULTI JOG Dial ... 19 Sound Adjustments Using Remote Control ... 20 Adjusting Speaker Output Levels Using Test Tone ... 20 Adjusting Subwoofer Output Level ... 21 Differences between RX-6030VBK/RX-6032VSL and RX-5030VBK/RX-5032VSL Main unit Color Video input terminals... -
Page 4: Parts Identification
• Source selection buttons (11) DVD MULTI, DVD, VCR, TV SOUND, CD, TAPE/CDR, FM, AM • SOURCE NAME button (12) f For RX-5030VBK and RX-5032VSL • Source selection buttons (11) DVD, VCR, TV SOUND, CD, TAPE/CDR, FM/AM • SOURCE NAME button (12) - Page 5 VOLUME 6030J REMOTE CONTROL RM-SRX * DVD MULTI (source selection button) and BASSBOOST (&) buttons are NOT provided for RX-5030VBK and RX-5032VSL. 9 TUNED indicator (22) 0 INPUT ATT indicator (18) - STEREO indicator (22) = AUTO MUTING indicator (23)
- Page 6 /CDR DIGITAL IN FRONT (PLAY) (REC) WOOFER SURR (REAR) (PLAY) RIGHT TV SOUND SUBWOOFER RIGHT LEFT AUDIO Rear Panel—RX-5030VBK/RX-5032VSL DIGITAL 1 (DVD) DIGITAL 2 ( CD ) (REC) TAPE RIGHT /CDR DIGITAL IN (PLAY) AUDIO (REC) (PLAY) RIGHT TV SOUND...
-
Page 7: Getting Started
Getting Started Before Installation General Precautions • DO NOT insert any metal object into the unit. • DO NOT disassemble the unit or remove screws, covers, or cabinet. • DO NOT expose the unit to rain or moisture. Locations • Install the unit in a location that is level and protected from moisture. -
Page 8: Connecting The Speakers And Subwoofer
Getting Started Connecting the Speakers and Subwoofer You can connect five speakers—a pair of front speakers, a center speaker, and a pair of surround speakers—and a subwoofer. CAUTION: Use speakers with a SPEAKER IMPEDANCE as indicated by the speaker terminals. 7 Connection diagram To subwoofer SUBWOOFER... -
Page 9: Connecting Audio/Video Components
Connecting Audio/Video Components Turn the power off to all components before making connections. You can connect the following audio/video components to this receiver. Refer also to the manuals supplied with your components. • Audio Components: CD player* and Cassette deck (or CD recorder*) •... - Page 10 Getting Started Rear panel (REC) TAPE RIGHT /CDR FRONT (PLAY) (REC) WOOFER SURR (REAR) (PLAY) RIGHT TV SOUND SUBWOOFER RIGHT LEFT AUDIO (REC) TAPE RIGHT /CDR FRONT (PLAY) (REC) WOOFER SURR (REAR) (PLAY) RIGHT TV SOUND SUBWOOFER RIGHT LEFT AUDIO ANTENNA FM 75 COAXIAL...
- Page 11 ‰ To composite video output Ï To S-video output Ì To component video output DVD player A B C AUDIO RIGHT FRONT WOOFER SURR (REAR) RIGHT SUBWOOFER RX-5030VBK/RX-5032VSL DVD player MONITOR RIGHT LEFT AUDIO Rear panel MONITOR OUT ANTENNA FM 75 COAXIAL MONITOR LEFT •...
-
Page 12: Digital Connections
Getting Started Digital Connections This receiver is equipped with two DIGITAL IN terminals—one digital coaxial terminal and one digital optical terminal. You can connect any component to one of the digital terminals using a digital coaxial cable (not supplied) or digital optical cable (not supplied). -
Page 13: Basic Operations
MEMORY TAPE/CDR*: FM (front panel): AUDIO on the AM (front panel): FM/AM* (remote control): AUDIO on the RX-5030VBK/RX-5032VSL On the front panel From the remote control DVD: VCR: TV SOUND: CD*: TAPE/CDR*: Select the cassette deck (or the CD recorder). -
Page 14: Changing The Source Name
“CDR” appears on the display when selected as the source. RX-6030VBK/RX-6032VSL SOURCE NAME RX-5030VBK/RX-5032VSL Press TAPE/CDR (SOURCE NAME) on the front panel to select “TAPE” as the source. Press again and hold SOURCE NAME (TAPE/CDR) on the front panel until “ASSIGN CDR”... -
Page 15: Adjusting The Volume
Adjusting the Volume On the front panel To increase the volume, turn MASTER VOLUME control clockwise. To decrease the volume, turn MASTER VOLUME control counterclockwise. From the remote control To increase the volume, press VOLUME +. To decrease the volume, press VOLUME −. The volume level can be adjusted within a range of “0”... -
Page 16: Turning Off The Power With The Sleep Timer
Basic Operations Turning Off the Power with the Sleep Timer You can fall asleep while listening to music—Sleep Timer. A/V CONTROL RECEIVER TA/NEWS/INFO DISPLAY MODE Press SLEEP on the remote control repeatedly. • The SLEEP indicator lights up on the display. Each time you press the button, the shut-off time changes in 10 minute intervals as follows: (Canceled) -
Page 17: Basic Settings
Basic Settings Basic Settings Using MULTI JOG Dial After connecting and placing speakers, you need to make basic settings for the following items according to your listening conditions. • Speaker information (see the next column and page 16) • Digital input terminal sources (see page 16) •... -
Page 18: Selecting The Digital Input Terminals-Digital In
Basic Settings 7 Speaker distance—DISTANCE UNIT, FRNT DISTANCE, CNTR DISTANCE, SURR DISTANCE Select the unit to measure the distance between your listening position and speakers—“METER” or “FEET.” After selecting the measuring unit, select the appropriate speaker distance for each speaker within the range of “0.3m” (“1FT”) to “9.0m”... -
Page 19: Selecting The Analog Or Digital Input Mode
Front panel RX–6030V AUDIO/VIDEO CONTROL RECEIVER SURROUND DIGITAL AUTO ONE TOUCH OPERATION BASS BOOST ANALOG PRO LOGIC DSP H.PHONE AUTO MUTING TUNED STEREO TA NEWS INFO LINEAR PCM S.WFR LFE SURROUND/DSP DIGITAL CH– D I G I T A L PHONES D I G I T A L SPEAKERS... -
Page 20: Sound Adjustments
Sound Adjustments Front panel RX–6030V AUDIO/VIDEO CONTROL RECEIVER STANDBY SURROUND STANDBY/ON DIGITAL AUTO ONE TOUCH OPERATION BASS BOOST ANALOG PRO LOGIC DSP H.PHONE AUTO MUTING TUNED STEREO TA NEWS INFO LINEAR PCM S.WFR LFE SURROUND/DSP DIGITAL CH– DVD MULTI TV SOUND D I G I T A L PHONES D I G I T A L... -
Page 21: Sound Adjustments Using Multi Jog Dial
Sound Adjustments Using MULTI JOG Dial You can adjust the sound using MULTI JOG dial on the front panel. • Tone—BASS, TREBLE • Subwoofer output level*—SUBWFR LEVEL • Speakers’ output level*— FRONT L/R LEVEL, CENTER LEVEL, SURR L/R LEVEL • Effect level for DAP modes—EFFECT •... -
Page 22: Sound Adjustments Using Remote Control
Sound Adjustments 7 Tone—BASS, TREBLE Adjust the bass and treble sounds as you like (–10 to +10 in 2 step intervals). • “0” is the initial setting. 7 Subwoofer output level—SUBWFR LEVEL Adjust the subwoofer output level (–10 to +10 in 1 step interval). -
Page 23: Adjusting Subwoofer Output Level
Press SOUND. The 10 keys are activated for sound adjustments. Press TEST. “TEST TONE L” starts flashing on the display and a test tone comes out of the speakers in the following order: TEST TONE C TEST TONE L (Left front speaker) (Center speaker) TEST TONE LS TEST TONE RS... -
Page 24: Tuner Operations
Tuner Operations Front panel RX-6030VBK/RX-6032VSL RX-5030VBK/RX-5032VSL RX–6030V AUDIO/VIDEO CONTROL RECEIVER STANDBY SURROUND STANDBY/ON DIGITAL AUTO ONE TOUCH OPERATION ANALOG PRO LOGIC DSP H.PHONE AUTO MUTING TUNED STEREO TA NEWS INFO LINEAR PCM S.WFR LFE SURROUND/DSP DIGITAL CH– DVD MULTI TV SOUND... -
Page 25: To Tune In To A Preset Station
RX-6030VBK/RX-6032VSL Press FM or AM. The last received station of the selected band is tuned in. RX-5030VBK/RX-5032VSL Press FM/AM. The last received station of the last selected band is tuned • Each time you press the button, the band alternates between FM and AM. -
Page 26: Creating Realistic Sound Fields
Creating Realistic Sound Fields You can use the following Surround and DSP modes to reproduce a realistic sound field: Surround modes 7 Dolby • Dolby Pro Logic II • Dolby Digital 7 DTS Digital Surround DSP modes 7 DAP modes 7 All Channel Stereo Surround modes 7 Dolby... - Page 27 DSP modes 7 DAP (Digital Acoustic Processor) modes DAP modes have been designed to create important acoustic surround elements. The sound heard in a live club, dance club, hall or pavilion consists of direct sound and indirect sound—early reflections and reflections from behind. Direct sounds reach the listener directly without any reflection.
-
Page 28: Using Surround Modes
Creating Realistic Sound Fields Make sure that you have set the speaker information correctly (see pages 15 and 16). • If only the front speakers are connected, you cannot use Surround/DSP modes. • You cannot use DSP modes if no surround speakers are connected. •... -
Page 29: Using Dsp Modes
Using DSP Modes Speaker layouts required for the DSP modes are as follows: • 5 channels (Front, center, and surround speakers are connected.) • 4 channels (Front and surround speakers are connected.) 7 Operating procedure Start playing 2 channel software—either analog or Linear PCM—and select the source. -
Page 30: Using Dvd Multi Playback Mode (Rx-6030Vbk/Rx-6032Vsl Only)
Using DVD MULTI Playback Mode RX-6030VBK This section is ONLY for This receiver provides the DVD MULTI playback mode for reproducing the analog discrete output mode of the DVD player. Before playing a DVD, refer also to the manual supplied with the DVD player. -
Page 31: Compu Link Remote Control System
The COMPU LINK remote control system allows you to operate JVC’s audio components through the remote sensor on the receiver. To use this remote control system, you need to connect JVC’s audio components through the COMPU LINK-4 (SYNCHRO) jacks (see below) in addition to the connections using cables with RCA pin plugs (see page 7). -
Page 32: Av Compu Link Remote Control System
AV COMPU LINK Remote Control System The AV COMPU LINK remote control system allows you to operate JVC’s video components (TV, VCR, and DVD player) through the receiver. To use this remote control system, you need to connect the video components you want to operate following the diagrams below and the procedure on the next page. - Page 33 Notes: • When connecting only the VCR or DVD player to this receiver, connect it directly to the receiver using cables with the monaural mini-plugs. • Make sure that the remote control code of the VCR connected to the VCR jacks is set to code “A.” •...
-
Page 34: Operating Jvc's Audio/Video Components
IMPORTANT: To operate JVC’s audio components using this remote control: • You need to connect JVC’s audio components through the COMPU LINK-4 (SYNCHRO) jacks (see page 29) in addition to the connections using cables with RCA pin plugs (see page 7). - Page 35 CD player After pressing CD, you can use the following buttons for the CD operations: Start playback. Return to the beginning of the current (or previous) tracks. ¢ Skip to the beginning of the next tracks. Stop playback. Pause playback. To release, press 3. 1 –...
-
Page 36: Operating Video Components
IMPORTANT: To operate JVC’s video components using this remote control: • You need to connect JVC’s video components through the AV COMPU LINK terminals (see page 30) in addition to the connections using cables with RCA pin plugs (see pages 8 and 9). -
Page 37: Operating Other Manufacturers' Video Equipment
Operating Other Manufacturers’ Video Equipment By changing the transmission signals, you can use the remote control supplied for this unit to operate other manufacturers’ equipment. • Refer also to the manuals supplied for the other products. • To operate these components with the remote control, first you need to set the manufacturers’... - Page 38 Operating Other Manufacturers’ Video Equipment To change the transmission signals for operating a VCR 1 Press and hold STANDBY/ON 2 Press VCR. 3 Enter manufacturer’s codes using buttons 1 – 9, and 0. 4 Release STANDBY/ON VCR. Now, you can perform the following operations on the VCR.
-
Page 39: Troubleshooting
Troubleshooting Use this chart to help you solve daily operational problems. If there is any problem you cannot solve, contact your JVC service center. PROBLEM The power does not come on. No sound from speakers. Sounds from speakers are heard unequally. -
Page 40: Specifications
Specifications RX-6030VBK/RX-6032VSL Amplifier Output Power: Audio Audio Input Sensitivity/Impedance (1 kHz): Audio Input (DIGITAL IN)*: Audio Output Level: Signal-to-Noise Ratio (’66 IHF/’78 IHF): Frequency Response (8 Ω): Bass boost: Tone Control: Video Video Input Sensitivity/Impedance: Composite video: S-video: Component video: Video Output Level/Impedance: Composite video: S-video:... - Page 41 RX-5030VBK/RX-5032VSL Amplifier Output Power: Audio Audio Input Sensitivity/Impedance (1 kHz): Audio Input (DIGITAL IN)* : Audio Output Level: Signal-to-Noise Ratio (’66 IHF/’78 IHF): Frequency Response (8 Ω): Tone Control: Video Video Input Sensitivity/Impedance: Composite video: Video Output Level/Impedance: Composite video:...
- Page 42 If service is not available locally, box the product carefully, preferably in the original carton, and ship, insured, with a copy of your bill of sale plus a letter of explanation of the problem to the nearest JVC Factory Service Center, the name and location of which will be given to you by the toll-free number.
- Page 43 Caution To prevent electrical shock,do not open the cabinet.There are no user serviceable parts inside.Please refer to qualified service personnel for repairs. Accessories To purchase accessories for your JVC product,please call toll free:1 (800)882-2345 or on the web at www.JVC.com...
- Page 44 VICTOR COMPANY OF JAPAN, LIMITED © 2002 VICTOR COMPANY OF JAPAN, LIMITED 0103NHMMDWJEIN...
- Page 45 AUDIO/VIDEO CONTROL RECEIVER RECEPTEUR DE COMMANDE AUDIO/VIDEO RX-6030VBK/RX-6032VSL RX-5030VBK/RX-5032VSL STANDBY TA/NEWS/INFO SURROUND STANDBY/ON DISPLAY MODE SURROUND/DSP PHONES D I G I T A L P R O L O G I C INSTRUCTIONS MANUAL D’INSTRUCTIONS RX–6030V AUDIO/VIDEO CONTROL RECEIVER DIMMER...
- Page 46 Wall or obstructions Mur, ou obstruction cause harmful interference Spacing 15 cm or more Dégagement de 15 cm ou plus RX-6030VBK/RX-6032VSL RX-5030VBK/RX-5032VSL Front Avant Stand height: 15 cm or more Hauteur du socle: 15 cm ou plus Floor Plancher...
- Page 47 Sound Adjustments Using MULTI JOG Dial ... 19 Sound Adjustments Using Remote Control ... 20 Adjusting Speaker Output Levels Using Test Tone ... 20 Adjusting Subwoofer Output Level ... 21 Differences between RX-6030VBK/RX-6032VSL and RX-5030VBK/RX-5032VSL Main unit Color Video input terminals...
-
Page 48: Parts Identification
• Source selection buttons (11) DVD MULTI, DVD, VCR, TV SOUND, CD, TAPE/CDR, FM, AM • SOURCE NAME button (12) f For RX-5030VBK and RX-5032VSL • Source selection buttons (11) DVD, VCR, TV SOUND, CD, TAPE/CDR, FM/AM • SOURCE NAME button (12) - Page 49 VOLUME 6030J REMOTE CONTROL RM-SRX * DVD MULTI (source selection button) and BASSBOOST (&) buttons are NOT provided for RX-5030VBK and RX-5032VSL. 9 TUNED indicator (22) 0 INPUT ATT indicator (18) - STEREO indicator (22) = AUTO MUTING indicator (23)
- Page 50 FRONT (PLAY) CENTER (REC) WOOFER SURR (REAR) (PLAY) RIGHT LEFT TV SOUND SUBWOOFER RIGHT LEFT AUDIO Rear Panel—RX-5030VBK/RX-5032VSL DIGITAL 1 (DVD) COMPU LINK COMPU LINK-4 (SYNCHRO) DIGITAL 2 ( CD ) (REC) TAPE RIGHT LEFT /CDR DIGITAL IN (PLAY) AUDIO...
-
Page 51: Getting Started
Getting Started Before Installation General Precautions • DO NOT insert any metal object into the unit. • DO NOT disassemble the unit or remove screws, covers, or cabinet. • DO NOT expose the unit to rain or moisture. Locations • Install the unit in a location that is level and protected from moisture. -
Page 52: Connecting The Speakers And Subwoofer
Getting Started Connecting the Speakers and Subwoofer You can connect five speakers—a pair of front speakers, a center speaker, and a pair of surround speakers—and a subwoofer. CAUTION: Use speakers with a SPEAKER IMPEDANCE as indicated by the speaker terminals. 7 Connection diagram To subwoofer SUBWOOFER... -
Page 53: Connecting Audio/Video Components
Connecting Audio/Video Components Turn the power off to all components before making connections. You can connect the following audio/video components to this receiver. Refer also to the manuals supplied with your components. • Audio Components: CD player* and Cassette deck (or CD recorder*) •... - Page 54 Getting Started Rear panel (REC) TAPE RIGHT /CDR FRONT (PLAY) (REC) WOOFER SURR (REAR) (PLAY) RIGHT TV SOUND SUBWOOFER RIGHT LEFT AUDIO (REC) TAPE RIGHT /CDR FRONT (PLAY) (REC) WOOFER SURR (REAR) (PLAY) RIGHT TV SOUND SUBWOOFER RIGHT LEFT AUDIO ANTENNA FM 75 COAXIAL...
- Page 55 ‰ To composite video output Ï To S-video output Ì To component video output DVD player A B C AUDIO RIGHT FRONT WOOFER SURR (REAR) RIGHT SUBWOOFER RX-5030VBK/RX-5032VSL DVD player MONITOR RIGHT LEFT AUDIO Rear panel MONITOR OUT ANTENNA FM 75 COAXIAL MONITOR LEFT •...
-
Page 56: Digital Connections
Getting Started Digital Connections This receiver is equipped with two DIGITAL IN terminals—one digital coaxial terminal and one digital optical terminal. You can connect any component to one of the digital terminals using a digital coaxial cable (not supplied) or digital optical cable (not supplied). -
Page 57: Basic Operations
MEMORY TAPE/CDR*: FM (front panel): AUDIO on the AM (front panel): FM/AM* (remote control): AUDIO on the RX-5030VBK/RX-5032VSL On the front panel From the remote control DVD: VCR: TV SOUND: CD*: TAPE/CDR*: Select the cassette deck (or the CD recorder). -
Page 58: Changing The Source Name
“CDR” appears on the display when selected as the source. RX-6030VBK/RX-6032VSL TAPE/CDR SOURCE NAME RX-5030VBK/RX-5032VSL Press TAPE/CDR (SOURCE NAME) on the front panel. • Make sure “TAPE” appears on the display. Press again and hold SOURCE NAME (TAPE/CDR) on the front panel until “ASSIGN CDR”... -
Page 59: Adjusting The Volume
Adjusting the Volume On the front panel To increase the volume, turn MASTER VOLUME control clockwise. To decrease the volume, turn MASTER VOLUME control counterclockwise. From the remote control To increase the volume, press VOLUME +. To decrease the volume, press VOLUME −. The volume level can be adjusted within a range of “0”... -
Page 60: Turning Off The Power With The Sleep Timer
Basic Operations Turning Off the Power with the Sleep Timer You can fall asleep while listening to music—Sleep Timer. A/V CONTROL RECEIVER TA/NEWS/INFO DISPLAY MODE Press SLEEP on the remote control repeatedly. • The SLEEP indicator lights up on the display. Each time you press the button, the shut-off time changes in 10 minute intervals as follows: (Canceled) -
Page 61: Basic Settings
Basic Settings Basic Settings Using MULTI JOG Dial After connecting and placing speakers, you need to make basic settings for the following items according to your listening conditions. • Speaker information (see the next column and page 16) • Digital input terminal sources (see page 16) •... -
Page 62: Selecting The Video Input Terminal-Video In Dvd, Video In Vcr
Basic Settings 7 Speaker distance—DISTANCE UNIT, FRNT DISTANCE, CNTR DISTANCE, SURR DISTANCE Select the unit to measure the distance between your listening position and speakers—“METER” or “FEET.” After selecting the measuring unit, select the appropriate speaker distance for each speaker within the range of “0.3m” (“1FT”) to “9.0m”... -
Page 63: Selecting The Analog Or Digital Input Mode
Front panel RX–6030V AUDIO/VIDEO CONTROL RECEIVER SURROUND DIGITAL AUTO ONE TOUCH OPERATION BASS BOOST ANALOG PRO LOGIC DSP H.PHONE AUTO MUTING TUNED STEREO TA NEWS INFO LINEAR PCM S.WFR LFE SURROUND/DSP DIGITAL CH– D I G I T A L PHONES D I G I T A L SPEAKERS... -
Page 64: Sound Adjustments
Sound Adjustments Front panel RX–6030V AUDIO/VIDEO CONTROL RECEIVER STANDBY SURROUND STANDBY/ON DIGITAL AUTO ONE TOUCH OPERATION BASS BOOST ANALOG PRO LOGIC DSP H.PHONE AUTO MUTING TUNED STEREO TA NEWS INFO LINEAR PCM S.WFR LFE SURROUND/DSP DIGITAL CH– DVD MULTI TV SOUND D I G I T A L PHONES D I G I T A L... -
Page 65: Sound Adjustments Using Multi Jog Dial
Sound Adjustments Using MULTI JOG Dial You can adjust the sound using MULTI JOG dial on the front panel. • Tone—BASS, TREBLE • Subwoofer output level*—SUBWFR LEVEL • Speakers’ output level*— FRONT L/R LEVEL, CENTER LEVEL, SURR L/R LEVEL • Effect level for DAP modes—EFFECT •... -
Page 66: Sound Adjustments Using Remote Control
Sound Adjustments 7 Tone—BASS, TREBLE Adjust the bass and treble sounds as you like (–10 to +10 in 2 step intervals). • “0” is the initial setting. 7 Subwoofer output level—SUBWFR LEVEL Adjust the subwoofer output level (–10 to +10 in 1 step interval). -
Page 67: Adjusting Subwoofer Output Level
Press SOUND. The 10 keys are activated for sound adjustments. Press TEST. “TEST TONE L” starts flashing on the display and a test tone comes out of the speakers in the following order: TEST TONE C TEST TONE L (Left front speaker) (Center speaker) TEST TONE LS TEST TONE RS... -
Page 68: Tuner Operations
Tuner Operations Front panel RX-6030VBK/RX-6032VSL RX-5030VBK/RX-5032VSL RX–6030V AUDIO/VIDEO CONTROL RECEIVER STANDBY SURROUND STANDBY/ON DIGITAL AUTO ONE TOUCH OPERATION ANALOG PRO LOGIC DSP H.PHONE AUTO MUTING TUNED STEREO TA NEWS INFO LINEAR PCM S.WFR LFE SURROUND/DSP DIGITAL CH– DVD MULTI TV SOUND... -
Page 69: To Tune In To A Preset Station
RX-6030VBK/RX-6032VSL Press FM or AM. The last received station of the selected band is tuned in. RX-5030VBK/RX-5032VSL Press FM/AM. The last received station of the last selected band is tuned • Each time you press the button, the band alternates between FM and AM. -
Page 70: Creating Realistic Sound Fields
Creating Realistic Sound Fields You can use the following Surround and DSP modes to reproduce a realistic sound field: Surround modes 7 Dolby • Dolby Pro Logic II • Dolby Digital 7 DTS Digital Surround DSP modes 7 DAP modes 7 All Channel Stereo Surround modes 7 Dolby... - Page 71 DSP modes 7 DAP (Digital Acoustic Processor) modes DAP modes have been designed to create important acoustic surround elements. The sound heard in a live club, dance club, hall or pavilion consists of direct sound and indirect sound—early reflections and reflections from behind. Direct sounds reach the listener directly without any reflection.
-
Page 72: Using Surround Modes
Creating Realistic Sound Fields Make sure that you have set the speaker information correctly (see pages 15 and 16). • If only the front speakers are connected, you cannot use Surround/DSP modes. • You cannot use DSP modes if no surround speakers are connected. •... -
Page 73: Using Dsp Modes
Using DSP Modes Speaker layouts required for the DSP modes are as follows: • 5 channels (Front, center, and surround speakers are connected.) • 4 channels (Front and surround speakers are connected.) 7 Operating procedure Start playing 2 channel software—either analog or Linear PCM—and select the source. -
Page 74: Using Dvd Multi Playback Mode
Using DVD MULTI Playback Mode RX-6030VBK This section is ONLY for This receiver provides the DVD MULTI playback mode for reproducing the analog discrete output mode of the DVD player. Before playing a DVD, refer also to the manual supplied with the DVD player. -
Page 75: Compu Link Remote Control System
The COMPU LINK remote control system allows you to operate JVC’s audio components through the remote sensor on the receiver. To use this remote control system, you need to connect JVC’s audio components through the COMPU LINK-4 (SYNCHRO) jacks (see below) in addition to the connections using cables with RCA pin plugs (see page 7). -
Page 76: Av Compu Link Remote Control System
AV COMPU LINK Remote Control System The AV COMPU LINK remote control system allows you to operate JVC’s video components (TV, VCR, and DVD player) through the receiver. To use this remote control system, you need to connect the video components you want to operate following the diagrams below and the procedure on the next page. - Page 77 Notes: • When connecting only the VCR or DVD player to this receiver, connect it directly to the receiver using cables with the monaural mini-plugs. • Make sure that the remote control code of the VCR connected to the VCR jacks is set to code “A.” •...
-
Page 78: Operating Jvc's Audio/Video Components
IMPORTANT: To operate JVC’s audio components using this remote control: • You need to connect JVC’s audio components through the COMPU LINK-4 (SYNCHRO) jacks (see page 29) in addition to the connections using cables with RCA pin plugs (see page 7). - Page 79 RX-6030VBK/RX-6032VSL RX-5030VBK/RX-5032VSL CATV A/V CONTROL STANDBY/ON RECEIVER TEST FRONT L FRONT R AUDIO TEST CENTER SUBWFR TV/CATV MENU SURR L SURR R MENU ENTER LEVEL ENTER TA/NEWS/INFO RETURN RETURN SLEEP REC PAUSE CD–DISC REC PAUSE DISPLAY MODE TAPE/CDR DVD MULTI...
- Page 80 Operating JVC’s Audio/Video Components RX-6030VBK/RX-6032VSL RX-5030VBK/RX-5032VSL CATV A/V CONTROL STANDBY/ON RECEIVER TEST FRONT L FRONT R AUDIO TEST CENTER SUBWFR TV/CATV SURR L SURR R MENU MENU ENTER LEVEL ENTER TA/NEWS/INFO RETURN RETURN SLEEP REC PAUSE CD–DISC REC PAUSE DISPLAY MODE...
-
Page 81: Operating Video Components
IMPORTANT: To operate JVC’s video components using this remote control: • You need to connect JVC’s video components through the AV COMPU LINK terminals (see page 30) in addition to the connections using cables with RCA pin plugs (see pages 8 and 9). -
Page 82: Operating Other Manufacturers' Video Equipment
Operating Other Manufacturers’ Video Equipment By changing the transmission signals, you can use the remote control supplied for this unit to operate other manufacturers’ equipment. • Refer also to the manuals supplied for the other products. • To operate these components with the remote control, first you need to set the manufacturers’... - Page 83 To change the transmission signals for operating a VCR 1 Press and hold STANDBY/ON 2 Press VCR. 3 Enter manufacturer’s codes using buttons 1 – 9, and 0. 4 Release STANDBY/ON VCR. Now, you can perform the following operations on the VCR.
-
Page 84: Troubleshooting
Troubleshooting Use this chart to help you solve daily operational problems. If there is any problem you cannot solve, contact your JVC service center. PROBLEM The power does not come on. No sound from speakers. Sounds from speakers are heard unequally. -
Page 85: Specifications
Specifications RX-6030VBK/RX-6032VSL Amplifier Output Power: Audio Audio Input Sensitivity/Impedance (1 kHz): Audio Input (DIGITAL IN)*: Audio Output Level: Signal-to-Noise Ratio (’66 IHF/’78 IHF): Frequency Response (8 Ω): Bass boost: Tone Control: Video Video Input Sensitivity/Impedance: Composite video: S-video: Component video: Video Output Level/Impedance: Composite video: S-video:... - Page 86 Specifications RX-5030VBK/RX-5032VSL Amplifier Output Power: Audio Audio Input Sensitivity/Impedance (1 kHz): Audio Input (DIGITAL IN)* : Audio Output Level: Signal-to-Noise Ratio (’66 IHF/’78 IHF): Frequency Response (8 Ω): Tone Control: Video Video Input Sensitivity/Impedance: Composite video: Video Output Level/Impedance: Composite video:...
- Page 87 VICTOR COMPANY OF JAPAN, LIMITED EN, FR © 2003 VICTOR COMPANY OF JAPAN, LIMITED 0103NHMMDWJEIN...