Table of Contents
Advertisement
Quick Links
Advertisement
Table of Contents

Related Manuals for Garmin INREACH MINI 2


Summary of Contents for Garmin INREACH MINI 2
- Page 1 INREACH MINI 2 ® Owner’s Manual...
- Page 2 © 2022 Garmin Ltd. or its subsidiaries All rights reserved. Under the copyright laws, this manual may not be copied, in whole or in part, without the written consent of Garmin. Garmin reserves the right to change or improve its products and to make changes in the content of this manual without obligation to notify any person or organization of such changes or improvements. Go to www.garmin.com...
-
Page 3: Table Of Contents
Table of Contents Changing the Map Orientation..... 13 Setting the Compass Heading..... 13 Calibrating the Compass...... 13 Introduction........1 Sharing Your Current Location..... 13 Getting Started........1 Waypoints..........14 Device Overview........2 Saving Your Current Location as a Buttons............. 2 Waypoint..........14 Turning On the Device...... - Page 4 System Settings........19 Time Settings........19 Units Settings........20 Device Information......20 Product Updates........20 Setting Up Garmin Express....20 Getting More Information....20 Viewing E-Label Regulatory and Compliance Information....... 20 Attaching the Spine Mount Adapter..21 Attaching a Lanyard......22 Locking and Unlocking the Buttons..
-
Page 5: Introduction
™ activate a service plan (Activating the Device, page 4 Download the Garmin Explore app to your smartphone, and pair your device (Pairing Your Smartphone, page 5 Sync your device with the Garmin Explore app (Syncing inReach Data, page... -
Page 6: Device Overview
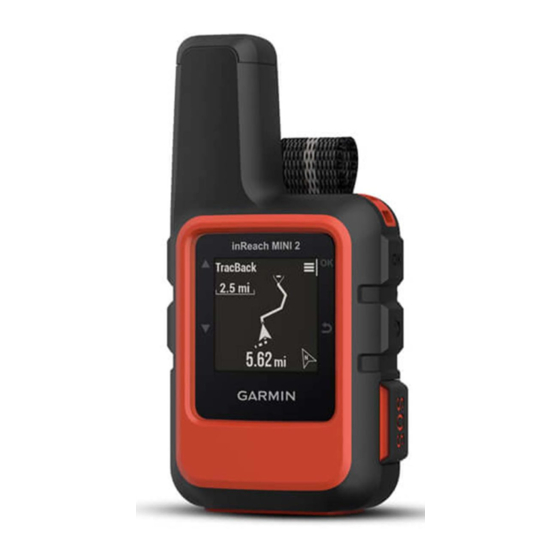
Device Overview Internal Iridium ® antenna Buttons USB port (under weather cap) SOS button (under protective cap) Power button Mounting screw Buttons Press to scroll through menus, pages, and settings. From the home page, press to view the widget glances. Press to scroll through menus, pages, and settings. -
Page 7: Turning On The Device
Turning On the Device Press and hold Viewing the Main Menu 1 From the home page, press OK to open the main menu. 2 Press to scroll through the menu options. Power Menu The Power menu displays the device battery life. It also allows you to adjust settings and turn off the device. Press to open the power menu. -
Page 8: Viewing The Widget Glances
Viewing the Widget Glances Widget glances provide quick access to messages, tracking, navigation, weather, and more (Widget Glances, page 1 From the home page, press The device scrolls through the widget glances and displays summary data for each. 2 Press OK to view more information. 3 Press OK to open the options menu (if available). -
Page 9: Status Icons
Approaching maximum operating temperature Activating the Device WARNING Before you can use the inReach features of your inReach Mini 2 device, including messaging, SOS, tracking, and inReach Weather, you must activate it. 1 From your computer or smartphone, go to explore.garmin.com... -
Page 10: Pairing Your Smartphone
Pairing Your Smartphone To get the most out of your inReach device, you should pair it with the Garmin Explore app. The app allows you to create, manage, and view recorded user data, such as waypoints, courses, and activities. 1 Bring your compatible phone within 10 m (33 ft.) of your device. -
Page 11: Inreach Features
Features WARNING Before you can use the inReach features of your inReach Mini 2 device, including messaging, SOS, tracking, and inReach Weather, you must have an active satellite subscription. Always test your device before you use it outdoors. Ensure you have a clear view of the sky when using the messaging, tracking, and SOS functions, because these features require satellite access to operate properly. -
Page 12: Posting To Social Media
Posting to Social Media You can link your Facebook and Twitter accounts to your MapShare web page. Go to explore.garmin.com ™ ™ ™ complete the setup. 1 From the home page, press OK to open the main menu. 2 Select Send Message. -
Page 13: Viewing Message Details
2 Select Messages, and select a conversation. 3 Select Delete. Contacts You can add, delete, and edit contacts on the inReach Mini 2 device. Adding a Contact 1 From the home page, press OK to open the main menu. 2 Select Contacts > Add Contact. -
Page 14: Inreach Tracking
Tracking You can use the tracking feature on your inReach Mini 2 device to record track points and transmit them over the Iridium satellite network at the specified send interval. Track points appear on the Garmin Explore website and the MapShare tracking page. -
Page 15: Sos
Garmin IERCC, and they notify the appropriate emergency responders of your situation. You can communicate with the Garmin IERCC during your emergency while you wait for help to arrive. You should only use the SOS function in a real emergency situation. -
Page 16: Sending A Custom Sos Message
Sending a Custom SOS Message After pressing the SOS button to initiate an SOS rescue, you can reply with a custom message. 1 From the home page, press to scroll through the widget glances. 2 Select SOS > Reply to compose a custom SOS message. 3 Select an option: •... -
Page 17: Panning And Zooming The Map
Panning and Zooming the Map 1 From the home page, press to scroll through the widget glances. 2 Select Navigation, and scroll to the map. 3 Press OK to open the options menu. 4 Select Pan/Zoom Map. 5 Select an option: •... -
Page 18: Waypoints
Waypoints Waypoints are locations you record and store in the device. Waypoints can mark where you are, where you are going, or where you have been. Saving Your Current Location as a Waypoint 1 From the home page, press OK to open the main menu. 2 Select Mark Waypoint. -
Page 19: Navigating Using Tracback
Courses A course can have multiple destinations, and can be navigated point to point or on routable roads. You can create and save courses in the Garmin Explore app. Navigating a Saved Course 1 From the home page, press OK to open the main menu. -
Page 20: Navigating To The Start Of Your Current Activity
Navigating to the Start of Your Current Activity While recording an activity, you can navigate back to the beginning of your path. This can be helpful when finding your way back to camp or the trail head. 1 From the home page, press OK to open the main menu. 2 Select Navigate >... -
Page 21: Setting The Weather Location
2 Select Weather. 3 Press OK to open the options menu. 4 Select Remove. Data Use and History You can view plan details and data use on the inReach Mini 2 device. Data Use and History... -
Page 22: Viewing Plan Details
Viewing Plan Details You can view the details of your current data plan and check for data plan updates. 1 From the home page, press OK to open the main menu. 2 Select Service Plan > Plan Details. Viewing Data Use You can view the number of messages, preset messages, and track points sent during the current billing cycle. -
Page 23: Phone Settings
Owner Info: Allows you to add owner information, such as your name. The information appears on the home page. USB Mode: Sets the device to use mass storage mode or Garmin mode when connected to a computer. Screenshots: Allows you to take a picture of the device screen. -
Page 24: Units Settings
• Go to support.garmin.com for additional manuals, articles, and software updates. • Go to buy.garmin.com, or contact your Garmin dealer for information about optional accessories and replacement parts. Viewing E-Label Regulatory and Compliance Information The label for this device is provided electronically. The e-label may provide regulatory information, such as identification numbers provided by the FCC or regional compliance markings, as well as applicable product and licensing information. -
Page 25: Attaching The Spine Mount Adapter
Attaching the Spine Mount Adapter 1 Remove the short screw from the carabiner strap 2 Secure the spine mount adapter over the back of the device using the long screw included with the device. TIP: The spine mount adapter fits over the carabiner strap. You can attach the adapter over the strap or remove the strap. -
Page 26: Attaching A Lanyard
Attaching a Lanyard 1 Insert the loop of the lanyard through the slot in the device. 2 Thread the other end of the lanyard through the loop, and pull it tight. 3 If necessary, attach the lanyard to your clothing or backpack to tether it during an activity. Locking and Unlocking the Buttons You can lock the buttons to prevent inadvertent button presses. -
Page 27: Troubleshooting
(inReach Remote Settings, page 19). Resetting All Default Settings Before you reset your device, you should sync your device with the Garmin Explore app to upload your activity data. You can reset all device settings to the factory default values. -
Page 28: Charging The Inreach Device
Charging the inReach Device NOTICE To prevent corrosion, thoroughly dry the USB port, the weather cap, and the surrounding area before charging or connecting to a computer. NOTE: The device does not charge when it is outside the approved temperature range (Specifications, page 25). -
Page 29: Specifications
30-minute tracking send interval with standard activity recording Moderate tree cover: Up to 10 days Turned off One year The device withstands incidental exposure to water of up to 1 m for up to 30 min. For more information, go to www.garmin.com/waterrating. Device Information... -
Page 30: Index
USB, connector 2 customizing the device 18 waypoints 14 data 17 deleting 14 data use 18 editing 14 navigating 14 Garmin Express 20 saving 14 updating software 20 viewing on the map 14 glances 4 weather 4, 16, 17 GPS 5, 12 wrist strap 22 navigation 12, 13 history 17 icons 5 initial setup 5... - Page 32 February 2022 GUID-802DEF62-EBB2-463C-8C51-C58FB29F89E3 v1...