Table of Contents
Advertisement
Advertisement
Table of Contents

Related Manuals for Esoteric I-03


Summary of Contents for Esoteric I-03
-
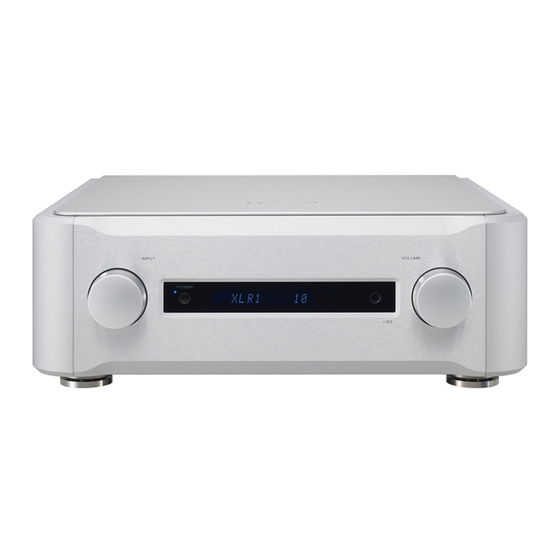
Page 1: Integrated Amplifier
D01141820A I-03 Integrated Amplifier OWNER’S MANUAL... -
Page 2: Important Safety Instructions
DO NOT REMOVE THE EXTERNAL CASES OR CABINETS TO EXPOSE THE ELECTRONICS. NO USER SERVICEABLE PARTS ARE WITHIN. o IF YOU ARE EXPERIENCING PROBLEMS WITH THIS PRODUCT, CONTACT ESOTERIC FOR A SERVICE REFERRAL. DO NOT USE THE PRODUCT UNTIL IT HAS BEEN REPAIRED. For U.S.A. -
Page 3: Table Of Contents
Contents Thank you for choosing ESOTERIC. Read this manual carefully to get the best performance from this unit. What’s in the box ........... . 3 Before Use . -
Page 4: Before Use
Read this before attempting any operations. Placement of the unit This unit is heavy. Take care to prevent injuries when lifting and installing it. o High-quality tool steel is used for the spike feet, securely attached to the bottom of the unit. Although the outer feet may appear loose, the weight of the unit causes them to become firm and secure. -
Page 5: Identifying The Parts (Main Unit)
INPUT Turn this knob to select a source. Select the terminal that is connected to the device you want to play (page 12). In setup mode, turn this knob to change the setting of each item (pages 14, 15). o You can assign names to the input terminals. You can also set the terminals to be skipped when you do not want to use them (pages 17, 18). -
Page 6: Identifying The Parts (Remote Control Unit)
In such cases, the same controls on the remote control and main unit will operate similarly. The buttons not mentioned in this chapter do not work with the I-03. However, they can be used for other Esoteric products. -
Page 7: Remote Control Unit
The included remote control allows this unit to be operated from a distance. Point the remote control unit at the main unit’s remote sensor within 23 feet (7 m) of the main unit. Remote sensor 7 m (23 feet) o Depending on the angle, reception might be difficult. Use the remote control from directly in front of the unit as much as possible. -
Page 8: Connections
After all other connections are complete, connect the power cord plug to the AC wall socket. o Read the instructions of each component you intend to use with this unit. o Be sure to connect each plug securely. To prevent hum and noise, do not bundle the connection cords. XLR pin assignment 1. -
Page 9: Power Cord Receptacle
AC wall socket. Do not use any power cords other than the one included with this unit or a power cord specified by ESOTERIC. Use of other power cords may result in fire or cause electric shock. -
Page 10: Speaker Connections
After all other connections are complete, connect the power cord plug to the AC wall socket. o Read the instructions of each component you intend to use with this unit. o The metal portions of the two separate wires should not touch or an electrical short can occur. Shorted wires can create a fire hazard or induce a failure in your equipment. -
Page 11: Connections When Using As A Pre Amplifier
Using speaker cables with bare wire Turn the terminal cap counterclockwise to loosen it. Insert the bare wire end properly into the terminal hole, and then tighten the terminal cap. o Do not insert the insulation coating into the terminal hole. Insert only bare wire. -
Page 12: Basic Operation
The blue indicator lights. o When connected to an external power amplifier, turn on the power of the power amplifier after turning on the I-03. Turn the INPUT knob to select an input source. The selected source is shown on the display. -
Page 13: Dimmer/Muting
Press the POWER button to turn off the I-03. Turn off the power of the connected input source devices. Listening with headphones For private listening, insert a 6.35 mm (1/4”) stereo headphone plug into the PHONES jack, and then adjust the volume by turning the VOLUME knob. -
Page 14: Balance And Input Level Settings
Balance and output level can be adjusted in the following steps: o You can specify different settings for each input terminal. Turn the INPUT knob to select the input source. Press the SETUP button repeatedly to select the menu item to be set. Each time the SETUP button is pressed, the item changes as follows: Bal >... -
Page 15: Additional Settings
Additional settings are available. o See “Available setup items and settings” from the next page for each setting. Changing settings Press and hold the SETUP button for more than 2 seconds. Hold down more than 2 sec. “Disp>” appears on the display and the unit enters the setup mode. - Page 16 Available setup items and settings Volume display Display: Disp>*** Changes the volume display. The default setting is “Step”. Step The volume level changes in steps from 0 to 99. The volume level changes in steps from -∞ dB dB to 0.0 dB. “---“...
- Page 17 o When “THRU” is selected for RCA2 terminals and sound signals are output from the terminals, you cannot use the VOLUME knob/ control buttons of this unit. When you select “THRU”, be sure to connect the RCA2 terminals to a device that allows you to control the volume level at the device side.
- Page 18 Creating your own input terminal name. 1 Press the INPUT buttons (</>) repeatedly until “88888 ” appears while the input terminal name (XLR1, XLR2, RCA1, RCA2 or RCA3) and “=” are displayed. 2 Press the ON button. 3 Input the letters. Press the INPUT buttons (</>) to move the cursor.
-
Page 19: Troubleshooting
If you experience any problems with the unit, please take a moment to look through this chart and see if you can solve the problem yourself before you call your dealer or ESOTERIC customer service/ technical support. Moreover, the problem might be caused by something other than this unit. -
Page 20: Specifications
Speaker Outputs Rated output power ..... . .240 W + 240 W (1 kHz, 6 Ω) Maximum output power 320 W + 320 W (1 kHz, 0.1 %, 6 Ω) (JEITA) Total harmonic distortion . -
Page 21: Rear Panel Layout
Rear Panel Layout... - Page 22 For European customers Disposal of electrical and electronic equipment (a) All electrical and electronic equipment should be disposed (b) By disposing of electrical and electronic equipment correctly, (c) Improper disposal of waste electrical and electronic equipment (d) The Waste Electrical and Electronic Equipment (WEEE) (e) Return and collection systems are available to end users.
- Page 23 Les produits vendus en Europe sont fabriqués conformément avec la directive européenne RoHS. o La información de la siguiente tabla se aplica únicamente a los productos de venta en la República Popular China. o Los productos vendidos en el espacio europeo se fabrican en conformidad con la directiva europea RoHS. I-03...
- Page 24 TEAC EUROPE GMBH Bahnstraße 12, D-65205 Wiesbaden-Erbenheim, Deutschland Phone: 0611-71580 This appliance has a serial number located on the rear panel. Please record the serial number and retain it for your records. Model name: I-03 Serial number: 0411 . MA-1693A...