
Related Manuals for Elation 5R


Summary of Contents for Elation 5R
- Page 1 Platinum Spot 5R Elation Professional 6122 S Eastern Ave Los Angeles, Ca 90040 www.elationlighting.com Rev. 11/10/2010 - visage Version 1.2...
- Page 2 Platinum Spot 5R™ ©Elation Professional, Los Angeles Ca. www.ElationLighting.com...
-
Page 3: Table Of Contents
DMX Channel Values…………………………………………………………… 43 14. Error Codes………………………………………………………………………….……. 48 15. Cleaning and Maintenance……………………………………………………………… 51 16. Photometric Data………………………………………………………………………….52 17. Gobo Patterns……………………………………………………………..……………... 53 18. Dimensional Drawings………………………………………………….……………….. 54 19. Circuit Schematic………...………………………………………………………………. 55 20. Technical Specifications…………………………………………...………….……….…56 21. Warranty……………………………………………………………………………………58 ©Elation Professional, Los Angeles Ca. www.ElationLighting.com... -
Page 4: General Information
INTRODUCTION: Congratulations, you have just purchased one of the most innovative and reliable lighting fixtures on the market today! The Platinum Spot 5R™ has been designed to perform reliably for years when the guidelines in this booklet are followed. Please read and... -
Page 5: Warranty Registration
Lamp Replacement: Please note that due to the nature of the Platinum 5RLamp and the optical path of the Platinum Spot 5R it is imperative to replace the lamp at the rated 2000 hour lamp life! UV RADIATION: This fixture emits intense UV radiation, which is harmful to the eyes and skin. - Page 6 This fixture is designed for use indoors. Use of this fixture outdoors will void the manufactures warranty. Please be aware that damages caused by manual modifications to the device are not subject to warranty. ©Elation Professional, Los Angeles Ca. www.ElationLighting.com...
-
Page 7: Safety Instructions
2. Never touch the fixture during normal operation. This can cause severe personnel injuries and/or damage to the fixture. 3. Be sure to unplug the Platinum Spot 5R™ from the power outlet before performing any service related issues. 4. Lamp Replacement; Allow at least 15 minutes after disconnecting main power before you open the Platinum Spot 5R™. - Page 8 Important Notice: Damages resulting from the disregard of safety and general user instructions found in this user manual are not subject to any warranty claims. as sensitive persons may suffer an epileptic shock. ©Elation Professional, Los Angeles Ca. Never touch the device during operation! The housing may heat up Never look directly into the light source, Platinum Spot 5R™...
-
Page 9: Features
• Prism and prism rotation, with 16 prism macros • Frost Filter for Soft and Hard Edge Spot • Bright Phillips Platinum 5R Lamp (160w / 8000K / 2000Hrs / 7950Lm) • Dimmer intensity from 0%~100% • Electronic Power Supply (120v/60Hz) •... -
Page 10: General Guidelines
Do not permit operation by persons not qualified for operating this type of theatrical fixture; most damages are the result of operations by nonprofessionals. Please use the original packaging to transport the fixture in for service. ©Elation Professional, Los Angeles Ca. www.ElationLighting.com... -
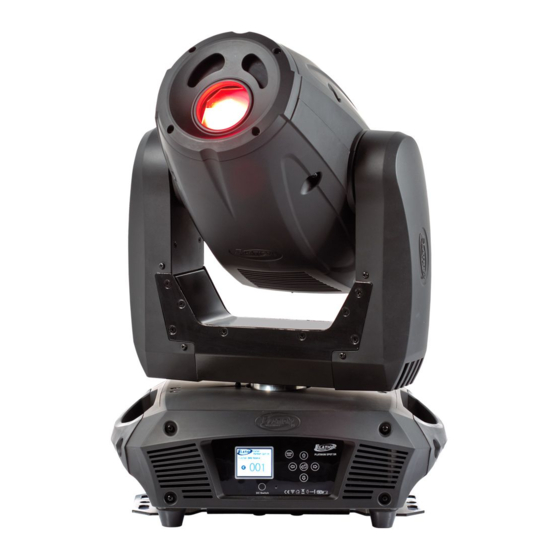
Page 11: Fixture Overview
8: Mode/Esc Button 9: Up Button 10: Enter Button 11: Handle 12: Lamp Access Panel 13: 3-Pin DMX in 14: 3-Pin DMX out 15: 5-Pin DMX in 16: 5-Pin DMX out 17: Power Cord 18: Fuse ©Elation Professional, Los Angeles Ca. www.ElationLighting.com... - Page 12 12. Lamp Access Panel – This panel provides access to the lamp and lamp socket assembly. Always allow ample time for the lamp to cool before attempting access to the lamp and lamp socket. ©Elation Professional, Los Angeles Ca. www.ElationLighting.com...
- Page 13 Elation Service Technician. Using a fuse other than that specified could seriously damage the unit and will void your manufactures warranty. ©Elation Professional, Los Angeles Ca. www.ElationLighting.com...
-
Page 14: Lamp Installation
Lamp Protection Circuitry Because of the nature of the extremely short gap of the Platinum 5R Lamp and the tight nature of the internal optical system it is imperative that the lamp be replaced every 2000 hours. This is done to protect the internal optical system as well as prevent accidental lamp explosion, which could lead to hot glass particles falling from the fixture. -
Page 15: Lamp Installation
Before reassembling the unit, be sure the new lamp is securely seated in the lamp socket. Always be sure to only use specified lamp types! (Philips MSD Platinum 5R). 6. Once the lamp has been inserted and secured into the socket, follow the lamp optimization instructions outlined below, then lock the lamp cover back in to place by securing screws “A”... -
Page 16: Lamp Optimization
Please remember that a MSD Platinum 5R lamp is not a hot-restrike lamp therefore, you must wait approximately 15 minutes before you can attempt to strike the lamp once it has been turned off. -
Page 17: Mounting And Installation
1.5 feet Mounting The Platinum Spot 5R™ is fully operational in two different mounting positions, hanging upside-down from a ceiling, or set on a flat level surface (see illustration on next page). Be sure this fixture is kept at least 0.5m away from any flammable materials (decoration etc.). -
Page 18: Mounting Points
Improper installation can result in bodily injury. CAUTION! Be sure a qualified electrician performs all electrical connections. Be sure to complete all rigging and installation procedures before connecting the main power cord to the appropriate wall outlet. ©Elation Professional, Los Angeles Ca. www.ElationLighting.com... -
Page 19: Securing
Securing the Platinum Spot 5R™ Regardless of the rigging option you choose for your Platinum Spot 5R™ always be sure to secure your fixture with a safety cable. The fixture provides a built-in rigging point for a safety cable on the hanging bracket as illustrated above. -
Page 20: Understanding Dmx
1 to that fixture no matter where it is located in the DMX chain. The Platinum Spot 5R™ can be controlled via DMX-512 protocol. The Platinum Spot 5R™ is a 17 channel DMX fixture (17 default, can also be 15 or 24). The DMX address is set electronically using the controls on the LCD menu. -
Page 21: 3-Pin To 5-Pin Conversion
Always be sure daisy chain your in and out data connections, never split or “Y” your DMX connections unless you are using an approved DMX splitter such as the Elation Opto Branch 4™ or DMX Branch/4™. ©Elation Professional, Los Angeles Ca. www.ElationLighting.com... -
Page 22: Dmx Terminator
Fixture DMX addressing; All fixtures should be given a DMX starting address when using a DMX controller, so the correct fixture responds to the correct control signal. This digital starting address is the ©Elation Professional, Los Angeles Ca. www.ElationLighting.com... - Page 23 In the case of the Platinum Spot 5R™, which is a 17 channel fixture (default), you should set the starting DMX address of the first unit to 1, the second unit to 18 (17 + 1), the third unit to 35 (17 + 18), and so on.
-
Page 24: Fixture Menu
Platinum Spot 5R™ 9. FIXTURE MENU On-Board System Menu: The Platinum Spot 5R™ comes with an easy to navigate, full color system menu. This next section will detail the functions of each command in the system menu. LED Control Panel: The control panel located on the base of the fixture allows you to access the main menu and make all necessary adjustments to the Platinum Spot 5R™. - Page 25 Pan Reverse Tilt Reverse Pan Degree Feedback Movement Speed Mic Sensitivity Hibernation V1.0 Mode Fans Control Auto Fans Speed High Fans Speed ©Elation Professional, Los Angeles Ca. A001~AXXX PAN…… Slave1,Slave2,Slave3 Master / Alone Master / Alone XXXX(Hours) XXXX(Hours) XXXX(Hours) XXXX(Hours) XXXX(Minute)
- Page 26 Auto Pro Part 3 = Program 1 ~ 10 Program 3 Edit Program Program 1 Program 10 Edit Scenes Edit Scene ~ Edit Scene ©Elation Professional, Los Angeles Ca. 02~60m 05m ON/OFF ON/OFF Program Test Step 01=SCxxx Step 64=SCxxx Pan,Tilt,……...
- Page 27 “Edit program”. You can edit the individual scenes under “Edit scenes”. With this function, you can run the individual scenes either automatically, i.e. with the adjusted Step-Time. ©Elation Professional, Los Angeles Ca. Scenes external source www.ElationLighting.com...
- Page 28 “XXXX”, where “XXXX” represents the number of hours the lamp has been running since it was last struck. This counter is automatically reset after every power-on. Timer Password Use this function to enter the “Clear Last Run” password. Password is “038” ©Elation Professional, Los Angeles Ca. www.ElationLighting.com...
-
Page 29: Software Version
• Press “ENTER” to confirm. • Press the Mode/Esc-button to return to the main menu. 9.3.2 Automatic La-On When in the “ON” position, this function will automatically turn the lamp on when power is applied to the fixture ©Elation Professional, Los Angeles Ca. www.ElationLighting.com... - Page 30 No DMX Status – This function dictates how the fixture will function if it looses DMX signal during normal operation. The default function is set to hold, in which the fixture will lock into the last DMX signal it received and remain in that position until it ©Elation Professional, Los Angeles Ca. www.ElationLighting.com...
- Page 31 Movement Speed – This function changes the speed function of the Pan and Tilt motors. Use this function intergrading Platinum Spot 5R into lighting rigs that includes original Design Spot 250s. There are 3 different mode variations;...
- Page 32 Display Reverse – This function will allow the entire display to be flipped by 180˚ to allow for better view when the fixture is hung from truss or a ceiling. This function is disabled as default. ©Elation Professional, Los Angeles Ca. www.ElationLighting.com...
- Page 33 Reset Shutter: This function will only reset the blackout shutter to the home position. Reset Others: This function will reset all other motors not associated with any in the previously listed reset commands to the home position. ©Elation Professional, Los Angeles Ca. www.ElationLighting.com...
- Page 34 9.8 EDIT PROGRAM: - The fixture comes equipped with a built-in DMX recorder that allows custom programs to be installed and recalled directly from the fixture’s control board. ©Elation Professional, Los Angeles Ca. www.ElationLighting.com...
- Page 35 9.8.4 Rec Controller - The Platinum Spot 5R features an integrated DMX recorder. Pre-programmed scenes can be transmitted to the fixture via any DMX compliant controller.
-
Page 36: Dmx Addressing
4. “Address via DMX” is the menu function that activates the RDMX function. 5. Press the UP button to display “ON” to activate this function, or “OFF” to deactivate this function. 6. Press ENTER to confirm. 7. Press MODE/ESC to return to the main menu. ©Elation Professional, Los Angeles Ca. www.ElationLighting.com... - Page 37 420, set channel 1 to a value of “7,” channel 2 to "8" and channel 3 to "164" (256+164=420). 4. Wait for approximately 20 seconds for the unit to complete the address reset function. ©Elation Professional, Los Angeles Ca. www.ElationLighting.com...
-
Page 38: Operation
11. OPERATION Operating Modes: The Platinum Spot 5R™ can operate in six different modes. This next section will detail the differences in the operating modes. • Auto Program Mode (Master) - The fixture will chase through the built-in programs, sending a DMX control signal to all other fixtures connect via DMX cables instruction for a synchronized light show. - Page 39 A DMX controller allows you to create unique programs tailored to your individual needs. The Platinum Spot 5R™ uses 17 (default up to 24) DMX channels. See page 42 for detailed description of the DMX traits. To control your fixture in DMX mode, follow the set-up procedures on pages 19-22 as well as the set-up specifications that are included with your DMX controller.
-
Page 40: Working With Built-In Programs
You can repeat the procedure for all functions listed below: “Auto Program” – Allows access to all 17 of the fixture’s DMX traits. “PAN” – pan movement. ©Elation Professional, Los Angeles Ca. www.ElationLighting.com... - Page 41 DMX controller follow the procedures below: Using your DMX control build and store scenes as you normally would. Once you have built all your required scenes, enter the fixtures main menu and toggle to Step 2 – Editing Programs. ©Elation Professional, Los Angeles Ca. www.ElationLighting.com...
- Page 42 Operation” on page 37 for proper set-up instructions. Select “Alone” when running a single fixture or when multiple fixtures in stand-alone mode. See section 11.1 “Stand-Alone Operation” on page 37 for proper set-up instructions. ©Elation Professional, Los Angeles Ca. www.ElationLighting.com...
-
Page 43: Dmx Channel Traits
TILT Movement 8bit: 0-255 Tilt Movement By 270 Tilt Fine 16bit: 0-255 Fine control of Tilt movement Color Wheel: 0-13 Open / white 14-27 Color 1 28-41 Color 2 42-55 Color 3 56-69 Color 4 ©Elation Professional, Los Angeles Ca. Function www.ElationLighting.com... - Page 44 128-189 Forwards gobo rotation from fast to slow 190-193 No rotation 194-255 Backwards gobo rotation from slow to fast Rotating gobo indexing Fine 0-255 Fine indexing Fixed Gobos: Open/hole 8-15 Gobo 1 16-23 Gobo 2 24-31 Gobo 3 ©Elation Professional, Los Angeles Ca. www.ElationLighting.com...
- Page 45 3 facet rotating prism, Prism / Gobo macros: 0-31 Open 32-127 Rot. Prism 128-135 Macro 1 136-143 Macro 2 144-151 Macro 3 152-159 Macro 4 160-167 Macro 5 168-175 Macro 6 176-183 Macro 7 184-191 Macro 8 192-199 Macro 9 ©Elation Professional, Los Angeles Ca. www.ElationLighting.com...
- Page 46 Iris: 0-191 Maximum diameter to minimum diameter 192-223 Pulse closing fast to slow 224-255 Pulse opening slow to fast Iris Fine: 0-255 Iris Fine Frost: 0-191 Frost 0~100% 192-223 Pulse opening fast to slow ©Elation Professional, Los Angeles Ca. www.ElationLighting.com...
- Page 47 Other motor reset 100-119 Internal program 1 120-139 Internal program 2 140-159 Internal program 3 160-179 Internal program 4 180-199 Internal program 5 200-219 Internal program 6 220-239 Internal program 7 240-255 Auto program by music ©Elation Professional, Los Angeles Ca. www.ElationLighting.com...
-
Page 48: Error Codes
The head is not located in the default tilt position after start-up or after a reset command. This message will appear after a fixture reset if the tilt magnetic-indexing circuit malfunctions (sensor failed or magnet is missing) or there is a stepper motor failure (defective motor or a ©Elation Professional, Los Angeles Ca. www.ElationLighting.com... - Page 49 PCB). The Prism wheel is not located in the default position after the reset. Iris error: This message will appear after the reset of the fixture and if the magnetic-indexing circuit ©Elation Professional, Los Angeles Ca. www.ElationLighting.com...
- Page 50 This message will appear after the reset of the fixture and if the magnetic indexing circuit malfunctions (sensor failed or magnet missing) or the stepping-motor is defective (or its driver circuit on the main PCB). The focus motor is not located in the default position after the reset. ©Elation Professional, Los Angeles Ca. www.ElationLighting.com...
-
Page 51: Cleaning And Maintenance
There are no user serviceable parts inside this fixture with the exception of the lamp. Please refer all other service related issues to an authorized Elation service technician. Should you decide to service the fixture yourself please order genuine Elation parts directly from Elation. ©Elation Professional, Los Angeles Ca. www.ElationLighting.com... -
Page 52: Photometric Data
Platinum Spot 5R™ PHOTOMETRIC DATA: ©Elation Professional, Los Angeles Ca. www.ElationLighting.com... -
Page 53: Gobo Patterns
Platinum Spot 5R™ GOBOS: ©Elation Professional, Los Angeles Ca. www.ElationLighting.com... -
Page 54: Dimensional Drawings
Platinum Spot 5R™ DIMENSIONAL DRAWINGS: ©Elation Professional, Los Angeles Ca. www.ElationLighting.com... -
Page 55: Circuit Schematic
Platinum Spot 5R™ 19. CIRCUIT SCHEMATICS ©Elation Professional, Los Angeles Ca. www.ElationLighting.com... - Page 56 B. For warranty service, send the product only to the Elation Professional shipping charges must be pre-paid. If the requested repairs or service (including parts replacement) are within the terms of this warranty, Elation Professional shipping charges only to a designated point within the United States.
- Page 57 The consumer’s and or Dealer’s sole remedy shall be such repair or replacement as is expressly provided above; and under no circumstances shall Elation Professional® be liable for any loss or damage, direct or consequential, arising out of the use of, or inability to use, this product.
-
Page 58: Technical Specifications
120v/60Hz Fuse Protection 120V = 5A/250V, GMA (5x20mm fine-wire fuse) 220V = 3.15A/250V, GMA (5x20mm fine-wire fuse) Power Consumption 350 Watts Lamp Type MSD Platinum 5R (Phillips) Lamp Wattage 150-189 Life time 2000 Hrs Color temperature 8000˚ K Luminous flux... - Page 59 Operating Noise Levels (Base level 46.8dB) Mode: Auto 1m = 55.9 dB Mode: High 1m = 56.2 dB Mode: Auto 1m = 51.6 db (Lamp off) Ambient Operating Temperature -25˚C ~ 45˚ C Specifications subject to change without notice. ©Elation Professional, Los Angeles Ca. www.ElationLighting.com...
- Page 60 Platinum Spot 5R™ Elation Professional 6122 S. Eastern Ave. Los Angeles, CA. 90040 323-582-3322 / 323-832-9142 fax www.ElationLighting.com / Info@ElationLighitng.com ©Elation Professional, Los Angeles Ca. www.ElationLighting.com...