Table of Contents
Advertisement
XDVDN9131
INSTALLATION/OWNER'S MANUAL
DVD Multimedia Receiver with GPS Navigation and 7" Touch Screen Display
Safety Notes:
The DVD video display of the in-dash unit will not operate while the vehicle is moving. This is a safety feature
to prevent driver distraction. In-dash DVD video functions will only operate when vehicle is in Park and the
parking brake is engaged. It is illegal in most states for the driver to view video while the vehicle is in motion.
Advertisement
Table of Contents
Troubleshooting

Related Manuals for Dual XDVDN9131


Summary of Contents for Dual XDVDN9131
- Page 1 XDVDN9131 INSTALLATION/OWNER’S MANUAL DVD Multimedia Receiver with GPS Navigation and 7” Touch Screen Display Safety Notes: The DVD video display of the in-dash unit will not operate while the vehicle is moving. This is a safety feature to prevent driver distraction. In-dash DVD video functions will only operate when vehicle is in Park and the...
- Page 2 Copyright Notes This product incorporates copyright protection technology that is protected by method claims of certain U.S. patents and other intellectual property rights owned by Macrovision Corporation and other rights owners. Use of this copyright protection technology must be authorized by Macrovision Corporation, and is intended for home and other limited viewing uses only unless otherwise authorized by Macrovision Corporation.
-
Page 3: Table Of Contents
Troubleshooting ..........XDVDN9131... - Page 4 XDVDN9131 Upon installation of this Monitor/DVD player (“unit”) into a vehicle, the driver of the vehicle must not operate this unit by watching videos or playing video games while driving. Failure to follow this instruction could lead to driver distraction which could result in serious injury or death to the vehicle’s occupants or persons outside the vehicle and/or...
-
Page 5: Safety Information/Precautions
Please read all instructions carefully before attempting to install or operate. Due to its technical nature, it is highly recommended that your DUAL XDVDN9131 is installed by a professional installer or an authorized dealer. This product is only for use in vehicles with 12VDC negative ground only. - Page 6 XDVDN9131 Preparation Before You Start • Disconnect negative battery terminal. Consult a qualified technician for instructions. • Avoid installing the unit where it would be subject to high temperatures, such as from direct sunlight, or where it would be subject to dust, dirt or excessive vibration.
- Page 7 When replacing a fuse, make sure to use the correct type and amperage. Using an incorrect fuse could damage the unit. The XDVDN9131 uses (2) 10 amp ATM mini style fuses. There is one fuse located on the back of the unit and one fuse located inside the in-line filter box.
- Page 8 XDVDN9131 Installation - GPS Antenna & Microphone • Determine a suitable location for mounting the GPS antenna. For optimum reception, the antenna should be mounted in the center of the vehicle roof with a minimum of 6” from any window. The antenna can also be mounted to the rear trunk lid at least 4”...
- Page 9 Remove the battery from the battery holder Install the new battery Make sure to keep the (+) side up Insert the battery holder XDVDN9131 OPERATION IR Remote Preparation Notes: • Remove the battery if the remote will not be used for a month or longer •...
-
Page 10: Control Locations - Monitor Closed
XDVDN9131 Control Locations - Monitor Closed Bluetooth Microphone Eject Display/Info Secondary LCD Auto Store/Preset Scan Open/Close Monitor Front Panel Release 3.5mm A/V Input USB Input Secondary LCD Information Note: Secondary LCD only functions when TFT monitor is closed. OPERATION Stereo indicator... - Page 11 Fast Forward Power/Volume/EQ Navigation Voice Announcement Volume Level Channel/Chapter/Track Down Fast Reverse XDVDN9131 Control Functions - Monitor Closed Built-in microphone for Bluetooth hands-free calls. Press once to eject disc. When the monitor is closed, press DISP to toggle display between information available for the current mode such as clock, frequency, track, song or chapter information.
- Page 12 XDVDN9131 Control Functions - Monitor Closed Mode End Button Mute Infrared Sensor Caution Reset Front Panel Removal/Attachment Reset Disc-in Indicator OPERATION Press MODE to select between Tuner, Disc (which includes DVD and CD playback), operation of iPod, USB, Bluetooth, SD, Auxiliary 1 and Auxiliary 2 inputs.
- Page 13 • The last position of the monitor can be saved in memory. When “TFT Auto Open” is set to "On" in the Main Setup menu, the monitor will return to its last position automatically the next time the unit is turned on. XDVDN9131 OPERATION Close Monitor...
-
Page 14: Control Locations - Remote
XDVDN9131 Control Locations - Remote Power Navigation Open/Close Mode Volume Up Key #1 Key #2 Key #3 Volume Down Key #4 Key #5 Key #6 Mute/Loudness Key #7 Key #8 * The remote control uses one 3 volt Lithium CR2025 battery. For best performance, replace only with CR2025 or equivalent. - Page 15 Zoom Audio Angle Sub-Title XDVDN9131 Control Functions - Remote Press once to turn the unit on, press again to turn unit off. Press to select between navigation mode and current source. Press once to open monitor; press again to close the monitor.
-
Page 16: General Operation
XDVDN9131 General Operation Power On/Off Mute Loudness Mode Optional Mode Selection Volume Audio Setup (from OSD) Audio Setup (from remote) OPERATION Momentarily press the volume control (PWR) or any other button (except EJECT) to turn the unit on. Hold for 3 seconds to turn the unit off. - Page 17 Turn the rotary Q or P to adjust the tint. (0 minimum/+20 maximum). Note: A video signal must be connected to A/V 1 or A/V 2 in order to access the COLOR SETUP menu. XDVDN9131 General Operation to step to the desired menu option: COLOR SETUP...
-
Page 18: General Operation
XDVDN9131 General Operation - Main Menu Main Menu Access Button/Icon Identification OPERATION There are two methods to access the MAIN menu: • Press MENU button on the remote control. • Touch MENU or the upper left corner of the touch screen from any mode (except Navigation). -
Page 19: Main Setup Menu
Tuner 00 : 00 Clock Clock Mode 12Hr Clock Display Beep XDVDN9131 • Press MAIN SETUP icon to access the Main setup mode. • Select desired parameter you wish to change. • Page will return back to previous screen after 15 seconds of inactivity or by pressing the RETURN arrow in the top right corner. - Page 20 XDVDN9131 Main Setup - Menu Settings Default Camera Image Normal TFT Auto Open Anti-theft Code 0000 Anti-theft Reset Unit Settings Default Tuner Gain Disc Gain iPod Gain USB Gain Navi Gain BT-HF Gain BT-A2DP Gain SD Gain AV/1 Gain AV/2 Gain...
- Page 21 Adjusting Radio Frequency Step 1 Touch MENU at the top left corner of screen. Step 2 Touch MAIN SETUP icon. Step 3 Touch USA. Step 4 Touch the setting for your region. Step 5 Touch RETURN to exit. XDVDN9131 OPERATION...
- Page 22 XDVDN9131 Main Setup - Adjusting the Clock 12Hr Clock Mode Step 1 Step 2 Step 3 Steps 4-6 OPERATION Touch MENU at the top left corner of screen. Touch MAIN SETUP icon. 3) Touch the current time in the CLOCK row.
- Page 23 1-866-382-5476 support in unlocking the system. Step 9 & 10 XDVDN9131 1) Touch MENU. 3) Touch down arrow icon. 5) Enter 0000, then press OK. 7) Touch Off. 9) Enter new 4-digit password (created in step 6), then press OK.
-
Page 24: Screen Setup Menu
XDVDN9131 Screen Setup - Menu Screen Setup Menu Settings Default Brightness (OSD) Screen Tilt TS Calibrate Calibration Touch Calibration to enter the Touch Screen calibration mode Version List OPERATION • From the main menu, press Setup mode. • Press the PAGE DOWN icon to access the Version List (pages 2 and 3). - Page 25 Step 1 Step 2 Step 3 Step 4 Step 5 XDVDN9131 1) Touch MENU at the top left corner of screen. 2) Touch SCREEN SETUP icon. 3) Touch [-] to reduce brightness. 4) Touch [+] to increase brightness. 5) Touch RETURN to exit.
- Page 26 XDVDN9131 Screen Setup - Setting TFT Angle Set for best viewing angle for your vehicle Step 1 Step 2 Step 3 Step 4 Step 5 OPERATION 1) Touch MENU at the top left corner of screen. 2) Touch SCREEN SETUP icon.
- Page 27 Step 1 Step 2 Step 3 & 4 Step 4 & 5 XDVDN9131 1) Touch MENU at the top left corner of screen. 2) Touch SCREEN SETUP icon. 3) Touch Calibration in TS Calibration row. 4) Touch the pointers as indicated on the screen.
-
Page 28: Am/Fm Tuner Overview
XDVDN9131 AM/FM Tuner Operation - OSD Overview Tuner Mode OPERATION From the main menu, touch TUNER icon on the screen to select AM/FM Tuner mode. Current Source Indicator Displays source currently playing. Main Menu Touch MENU to access the main menu. - Page 29 Indicates current frequency. Local / DX Tuning Mode Shows when local or distance tuning is on. Band Indicator Shows which band the radio is tuned to, FM1, FM2 or AM. XDVDN9131 OPERATION front panel or remote control.) front panel or remote control.)
-
Page 30: Am/Fm Tuner Operation
XDVDN9131 AM/FM Tuner Operation AM/FM Tuner Mode Band Manual Tuning Seek Tuning Storing Presets Auto Store Presets Preset Scan OPERATION From the main menu, touch TUNER icon to select AM/FM Tuner mode. From the remote control or the front panel: Press MODE until the current station information is displayed on the screen. - Page 31 XDVDN9131 OPERATION AM/FM Tuner Operation Direct Preset Tuning To select a desired station from the preset station list, touch any of the displayed station frequencies or preset numbers from the list. Use the up and down arrows on screen to select between the preset pages, if necessary.
- Page 32 XDVDN9131 Upon installation of this Monitor/DVD player (“unit”) into a vehicle, the driver of the vehicle must not operate this unit by watching videos or playing video games while driving. Failure to follow this instruction could lead to driver distraction which could result in serious injury or death to the vehicle’s occupants or persons outside the vehicle and/or...
-
Page 33: Dvd Setup
6. Note: DVD and AUX AV audio can be heard while the vehicle is in motion without engaging the parking brake. Follow these two initialization procedures carefully to allow video playback on on the XDVDN9131 front monitor: There are two situations to initiate the PARKING BRAKE sequence. First situation (if vehicle is moving): 1) Stop vehicle, put in Park, make sure PARKING BRAKE is off/released. - Page 34 Some DVD discs can be played only in certain playback modes according to the intentions of the software. As the XDVDN9131 plays discs according to their intentions, some functions may not work as intended. Please be sure to read the instructions provided with each disc. This player has been designed to play back DVD software that has been encoded for specific region areas.
- Page 35 XDVDN9131 OPERATION DVD Setup - Inserting a Disc Eject Button Disc Loading Slot Insert DVD with label facing upwards Inserting a Disc Press REL to fold down the front panel. With the label facing up, insert a standard size disc into the slot. Gently close the front panel, the disc will automatically begin playback.
- Page 36 XDVDN9131 DVD Setup - Touch Screen Controls Hidden Touch Screen areas There are several hidden TOUCH SCREEN areas as outlined below: while in DVD mode "A" area can be used in DVD, A/V 1 and A/V 2 modes to access MAIN menu.
- Page 37 Sub Title DVD Audio DVD Menu XDVDN9131 DVD Setup Menu - Language With the unit in DVD mode, press AREA E (bottom center of screen) to display the DVD transport controls (1). Press Setup (2) or press and hold the 0 key on the remote to access the DVD setup menu.
- Page 38 XDVDN9131 DVD Setup Menu - Video Settings Video Setup Menu Note: A DVD disc must be inserted to access these functions and features. TV Shape Angle Mark OPERATION With the unit in DVD mode, press AREA E (bottom center of screen) to display the DVD transport controls (1).
-
Page 39: Dvd Setup
Rating Setting Parental Password Override XDVDN9131 DVD Setup Menu - Rating With the unit in DVD mode, press AREA E (bottom center of screen) to display the DVD transport controls (1). Press Setup (2) or press and hold the 0 key on the remote to access the DVD setup menu. -
Page 40: Dvd Operation
XDVDN9131 DVD Operation - Touch Screen Controls Using the Hidden Touch Screen Controls Touch AREA E DVD Mode OPERATION From the main menu, touch the DISC icon on the screen to select DVD mode. Setup Menu Touch to access the DVD Setup menu. - Page 41 Note: Some DVD discs can be played only in certain playback modes according to the intentions of the software. As the XDVDN9131 plays discs according to their intentions, some functions may not work as intended. Please be sure to read the instructions provided with each disc.
-
Page 42: Dvd Operation
XDVDN9131 DVD Operation Playback Control Repeat Mode Play/Pause Stop Sub-Titles OPERATION Touch Area E to bring up the on-screen buttons. Touch to fast forward or Each subsequent press of the button will change the speed from normal to 2x to 4x to 8x to 16x to 32x and back to 1x. -
Page 43: Dvd Operation
XDVDN9131 OPERATION DVD Operation DVD Audio Touch AUD to change the audio stream. Each touch will cycle the audio stream. From the remote control: Press the AUDIO button to select the Audio stream. Notes: • Not all DVD's have multiple languages, therefore this function may be disabled or limited. - Page 44 XDVDN9131 CD Operation - OSD Overview CD Mode From the main menu, touch the DISC icon on the screen to select CD mode. Current Source Indicator Track Number Indicator Track Time Indicator Track Title List Clock Scroll bar Page Up OPERATION Displays source currently playing.
- Page 45 Touch INT to listen to 10 seconds of each track in order. Intro will appear next to the MENU button while this feature is activated. Touch INT again to exit Intro mode. XDVDN9131 OPERATION icon to see the next 6 tracks on the disc.
-
Page 46: Cd Operation
XDVDN9131 CD Operation Navigating the Track Title List Track Select Direct Select Direct Track Entry Fast Forward/Fast Reverse Intro Mode Random Mode OPERATION Navigate the track title list in one of two ways: • Using the Page Up and Page Down buttons on the screen. - Page 47 XDVDN9131 OPERATION CD Operation Repeat Mode Touch RPT to repeat a track. Rpt Trk will appear next to the MENU button while this feature is activated. Touch RPT again to exit Repeat Mode. From the remote control: Press to select Repeat. Press it a second time to disable Repeat.
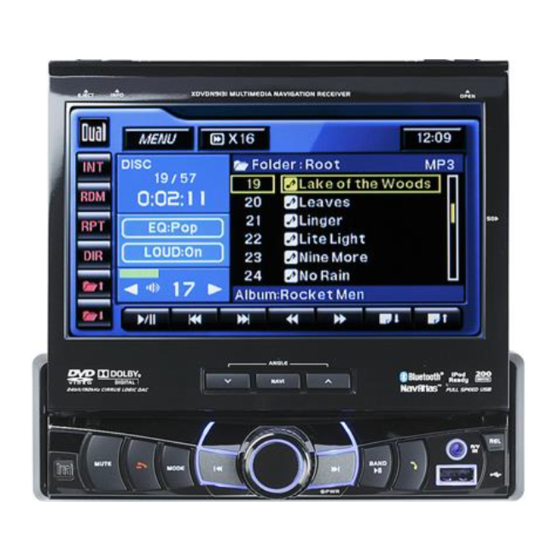
- Page 48 XDVDN9131 MP3/WMA/JPG Operation - OSD Overview MP3/WMA/JPG Mode OPERATION From the main menu, touch the DISC or USB icon on the screen. Current Source Indicator Displays source currently playing. File Number Indicator Displays current file number and total number of files in the current folder.
- Page 49 Touch INT to listen to 10 seconds of each track in the current folder and again to preview all tracks. Touch INT again to exit Intro mode. XDVDN9131 OPERATION icon to see the next 6 files in the current folder.
-
Page 50: Mp3/Wma/Jpg Operation
XDVDN9131 MP3/WMA/JPG Operation Audio to Image Indicator Folder List Navigating the Folder/Playlist File Select Direct Select Direct Track Entry Fast Forward/Fast Reverse Intro Mode OPERATION The Audio to Image indicator allows the selection of either audio (MP3 or WMA) or image (JPEG) files to be displayed in the Playlist. - Page 51 This is a safety feature to prevent driver distraction. The JPG image viewer function will only operate when vehicle is in Park and the parking brake is engaged as described on page 32. XDVDN9131 MP3/WMA/JPG Operation on the remote control to stop playback of the current track. Pressing to stop the slideshow.
- Page 52 XDVDN9131 USB/SD Operation - OSD Overview USB/SD Mode *Note: To provide the highest level of navigation performance, this model does not support JPG image file playback from SD cards. OPERATION From the main menu, touch the USB or SD icon on the screen.
- Page 53 Touch INT to listen to 10 seconds of each track in the current folder and again to preview all tracks. Touch INT again to exit Intro mode. XDVDN9131 OPERATION icon to see the next 6 files in the current folder.
-
Page 54: Usb/Sd Operation
XDVDN9131 USB/SD Operation USB/SD Connection Audio to Image Indicator Note Folder List Navigating the Folder/Playlist Track Select Direct Select Direct Track Entry OPERATION Connect a USB device or insert an SD card. When inserting an SD card, the label should face away from the unit. Note: The unit will automatically switch to SD mode when an SD card is inserted. - Page 55 Repeat Mode Play/Pause Stop XDVDN9131 Use the Fast Forward or Fast Reverse on-screen buttons to speed up the playback. Each subsequent press of the button will change the speed from normal to 2x to 4x to 8x to 16x to 32x and back to 1x.
- Page 56 XDVDN9131 Media Compatibility - Disc MEDIA File Type File System ISO9660 ISO9660 Extension Other Extensions File .mp3/.MP3/.Mp3/.mP3 Extension MPEG Format Sampling Frequency Bitrate Other Information Total Folder Number File Number via Folder MP3 ID3 TAG WMA TAG OPERATION Level 1, Level 2...
- Page 57 • The JPG image viewer function will only operate when vehicle is in park and the parking brake is engaged as described on page 32. • Due to ongoing technological advancement, some USB flash drives and/or SD cards may be incompatible with this unit. XDVDN9131 Media Compatibility - USB/SD FAT 12 FAT 16/FAT 32 .wma/.WMA...
- Page 58 XDVDN9131 Media Compatibility - Notes Media Compatibility Playback Order Compatible Recording Formats Additional MP3/WMA Information Notes OPERATION The following types of discs are compatible: • CD-DA, CD-ROM (ISO), CD-R, CD-RW • DVD Video, DVD+R/RW, DVD-R/RW The following types of discs/files are not compatible: •...
- Page 59 Playlist Clock Scroll bar Page Up Page Down XDVDN9131 Operation of iPod - OSD Overview Displays source currently playing. Displays current song number and total number of songs. Shows the elapsed time of the current song. Displays the artist information for the currently selected song.
- Page 60 XDVDN9131 Operation of iPod - OSD Overview OPERATION Fast Forward Touch the icon to fast forward at 2x speed. Touch again to cancel. Fast Reverse Touch the icon to fast reverse at 2x speed. Touch again to cancel. Album Information Displays available album information for the current song.
-
Page 61: Operation Of Ipod
Touch RDM to shuffle the songs in the current group. Random will appear next to the MENU button while this feature is activated. Touch RDM again to exit Random Mode. XDVDN9131 Operation of iPod on-screen button to go back to a previous menu. For example,... - Page 62 XDVDN9131 Operation of iPod Repeat Mode Play/Pause High Speed Search Playing Music Files Selecting Music By: Playlists Artists Albums Genres Songs Composers Audiobooks Podcasts OPERATION Touch RPT to repeat a song. Repeat will appear next to the MENU button while this feature is activated. Touch RPT again to exit Repeat Mode.
- Page 63 This is a safety feature to prevent driver distraction. Video/photo functions will only operate when vehicle is in Park and the parking brake is engaged as described on page 32. XDVDN9131 Operation of iPod icon to access the search menu.
-
Page 64: Operation Of Ipod
XDVDN9131 OPERATION Operation of iPod Viewing Photos 1. Touch icon to access the search menu. 2. Touch Photo, then begin slideshow from your iPod device. Touch Area A to return to the search menu. Photo Controls Notes Character support - only alphanumeric characters can be displayed on the secondary LCD (ASCII type). -
Page 65: Auxiliary Inputs
The unit will automatically select camera mode when connected to the reverse lamp circuitry. Refer to page 6 for details. Anytime the reverse gear is selected, the panel will open and select camera mode automatically. XDVDN9131 Auxiliary Inputs - A/V 1 & A/V 2 OPERATION... - Page 66 XDVDN9131 Bluetooth - OSD Overview (Optional) ® Before using Bluetooth Make sure the Bluetooth option is set to On in the Bluetooth Setup menu. From the main menu, touch the Bluetooth icon on the screen. A Bluetooth icon will Bluetooth Mode appear anytime a Bluetooth device is connected.
- Page 67 During hands free operation, some noise may be heard when using a mobile device with this head unit, depending on the mobile device and or the communication environment. XDVDN9131 Bluetooth - OSD Overview (Optional) ®...
- Page 68 When prompted by your mobile device, enter 1234 for the PIN or pass code. The device name of the head unit will show up as "DUAL BT". During the pairing process, the Bluetooth icon will flash. After the pairing process has completed, and the device is connected, the Bluetooth icon will illuminate steady.
-
Page 69: Bluetooth Operation
Notes It is not possible to hear navigation voice guidance when using Bluetooth to make a hands-free phone call. Voice guidance will resume once the call is ended. XDVDN9131 Bluetooth - Operation (Optional) ®... - Page 70 Touch to skip ahead to the next song. on the remote control to stop playback. or when the device or the XDVDN9131 is powered off/on. Refer to the owner's manual of your mobile device for more information.
- Page 71 Remaining travel distance from current position to destination (To go to Route Summary page, tap anywhere from 9-12) Menu button: Tap to go to Menu Map scale: Indicates current map scale level Voice guidance repeat button: Repeats the last voice instruction XDVDN9131 OPERATION Navigation...
- Page 72 XDVDN9131 Navigation Turn-by-Turn Screen Route Summary Screen Navigation Main Menu Where to? My Route Clear route Settings OPERATION The main menu can be accessed by pressing the MENU button on the map screen. Descriptions of each button are as follows: Allows you to search for a location in various ways.
- Page 73 Search for points of interest by point of interest name. POI Name Search for points of interest by category in a certain city. POI in City Search for points of interest by telephone number. POI Telephone No. Go to page 1. XDVDN9131 OPERATION Navigation...
- Page 74 XDVDN9131 Navigation How to plan your first route 1. Press Menu, Where To?, then Address 2. Search for a City Name 3. Search for a Street Name 4. Enter House number OPERATION Your current position (and direction) is indicated on the map by the red arrow For your convenience, previously searched state/province name and city name are initially selected on the first stage of address search.
- Page 75 You can set the automatic zooming at intersection and/or on speed. Home You can set or change your home location. Label on Map You can turn on/off displaying various labels on the map. Go to page 2. XDVDN9131 OPERATION Navigation...
- Page 76 XDVDN9131 Navigation Settings Page 2 of 3 Voice/Text Language Routing Options Units Set Clock Time Zone Speed Limit Fuel Cost Settings Page 3 of 3 Volume Keyboard About Restore Settings OPERATION Settings allows you to customize the settings of the Navigation system.
-
Page 77: Warranty
Who is covered? This warranty is extended to the original retail purchaser for products purchased from an authorized Dual dealer and used in the U.S.A. What is covered? This warranty covers all defects in material and workmanship in this product. The... -
Page 78: Eula
XDVDN9131 End-User License Agreement (EULA) IMPORTANT – READ THESE TERMS AND CONDITIONS OF THIS END USER LICENSE AGREEMENT CAREFULLY BEFORE USING THE SOFTWARE. This End-User License Agreement (“EULA”) is a legal agreement between you and EnGIS Technologies, Inc. (EnGIS). This EULA applies to (the use of) EnGIS software, including Internet-based services, and all contents and contents programs offered by EnGIS (“Software”). -
Page 79: Eula
11) GOVERNING LAW: This EULA shall be governed by the laws of the state of California, USA. The United Nations Convention on Contract for the international Sale of Goods is hereby excluded in its entirety from application to this Agreement. XDVDN9131 End-User License Agreement (EULA) OPERATION... -
Page 80: Specifications
XDVDN9131 Specifications Disc FM Tuner AM Tuner Bluetooth Monitor General Power Output: 17 Watts RMS x 4 channels at 4 ohms and < 1% THD+N Signal to Noise Ratio: 80dBA (reference: 1 watt into 4 ohms) OPERATION Frequency response: 10Hz-20kHz Channel separation @ 1kHz: >65dB... -
Page 81: Troubleshooting
Invalid Region appears on Region code error display or Wrong Region flashes on LCD Monitor will not Monitor travel path obstructed open/close XDVDN9131 General Cause Check connections for proper voltage (11~16VDC) Check connection to ground Replace fuse(s) Check connections at speakers... - Page 82 XDVDN9131 Troubleshooting Problem "Please connect first" There is no mobile device connected to the head unit Pair and or connect a mobile device to the head unit as is displayed when the Talk button is pressed Mobile device will Bluetooth function is not active on the head unit...
-
Page 83: Troubleshooting
Please keep your original sales receipt and be prepared to provide this receipt in the event you require service, as your original receipt is considered the best proof of purchase and indicates the date you purchased your Dual product. Dealer Name... - Page 84 Dual Electronics Corp. Toll Free: 1-866-382-5476 www.dualav.com ©2009 Dual Electronics Corp. All rights reserved. NSA1209-V01.4 Printed in China...