SATO WS408DT Owner's Manual
Hide thumbs
Also See for WS408DT:
- Technical manual (127 pages) ,
- Operator's manual (91 pages) ,
- Interface manual (72 pages)
Table of Contents
Advertisement
Quick Links
Advertisement
Table of Contents

Related Manuals for SATO WS408DT


Summary of Contents for SATO WS408DT
- Page 1 All manuals and user guides at all-guides.com WS Printer Owner’s Manual WS408DT ...
- Page 2 All manuals and user guides at all-guides.com FCC ID In a domestic environment this product may cause radio interference in which case the user may be required to take adequate measures. FCC Warning This equipment has been tested, pursuant to Part 15 of the FCC Rules. These limits are designed to provide reasonable protection against harmful interference when the equipment is operated in a commercial environment. This equipment generates, uses, and can radiate radio frequency energy and, if not installed and used in accordance with the instruction manual, may cause harmful interference to radio communications. Operations of this equipment in a residential area is likely to cause harmful interference in which case the user will be required to correct the interference at his own expense. This device complies with Part 15 of the FCC Rules. Operation is subject to the following two conditions: (1) this device may not cause harmful interference, and (2) this device must accept any interference received, including interference that may cause undesired operation. FCC Statement for Optional RF module This device complies with RF radiation exposure limits set forth for an uncontrolled environment. The antenna used for this transmitter must be installed to provide a separation distance of at least 20 cm from all people and must not be collocated or operating in conjunction with any other antenna or transmitter. i ...
- Page 3 All manuals and user guides at all-guides.com Bluetooh/Wireless Communication Compliance Statement This product has been certified for compliance with the relevant radio interference regulations of your country or region. To make sure continued compliance, do not: ∙ Disassemble or modify this product. ∙ Remove the certificate label (serial number seal) affixed to this product. Use of this product near microwave and/or other wireless LAN equipment, or where static electricity or radio interference is present, may shorten the communication distance, or even disable communication. WARNING Changes or modifications not expressly approved by the party responsible for compliance could void the user's authority to operate the equipment. (for USA only) ii ...
- Page 4 In no event shall SATO or anyone else involved in the creation, production, or delivery of the accompanying product (including hardware and software) be liable for any damages whatsoever (including, ...
-
Page 5: Table Of Contents
All manuals and user guides at all-guides.com Contents 1 Introduction ...................... 2 1.1 Features ....................... 2 1.2 Unpacking.................... 2 1.3 Understand your printer ................ 3 1.3.1 Perspective view ................ 3 1.3.2 Back view .................. 4 1.3.3 Interior view ................... 5 1.4 ... - Page 6 All manuals and user guides at all-guides.com 5.1 Printer issues ..................... 3 1 5.2 Media issues .................... 3 2 5.3 Other issues .................... 3 3 6 Specifications ....................... 3 4 6.1 Printer ....................... 3 4 6.2 Media ...................... 3 5 6.3 Bar codes .................... 3 6 6.4 ...
-
Page 7: Introduction
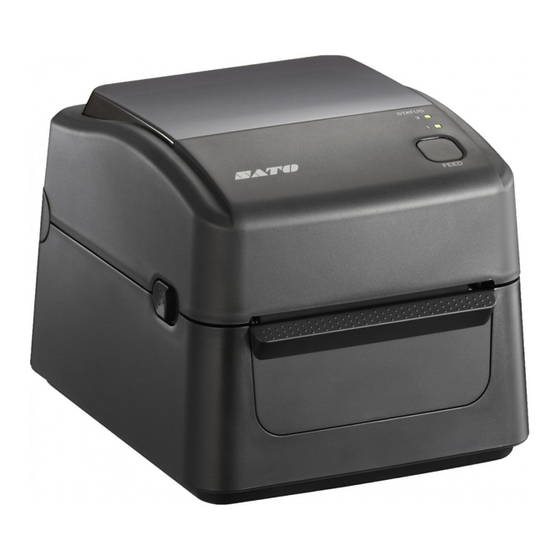
All manuals and user guides at all-guides.com 1 Introduction Unpacking 1 Introduction Thank you for purchasing a SATO WS printer. This manual provides information about how to set up and operate your printer, load the media and solve common problems. 1.1 Features ■ Various Connectivity Options USB, Ethernet ■ Easy Operation One‐button design for easy control ■ Fast Print Speed Max 6 inches/sec for the WS408 model ■ Wireless Connection Build a wireless printing environment with Bluetooth ■ External Memory The extra USB port allows you to use a USB flash ... -
Page 8: Unpacking
When you receive e the printe er, open the e package im mmediately and inspec ct for shippi ng damage . If you disc cover any da amage, con tact the shi pping comp pany and fil le a claim. S SATO is not responsible e for any da mage incur rred during shippi ng. Save all package m materials for the shippin ng company y to inspect . te If any it tem is missi ing, please contact you ur local dea ler. ... -
Page 9: Understand Your Printer
All manuals and user guides at all-guides.com 1 I ntroduction Under rstand your pr r inter 3 Un dersta and y our p rinter r 3.1 Pe erspect tive view w 3 ... - Page 10 All manuals and user guides at all-guides.com 1 I ntroduction Under rstand your pr rinter 3.2 Ba ack view w ution The areas indic cated by th e ellipse ha ave sharp e edges. To a void inju ury, be caref ful not to to ouch them w when handl...
-
Page 11: Interior View
All manuals and user guides at all-guides.com 1 I ntroduction Under rstand your pr rinter 3.3 In terior v view rning The printhead becomes ve ery hot dur ring printing g. Do not to ouch the printhead o or touch ar round it dir rectly after printing. ... -
Page 12: Printer Lights
All manuals and user guides at all-guides.com 1 Introduction Printer lights 1.4 Printer lights There are two LED lights that show the status of your printer. 1.4.1 Status lights Status lights help you check printer’s condition. The following tables show the blinking speed of status lights and the conditions they indicate. Symbol Blinking Speed Blinking Interval Fast 0.5 Second Medium 1 Second Slow 2 Seconds LED 1 LED 2 Description Off Off The print module is opened when the printer is turned on. Green Off ... -
Page 13: System Mode
All manuals and user guides at all-guides.com 1 Introduction Printer lights 1.4.2 System mode The system mode consists of status light color combinations. It contains a list of commands for you to select and run. To enter the system mode and run the command, do the following: 1. Turn off the printer. 2. Press and hold the FEED button, and turn on the printer. 3. Both status lights glow solid orange for a few seconds. Next, they turn to green shortly, and then turn to other colors. 4. When status lights show the color combination you need, release the FEED button immediately. 5. Press the FEED button to run the command. The following table is the command list of the system mode. LED 1 LED 2 Command Green Red Transmissive Sensor Calibration (Section 3.1) Green Orange Reflective Sensor Calibration (Section 3.1) ... -
Page 14: Get Started
All manuals and user guides at all-guides.com 2 G Get started Atta ach the power r cord Get start ted This ch hapter desc cribes how t to set up yo our printer. ution Do n not use you r printer in areas expo sed to splas shing water r or y other liqui d. ution Do n not drop yo ur printer, o or place it in n an area su ubject to ... -
Page 15: Turn On/Off Your Printer
All manuals and user guides at all-guides.com 2 Get started Turn on/off the printer 2.2 Turn on/off your printer When your printer is connected to a host (a computer), it is good to turn on the printer before turning on the host, and turn off the host before turning off the printer. 2.2.1 Turn on your printer 1. To turn on your printer, turn on the Power Switch as below. The “I” is the ON position. 2. Both status lights glow solid orange for a few seconds, and then LED 2 goes out, while LED 1 turns to solid green. Note If you connect the printer to the internet or insert a USB drive before turning on the printer, it will take longer for the printer to enter the online mode (LED 1 glows solid green) after you turn it on. 9 ... -
Page 16: Turn Off Your Printer
All manuals and user guides at all-guides.com 2 Get started Turn on/off the printer 2.2.2 Turn off your printer 1. Make sure LED 2 is off and LED 1 is solid green before turning off the printer. 2. To turn off your printer, turn off the Power Switch as below. The “O” is the OFF position. Caution Do not turn off your printer during data transmission. 10 ... -
Page 17: Load Media
All manuals and user guides at all-guides.com 2 Get started Load media 2.3 Load media There are various types and sizes for the media roll. Load the applicable media to satisfy your need. 2.3.1 Prepare media The inside wound and outside wound media roll can be loaded into the printer the same way. In case the media roll is dirty during shipping, handling or storage, remove the outside length of the media. It helps avoid dragging adhesive and dirty media between the printhead and platen roller. Inside Wound Outside Wound 2.3.2 Place a media roll 1. Open the top cover of the printer. 11 ...