Table of Contents
Advertisement
Advertisement
Table of Contents
Troubleshooting

Related Manuals for Zeiss Primovert


Summary of Contents for Zeiss Primovert
- Page 2 Violations will entail an obligation to pay compensation. All rights reserved in the event of granting of patents or registration of a utility model. Issued by: Carl Zeiss Microscopy GmbH Carl-Zeiss-Promenade 10 07745 Jena, Germany microscopy@zeiss.com www.zeiss.com/microscopy...
-
Page 3: Table Of Contents
Connecting the Stand with Binocular Tube or Phototube to the Power Supply System ..20 Operating the Microscope ....................21 3.2.1 Operational and Functional Elements of the Primovert Microscope ........21 Primovert HDcam ......................27 3.3.1 Control and Functional Elements of the Integrated Camera ..........27 3.3.2... - Page 4 ZEISS Copyright Primovert 3.9.2 Attaching a Camera to the Stand with Binocular Phototube ..........44 3.10 Care, Maintenance and Troubleshooting ................46 3.11 Instrument Care ........................ 46 3.12 Troubleshooting on the Microcope ..................47 3.13 Troubleshooting on the Integrated HD IP Camera .............. 49 Technical Data ........................
-
Page 5: Notes On Instrument Safety
The Primovert microscopes have been designed, produced and tested in compliance with the standards DIN EN 61010-1 (IEC 61010-1) and IEC 61010-2-101 "Safety requirements for electrical equipment for measurement, control and laboratory use". The Primovert microscopes meet the requirements of the EC Directive 98/79/EC Annex 1, RoHS Directive 2011/65/EC and carry the mark. -
Page 6: Unpacking, Setup, Transportation, Storage
ZEISS Notes on Instrument Safety Primovert Unpacking, Setup, Transportation, Storage Please observe the following safety notes for unpacking, transportation and storage of the microscope: The microscope is supplied packed to commercial standards in a plastic case with outer cardboard −... - Page 7 If any protective measures are no longer effective, the device must be taken out of service and secured against inadvertent operation. Please contact a Zeiss service agency or the Carl Zeiss Microscopy Service to have the device repaired.
-
Page 8: Warranty Notes
Warranty Notes The Primovert microscopes including their original accessories must not be used for microscopic techniques other than those described in this operating manual. The manufacturer cannot assume any liability for other applications. -
Page 9: Warning And Information Labels
Primovert Notes on Instrument Safety ZEISS Warning and Information Labels Fig. 1 Warning and information labels on the Primovert 12/2014 415510-7244-001... -
Page 10: Description
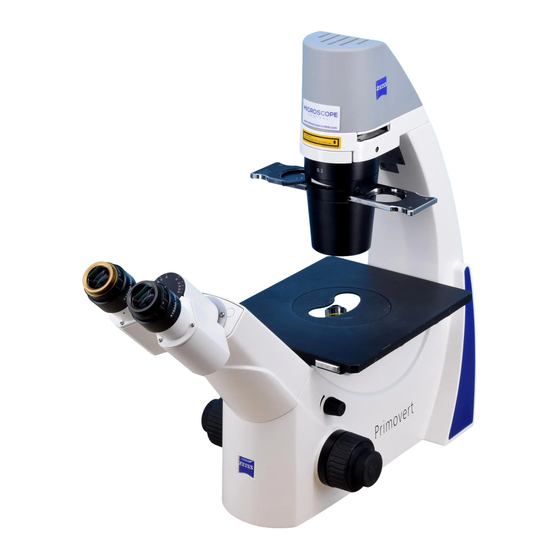
ZEISS Description Primovert DESCRIPTION System Overview 415510-7244-001 12/2014... - Page 11 Primovert Description ZEISS 12/2014 415510-7244-001...
-
Page 12: Intended Use
− Stand-type Primovert Ergo with binocular ergotube, continuous angle adjustment from 30° to 60° − Stand-type Primovert HDcam with integrated HD IP CMOS camera and various interfaces and setting − options Stand-type Primovert iLED with integrated LED-fluorescence unit (one channel) and binocular −... - Page 13 Primovert Description ZEISS Quadruple nosepiece with W 0.8" lens thread running on ball bearing. − Infinity-corrected "Plan-ACHROMAT" objectives with magnifications of 4x and 10x for brightfield and − phase contrast, as well as LD "Plan-ACHROMAT" objectives with long working distance and magnifications of 20x and 40x for brightfield and phase contrast.
-
Page 14: Objectives
Where: Long working distance Objective magnification, with a defined color ring on the objective being assigned to each magnification step (Carl Zeiss color code) Numerical aperture ∞ Infinite mechanical tube length Usable with cover glass thickness D = 1.0 mm, similar data for other glass... -
Page 15: Start-Up And Operation
Primovert Start-Up and Operation ZEISS START-UP AND OPERATION Starting up the Microscope 3.1.1 Setting up the Microscope Before installing and starting up the microscope, be sure to carefully read and subsequently observe the notes on instrument safety (see Section 1). -
Page 16: Inserting The Condenser
(Fig. 5/3) of the upper part of the stand until it engages in the desired position. When using the Primovert iLED in fluorescent mode, use the yellow filter inserted into the filter slider (included Fig. -
Page 17: Inserting The Phase Contrast Slider
Primovert Start-Up and Operation ZEISS 3.1.5 Inserting the Phase Contrast Slider The 2-position Ph slider (Fig. 6/1) and the 3-position slider (Fig. 6/2) delivered completely, with phase contrast stops mounted. • Push the Ph slider (Fig. 6/1 or 2) from the right or the left side, with the inscription facing upwards, into the condenser slot (Fig. -
Page 18: Mounting The Specimen Guide And Inserting The Mounting Frame
ZEISS Start-Up and Operation Primovert 3.1.7 Mounting the Specimen Guide and Inserting the Mounting Frame • If attached, remove the stage enlargement plate from the right side of the stage. • Attach the specimen guide (Fig. 8/2) from below to the right side of the stage (Fig. 8/1) and fasten it with the two knurled screws (Fig. -
Page 19: Mounting Uv Protection Plate Onto Primovert Iled
3.1.8 Mounting UV Protection Plate onto Primovert iLED • Put the UV protection plate (Fig. 9/1) on the Primovert fluorescence stand. • Fix it with the screws (Fig. 9/2) on both sides. 1 UV protection plate 2 Screws Fig. 9... -
Page 20: Transmitted-Light Illuminator: Inserting The Led
ZEISS Start-Up and Operation Primovert 3.1.9 Transmitted-Light Illuminator: Inserting the LED The microscope is delivered with the transmitted-light illuminator with halogen bulb 6 V 30 W/LED 3 W already mounted. If the transmitted-light illuminator with LED (halogen bulb) is to be additionally employed, it must be inserted into the stand instead of the transmitted-light illuminator with halogen bulb (LED) (see Section 3.9.1). -
Page 21: Operating The Microscope
Primovert Start-Up and Operation ZEISS Operating the Microscope 3.2.1 Operational and Functional Elements of the Primovert Microscope Fig. 11 Operational elements of Primovert with binocular tube, ergotube and phototube 12/2014 415510-7244-001... - Page 22 ZEISS Start-Up and Operation Primovert Legend to Fig. 11: 1 Transmitted-light illuminator (built-in) 2 Filter slider 3 Slider with phase stops 4 Handle (rear) 5 Control knob for Y travel of specimen guide (travel readable on alphabetic scale reflected in the mirror)
- Page 23 Primovert Start-Up and Operation ZEISS Fig. 12 Operational elements of Primovert HDcam with integrated camera 12/2014 415510-7244-001...
- Page 24 17 Fine focusing drive (left side) 18 SD card slot 19 Nosepiece 20 Plug-in power unit Operating of Primovert HDcam with integrated camera with iPad • Swivel down the holder (Fig. 13/2) and insert the iPad (Fig. 13/1). 1 iPad 2 Holder Fig.
- Page 25 Primovert Start-Up and Operation ZEISS Fig. 14 Operational elements of Primovert iLED with integrated fluorescence unit 12/2014 415510-7244-001...
- Page 26 ZEISS Start-Up and Operation Primovert Legend to Fig. 14: 1 Transmitted-light illuminator (built-in) 2 Filter slider 3 Slider with phase stops 4 Handle (rear) 5 Specimen stage 6 Rotary knob for adjusting the transmitted light illumination intensity 7 Fine focusing drive (right side) 8 Coarse focusing drive (right side) 9 On/off switch for illumination;...
-
Page 27: Primovert Hdcam
Primovert Start-Up and Operation ZEISS Primovert HDcam 3.3.1 Control and Functional Elements of the Integrated Camera Do not operate the camera in a potentially explosive environment! Operation of the camera in a potentially explosive environment, in the presence of volatile anesthetics or flammable... - Page 28 The microscope stand has a SD / SDHC card port (Fig. 18/2) at the left side for storing image data, 1 USB 2.0 see section 3.3.3.1. 2 Netport in Primovert HDcam 3 HDMI Fig. 16 Interfaces on reverse side The following connecting cables are required for use of the ports:...
-
Page 29: Connect Ipad To Usb Charge Port
Primovert Start-Up and Operation ZEISS The various states of the integrated camera are displayed by LED. System status LED display / operating mode Start sequence LED lights up green Start sequence completed LED flashes green Ready for operation LED lights up green... -
Page 30: Ports And Their Possible Uses
ZEISS Start-Up and Operation Primovert 3.3.3 Ports and their Possible Uses 3.3.3.1 Saving Data to the SD Card via SD Card Port An SD card has a max. capacity of 4 GB, an SDHC (HC = high capacity) up to 32 GB. Prior to use on the PC, the SDHC card must be formatted in the format FAT32. - Page 31 Primovert Start-Up and Operation ZEISS 3.3.3.2 Data Transfer to the PC via USB 2.0 Port The USB port is used for data transfer to the PC. A mini USB 2.0 cable is required for transferring data to the PC. The built-in camera is compatible with ZEN or ZEN lite.
- Page 32 ZEISS Start-Up and Operation Primovert 3.3.3.3 Visualization of Data via HDMI Port The integrated camera can be connected to a monitor, TV or projector for visualization of the live image data. The data at the HDMI output is in DVI format. Further HDMI functions (e.g. audio, communication between monitor and camera) are not supported.
- Page 33 To do this, insert the Ethernet cable (Fig. 21/1) into the jack on the reverse side of the microscope (Fig. 21/2). A WLAN router will be required to use the built-in camera together with the ZEISS Labscope app. Existing WLAN infrastructure may be used or a separate microscope WLAN set up The integrated camera will identify itself automatically to the network (Fig.
-
Page 34: Remote Control Of Integrated Camera
ZEISS Start-Up and Operation Primovert 3.3.4 Remote Control of Integrated Camera Fig. 22 Remote control Button Standard function Function in OSD menu Turn On / Off HDMI output Turn On / Off HDMI output Enter Trigger automatic white balance OK (apply value) -
Page 35: Configuring The Integrated Hd Ip Camera
Primovert Start-Up and Operation ZEISS 3.3.5 Configuring the Integrated HD IP Camera • Press the Menu button on the control panel. The OSD menu for adjusting the settings will appear. The following menus are available for configuring the camera: Fig. 23... - Page 36 ZEISS Start-Up and Operation Primovert Fig. 24 Exposure menu AET / AGC AET (automatic exposure time) and AGC (auto gain control) automatically ensure the correct brightness of the image when the setting is at Continuous. The settings are Once / Continuous / Off.
- Page 37 Primovert Start-Up and Operation ZEISS Fig. 25 Resolution menu Preset The following options are available: 720p60: HD resolution, 1280x720, 60 Hz 1080p30: Full HD resolution, 1920x1080, 30 Hz A default resolution of 720p60 has been set. Please observe the following: Prior to conversion to the full HD resolution (1080p30), check that the monitor supports this option.
- Page 38 ZEISS Start-Up and Operation Primovert Fig. 26 Setup User menu Date / Time Date and time in year-month-day / hour-minute-second format. Each element can be adjusted using the up / down buttons. The new time can be set by pressing the OK button.
-
Page 39: Switching The Microscope On / Off
Primovert Start-Up and Operation ZEISS Switching the Microscope On / Off • Switch on the microscope using the rotary knob (Fig. 28/2) (ON or AUTO position). ON position: − The two ON/OFF switches (Fig. 28/1) on the specimen stage for quickly switching the transmitted- light illuminator on and off are inactive. -
Page 40: Adjusting Interpupillary Distance And Viewing Height
ZEISS Start-Up and Operation Primovert • Adjust the desired illumination intensity using the rotary knob (Fig. 11/11). The selected intensity is indicated in five steps by the blue light-emitting diodes (Fig. 11/24) arranged on both sides of the stand. • The torque of the coarse focusing drive is factory-adjusted and can be readjusted if required. For this purpose, insert a screwdriver into one of the four radially arranged holes of the ring (Fig. -
Page 41: Compensating Defective Vision At The Eyepieces And Inserting The Eyepiece Pointer Or Eyepiece Micrometer
Primovert Start-Up and Operation ZEISS • With the stand model Primovert with ergotube the tube angle can be adjusted in the range from 30° to 60° according to individual requirements. Compensating Defective Vision at the Eyepieces and Inserting the Eyepiece Pointer or Eyepiece Micrometer The eyepieces (Fig. -
Page 42: Adjusting Transmitted-Light Phase Contrast
ZEISS Start-Up and Operation Primovert Adjusting Transmitted-Light Phase Contrast • First, adjust the microscope as you do for brightfield. • Turn the nosepiece to position the phase- contrast objective (for Ph 0, Ph 1 or Ph 2) into the light path. -
Page 43: Reflected-Light Fluorescence
Primovert Start-Up and Operation ZEISS Reflected-Light Fluorescence • Turn the transmitted light / reflected light changeover switch (Fig. 35/1) upward to the reflected-light position (Fluorescence). • Switch on the reflected-light illuminator using the rotary knob (Fig. 35/2) and adjust the desired illumination intensity. -
Page 44: Attaching A Camera To The Stand With Binocular Phototube
ZEISS Start-Up and Operation Primovert A spare bulb (Fig. 36/5) can be placed in the transmitted-light illuminator with halogen bulb and remain there during the operation. The transmitted-light illuminator with LED has to be replaced completely. The LED alone cannot be replaced. - Page 45 • Carry out this test until the image is format-filling without masking or vignetting. • Retighten the set screw (Fig. 37/5). With camera/adapter combinations that have not been recommended expressly by Zeiss, it may be quite impossible to obtain an unvignetted image.
-
Page 46: Care, Maintenance And Troubleshooting
ZEISS Start-Up and Operation Primovert 3.10 Care, Maintenance and Troubleshooting 3.11 Instrument Care Care of the microscope is restricted to the following operations: • Cover the instrument with the dust cover after every use and do not expose the instrument to ultraviolet radiation without any protection. -
Page 47: Troubleshooting On The Microcope
Primovert Start-Up and Operation ZEISS 3.12 Troubleshooting on the Microcope Problem Cause Remedy Field of view is not completely Nosepiece with objective has not been Switch nosepiece with objective into visible. switched into click-stop position. click-stop position. Condenser has not been set correctly. - Page 48 ZEISS Start-Up and Operation Primovert Problem Cause Remedy Image focus is unstable. Adjusted torque of coarse focusing Increase the torque of the coarse drive is too low. focusing drive to make motion stiffer. The fluorescence light source Fluorescence light source or circuit Contact service person for further doesn't lighten on.
-
Page 49: Troubleshooting On The Integrated Hd Ip Camera
3.13 Troubleshooting on the Integrated HD IP Camera Problem-solving notes for the use of the built-in camera in conjunction with the network / WLAN and Labscope app are to be found separately at the Zeiss website www.zeiss.com/labscope. Problem Cause Troubleshooting... - Page 50 ZEISS Start-Up and Operation Primovert Problem Cause Troubleshooting The image has severe noise. The amplification (gain) is set too Reduce the gain and increase the high. exposure time instead. The image is too dark or too AET / AGC (automatic exposure time / Activate AET / AGC and select light.
-
Page 51: Technical Data
Line frequency 50 / 60 Hz Power consumption Primovert HDcam max. 45 W Power supply Primovert HDcam Input: 100-240 V DC; 50-60 Hz, max. 1.6 A Power supply Primovert HDcam Output: 12 V DC, max. 5 A Power consumption Primovert iLED max. - Page 52 LD condenser 0.3 for V 4x to 40x, a = 72 mm LD condenser 0.4 for V 4x to 40x, a = 55 mm Primovert with binocular tube Maximum field-of-view number Interpupillary distance adjustable from 48 to 75 mm Tube angle 45°...
- Page 53 30° to 60°, continuously adjustable Viewing height 360 to 480 mm Viewing port tube factor 1x Primovert with integrated 5 MP HD IP camera Acquired visual field of the camera 11.4 mm x 8.56 mm (14.2 mm diagonal) Fixed built-in camera adapter 0.63x Output HDMI / USB2.0 / Ethernet port/ SD card...
- Page 54 ZEISS Technical Data Primovert Signal processing / interface-specific data Digitization / color depth 24 bit, 3 x 8 bit / pixel Amplification 0-18 dB Interfaces USB 2.0 mini USB plug LAN via RJ 45 jack, 100 Mbit SD card (secure digital) 1-32 GB, slot for SD and SDHC...