Table of Contents
Advertisement
Advertisement
Table of Contents

Related Manuals for Zeiss Primostar 3


Summary of Contents for Zeiss Primostar 3
- Page 1 Quick Guide ZEISS Primostar 3...
- Page 2 Effective from: 09/2020 © 2020 Without the prior written consent of ZEISS, this document or any part of it must neither be translated nor reproduced or transmitted in any form or by any means - including electronic or mechanic methods, by photocopying, recording or by any in- formation or filing system.
-
Page 3: Table Of Contents
Microscope Primo Star 3, FIX-KÖHLER Version with Camera Tube ......18 Installation Conditions ..................20 4 Switching On/Off Safely..................22 5 How to Get the First Picture ................. 23 Quick Guide ZEISS Primostar 3 | en-US | Rev. 1 | 415501-7012-101... -
Page 4: General Information
ZEISS 1 General Information This Instruction Manual pertains to the Primostar 3, hereinafter referred to as the "microscope". This Instruction Manual contains basic steps and safety information that must be observed during operation and maintenance. For this reason, these operating instructions must be read by the spe- cialist staff / operator prior to commissioning and must always be available at the place of use of the microscope. -
Page 5: Explanation On Warnings And Additional Information
System and 3rd The Microscope can be configured in many ways. Information about the individual components, Party Components, enhancements and accessories can be obtained from your ZEISS Sales & Service Partner. Also refer Accessories to the 3rd Party documentation of the manufacturer. -
Page 6: Contact
1 General Information | 1.4 Contact ZEISS 1.4 Contact If you have any questions or problems, please contact your local ZEISS Sales & Service Partner or one of the following addresses: Headquarter Phone: +49 1803 33 63 34 Fax: +49 3641 64 3439 Email: info.microscopy.de@zeiss.com... -
Page 7: Safety
If it is noted that protection measures are no longer effective or other circumstances occur which impair safety and cause changes in operating behavior, the microscope should be shut down im- mediately and a ZEISS service technician should be notified. Make sure that all the protective pan- els and warning labels are attached and readable. -
Page 8: Requirements For Users
Detachable mains supply must not be replaced with inadequately rated cords. Always use the power cords supplied by ZEISS. When an unsuitable power cord is used, ZEISS can no longer guar- antee the electrical safety and functionality of the Microscope. - Page 9 Only use microscope com- ponents supplied by ZEISS. Do not open the device unless you are trained and explicitly authorized by ZEISS. Always contact ZEISS or a certified service agency for the repair of the instrument.
-
Page 10: Warning And Information Labels
Always observe all warning labels on the mi- croscope. Fig. 1: Positions of labels on the microscope rear side Fig. 2: Position of the label Fig. 3: Positions of labels on the fluorescence unit Quick Guide ZEISS Primostar 3 | en-US | Rev. 1 | 415501-7012-101... - Page 11 Operate microscope only on a stable, solid, smooth and not tinderlike (non-flammable) surface. Microscope type label Microscope type label Primostar 3 EU Importer Carl Zeiss Microscopy GmbH Carl-Zeiss-Promenade 10 07745 Jena, Germany Quick Guide ZEISS Primostar 3 | en-US | Rev. 1 | 415501-7012-101...
-
Page 12: Safety Device Of The Reflected-Light Fluorescence Illuminator
To check the microscope safety, please contact your ZEISS sales and service partner and keep the service protocols for your microscope. -
Page 13: Product And Functional Description
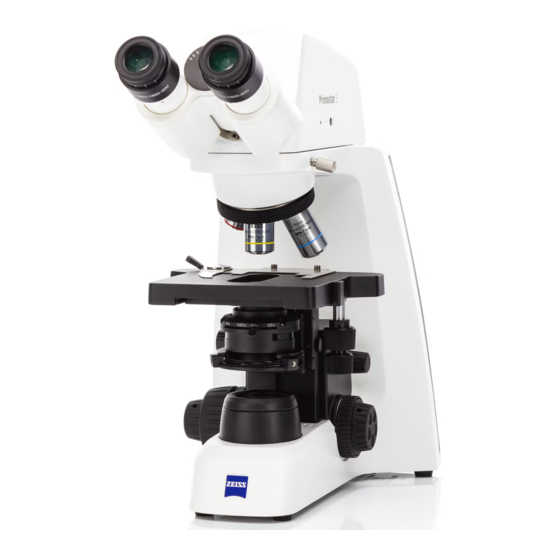
ZEISS 3 Product and Functional Description | 3 Product and Functional Description The Primostar 3 microscopes are transmitted-light microscopes of compact design with a small footprint. The microscopes provide high resolution, infinity-corrected objectives for all important transmit- ted-light techniques, such as brightfield, darkfield, simple polarization, and phase contrast mi- croscopy. -
Page 14: Microscope Primo Star 3, Fix-Köhler Versions
Lever for opening or closing the aperture diaphragm Abbe condenser 0.9/1.25 for changing between brightfield, phase contrast and darkfield Quick Guide ZEISS Primostar 3 | en-US | Rev. 1 | 415501-7012-101... - Page 15 Coarse focusing drive (left hand side) for focusing the microscopic image Fine focusing drive (left hand side) for focusing the microscopic image Quick Guide ZEISS Primostar 3 | en-US | Rev. 1 | 415501-7012-101...
-
Page 16: Microscope Primo Star 3, Full-Köhler Versions
Rotary knob of condenser modulator disc for changing between brightfield, phase contrast and darkfield Lever for opening or closing the aperture diaphragm Quick Guide ZEISS Primostar 3 | en-US | Rev. 1 | 415501-7012-101... - Page 17 Coarse focusing drive (left hand side) for focusing the microscopic image Fine focusing drive (left hand side) for focusing the microscopic image Quick Guide ZEISS Primostar 3 | en-US | Rev. 1 | 415501-7012-101...
-
Page 18: Microscope Primo Star 3, Fix-Köhler Version With Camera Tube
Nosepiece with four or five positions for changing objectives Mechanical stage with specimen holder left for for positioning and fixing of object carrier(s) reckless stage Lever for opening or closing the aperture diaphragm Quick Guide ZEISS Primostar 3 | en-US | Rev. 1 | 415501-7012-101... - Page 19 Coarse focusing drive (left hand side) for focusing the microscopic image Fine focusing drive (left hand side) for focusing the microscopic image Connections of the camera tube please refer to the Instruction Manual Quick Guide ZEISS Primostar 3 | en-US | Rev. 1 | 415501-7012-101...
-
Page 20: Installation Conditions
Microscope, some of which react sensitively. It can also lead to reduced image quality and experimental errors. To reduce vibrations at the microscope installation location, ZEISS offers various passive and active damping options; small, air-damped system table, table top mat TS 150). - Page 21 ZEISS 3 Product and Functional Description | 3.4 Installation Conditions Fig. 9: Dimensions of Primostar 3 FULL KÖHLER Fig. 10: Dimensions of Primostar 3 FIX KÖHLER with camera tube Quick Guide ZEISS Primostar 3 | en-US | Rev. 1 | 415501-7012-101...
-
Page 22: Switching On/Off Safely
4 Switching On/Off Safely ZEISS 4 Switching On/Off Safely The Primostar 3 is delivered in a fully assembled condition. It can be set up and calibrated by the customer himself or through the ZEISS service. Procedure 1. Connect the Microscope’s power supply with its power cord to an electrical outlet. -
Page 23: How To Get The First Picture
In most cases this aperture gives the best contrast at almost full resolution and is thus the best compromise for the human eye. 11. Replace the eyepiece in the tube barrel. Quick Guide ZEISS Primostar 3 | en-US | Rev. 1 | 415501-7012-101... - Page 24 Carl Zeiss Microscopy GmbH Carl-Zeiss-Promenade 10 phone: +49 1803 33 63 34 07745 Jena fax: +49 3641 64 3439 Germany info.microscopy.de@zeiss.com www.zeiss.com/microscopy...