Tripp Lite N48M Series Installation Manual
Ultra high-density fiber panel all-in-one solution
Hide thumbs
Also See for N48M Series:
- Installation manual (4 pages) ,
- Installation manual (4 pages) ,
- Installation manual (21 pages)
Advertisement
Available languages
Available languages
Quick Links
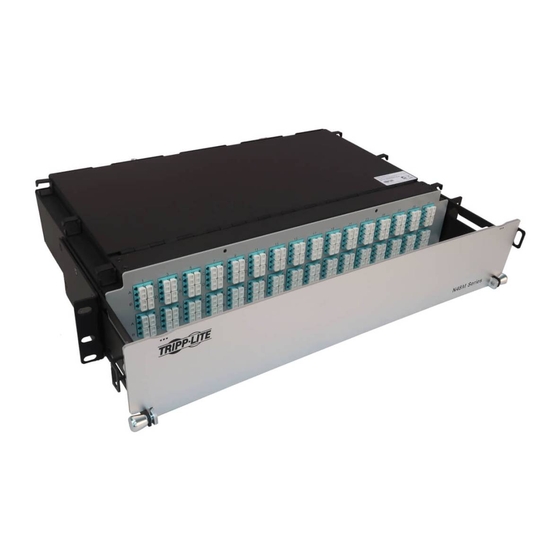
Ultra High-Density Fiber Panel
All-In-One Solution
Installation Guide
N48M/N48S Series
Español 5 • Français 9 • Русский 13 • Deutsch 17
WARRANTY REGISTRATION
Register your product today and be
automatically entered to win an ISOBAR
surge protector in our monthly drawing!
tripplite.com/warranty
1111 W. 35th Street, Chicago, IL 60609 USA • tripplite.com/support
Copyright © 2021 Tripp Lite. All rights reserved.
®
1
Advertisement

Related Manuals for Tripp Lite N48M Series


Summary of Contents for Tripp Lite N48M Series
- Page 1 WARRANTY REGISTRATION Register your product today and be automatically entered to win an ISOBAR ® surge protector in our monthly drawing! tripplite.com/warranty 1111 W. 35th Street, Chicago, IL 60609 USA • tripplite.com/support Copyright © 2021 Tripp Lite. All rights reserved.
-
Page 2: Installation
Installation Materials Needed: • Phillips Screwdriver • Rack-Mounting Screws Open the box and unpack its contents. Extend the front door by pulling it away from the unit. Tighten the side screws. Non-Extended Extended... - Page 3 Installation Place the panel into position in an enclosure or open To access the MPO cables, untighten the two handscrews frame rack. Align the mounting holes and use rack- located on the rear of the unit , lift the top panel mounting screws (2 per side, not included) to secure the and flip down the rear access plate unit.
- Page 4 Installation Close the top panel. As you close it, guide the MPO cable through the opening in the rear plate. Hand-tighten the two screws to secure. Rear View 1111 W. 35th Street, Chicago, IL 60609 USA • tripplite.com/support 21-02-041-93-3DF9_RevA...
-
Page 5: Guía De Instalación
Panel de Fibra de Ultra Alta Densidad Serie N48M/N48S English 1 • Français 9 • Русский 13 • Deutsch 17 1111 W. 35th Street, Chicago, IL 60609 EE. UU. • tripplite.com/support Copyright © 2021 Tripp Lite. Todos los derechos reservados. - Page 6 Instalación Materiales Necesarios: • Destornillador Phillips • Tornillos para Instalación en Rack Abra la caja y desempaque su contenido. Extienda la puerta delantera alejándola de la unidad. Apriete los tornillos laterales. No Extendido Autonomía...
- Page 7 Instalación Coloque el panel en su posición en un gabinete o rack Para acceder a los cables MPO, apriete los dos tornillos de marco abierto. Alinee los orificios de instalación y de mano ubicados en la parte posterior de la unidad use tornillos para instalación en rack (2 por lado, no levante el panel superior y pliegue hacia abajo la placa...
- Page 8 Instalación Cierre el panel superior. A medida que lo cierra, guíe el cable MPO a través de la abertura en la placa posterior. Apriete a mano los dos tornillos para asegurar. Vista Posterior 1111 W. 35th Street, Chicago, IL 60609 EE. UU. • tripplite.com/support 21-02-041-93-3DF9_RevA...
-
Page 9: Guide D'installation
Solution tout-en-un pour panneau de fibres ultra haute densité Série N48M/N48S English 1 • Español 5 • Русский 13 • Deutsch 17 1111 W. 35th Street, Chicago, IL 60609 USA • tripplite.com/support Droits d'auteur © 2021 Tripp Lite. Tous droits réservés. - Page 10 Installation Matériel nécessaire : Tournevis à pointe cruciforme Vis pour le montage en bâti Ouvrir la boîte et déballer son contenu. Déployer la porte avant en la tirant et en l'éloignant de l'appareil. Serrer les vis latérales. Non déployée Déployée...
- Page 11 Installation Mettre le panneau en place dans un boîtier ou un bâti à Pour accéder aux câbles MPO, desserrer les deux serre- cadre ouvert. Aligner les trous de montage, puis utiliser les joints situés à l'arrière de l'appareil , soulever le vis pour le montage en bâti (2 par côté, non incluses) pour panneau supérieur , puis rabattre la plaque d'accès...
- Page 12 Installation Fermer le panneau supérieur. En le fermant, guider le câble MPO dans l'ouverture de la plaque arrière. Serrer les deux vis à la main pour retenir en place. Vue arrière 1111 W. 35th Street, Chicago, IL 60609 USA • tripplite.com/support 21-02-041-93-3DF9_RevA...
-
Page 13: Руководство По Установке
Панель коммутационная волоконно-оптическая со сверхвысокой плотностью соединений (неразъемно-комплектная) Серия N48M/N48S English 1 • Español 5 • Français 9 • Deutsch 17 1111 W. 35th Street, Chicago, IL 60609 USA • tripplite.com/support Охраняется авторским правом © 2021 Tripp Lite. Перепечатка запрещается. - Page 14 Установка Необходимые материалы: • Крестообразная отвертка • Винты для монтажа в стойку Откройте коробку и распакуйте ее содержимое. Откиньте переднюю дверцу, потянув ее от устройства на себя. Затяните боковые винты. Задвинуто Выдвинуто...
- Page 15 Установка Поместите панель на предполагаемое для нее место в шкафу или открытой Для доступа к MPO-кабелям ослабьте два винтовых зажима с тыльной стойке. Совместите монтажные отверстия и прикрепите устройство с стороны устройства, снимите верхнюю панель и откиньте вниз заднюю помощью винтов для монтажа в стойку (по 2 винта с каждой стороны, в съемную...
- Page 16 Установка Закройте верхнюю панель. При ее закрывании проведите MPO-кабель через отверстие в задней панели. Затяните рукой два винтовых зажима для фиксации панели. Вид сзади 1111 W. 35th Street, Chicago, IL 60609 USA • tripplite.com/support 21-02-041 93-3DF9_RevA...
- Page 17 Installationsanleitung Ultra High Density-Glasfaserpanel als Komplettlösung N48M/N48S-Serie English 1 • Español 5 • Français 9 • Русский 13 1111 W. 35th Street, Chicago, IL 60609 USA • tripplite.com/support Copyright © 2021 Tripp Lite. Alle Rechte vorbehalten.
- Page 18 Installation Benötigte Materialien: • Kreuzschlitzschraubenzieher • Schrauben für die Rack-Montage Öffnen Sie den Karton und packen Sie den Inhalt aus. Fahren Sie die Vordertür aus, indem Sie sie vom Gerät wegziehen. Ziehen Sie die Seitenschrauben fest. Nicht verlängert Verlängert...
- Page 19 Installation Setzen Sie die Platte in ein Gehäuse oder ein Open- Um an die MPO-Kabel zu gelangen, lösen Sie die beiden Frame-Rack ein. Richten Sie die Montagelöcher aus und Handschrauben auf der Rückseite des Geräts , heben verwenden Sie Rack-Montageschrauben (2 pro Seite, nicht Sie die obere Platte an und klappen Sie die hintere im Lieferumfang enthalten), um das Gerät zu befestigen.
- Page 20 Installation Schließen Sie die obere Platte. Führen Sie beim Schließen das MPO-Kabel durch die Öffnung in der Rückwand. Ziehen Sie die beiden Schrauben zur Sicherung mit der Hand fest. Rückansicht 1111 W. 35th Street, Chicago, IL 60609 USA • tripplite.com/support 21-02-041 93-3DF9_RevA...