
Related Manuals for Numark NS7 III


Summary of Contents for Numark NS7 III
- Page 1 User Guide English ( 2 – 23 ) Guía del usuario Español ( 24 – 45 ) Guide d’utilisation Français ( 47 – 70 ) Guida per l’uso Italiano ( 71 – 93 ) Benutzerhandbuch Deutsch ( 94 – 117 ) Appendix English ( 118 –...
- Page 2 User Guide (English) Introduction Box Contents NS7III Display Unit 2 Platter Assemblies Display USB Cable • Display Power Cable Aluminum Platter • Serato DJ™ Software (download) Slipmat • USB Cable Vinyl • Power Cable 45 RPM Adapter (attached) Quickstart Guide Spindle Screw User Guide (download) Allen Wrench...
- Page 3 Setup Before getting started: • Read the Safety & Warranty Manual before using NS7III. • Make sure all items listed in Introduction > Box Contents are included. 1. Assemble the Platters 1. Remove NS7III from the packaging. Remove the two platter assemblies from package (underneath NS7III).
- Page 4 2. Attach the Display Unit 1. With the screens facing up and slightly toward you, place the display unit over the two brackets on the rear panel (which would typically hold a laptop computer stand). Make sure the two brackets are securely inserted into the holes under the display unit. 2.
- Page 5 5. Using a standard USB cable (included), connect the “To PC” USB port on NS7III’s display unit to your computer. 6. Open Serato DJ and go! For more information on how to use Serato DJ with NS7III, visit and select Numark NS7III. Connection Diagram (example): Computer...
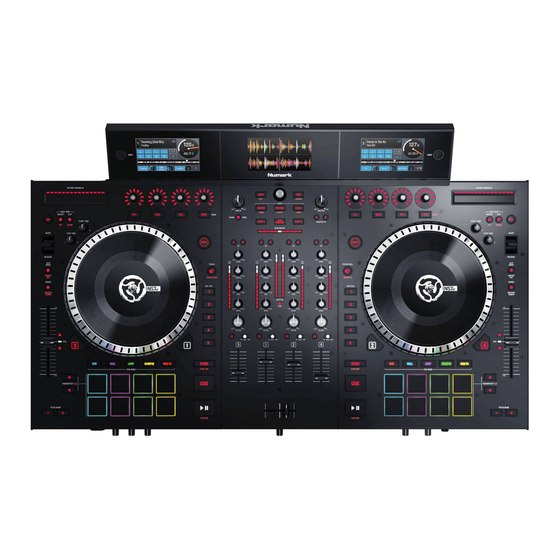
- Page 6 Features Top Panel 28 29 30 31 32 Useful Terms: Audio Playhead: The current position in a track from where audio will play. When you select a track and begin playing, the Audio Playhead will usually start from the beginning and stop at the end.
- Page 7 General Controls 1. Displays: Use the screens to view performance information, waveforms, and your library. Displays for more information. 2. View: Press this button to cycle through the available NS7III display modes. See Displays for more information. 3. Shift: Press and hold this button to access secondary functions (in red lettering) of other controls on NS7III.
- Page 8 Playback Controls 18. Platter: Controls the Audio Playhead in the software. 19. Start Time: Controls the rate at which the platter regains its normal playback speed. 20. Stop Time: Controls the rate at which the platter slows to a complete stop (“brake time”). 21.
- Page 9 Pad Mode Controls 26. Pads: These pads have different functions on each Deck depending on the current Pad ® Mode. These pads are the same pads used with Akai Professional MPCs , so they are velocity-sensitive (in certain modes only), durable, and easy to play. In this User Guide, when referring to specific pads, it will refer to the numbers as shown here.
- Page 10 29. Auto / Roll: This Pad Mode button puts the pads in two modes: Auto-Loop Mode (dark blue) and Loop Roll Mode (light blue). When the button is unlit, the first press will always select Auto-Loop Mode. Note: The pad layouts here match the software’s default Auto-Loop time division layout. If you shift the range of time divisions displayed in the software, the pad layout will change to match it.
- Page 11 31. Sampler: This Pad Mode button switches the pads between two modes: Sample Player Mode and Sample Velocity Trigger Mode). When the button is unlit, the first press will always select Sample Player Mode. • Sample Player Mode: Pads 1-6 each trigger a sample, which you can assign in the software (the volume level is also set in the software).
- Page 12 Track Controls 33. Strip Search™: The length of this strip represents the length of the entire track. Place your finger on a point along this sensor to jump to that point in the track. (If you want to scroll through a track, we recommend using your computer rather than running your finger along the strip.) 34.
- Page 13 42. BPM Meter: This meter is an aid for matching the tempo of both decks. When the white center LED is lit, the BPMs are matched. Otherwise, the meter will tend towards the faster deck. The further from center, the greater the difference between the two BPMs. The meter is also an aid while adjusting Loop In or Loop Out points.
- Page 14 Effects Controls 51. FX 1, FX 2, FX 3: These buttons have different functions on each Deck depending on the current FX Mode. • Single-FX Mode: FX 1 activates or deactivates the effect; FX 2 activates or deactivates the first effect parameter (if applicable); FX 3 activates or deactivates the second effect parameter (if applicable).
- Page 15 Displays NS7III’s full-color displays provide real-time feedback of the software. The left and right displays can show Performance View 1 or Performance View 2. The center display can show Library View or Waveform View. To switch views, press the View button next to the display on either deck. To enter Library View immediately, turn the Scroll Knob.
- Page 16 Performance View 1 This view provides an alternative display of information about the current track, effects, hot cues, and loops. 1. Deck: This is the currently selected Layer in the software controlled by that hardware deck. Press the Deck button to switch between the Layers. Deck A controls Layer 1 or 3; Deck B controls Layer 2 or 4.
- Page 17 11. Auto-Loop Button: This button is the deck’s current auto-loop length. In Auto-Loop Mode, press one of the pads to trigger an auto-loop of a specific length, which will be shown here. See Top Panel > Pad Mode Controls > Auto / Roll to learn more.
- Page 18 Library View This view lets you browse through your library, including crates and subcrates, and load a track to either deck. To move through the list of tracks, turn the Scroll Knob. To load the currently selected track, press the Load button on the desired deck. To switch between the track list and crate list, press the Scroll Knob or use the Back / Fwd button.
- Page 19 Performance View 2 This view contains information about the current track, effects, hot cues, and loops. 1. Deck: This is the currently selected Layer in the software controlled by that hardware deck. Press the Deck button to switch between the Layers. Deck A controls Layer 1 or 3; Deck B controls Layer 2 or 4.
- Page 20 11. Auto-Loop Buttons: These eight buttons correspond to the deck’s eight pads while in Auto-Loop Mode. In that mode, press one of the pads to trigger an auto-loop of the corresponding length. See Top Panel > Pad Mode Controls > Auto / Roll to learn more.
- Page 21 Front Panel 10 11 1. Headphones (1/4”, 1/8”) (6.35 mm, 3.5 mm): Connect your 1/4” or 1/8” (6.35 mm or 3.5 mm) headphones to this output for cueing and mix monitoring. 2. Headphone Volume: Adjusts the volume level of the headphone output. 3.
- Page 22 Rear Panel 17 18 12 13 1. NS7III Power Input: Use the included power cable to connect NS7III to a power outlet. While the power is switched off, plug the cable into NS7III first, then plug the cable into a power outlet.
- Page 23 17. Grounding Terminal: If using phono-level turntables with a grounding wire, connect the grounding wire to these terminals. If you experience a low “hum” or “buzz”, this could mean that your turntables are not grounded. Note: Some turntables have a grounding wire built into the RCA connection and, therefore, nothing needs to be connected to the grounding terminal.
-
Page 24: Technical Specifications
Appendix (English) Technical Specifications Analog Signal-to-Noise Ratio Dynamic Range (Codec) > 114 dB (full USB signal path, > 95 dB Balanced Outputs (XLR) A-weighted) > 94 dB Unbalanced Outputs (Line, RCA) > 94 dB Unbalanced Outputs (Booth, RCA) > 94 dB Headphone Outputs (1/4”, 1/8”... -
Page 25: Trademarks And Licenses
Specifications are subject to change without notice. Trademarks and Licenses Numark, Akai Professional, MPC, and Strip Search are trademarks of inMusic Brands, Inc., registered in the U.S. and other countries. Mac and OS X are trademarks of Apple Inc., registered in the U.S. and other countries. - Page 26 Manual Version 1.1...