
Related Manuals for Toshiba RAS-5M51U2ACVG-SG


Summary of Contents for Toshiba RAS-5M51U2ACVG-SG
- Page 1 FILE NO. SVM-20009-1 SERVICE MANUAL AIR-CONDITIONER SPLIT TYPE RAS-5M51U2ACVG-SG Revised on June, 2020...
-
Page 2: Table Of Contents
CONTENTS 1. SAFETY PRECAUTIONS ............3 2. SPECIFICATIONS ...............10 3. REFRIGERANT R32 ..............18 4. CONSTRUCTION VIEWS ............26 5. WIRING DIAGRAM ..............27 6. SPECIFICATIONS OF ELECTRICAL PARTS......28 7. REFRIGERANT CYCLE DIAGRAM........... 29 8. CONTROL BLOCK DIAGRAM ..........31 9. -
Page 3: Safety Precautions
1. SAFETY PRECAUTIONS The important contents concerned to the safety are described on the product itself and on this Service Manual. Please read this Service Manual after understanding the described items thoroughly in the following contents (Indications/Illustrated marks), and keep them. [Explanation of illustrated marks] Mark Explanation... - Page 4 For general public use Power supply cord of parts of appliance for outdoor use shall be at least polychloroprene sheathed flexible cord (design H07RN-F) or cord designation 602 5 IEC66 (1.5 mm² or more). (Shall be installed in accordance with national wiring regulations.) This appliance is not intended for use by person (including children) with reduced physical, sensory or mental capabilities, or lack of experience and knowledge, unless they have been given supervision or instruction concerning use of the appliance by a person responsible for...
- Page 5 DANGER • THE MANUFACTURER SHALL NOT ASSUME ANY LIABILITY FOR THE DAMAGE CAUSED BY NOT OBSERVING THE DESCRIPTION OF THIS MANUAL. • FOR USE BY QUALIFIED PERSONS ONLY. • MEANS FOR DISCONNECTION FROM THE SUPPLY HAVING A CONTACT SEPARATION OF AT LEAST 3 MM IN ALL POLES MUST BE INCORPORATED IN THE FIXED WIRING.
- Page 6 WARNING About the refrigerant • This product contains fluorinated greenhouse gases • Do not vent gases to the atmosphere. • The appliance shall be stored in a room without continuously operating ignition sources (for example: open flames, an operating gas ppliance or an operating electric heater). •...
- Page 7 WARNING • Wiring between the indoor unit and outdoor units must be well shaped so that the cover can be fir ly placed. Improper cover installation may cause increased heat, fire, o electrical shock at the terminal area. • Be sure to use only approved accessories or the specified parts. Failure to do so ma cause the unit to fall, water leakage, fire or el ctrical shock.
- Page 8 WARNING • Do not modify the power cable, connect the cable midway, or use a multiple outlet extension cable. Doing so may cause contact failure, insulation failure, or excess current, resulting in fire or electrical shock • If you detect any damage, do not install the unit. Contact your supplying dealer immediately.
- Page 9 CAUTION • Please read this installation manual carefully before installing the unit. It contains further important instructions for proper installation. • Exposure of unit to water or other moisture before installation could result in electric shock. Do not store it in a wet basement or expose to rain or water. •...
-
Page 10: Specifications
Type Outdoor unit Combinations of indoor unit models that can be connected Cooling RAS-5M51U2ACVG-SG Refer to page 11 to 16 NOTES A 1-room connection is not an option for the indoor units (you cannot connect only one indoor unit). Be sure to connect indoor units in two or more. - Page 11 2-2. Performance with single and maximum Indoor unit combination Outdoor unit : RAS-5M51U2ACVG-SG Operation mode : Cooling Current limit : none 220V Unit capacity Total Indoor unit Operating (kW) Cooling capacity (kW) Power consumption (W) Operating current (A) status Rated Max.
- Page 12 240V Unit capacity Total Indoor unit Operating (kW) Cooling capacity (kW) Power consumption (W) Operating current (A) status Rated Max. Rated Max. Rated Max. Rated 1 unit 2.70 3.55 3.80 3.85 3.70 3.70 1180 1470 3.44 5.45 6.55 3.14 4.50 1475 1665 3.40...
- Page 13 Outdoor unit : RAS-5M51U2ACVG-SG Operation mode : Cooling Current limit : 11.0A 220V Unit capacity Total Operating Indoor unit (kW) Cooling capacity (kW) Power consumption (W) Operating current (A) status Rated Max. Rated Max. Rated Max. Rated 1 unit 2.70 3.85...
- Page 14 240V Unit capacity Total Indoor unit Operating (kW) Cooling capacity (kW) Power consumption (W) Operating current (A) status Rated Max. Rated Max. Rated Max. Rated 1 unit 2.70 3.55 3.80 3.85 3.70 3.70 1180 1470 3.44 5.45 6.55 3.14 4.50 1475 1665 3.40...
- Page 15 Outdoor unit : RAS‐5M51U2ACVG-SG Operation mode : Cooling Current limit : 8.5A 220V Unit capacity Total Indoor unit Operating (kW) Cooling capacity (kW) Power consumption (W) Operating current (A) status Rated Max. Rated Max. Rated Max. Rated 1 unit 2.70 3.85 4.15 4.25...
- Page 16 240V Unit capacity Total Indoor unit Operating (kW) Cooling capacity (kW) Power consumption (W) Operating current (A) status Rated Max. Rated Max. Rated Max. Rated 1 unit 2.70 3.55 3.80 3.85 3.70 3.70 1180 1470 3.44 5.45 6.55 3.14 4.50 1475 1665 3.40...
- Page 17 2-2-1. Operation Characteristic Curve <Cooling> 20.00 Condition 18.00 Indoor side : Db27 C / Wb19 16.00 Outdoor side : Db35 C / Wb24 Indoor unit airflow : High 14.00 Connecting pipe lenght for each Indoor unit : 5m. 12.00 10.00 8.00 6.00 4.00...
-
Page 18: Refrigerant R32
3. REFRIGERANT R32 3. If a refrigeration gas leakage occurs during This air conditioner adopts the new refrigerant HFC (R32) which does not damage the ozone layer. installation/servicing, be sure to ventilate fully. If the refrigerant gas comes into contact with fire, a The next section describes the precautions for air conditioner using the new refrigerant. - Page 19 Table 3-2-1 Thicknesses of annealed copper pipes Thickness (mm) Nominal diameter Outer diameter (mm) R32(R410A) 6.35 0.80 0.80 9.52 0.80 0.80 12.70 0.80 0.80 15.88 1.00 1.00 2. Joints For copper pipes, flare joints or socket joints are used. Prior to use, be sure to remove all contaminants. a) Flare Joints Flare joints used to connect the copper pipes cannot be used for pipings whose outer diameter exceeds 20 mm.
- Page 20 d) Flare Processing Make certain that a clamp bar and copper pipe have been cleaned. ØD By means of the clamp bar, perform the flare processing correctly. Use either a flare tool for R32 or conven- tional flare tool. Flare processing dimensions differ according to the type of flare tool.
- Page 21 Table 3-2-6 Flare and flare nut dimensions for R22 Dimension (mm) Nominal Outer diameter Thickness Flare nut width diameter (mm) (mm) (mm) 6.35 9.52 13.0 13.5 12.70 16.2 16.0 12.9 15.88 19.7 19.0 16.0 19.05 23.3 24.0 19.2 Fig. 3-2-2 Relations between flare nut and flare seal surface 2.
- Page 22 3-3. Tools 3-3-1. Required Tools The service port diameter of packed valve of the outdoor unit in the air-water heat pump using R32 is changed to prevent mixing of other refrigerant. To reinforce the pressure-resisting strength, flare processing dimensions and opposite side dimension of flare nut (For Ø12.7 copper pipe) of the refrigerant piping are lengthened.
- Page 23 3-4. Recharging of Refrigerant When it is necessary to recharge refrigerant, charge the specified amount of new refrigerant according to the following steps. Recover the refrigerant, and check no refrigerant remains in the equipment. When the compound gauge’s pointer has indicated –0.1 Mpa (–76 cmHg), place the handle Low in the fully closed position, and turn off the vacuum pump’s power switch.
- Page 24 1. Be sure to make setting so that liquid can be charged. 2. When using a cylinder equipped with a siphon, liquid can be charged without turning it upside down. Accordingly, when charging refrigerant from the refrigerant cylinder to the equipment, charge it turning the cylinder upside down if cylinder is not equipped with siphon.
- Page 25 2. Characteristics required for flux 3-5-3. Brazing • Activated temperature of flux coincides with the As brazing work requires sophisticated techniques, brazing temperature. experiences based upon a theoretical knowledge, it must be performed by a person qualified. • Due to a wide effective temperature range, flux is hard to carbonize.
-
Page 26: Construction Views
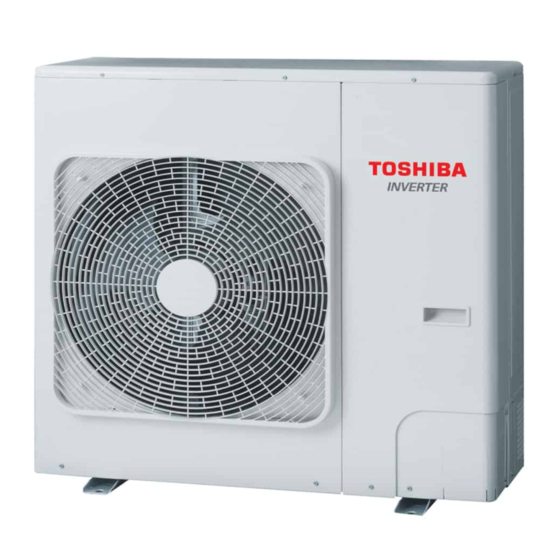
4. CONSTRUCTION VIEWS Outdoor Unit 2-dia.12x17 U-shape hole (For dia.8-10 anchor bolt) A leg part 2-dia.12x17 long hole B leg part (For dia.8-10 anchor bolt) Fan guard Connecting pipe port : Connecting pipe dia.6.35 Hanger E unit Connecting pipe dia.9.52 Connecting pipe dia.6.35 D unit Connecting pipe dia.9.52... -
Page 27: Wiring Diagram
5. WIRING DIAGRAM Outdoor Unit REACTOR CN300 3~ MAIN P.C. MCC-1436 FAN MOTOR BOARD REACTOR (MCC-1571) CN609 CN200 t°> POWER (BLU) CN201 SUPPLY THERMOSTAT 3~ CIRCUIT CN202 COMPRESSOR F100 COMPRESSOR T3.15A 250V P< ~ CN690 CN701 (WHI) HIGH PRESSURE SWITCH 250V ~... -
Page 28: Specifications Of Electrical Parts
6. SPECIFICATIONS OF ELECTRICAL PARTS Parts name Model name Rating Compressor DX270A2T-20L 3 Phases (4-Poles) ; 2200 W Outdoor fan motor WDF-340-A100-1 Output 100 W Reactor CH-56-3Z-T 5.8 mH, 18.5 A Reactor CH-76-VK 9.9 mH, 1 A UKV-A039 DC 12 V PMV coil MCC-1571 AC 220–240 V... -
Page 29: Refrigerant Cycle Diagram
7. REFRIGERANT CYCLE DIAGRAM High Pressure switch Accumulator tank. DX270A2T-20L :2.35kg (R32) NOTE : • You need not add refrigerant if the piping length is 40m or less. • If the length exceeds 41m, add 20g of refrigerant per 1 meter over. •... - Page 30 Operation data Outdoor unit : RAS‐5M51U2ACVG-SG Operation mode : Cooling Condition (dry bulb / wet bulb) : Indoor side 27/19ºC, Outdoor side 35/24ºC Current limit : none Standard Heat exchanger pipe Indoor unit Compressor revolution pressure temperature (rps) P (MPa) T1 ( T2 ( 0.8 - 1.0...
-
Page 31: Control Block Diagram
8. CONTROL BLOCK DIAGRAM Outdoor Unit (Inverter Assembly) Outdoor air temp. sensor Gas side pipe temp. sensor Discharge temp. sensor WP-041 (CONTROL P.C. B) A unit P.M.V. M.C.U A unit serial signal • Inverter outdoor frequency control communication circuit • A/D converter function B unit P.M.V. -
Page 32: Operation Description
9. OPERATION DESCRIPTION • Detection of inverter input current and current 9-1. Outline of Air Conditioner Control release operation This air conditioner is a capacity-variable type air • Over-current detection and prevention operation conditioner, which uses DC motor for the indoor fan to IGBT module (Compressor stop function) motor and the outdoor fan motor. - Page 33 9-2. Operation Description 1. Basic operation ......................... 34 2. Outdoor fan motor control ......................35 3. Capacity control ........................36 Current release control ......................36 5. Compressor protective control ....................37 6. Discharge temperature control....................37 7. Pulse motor valve (PMV) control....................37 9-3.
-
Page 34: Basic Operation
Item Operation flow and applicable data, etc. Description 1. Operation control 1. Basic operation Receiving the user’s operation condition setup, the operation statuses of indoor/outdoor units are controlled. 1) The operation conditions are selected by the remote controller as shown in the below. 2) A signal is sent by ON button of the remote controller. -
Page 35: Outdoor Fan Motor Control
Item Operation flow and applicable data, etc. Description 2. Outdoor fan The blowing air volume at the outdoor unit side is controlled. 1) The operation command sent motor control from the remote controller is Receiving the operation command from the controller of indoor processed by the indoor unit unit, the controller of outdoor unit controls fan speed. -
Page 36: Capacity Control
Item Operation flow and applicable data, etc. Description 3. Capacity 1) Five and Four indoor units from A to E determine the respective instruction revolutions from the control difference between the remote controller setting temperature (Ts) and the indoor temperature (Ta), and transmit this to the outdoor unit. -
Page 37: Compressor Protective Control
Item Operation flow and applicable data, etc. Description 5. Compressor 1) This control purposes to raise the operation frequency until 36Hz for 2 minutes in order to protective protect the compressor (Prevention of oil accumulation in the refrigerating cycle) when the status control that the operation frequency is 36Hz or less has continued for 10 hours was calculated. -
Page 38: Service Switch (Sw801, Sw802) Operations
9-3. Service switch (SW801, SW802) operations Various displays and various operations are enabled by push buttons (service) switches and LED on the outdoor control P.C. board. 9-3-1. LED display 5 patterns are provided for LED display. ○:ON (○*:3 sec ON/0.5 sec OFF), ●:OFF, ◎:Rapid Flashing(5 times/sec), ◇:Slow Flashing(1 time/sec) D800 D801 D802... - Page 39 9-3-2. Service switch setting and service support function You can choose service switch setting and service support function. Operating method is as below. Turn on the circuit breaker Push SW801 & SW802 at the same time for 5 sec or more Initial status D800 D801...
- Page 40 [Confirmation method of various settings] You can confirm that various settings are validated. 1) Check LED displays are in the initial status. If it are not so, return them to the initial status. 2) Push and hold SW801 for 5 seconds or more. D804 changes to slow flashing. 3) Push SW801 several times and then stop it at the point where LED display (D800 to D804) to be checked.
- Page 41 9-3-4. Service support function Various displays are available by setting service switches. [Operating method] 1) Check LED display is the initial status. If it is not so, set the initial status. 2) Push SW801 several times and stop it at the item that you want to check. ○:ON (○*:3 sec ON/0.5 sec OFF)●:OFF Display ◎:Rapid Flashing(5 times/sec) ◇:Slow Flashing(1 time /sec)
- Page 42 3) Pushing SW802, the display changes to next item. To see other display contents, repeat that. 4) To finish LED display, be sure to execute item 1) to return LED to the initial status (error display of current occurrence) and then finish LED display. [Error display] The error which is occurring at present and the latest error (including error that is occurring now) can be confirmed by checking display on the outdoor control P.C.
- Page 43 C. Sensor, current, compressor operation frequency, PMV opening, Miswiring (mispiping) check display Using the service display function, you can check a variety of information. ○:ON (○*:3 sec ON/0.5 sec OFF)●:OFF ◎:Rapid Flashing(5 times/sec) ◇:Slow Flashing(1 time /sec) display Contents D800 D801 D802 D803 D804 D805 Temp.
- Page 44 9-3-5. How to set the SERVICE SWITCH SETTING. If you want to set the "COOLING ONLY SETTING OFF ⇒ ON" . ○:ON, ●:OFF, ◎:Rapid Flashing(5 times/sec), ◇:Slow Flashing(1 time/sec) Turn on the circuit breaker Initial status D800 D801 D802 D803 D804 D805 (Yellow)
- Page 45 9-3-6. How to set the SERVICE SUPPORT FUNCTION. If you want to check the "COMPRESSOR FREQUENCY" . ○:ON, ●:OFF, ◎:Rapid Flashing(5 times/sec), ◇:Slow Flashing(1 time/sec) Turn on the circuit breaker Initial status D800 D801 D802 D803 D804 D805 (Yellow) (Yellow) (Yellow) (Yellow) (Yellow)
-
Page 46: Intermittent Operation Control For Indoor Fans Of The Indoor Unit At Thermo-Off Side In Heating Operation
9-4. Intermittent Operation Control for Indoor Fans of the Indoor Unit at Thermo-off Side in Heating Operation While heating operation is executed in two rooms, if room temperature reached the setup temperature in one room and thermo-off occurred, the following operations start. (Refer to the figure below.) 1. -
Page 47: Installation Procedure
10. INSTALLATION PROCEDURE 10-1. Installation/Servicing Tools Changes in the product and components In the case of an air conditioner using R32, in order to prevent any other refrigerant from being charged accidentally, the service port diameter of the outdoor unit control valve (3-way valve) has been changed. (1/2 UNF 20 threads per inch) •... - Page 48 10-2. Outdoor Unit 10-2-1. Accessory and Installation Parts Installation manual 10-2-2. Refrigerant Piping • Piping kit used for the conventional refrigerant cannot be used. • Use copper pipe with 0.8 mm or more thickness. • Flare nut and flare works are also different from those of the conventional refrigerant. Take out the flare nut attached to the main unit of the air conditioner, and use it.
- Page 49 18 or 24 or 26 6.35, 12.7 mm *2 Need the reducer (12.7 to 9.52 mm). *3 Need the expander (9.52 to 12.7 mm). Total 75 (RAS-5M51U2ACVG-SG) — • Locally procured. 10-2-5. Installation Installation Location • A place which can bear the weight of the outdoor unit and does not cause an increase in noise level and vibration.
- Page 50 CAUTION When the outdoor unit is installed in a place where the drain water might cause any problems, Seal the water leakage point tightly using a silicone adhesive or caulking compound. Precautions for Installation When the outdoor unit is to be installed in an elevated •...
- Page 51 12-2-6. Refrigerant piping Pipe connecting 1. Piping connections to the outdoor unit should be CAUTION arranged in the sequence A, B, C, D, E (5 rooms) starting from the bottom. Install in rooms that are 13 m3 or larger. If (For each piping connection, the gas pipe is on the a leak of refrigerant gas occurs inside the bottom and the liquid pipe is on the top.)
- Page 52 Tightening connection Half union Flare nut Align the centers of the connecting pipes and Externally Internally tighten the flare nut as far as possible with your threaded side threaded side fingers. Use a wrench to secure. Use a torque wrench to tighten. Then tighten the nut with a spanner and torque wrench as shown in the figure.
- Page 53 Pipe connection Air Purge Make wire and pipe connections for each indoor unit From the sake of environmental protection, use a vacuum pump to extract separately. the air during installation. * Prepare a 4 mm hexagon wrench. Align the centres of the connecting pipes and tighten the 1.
- Page 54 Valve stem cap connection Flare nut connections (Outdoor unit) * Check point example (RAS-5M51U2ACVG-SG) Performing Additional Installation of an Indoor Unit 1. Collect refrigerant from the outdoor unit. 2. Turn off the circuit breake . 3. Perform additional installation referring to the procedure from “Refrigerant Piping Connection”...
- Page 55 5. Attach the front panel to the outdoor unit. Stripping Length of connecting cable for outdoor unit Screw Connecting cable (E unit) Connecting cable (C unit) Connecting cable (D unit) * Connection example (RAS-5M51U2ACVG-SG) - 55 -...
- Page 56 Important instruction To all installers Please be remined that all air conditioners installed at HDB flats ar subjected to a current restriction of 11A or 8.5A. It is the installer’s responsibility to have to current release control set correctly for the type of HDB flat which the IMS unit is installed The setting method is the following.
- Page 57 12-2-9. Test run : ON, : OFF, : Rapid Flashing (5 times/sec.), : Slow Flashing (1 time/sec.) Wiring/Piping Check Description D800 D801 D802 D803 D804 D805 CAUTION Normal operation (no error) Trouble in unit A Electric current is applied on the ...
- Page 58 Instructions for the Customers 3. Hold down SW801 for at least 5 seconds, and check that D800 is lighted and D804 light is flashing(1time/sec.) • Explain to the customers the proper operation procedure and let them D800 D801 D802 D803 D804 D805 operate the air conditioner along with the supplied instruction manual.
- Page 59 10-3-4. Remote Control A-B Selection 10-3. Test Operation 10-3-1. Gas Leak Test • When two indoor units are installed in the same room or adjacent two rooms, if operating a unit, two units may Check the flare nut connections for gas leaks with a receive the remote control signal simultaneously and gas leak detector and/or soapy water.
-
Page 60: How To Diagnose The Trouble
11. HOW TO DIAGNOSE THE TROUBLE The pulse modulating circuits are mounted to both indoor and outdoor units. Therefore, diagnose troubles according to the trouble diagnosis procedure as described below. (Refer to the check points in servicing written on the wiring diagrams attached to the indoor/outdoor units.) Table 11-1 Troubleshooting Procedure Page... - Page 61 11-1. First Confirmation 11-1-3. Operation Which is not a Trouble (Program Operation) 11-1-1. Confirmation of Power Supply For controlling the air conditioner, the program Confirm that the power breaker operates (ON) operations are built in the microcomputer as normally. described in the following table. If a claim is made for running operation, check 11-1-2.
- Page 62 11-2. Primary Judgment To diagnose the troubles, use the following methods. 1) Judgment by flashing LED of indoor unit 2) Self-diagnosis by service check remote controller 3) Judgment of trouble by every symptom Firstly use the method (1) for diagnosis. Then, use the method (2) or (3) to diagnose the details of troubles. For any trouble occurred at the outdoor unit side, detailed diagnosis is possible by 6-serial LED on the control P.C.
- Page 63 11-4. Self-Diagnosis by Remote Controller (Check Code) 1. If the lamps are indicated as shown B to E in Table 11-3-1, execute the self-diagnosis by the remote controller. 2. When the remote controller is set to the service mode, the indoor controller diagnoses the operation condition and indicates the information of the self-diagnosis on the display of the remote controller with the check codes.
- Page 64 11-4-2 Caution at Servicing 1. After using the service mode of remote controller finished, press the [ ] button to reset the remote controller to normal function. 2. After finished the diagnosis by the remote controller, turn OFF power supply and turn its ON again to reset the air conditioner to normal operation.
- Page 65 Block distinction Operation of diagnosis function Action and Judgment Check Check Display flashing Block Cause of operation conditioner code code error status Serial signal 1) Defective wiring of the Indoor unit Flashes when 1) to 3) The outdoor unit never and connecting connecting cable or operates...
- Page 66 Block distinction Operation of diagnosis function Action and Judgment Check Check Display flashing Block Cause of operation conditioner code code error status Outdoor Current on inverter circuit All OFF Flashes after 1. Remove connecting lead wire of the is over limit in short time. error is detected compressor, and operate again.
- Page 67 Block distinction Operation of diagnosis function Action and Judgment Check Check Display flashing Block Cause of operation conditioner code code error status 1. Check installation conditions such as Compressor drive output error. All OFF Flashes after Outdoor (Relation of voltage, current error is detected packed valve opening, refrigerant 8 times*.
- Page 68 Block distinction Operation of diagnosis function Action and Judgment Check Check Display Block Cause of operation conditioner code code flashing error status The others Compressor does not rotate. All OFF Flashes after 1. Remove connecting lead wire of the (including Because of missed wiring, error is detected compressor, and operate again.
- Page 69 Block distinction Operation of diagnosis function Action and Judgment Check Check Display Block Cause of operation conditioner code code flashing error status Return signal of the outdoor Indoor unit Flashes when 1. . Check power supply (Rate +10%) The others operates error is detected unit has been sent when...
- Page 70 11-5. Judgment of Trouble by Symptom 11-5-1. Wiring Failure (Interconnecting and Serial Signal Wire)(1) Outdoor unit does not operate 1) Is the voltage between of the indoor terminal block varied? 2) Confirm that transmission from indoor unit to outdoor unit is correctly performed based upon the following diagram.
- Page 71 Service Support Function (LED Display, Switch Operation) 1. Outline A various setup and operation check can be performed by the push down button switches (SW801, SW802) on the outdoor control P.C. board WP-041. Operation part Part No. Specifications Operation contents SW801 Push down button switch Performs the specific operation to check maintenance and various initial settings.
- Page 72 11-6. Trouble Diagnosis by Outdoor LED For the outdoor unit, the self-diagnosis is possible by LED (Green) and five LEDs (Yellow). Green LED (D805) and Yellow LEDs (D800 to D804) are provided on the display P.C. board WP-041. 1. In the initial LED display status, Green LED(D805) is lighted as below. Normal Error occurring D800...
- Page 73 :ON ( *:3 sec ON / 0.5 sec OFF) :OFF Check Outdoor Check and troubleshooting code LED display (Item without special mention indicates part of outdoor unit.) [1C] [Case thermo operation, Power supply error ] Is AC mains voltage correct? Confirm power supply (198 to 264V) construction.
- Page 74 :ON ( *:3 sec ON / 0.5 sec OFF) :OFF Check Outdoor Check and troubleshooting code LED display (Item without special mention indicates part of outdoor unit.) * * [19] [Discharge temp. sensor (TD) error] Is connection of CN600 Correct connector.
- Page 75 :ON ( *:3 sec ON / 0.5 sec OFF) :OFF Check Outdoor Check and troubleshooting code LED display (Item without special mention indicates part of outdoor unit.) [1C] ∗ There is a possibility that it is one of the following errors. Confirm LED on display P.C.
- Page 76 :ON ( *:3 sec ON / 0.5 sec OFF) :OFF Check Outdoor Check and troubleshooting code LED display (Item without special mention indicates part of outdoor unit.) * [1C] [A room gas side temp. sensor (TGa) error] (Continued) Is connection of CN604 Correct connector.
- Page 77 :ON ( *:3 sec ON / 0.5 sec OFF) :OFF Check Outdoor Check and troubleshooting code LED display (Item without special mention indicates part of outdoor unit.) [1d] [Compressor lock] Is AC mains voltage correct? Check wiring construction. (198 to 264V) Ask repair of power supply.
- Page 78 :ON ( *:3 sec ON / 0.5 sec OFF) :OFF Check Outdoor Check and troubleshooting code LED display (Item without special mention indicates part of outdoor unit.) [20] ∗ There is a possibility that it is one of the following errors. Confirm LED on outdoor P.C.
- Page 79 :ON ( *:3 sec ON / 0.5 sec OFF) :OFF Check Outdoor Check and troubleshooting code LED display (Item without special mention indicates part of outdoor unit.) [21] ∗ There is a possibility that it is one of the following errors. Confirm LED on outdoor P.C.
- Page 80 11-7. Inspection of the Main Parts [1] Sensor characteristic table : Discharge temp. sensor : Outdoor temp. sensor TGa to TGe : Gas side temp. sensor TO,TGa to TGe Temperature (°C) 11-8. Outdoor Unit Part name Checking procedure Measure the resistance value of each winding by using the tester. Compressor (Model : DX270A2T-20L) Position...
- Page 81 11-9. How to Simply Judge Whether Outdoor Fan Motor is Good or Bad 1. Symptom • Outdoor fan motor does not rotate. • Outdoor fan motor stops within several tens seconds though it started rotating. • Outdoor fan motor rotates or does not rotate according to the position where the fan stopped, etc. Remote controller check code “02 : Outdoor block, 1A : Outdoor fan drive system error”...
- Page 82 <MCC-1571> Electrolytic capacitors (760µF/400V) Lead wire for grounding P09 (Black) Fan motor output Fan motor output Fan motor output CN300 CN300 CN300 Compressor Compressor Compressor (Red, White, Black) (Red, White, Black) (Red, White, Black) output terminals output terminals output terminals CN200 CN200 CN200...
- Page 83 <WP-041> Indoor/Outdoor communication wire Power supply Protective fuse connecting connector F01 (250V, 3.15A ,plastic case) CN01 (Red) Indoor/Outdoor communication signal LED D501, D508, D515, D524, D533 (Green,Outdoor → Indoor) D502, D511, D517, D525, D534 (Orange,Indoor → Outdoor) Lead wire for Indoor/ Outdoor communication P01 (Yellow) P02 (Red)
-
Page 84: How To Replace The Main Parts
12. HOW TO REPLACE THE MAIN PARTS 12-1. Outdoor Unit Part name Procedure Remarks CAUTION Common procedure Never forget to put on the gloves at working time; otherwise an injury will be caused by the parts etc. 1. Detachment 1) Stop operation of the air conditioner, and turn off the switch of the breaker. - Page 85 Part name Procedure Remarks Discharge 1. Detachment port cabinet 1) Perform work of Detachment 1 of 1 . 2) Take off screws for the discharge port cabinet and the partition plate. (ST1T Ø4 × 8, 3 pcs.) Heat exchanger 3) Take off screws for the discharge port cabinet Fin guard Motor base and the bottom plate.
- Page 86 Part name Procedure Remarks Inverter 1) Perform works Detachment 1 of 1 and 3 . Inverter fixed board Fixing assembly screw WARNING Never disassemble the inverter until 5 minutes after the power supply was turned off because there is a fear that an electric shock may occur. NOTE) When working, be sure to use the insulate tools and put on the insulated gloves.
- Page 87 Part name Procedure Remarks Inverter 8) Remove the soundproof plate (upper). Soundproof plate (upper) assembly 9) Remove the terminal cover of the compressor (Continued) and then remove the compressor lead of the compressor. 10) Pull up the inverter assembly and then remove it. Reactor cover side Compressor lead Case thermo...
- Page 88 Part name Procedure Remarks CDB P.C. 1) Perform works of Detachment 1 of 1 and 4) Power supply Terminal relay board connector connector CDB P.C. board CAUTION Never disassemble the inverter until 5 minutes after the power supply was turned off because there is a fear that an electric shock may occur.
- Page 89 Part name Procedure Remarks 7) Remove the earth wire of IPDU P.C. board. IPDU P.C. Fixing screws Earth screw (Truss head B tight screw Ø4 × 6, 1 pc.). board for element 8) Take off fixing screws for IPDU P.C. board. (Continued) (7 positions) (Flange nut to fix element Ø3 ×...
- Page 90 Part name Procedure Remarks Replacement 1. Reactor to be attached to the inverter Reactor cover Reactor of reactor assembly relay connector 1) Perform works of Detachment 1 of 1 and 2) Remove the relay connector of the reactor. 3) Remove the reactor cover. (Truss head B tight screw Ø4 ×...
- Page 91 Part name Procedure Remarks Fan motor 1) Perform works of Detachment 1 of 1 and 2 . Propeller fan 2) Take off flange nut which fixes the fan motor and the propeller fan. Loosened by Loosened by Loosened by turning clockwise turning clockwise turning clockwise ∗...
- Page 92 Part name Procedure Remarks Compressor 1. Removal of defective compressor assembly 1) Perform work of Detachment 1 of 1 . 2) Recover the refrigerant gas from the outdoor unit. 3) Perform works of 2 , 3 and 4 . 4) Remove the soundproof plate and TD sensor. 5) Take off fixing screw for the anchor board and the partition plate.
- Page 93 Part name Procedure Remarks Fan guard 1. Detachment 1) Perform works of Detachment 1 of 1 and 2 . Discharge Bell mouth port cabinet CAUTION Work on the cardboard, cloth, and etc. in order to prevent damage on the product. 2) Take off the discharge port cabinet and put it as the fan guard side directs downward.
- Page 94 No. Part name Procedure Remarks 1. Detachment Coil: Black 1) Perform work of Detachment 1 of [1]. Coil: Blue 2) Turn the coil clockwise (counterclockwise) and then Coil: Green remove it from PMV main unit. (All 5 pcs.) Coil: Red Coil: Yellow 2.
- Page 95 No. Part name Procedure Remarks TD sensor ∗ Attachment (Discharge Mount TD sensor on the straight part of the discharge pipe temperature) so that the lead wire directs upward and the sensor directs upward of the cabinet. Detail B Detail B TO sensor ∗...
- Page 96 Part name Procedure Remarks TG sensor ∗ Attachment TGe: Black Mount these sensors on the directly arranged TGd: Blue part of the header connecting pipe at gas side TGc: Green so that the cabinet turns toward the front side TGb: Red and the sensors turn toward upper cabinet.
- Page 97 Part name Procedure Remarks Sensor wiring ∗ Bind TO sensor with the bundling band. Inverter fixing board process ∗ Pass TO sensor through upper part of the (Continued) inverter fixing board and then bind them with the bundling band. NOTE) Using the bundling band being on the market, be sure to bind the position which was bound.
-
Page 98: Exploded Views And Parts List
13. EXPLODED VIEWS AND PARTS LIST 13-1. Outdoor Unit 17, 36 18, 37 19, 38 63 HOLDER SENSOR (TD) 64 HOLDER SENSOR (TGa, TGb) 65 HOLDER SENSOR (TGc, TGd, TGe) Location Part Location Part Description Description 43T42342 BASE PLATE ASSEMBLY 43T46439 BODY-PMV 43T19346... - Page 99 13-2. Inverter Assembly 706 REACTOR, CH-56-3Z-T 705 REACTOR TERMINAL BLOCK, 9P TERMINAL BLOCK, 9P SPACER, COLLAR SPACER, BUSH SPACER 707 FUSE SENSOR ASSY, SERVICE (TO) SENSOR ASSY, SERVICE (TGA~TGE) SENSOR ASSY, SERVICE (TD) 710 PC BOARD ASSY, MCC-1436 712 PC BOARD ASSY, MCC-1571 713 PC BOARD ASSY, WP-041 Location Part...
- Page 100 144/9 MOO 5, BANGKADI INDUSTRIAL PARK, TIVANON ROAD, TAMBOL BANGKADI, AMPHUR MUANG, PATHUMTHANI 12000, THAILAND.