Maytag Whirlpool MHN33PR Product Introduction
Hide thumbs
Also See for Whirlpool MHN33PR:
- Installation instructions manual (64 pages) ,
- Installation instructions manual (48 pages)
Table of Contents
Advertisement
Advertisement
Table of Contents

Related Manuals for Maytag Whirlpool MHN33PR


Summary of Contents for Maytag Whirlpool MHN33PR
- Page 1 MHN33PR Product Introduction September 2016...
- Page 2 Outline I.Installation II.Technical Information/Description III.Installation (How To) a.Physical/Mounting b.Programming (Card and Non-Card) IV.Usage and Demo V.Servicing a.Diagnostics b.Disassembly c.Re-assembly d.Common Issues and Solutions...
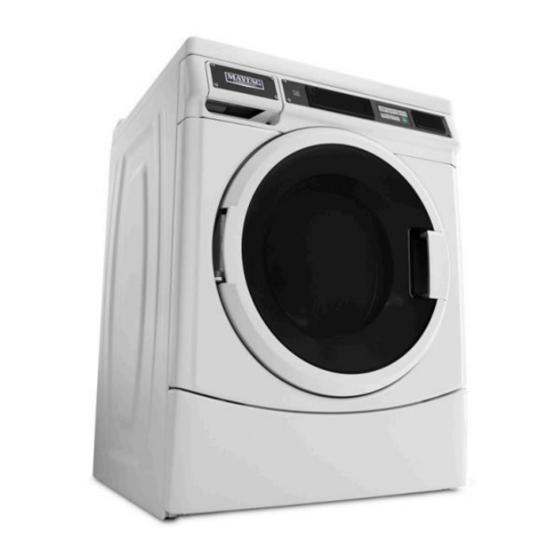
- Page 3 Feature Definition • 10.5 Kg Capacity • Advance Spin Technology • Duracore Drive System • Intelligent Controls • With M-series Technology • Energy-efficient Cleaning • Clothespin™ App By Maytag Compatible • HWD in mm: 961 x 686 x 732...
- Page 4 Accessories For Card System Operation...
-
Page 5: Technical Specifications
Technical Specifications MHN33PR 11kg. Capacity Energy Advantage ™ High-Efficiency Front-Load Washer BREAKER/FUSE MIN. REQUIREMENTS MOTOR: Variable-speed, reversible, thermo- protected, high-efficiency, controlled induction EXTRACT SPEED Maximum RPM 1,000 Maximum g-force HWD in mm: 961 x 686 x 732... -
Page 6: Pre-Installation Requirements
Pre-installation Requirements MHN33PR 11kg. Capacity Energy Advantage ™ High-Efficiency Front-Load Washer • Faucet with thread (3/4) • Standing Pipe - 30-39 inches in height - 2 inches in diameter... -
Page 7: Installation Procedure
Installation Procedure • Using a 1/2" wrench, loosen each of the shipping bolts at the back of the unit. • Once all 4 bolts are removed, discard the bolts and spacers. -
Page 8: Installation Reminders
Installation Reminders Using a 1/2" wrench, loosen each of the shipping bolts at the back of the unit. Check the levelness of the washer by placing a After the washer is level, use a 9/16" level on the top edge of the washer, first side to open-end wrench to turn the nuts on the feet tightly against the washer cabinet. -
Page 9: Operational Requirements
Operational Requirements Water Pressure: 20-100 psi (137.9-689.6 kPa) Water Flow Rate: 1L/10sec or 1.5L/15sec Space Requirements: To avoid operational noise created by the unit’s vibration, customer must provide enough spacing. Left and Right Front and Back**... - Page 10 Installation Reminders Using a 1/2" wrench, loosen each of the shipping bolts at the back of the unit. Check the levelness of the washer by placing a After the washer is level, use a 9/16" level on the top edge of the washer, first side to open-end wrench to turn the nuts on the feet tightly against the washer cabinet.
-
Page 11: Programming Procedure
Programming Procedure 1. This model is original setup for self- service laundry that’s why it initially displays a price of “0.00” on the screen. 2. Make sure to set it up to free cycle first before operating it. - Page 12 Programming Procedure There are 2 ways to enter the Setup Mode 1. Press the upper left key pad. 2. Press the lower right key pad. 3. Press the upper right key pad. 4. Press the lower left key pad...
- Page 13 Programming Procedure There are 2 ways to enter the Setup Mode Press or toggle the reset switch (whichever is installed) at the back of the unit.
- Page 14 Programming Procedure This product has TWO operational modes: FREE CYCLE: No money is needed to operate the machine HWD in mm: 961 x 686 x 732...
- Page 15 Programming Procedure This product has TWO operational modes: DEBIT CARD: A card reader will be attached to the unit, customer will need a debit card HWD in mm: 961 x 686 x 732 to start using the machine...
- Page 16 Programming Procedure DEBIT CARD: A card reader will be attached to the unit, customer will need a debit card to start using the machine HWD in mm: 961 x 686 x 732...
- Page 17 Free Cycle Setup No money is needed to operate the machine, can be used in a typical Laundry Shop Setup...
- Page 18 Free Cycle Setup After entering the setup mode, “6 07” will appear on the screen Set-up Code: Represents the different parameters needed to setup the washing machine...
- Page 19 Free Cycle Setup After entering the setup mode, “6 07” will appear on the screen Set-up Code: Represents the different parameters needed to setup the washing machine...
- Page 20 Free Cycle Setup After entering the setup mode, “6 07” will appear on the screen Set-up Code Value: This can vary between 0 – 99 depending on the parameter that needs to be adjusted.
- Page 21 Free Cycle Setup Use the buttons to set the value of the parameters - Pressing this key pad will increment the value of the parameter. Pressing this keypad will decrease the value. Pressing this key pad will advance to the next available set-up code.
- Page 22 Parameters that are commonly used… 1. Setting the Cycle Price to Free Cycle: Technicians need to set all the wash programs (Normal, Delicates, Power Wash) to free cycle. Cycle Price - Normal (0-Free Cycle) Cycle Price - Delicates (0-Free Cycle) Cycle Price –...
- Page 23 Parameters that are commonly used… Set-up Code: Represents the different parameters needed to setup the washing machine Wash Length (9-17 minutes) This parameter sets the wash length for all the wash programs Pre-Wash Length (2-7 minutes) This parameter sets the pre-wash length for all the wash programs Final Spin Length (3-8 minutes) This parameter sets the spin length for all the wash programs...
- Page 24 Parameters for the Extra Cycle Settings… Set-up Code: Represents the different parameters needed to setup the washing machine Normal Cycle Settings This parameter sets the cycle settings only for the Normal Wash Program Delicates Cycle Settings This parameter sets the cycle settings only for the Delicates Wash Program Power Wash Cycle Settings This parameter sets the cycle settings only for the Power Wash Program...
- Page 25 Parameters for the Extra Cycle Settings… Extra Cycle Settings: The Extra Rinse, Prewash and Wash Temperature can be set by default through these parameters.
- Page 26 Debit Card Setup A card reader will be attached to the unit, customer will need a debit card to start using the machine. This is used for self- service laundry setups.
- Page 27 Debit Card Setup Connect the card reader to the Attach the card reader to the AA3/Card Reader slot of the UI front panel of the unit. Board.
- Page 28 Debit Card Setup Using a programmed Setup Card with Install the front panel to the matching site code of the card reader unit. insert it to the card reader.
- Page 29 Debit Card Setup It will display “SU”, then It will display its programed pricing. remove the card when it Test it using the MONEY CARD. displays “donE”.
- Page 30 Usage Reminders...
-
Page 31: Detergent Dispenser
Detergent Dispenser Fabric Softener Detergent Liquid Bleach... -
Page 32: Washer Care
Washer Care • Cleaning the Door Seal/Bellow • Washer Maintenance Procedure... -
Page 33: Washer Maintenance
Washer Maintenance Cleaning the Door Seal/Bellow Open the washer door and remove any clothing or items from the washer. Inspect inner glass door. If debris is present, wipe off debris using damp cloth. Inspect the colored seal/bellow between the door opening and the basket for stained areas. - Page 34 Washer Maintenance Cleaning the Door Seal/Bellow If stained areas are found, wipe down these areas of the seal/bellow, using the procedure that follows. a) Mix a dilute solution, using 3/4 cup (177 mL) of liquid chlorine bleach, and 1 gal. (3.8 L) of warm tap water.
- Page 35 Washer Maintenance Washer Maintenance Procedure 1. Open the washer door and remove any clothing or items from the washer. 2. Use liquid chlorine bleach: Open the dispenser drawer and immediately add 2/3 cup (160 mL) of liquid chlorine bleach to the bleach compartment.
- Page 36 Washer Maintenance Washer Maintenance Procedure 4. To start the Washer Cleanout cycle, first enter “Service Diagnostic Test Mode”. Then press and hold EXTRA RINSE until “P-08” is displayed. Press START, afterwards the screen will show the washer status. NOTE: This cycle should not be used with anything still loaded in the wash basket.
- Page 37 Customer Usable Codes Codes that customers may use when certain situations arise in the course of their operation...
- Page 38 Customer Usable Codes Used to restore the unit to operational mode Error Code Reset after being interrupted by an error Applicable for debit card setups, used as a free cycle, if Cycle Credit customer’s paid cycle has been interrupted by an error. Used as a touch up cycle, if clothes are still dripping wet or if there’s still water...
- Page 39 Customer Usable Codes Error Code Reset Press the reset switch OR pull-out the AA1 service switch OR use the Service Diagnostic Code. The error code will still display on the screen Press and hold the UPPER RIGHT button until P-01 is displayed Wait for the door to unlock before depressing the reset...
- Page 40 Customer Usable Codes Error Code Reset Press the RESET switch/Pull Error code will still display out the AA1 service switch on the screen...
- Page 41 Customer Usable Codes Error Code Reset Press and hold the UPPER P-01 is displayed RIGHT button...
- Page 42 Customer Usable Codes Error Code Reset Wait for the door to unlock Test if the unit is already before depressing the operational RESET switch...
- Page 43 Customer Usable Codes Cycle Credit Press the reset switch OR pull-out the AA1 service switch OR use the Service Diagnostic Code. Setup code “6 00” will appear on the screen. Press and hold the UPPER RIGHT button until P-01 is displayed.
- Page 44 Customer Usable Codes Drain and Spin Cycle Press the reset switch OR pull-out the AA1 service switch OR use the Service Diagnostic Code. Setup code “6 00” will appear on the screen. Press and hold the UPPER RIGHT button until P-01 is displayed.
-
Page 45: Diagnostic Codes
Diagnostic Codes Codes that service technicians may use when certain situations arise in the course of a customer’s operation... - Page 46 Error Codes Error Description Possible Cause Code – A power surge/drop. CCU ERROR: Communication – Reversed polarity or mis-wire, along with open error within the Central Control Unit ground switches. (CCU); the pump drive in CCU fails to activate; one of the main relays in the CCU fails to activate.
- Page 47 Diagnostic Codes P-03 Quick Overview Test P-04 Manual Overview Test This cycle provides more typical full This cycle provides a quick length fills, tumbles, drains, and verification that the cold and hot water actuator valves, and pump motor are working, dispenser movement, allowing for a as well as.
- Page 48 Diagnostic Codes P-05 Button Test P-07 UI Diagnostics This diagnostic test allows technicians to determine faulty buttons and missing LCD Segments.
- Page 49 Diagnostic Codes P-09 Factory Reset This may be done to reset the machines memory, especially when the machines operation becomes intermittent.
- Page 50 Help Codes Press the reset switch OR pull-out the AA1 service switch OR use the Service Diagnostic Code. Press the LOWER MIDDLE key until it displays “2.XX”. Press the LOWER LEFT key, “1h.00” should appear on the screen. Press LOWER MIDDLE to move to another option (see Help Mode Submenu).
- Page 51 Help Codes PURPOSE: 1. This mode is used to verify the behavior of the washer, along with the operation of a customer cycle. 2. It allows verification of the current status of many switches, actuators, valves, and relays. 3. It also reports the current values of the drum speed, unbalance value, and power used by the MCU.
- Page 52 Help Codes PURPOSE: 4. Records the Error Code History which helps in diagnosing the problem. 5. Contains the command to increase wash water level. 6. Contains the software version, needed when software issues are encountered.
-
Page 53: Warranty Info
Warranty Info...