Sony XAV-63 Operating Instructions Manual
Av center
Hide thumbs
Also See for XAV-63:
- Operating instructions manual (208 pages) ,
- Specifications (4 pages) ,
- Installation/connections (2 pages)

Related Manuals for Sony XAV-63


Summary of Contents for Sony XAV-63
- Page 1 4-410-680-61(1) AV Center Operating Instructions XAV-64BT XAV-63 ©2012 Sony Corporation...
- Page 2 Be sure to install this unit in the dashboard of the car for safety. For installation and connections, refer to the supplied “Installation/Connections” guide. About this manual • This manual contains instructions for XAV- 64BT and XAV-63. • XAV-64BT is the model representatively used for illustration purposes.
-
Page 3: Table Of Contents
Table of Contents Notes on safety ......6 Notes on installation ..... 6 Copyrights . - Page 4 Useful Functions Listing up tracks/images/video files — List....... . 30 Selecting a track/image/video file .
- Page 5 Additional Information Precautions ......52 Notes on LCD panel ....52 Notes on discs .
-
Page 6: Notes On Safety
Notes on safety • Comply with your local traffic rules, laws and regulations. • While driving – Do not watch or operate the unit, as it may lead to distraction and cause an accident. Park your car in a safe place to watch or operate the unit. –... -
Page 7: Copyrights
Gracenote in the United States and/or other countries. This product uses font data which is licensed to Sony by Monotype Imaging Inc. or its affiliates. iPhone, iPod, iPod classic, iPod nano, and iPod touch are trademarks of Apple Inc., registered in the U.S. -
Page 8: Notes On Bluetooth Function (Xav-64Bt Only)
IMPORTANT NOTICE! Safe and efficient use Changes or modifications to this unit not expressly approved by Sony may void the user’s authority to operate the equipment. Please check for exceptions, due to national requirement or limitations, in usage of Bluetooth equipment before using this product. -
Page 9: Playable Discs And Symbols Used In These Operating Instructions
Playable discs and symbols used in these Operating Instructions This unit can play various video/audio discs. The following chart helps you to check if a disc is supported by this unit, as well as what functions are available for a given disc type. Disc symbol in manual *1 Audio files can also be stored. -
Page 10: Location And Function Of Controls/Terminals
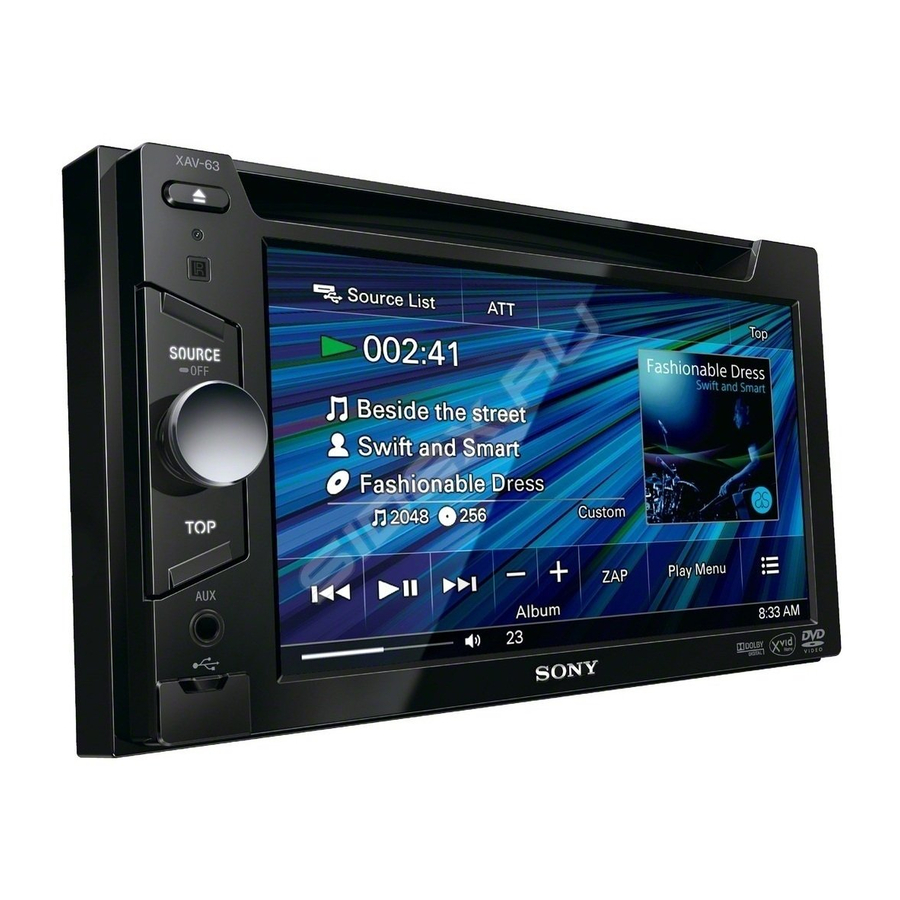
Location and function of controls/terminals Main unit For details, see the pages listed below. A Z (Eject) button page 17 B Reset button page 14 C Receptor for the remote commander D Disc slot page 17 E TOP button For XAV-64BT Press to open the top menu. - Page 11 Screen displays When no source is selected: Source List Top menu (XAV-64BT only): Source list: A “Source List” key Touch to open the source list. B “Top” key XAV-64BT Touch to open the top menu. XAV-63 Touch to open the source list. C Clock page 14, 48 (Close) key Touch to close the menu.
-
Page 12: Rm-X170 Remote Commander
RM-X170 Remote Commander • The remote commander can be used to operate the audio controls. For menu operations, use the touch panel. • For details, see the pages listed below. • Remove the insulation film before use (page 14). A OFF button Press to exit the source/stop the source. -
Page 13: Mode Button
J .m/M> buttons Radio: Press to tune to stations automatically. Press and hold to find a station manually. Disc* /USB: Press to skip a chapter/track/scene/file. Press and hold momentarily to reverse/ fast-forward video. Press and hold to reverse/fast-forward a track. Bluetooth Audio* Press to skip a track. -
Page 14: Getting Started
Getting Started Resetting the unit Before operating the unit for the first time, or after replacing the car battery or changing the connections, you must reset the unit. Press the reset button (page 10) with a pointed object, such as a ballpoint pen. Note Pressing the reset button will erase the clock setting and some stored contents. -
Page 15: Radio
Radio Listening to the radio Touch “Source List,” then “Tuner.” (For XAV-64BT only: From the top menu, touch “AV Source,” then “Tuner.”) The radio reception display appears, and the preset list is displayed automatically. Source List Band Touch “Band.” The band list appears. Source List Band Touch the desired band (“FM1,”... -
Page 16: Reception Indications
Reception indications Source List Band A Current source icon* B Band name, preset number* status C Volume level* D EQ7 setting status *1 Appears only when the controls are displayed. *2 Appears only when a preset station is received. *3 When ATT is activated, Storing and receiving stations Caution When tuning to stations while driving, use Best... -
Page 17: Selecting Pty
Selecting PTY During FM reception, touch “PTY List.” The PTY list appears if the station is transmitting PTY data. To scroll the list, touch v/V. Touch the desired program type. The unit searches for a station broadcasting the selected program type. To close the PTY list, touch “PTY List.”... -
Page 18: Playback Controls
Playback controls Touch the display if the playback controls are not displayed. Common to all discs/formats Source List Source List Source List Play Menu Control “Source List” Touch to open the source list. (page 11) “ATT” Touch to attenuate the sound. To cancel, touch again. -
Page 19: Playback Indications
“DVD Control” Touch to open the DVD control menu, which contains the following items. • “Audio”: Touch repeatedly to select the audio language/format. (page 20)* • “Subtitle”: Touch repeatedly to turn off/select the subtitle language.* • “Angle”: Touch repeatedly to change the viewing angle.* •... -
Page 20: Using Pbc (Playback Control) Functions
Using PBC (playback control) functions The PBC menu interactively assists with operations while a PBC-compatible VCD is played. Start playing a PBC-compatible VCD. The PBC menu appears. Touch “PBC Panel.” The menu control panel appears. Touch the number keys to select the desired item, then touch “ENTER.”... -
Page 21: Changing The Audio Channel
Changing the audio channel When playing a VCD/CD/MP3/WMA/AAC/ Xvid/MPEG-4, you can listen to both the right and left channel, only the right channel, or only the left channel via both the right and left speakers. The options are indicated below. “Stereo”: Standard stereo sound (default) “1/Left”: Left channel sound (monaural) “2/Right”: Right channel sound (monaural) -
Page 22: Direct Search Play
The shuffle options and switching order of each disc/format are indicated below. Disc/format Options “OFF”: Returns to normal play mode. “Title”: Plays chapters in the current title in random order. “OFF”: Returns to normal play mode. “Disc”: Plays tracks in the current disc in random order. -
Page 23: Usb Device Operations
USB Device Operations • MSC (Mass Storage Class) and MTP (Media Transfer Protocol) type USB devices compliant with the USB standard can be used. • Compatible codecs are MP3 (.mp3), WMA (.wma), AAC (.m4a), JPEG (.jpg), Xvid (.avi), and MPEG-4 (.mp4). •... -
Page 24: Enjoying Music According To Your Mood - Sensme
Enjoying music according to your mood — SensMe™ Sony’s unique “SensMe™ channels” and “SensMe™ mood” features automatically group tracks by channel or mood, and allow you to enjoy music intuitively. Before using the SensMe™ function The following is the basic procedure required to enjoy the SensMe™... -
Page 25: Transferring Tracks To The Usb Device Using "Content Transfer
Transferring tracks to the USB device using “Content Transfer” To enable the SensMe™ function on this unit, tracks need to be analyzed and transferred to the registered USB device using “Content Transfer.” Connect the registered USB device to your computer. For “WALKMAN,”... - Page 26 Channel list x Recommended, Shuffle All “Morning” (5:00 AM – 9:59 AM) “Daytime” (10:00 AM – 3:59 PM) “Evening” (4:00 PM – 6:59 PM) “Night” (7:00 PM – 11:59 PM) “Midnight” (12:00 AM – 4:59 AM) Plays tracks recommended for each time of day. Set the clock (page 14) for the channel to be displayed accurately.
-
Page 27: Playing Tracks In Mood Maps - Sensme™ Mood
Playing tracks in mood maps — SensMe™ mood “SensMe™ mood” distributes tracks as dots on a two-axis mood map, based on the characteristics of the individual tracks. By touching the point on the map according to your mood, a circle appears around the touched point, and the tracks inside the circle are played. -
Page 28: Searching For A Track By Listening To Track Passages - Zappin
Searching for a track by listening to track passages — ZAPPIN™ While playing short track passages from a USB device in sequence, you can search for a track you want to listen to. This function is convenient, for example, when searching for a track in shuffle or shuffle repeat mode. -
Page 29: Setting The Play Mode
About playback controls and indications You can control iPod playback in the same way as disc playback. For details, see “Playback controls” on page 18. For details on playback indications, see “Playback indications” on page 19. To stop playback Press and hold (SOURCE/OFF) for 1 second. To disconnect the iPod Stop playback, then disconnect. -
Page 30: Operating An Ipod Directly - Passenger App Control
Operating an iPod directly — Passenger App Control You can directly operate an iPod connected to this unit. During playback, touch “Play Menu,” then the “Passenger App Control” box to set to “ON.” Deactivating Passenger App Control Touch the “Passenger App Control” box to set to “OFF.”... -
Page 31: Using Gesture Command
Touch , then “Audio,” “Image,” or “Video” to select the file type. Touch the desired file. Playback of the selected file starts. Using Gesture Command You can perform frequently-used operations by drawing the following command stroke on the reception/playback display. Do this Radio reception: seek forward stations. -
Page 32: Bluetooth Status Indications
3 Handsfree calling/audio streaming You can make/receive a handsfree call, or listen to audio through this unit. For details on the compatibility of your device, visit the support site on the back cover. Bluetooth status indications Calling... Name 0123456789 Calling... Bluetooth status indications None: Bluetooth signal is off. -
Page 33: Connecting
Operate the Bluetooth device to search for this unit. A device list appears on the display of the device. This unit is displayed as “Sony Automotive.” DR-BT30Q Sony Automotive XXXXXXX If passkey* input is required on the display of the device, input “0000.”... -
Page 34: Handsfree Calling
Connecting to the audio device last- connected from this unit Make sure the Bluetooth signal of this unit and the audio device is turned on. Touch “Source List,” then “BT Audio.” Touch “Connect.” “ ” flashes while the connection is being made, then stays lit while connected. -
Page 35: Receiving Calls
The Bluetooth Phone display appears. Touch “Call Menu,” then “Recent Call Browsing.” The call history list appears. To scroll the list, touch v/V. Touch the desired item in the list. The contact confirmation display appears. Touch “Call.” The call is made and the calling display appears until the other party answers. -
Page 36: Operations During A Call
Operations during a call The following display appears during a call. BT Menu On the Line. Name 0123456789 Handsfree OFF 10:59 To adjust the talker’s voice volume Turn the volume control dial during a call. The level of the talker’s voice volume will be stored into memory, independently from the regular volume level. -
Page 37: Audio Streaming
Audio streaming Listening to a Bluetooth device via this unit If the other device supports A2DP (Advanced Audio Distribution Profile), you can listen to the playback sound via this unit. Connect this unit and the Bluetooth device (page 33). Reduce the volume on this unit. Touch “Source List,”... -
Page 38: Sound Adjustment
Sound Adjustment Selecting the sound quality — EQ7 You can select an equalizer curve from 7 music types (“Xplod,” “Vocal,” “Edge,” “Cruise,” “Space,” “Gravity,” “Custom,” or “OFF”). During reception/playback, touch “Source List,” then Touch “Sound.” The sound setting menu appears. Touch “EQ7.”... -
Page 39: Optimizing Sound For The Listening Position - Intelligent Time Alignment
Optimizing sound for the listening position — Intelligent Time Alignment The unit can change the localization of sound by delaying the sound output from each speaker to suit your position, and simulate a natural sound field with the feeling of being in the center of it wherever you sit in the car. -
Page 40: Speaker Configuration And Volume Setup
Speaker configuration and volume setup Creating a virtual center speaker — CSO To fully enjoy surround sound, it is preferable to have 5 speakers (front left/right, rear left/right, center) and 1 subwoofer. CSO (Center Speaker Organizer) allows you to create a virtual center speaker even though a real center speaker is not connected. -
Page 41: Monitor Adjustment
Monitor Adjustment Touch panel calibration Touch panel calibration is required if the touching position does not correspond with the proper item. Touch “Source List,” then Touch “General.” The general setting menu appears. Touch v/V to scroll, then touch “Touch Panel Adjust.” The setting display appears. -
Page 42: Customizing The Picture
Customizing the picture The options “Custom 1” and “Custom 2” of Picture EQ allow you to make your own picture setting by adjusting the picture tones. During video/image playback, touch “Source List,” then Touch “Screen,” then “Picture EQ.” Touch “Custom 1” or “Custom 2,” then “Custom Tune.”... -
Page 43: Basic Setting Operation
Settings The setting menu includes the following categories. • “General”: General settings (page 44) • “Sound”: Sound settings (page 46) • “Screen”: Screen settings (page 48) • “Visual”: DVD and other playback settings (page 49) Basic setting operation You can set items in the menu via the following procedure. -
Page 44: General Settings
General settings c “General” c the desired item c the desired option. For details on this procedure, see Touch “Basic setting operation” on page 43. For details, see the pages listed below. “z” indicates the default setting. Item Name Character Clock Adjust (page 14) Auto OFF Shuts off automatically after a... - Page 45 Item Front AUX Input (page 51) Sets whether or not an audio device’s input signals are detected via the front AUX input. Rear AUX Input (page 51) Sets the type of device connected to the rear AUX terminals to switch the background screen accordingly.
-
Page 46: Sound Settings
Sound settings c “Sound” c the desired item c the desired option. For details on this procedure, see “Basic Touch setting operation” on page 43. For details, see the pages listed below. “z” indicates the default setting. Item EQ7 (page 38) Balance/Fader (page 38) Listening Position (page 39) Sets the listening position and... - Page 47 Item Rear/Sub Out Switches the audio output between the rear speakers and subwoofer. RBE (Rear Bass Enhancer) (page 40) Uses rear speakers like subwoofers. Crossover Filter Selects the cut-off frequency of the front/rear speakers (HPF) and subwoofer (LPF). 4.1ch Speaker Level (page 40) Option Purpose...
-
Page 48: Screen Settings
Screen settings c “Screen” c the desired item c the desired option. For details on this procedure, see “Basic Touch setting operation” on page 43. For details, see the pages listed below. “z” indicates the default setting. Item Screen Theme (page 41) Picture EQ* (page 41) Aspect* (page 42) Clock... -
Page 49: Dvd And Other Playback Settings
DVD and other playback settings c “Visual” c the desired item c the desired option. For details on this procedure, see “Basic Touch setting operation” on page 43. For details, see the pages listed below. “z” indicates the default setting. Item DVD Menu Language DVD Audio Language... - Page 50 Item Monitor Type Selects an aspect ratio suitable for the connected monitor. (The screen aspect ratio of this unit also changes.) Depending on the disc, “4:3 Letter Box” may be selected automatically instead of “4:3 Pan Scan,” and vice versa. Multi Disc Resume USB Resume JPEG Slide Show...
-
Page 51: Using Optional Equipment
Using Optional Equipment Auxiliary audio/video equipment You can connect up to 2 optional devices, such as a portable media player, game console, etc., to the front AUX terminal and rear AUX terminals on the unit. (The front AUX terminal is for audio only.) Selecting an auxiliary device Touch “Source List,”... -
Page 52: Rear View Camera Settings
Rear view camera settings You can display setting items on the picture from the rear view camera to assist operation. This setting is available only when: – “Camera Input” is set to “ON” (page 45). – the parking brake is applied. Touch “Source List,”... -
Page 53: Notes On Discs
Notes on discs • Do not expose discs to direct sunlight or heat sources such as hot air ducts, nor leave it in a car parked in direct sunlight. • Before playing, wipe the discs with a cleaning cloth from the center out. -
Page 54: About Mp3 Files
About MP3 files • MP3, which stands for MPEG-1 Audio Layer-3, is a music file compression format standard. It compresses audio CD data to approximately 1/10 of its original size. • ID3 tag versions 1.0, 1.1, 2.2, 2.3 and 2.4 apply to MP3 only. -
Page 55: About Bluetooth Function
Should any problem persist, consult your nearest Sony dealer. If you have any questions or problems concerning your unit that are not covered in these Operating Instructions, consult your nearest Sony dealer. Maintenance Replacing the lithium battery of the remote commander Under normal conditions, the battery will last approximately 1 year. -
Page 56: Removing The Unit
If the fuse blows again after replacement, there may be an internal malfunction. In such a case, consult your nearest Sony dealer. Removing the unit Insert both release keys simultaneously until they click. -
Page 57: Region Code
*3 Bluetooth standard profiles indicate the purpose of Bluetooth communication between devices. Power amplifier section Outputs: Speaker outputs Speaker impedance: 4 – 8 ohms Maximum power output: 52 W × 4 (at 4 ohms) General Outputs: Video output terminal (rear) Audio output terminals (rear/sub switchable) Power antenna (aerial)/Power amplifier control terminal (REM OUT) -
Page 58: Troubleshooting
Troubleshooting The following checklist will help you remedy problems you may encounter with your unit. Before going through the checklist below, check the connection and operating procedures. If the problem is not solved, visit the support site on the back cover. General No power is being supplied to the unit. - Page 59 There is no picture/picture noise occurs in the rear monitor. • A source/mode which is not connected is selected. If there is no input, no picture appears in the rear monitor. • The color system setting is incorrect. t Set the color system to “PAL” or “NTSC” according to the connected monitor (page 44).
-
Page 60: Error Displays/Messages
Bluetooth function (XAV-64BT) The other Bluetooth device cannot detect this unit. • Set “Signal” to “ON” (page 37). • While connecting to a Bluetooth device, this unit cannot be detected from another device. Disconnect the current connection and search for this unit from the other device. - Page 61 USB device. Offset There may be an internal malfunction. t Check the connection. If the error indication remains on the display, consult your nearest Sony dealer. Output connection failure. The connection of speakers/amplifiers is incorrect.
-
Page 62: Language Code/Area Code List
Language code/area code list Language code list The language spellings conform to the ISO 639: 1988 (E/F) standard. Code Language Code 1027 Afar 1183 1028 Abkhazian 1186 1032 Afrikaans 1194 1039 Amharic 1196 1044 Arabic 1203 1045 Assamese 1209 1051 Aymara 1217 1052... - Page 64 Sony Corporation Printed in Thailand...