Table of Contents
Advertisement
Advertisement
Table of Contents

Related Manuals for Janome 134D


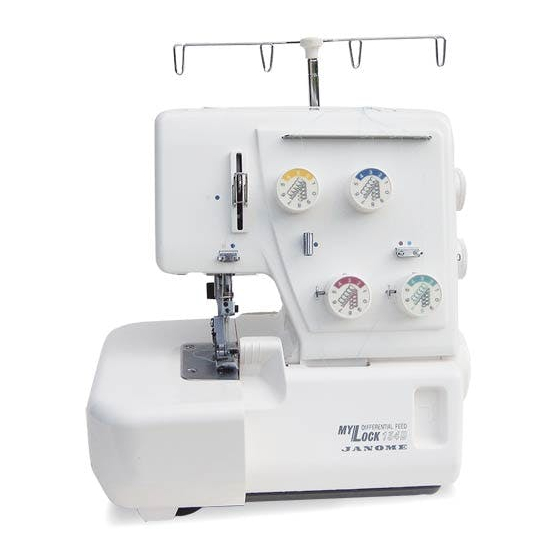
Summary of Contents for Janome 134D
- Page 1 SERVICING MANUAL MODEL 134D www.promelectroavtomat.ru...
-
Page 2: Table Of Contents
INDEX WHAT TO DO WHEN...................... 1-5 SERVICE ACCESS Face plate unit and belt cover ..................6 Machine base ........................ 7 Side cover ........................8 Looper cover unit ......................9 Front panel unit ......................10 MECHANICAL ADJUSTMENT Gauge for servicing ....................11-12 Needle bar height ...................... -
Page 3: What To Do When
WHAT TO DO WHEN 1. SEWING MACHINE CONDITION CONDITION CAUSE HOW TO FIX REFERENCE 1. The machine does Correct power source is not Use correct power source. not run or speed used. does not increase. The power switch is off. Turn on the snitch. - Page 4 CONDITION CAUSE HOW TO FIX REFERENCE 6. The needle is rubbing Adjust the clearance between the P 19 & 20 3. Noisy operation against the front needle needle and lower looper. (A little guard too much. scraping noise is normal.) 1.
- Page 5 (3) SEWING CONDITION CONDITION CAUSE HOW TO FIX REFERECE 1 Sewing results Thread is not inserted properly Re-thread properly are poor. into the thread tension discs. Position of looper thread Adjust the looper thread guide P 29 guide is off. position.
- Page 6 CONDITION CAUSE HOW TO FIX REFERENCE 1. Threading order is wrong. 5. Breaking Thread the lower looper, upper looper, right thread side, and needle. Then left side needle. 2. Tip of the upper looper or lower Replace the upper or lower looper. looper is dull or worn.
- Page 7 FEEDING AND CUTTING FABRRIC CONDITION CAUSE HOW TO FIX REFERENCE 1. Fabric 1. presser foot is in up position. Lower the presser foot. does not feed 2. Stitch length is too short. Standard length is 2.5 to 3.5 mm. properly. 3.
- Page 8 FACE PLATE I. Remove the setscrew (A) to remove the face plate (B). BELT COVER TO REMOVE 1. Remove the set screw (C). 2. Open the looper cover (D). 3. Loosen the two set screw (E) and (F). 4. Pull the top end (G) and back end (H) at the same time. TO ATTACH 5.
-
Page 9: Machine Base
MACHINE BASE TO REMOVE 1. Remove the four hinge screws (A), base cushions (B & C), washers (D, E & H). Washer (E) is thicker than the other three washers. 2. Remove the 2 set screws (F). 3. Remove the machine base (G). TO ATTACH 4. -
Page 10: Side Cover
SIDE COVER TO REMOVE 1. Open the side cover (A) to the left. 2. Remove the two setscrews (B) and washers (C). 3. Remove the side cover (A). TO ATTACH 4. Attach the side cover (A) to the setting plate (D) temporarily with two screws (B) and washers (C). -
Page 11: Looper Cover Unit
LOOPER COVER UNIT TO REMOVE 1. Remove the machine base (C). 2. Remove the two set screws (A), and remove the looper cover unit (B). TO ATTACH 3. Attach the looper cover unit (B) to the machine body (D) temporarily with 2 set screws (A). 4. -
Page 12: Front Panel Unit
FRONT PANEL UNIT TO REMOVE 1. Remove the face plate, belt cover. Machine base and looper cover unit. 2. Loosen the 2 setscrews (A). 3. Remove the setscrews (B). 4. Loosen the setscrew (C) to remove the front panel unit (D). TO ATTACH 5. -
Page 13: Gauge For Servicing
GAUGE FOR SERVICING Distance gauge Thickness gauge Needle gauge No. 8289 No. 787-G03 NO. 787-G02 Lower looper height NO.787-G01 www.promelectroavtomat.ru... - Page 14 GAUGE FOR SERVICING Adjustments can be done effectively and correctly with this gauge. Use needle HA-1 SP, size 11 or 14, when using this gauge. (A): for needle bar height (B): for presser bar height (C): for feed dog height & position of knives (D): for upper looper position (E): for feed timing Thickness of the gauge (1.7mm): for upper looper position &...
-
Page 15: Needle Bar Height
NEEDLE BAR HEIGHT The distance between the tip of needle on the right and the surface of needle plate (D) should be 11.2 to 11.6 mm (7/16 to 29/64) when the needle bar is at the highest position. TO ADJUST 1. -
Page 16: Presser Bar Height
PRESSER BAR HEIGHT The distance between the surface of needle plate (C) and bottom of presser foot should be 4.7 to 5.3 mm (47/256 to 53/256) when the presser bar lifter (D) is raised. TO ADJUST 1. Remove the face plate (Refer to page 6.) 2. -
Page 17: Feed Dog Height
FEED DOG HEIGHT When the presser foot is lowered and the feed dogs are at their highest position. The distance between the surface of needle plate (E) and bottom of presser foot should be 0.75 and 0.95 mm (15/512 to 19/512) TO ADJUST 1. -
Page 18: Feed Timing
FEED TIMING When the presser foot is lowered and the tip of right needle (G) is 2 mm (5/64”) above the needle plate in its downward motion, the top of the feed dog teeth (H) should be leveled with the top surface of needle plate (I) at the rearmost position (J). TO ADJUST 1. -
Page 19: Upper Knife Timing
UPPER KNIFE TIMING When the needle bar is at the highest position, the upper knife (D) should be also at the highest position. TO ADJUST 1. Remove the machine base (Refer to page 7). 2. Loosen the 2 set screws (C), then * turn the upper knife drive cam (E) to the direction of (A) when the upper knife timing is delayed. -
Page 20: Lower Looper Height
LOWER LOOPER HEIGHT The height of the lower looper (B) should be 65.7 mm from the center of the lower looper shaft (C). TO ADJUST Set the upper knife in down position to loosen set screw (A). Turn the hand wheel to set the lower looper (B) at the rightmost position. Remove set screw (A) and remove the lower looper (B). - Page 21 CLEARANCE BETWEEN THE NEEDLES AND THE LOWER LOOPER I NEEDLE GUARDS In case of size 11 needles are used, when the tip of the lower looper comes from the left just behind the needle on the left or right, the clearance between both needles (G) and the lower looper (P) should be 0 to 0.05 mm (S).
- Page 22 www.promelectroavtomat.ru...
- Page 23 TO ADJUST THE POSITION OF THE FRONT NEEDLE GUARD. Replace both needles with size 14 needles. 10. Push the front needle guard (I) slightly to adjust the clearance between the size 14 needles (J) and the lower looper (P) to 0 to 0.05 mm (H). Tighten hexagon socket screws (A).
- Page 24 TO ADJUST THE CLEARANCE BETWEEN THE NEEDLE AND THE FIXED NEEDLE GUARD The clearance between the needle (A) and the fixed needle guard (B) should be 0.3 to 0.7mm (3/256” to 7/256”). TO ADJUST Open the side cover and looper cover. Remove the presser foot and needle plate. Bring the needle to the lowest position.
-
Page 25: Lower Looper Timing
LOWER LOOPER TIMING When the needle comes up 2.8 to 3.2mm (7/64 to 1/8”) from the lowest position, the tip of the lower looper (H) comes just left of the needle (I) on the right. TO ADJUST 1. Remove the presser foot, needle plate and left-side needle. 2. -
Page 26: Upper Looper Position
UPPER LOOPER POSITION When the upper looper (C) is at the leftmost position. The distance between the center of needle on the right (F) and the center of looper eye (G) should be 4.8 to 5.2mm (3/16 to 3/ 64”). The space between the upper looper shaft guide (B) and the bottom of the upper looper (C) should be 1.6-1.8mm (1/16 to 9/128”) when the upper looper is set at the lowest position. -
Page 27: Upper & Lower Loopers Timing
UPPER & LOWER LOOPERS TIMING When lower looper (F) moves to the right, the tip of upper looper (G) meets the lower A ***. looper (F) within 1mm (5/128”) from the left of lower looper eye (H) as shown in *** TO ADJUST 1. -
Page 28: Clearance Between Loopers
CLEARANCE BETWEEN LOOPERS When the upper looper (D) meets lower looper (E) as shown in *** A ***, the Clearance should be 0 to 0.2 mm (0 to 1/128”) as shown in *** B ***. TO ADJUST 1. Remove the presser foot and needle plate. 2. -
Page 29: Clearance Between Needle And Upper Looper
CLEARANCE BETWEEN NEEDLE AND UPPER LOOPER When the upper looper (A) meets with needle (B), the clearance (D) should be: - 0.1 to +0.15mm (-1/256 to +3/512”) at the needle on the left. - 0.2 to +0.05mm (-1/128 to +1/512”) at the needle on the right. TO ADJUST 1. -
Page 30: Position Of Knives
POSITION OF KNIVES The top of lower knife (A) should be leveled with the surface of needle plate (B). When the upper knife (C) is at the lowest position, the front lower corner of upper knife (C) should be 0.5 to 1.0 mm (5/256 to 5/128”) below the edge of lower knife. TO ADJUST 1. -
Page 31: Position Of Looper Thread Guides
POSITION OF LOWER LOOPER THREAD GUIDES LOWER LOOPER THREAD GUIDE (A) Loosen the set screw (C), and adjust the lower looper thread guide (A) so that the hole of thread guide is in line with the groove of lower looper as shown in ** F **. Be careful not to raise the lower looper thread guide (A) too high. -
Page 32: Differential Feed Ratio
DIFFERENTIAL FEED RATIO CORRECT SETTING When the stitch length dial (G) is set at “3” and the differential feed dial (H) at 1.0, the difference of the feed amount between the main feed dog (D) and sub feed dog (E) should be less than 0.15mm (1/128”) (F). -
Page 33: Clearance Between Main & Sub Feed Dogs
CLEARANCE BETWEEN MAIN & SUB FEED DOGS CORRECT SETTING When the differential feed dial is set at “1 .0”, the front ends of both main (D) and sub feed (E) dogs should be level (less than 0.15 mm) (1/12&) or the clearance between both feed dogs should be 4.5 mm (3/16”) (I). -
Page 34: Stitch Length
STITCH LENGTH CORRECT SETTING The actual stitch length (F) should be 2.8 to 3.0 mm (7/64 to 8/64”) when the stitch length dial (E) is set at “3”. TO ADJUST 1. Remove the front panel unit. (Refer to page 10.) 2. -
Page 35: Play Of Main Shaft
PLAY OF MAIN SHAFT WHAT TO DO WHEN THE MAIN SHAFT IS LOOSE LATERALLY 1. Remove the belt cover and machine base (Refer to pages 6 & 7). 2. Remove the belt from the hand wheel pulley (C). 3. From the bottom of the machine, loosen set screw (A) on the main shaft ring (B). Slide the ring (B) to reduce the play on the main shaft (D). -
Page 36: Belt Tension
BELT TENSION CORRECT SETTING To check the belt tension, press the belt in the middle of the span lightly with your finger (approx. 300g). The belt should depress 5 to 6 mm (13/64” to 15/64”). TO ADJUST 1. Remove the belt cover (Refer to page 6.) 2. - Page 37 REPLACEMENT OF MACHINE SOCKET To remove: 1. Remove the belt cover. 2. Remove the two setscrews (G), and pull out the cord connectors (A, B, C & D). To attach: 3. Insert the cord connectors (A, B, C & D) as shown below. Connectors: A: Blue for motor B: Brown for motor...
-
Page 38: Replacement Of Lamp
REPLACEMENT OF LAMP TO CHANGE THE LAMP 1. Remove the face plate (Refer to page 6). 2. Push the light bulb (A) up and turn the bulb counter-clockwise (B) to remove it. 3. Put the new bulb in by pushing it up and turning it clockwise (C). 4. -
Page 39: Oiling
OILING Apply a few drops of fine quality sewing machine oil to the parts indicated with arrows (A, B, C, D, E & F). It is recommended to apply oil once a week in normal use, once in ten hours in continuous use. www.promelectroavtomat.ru...